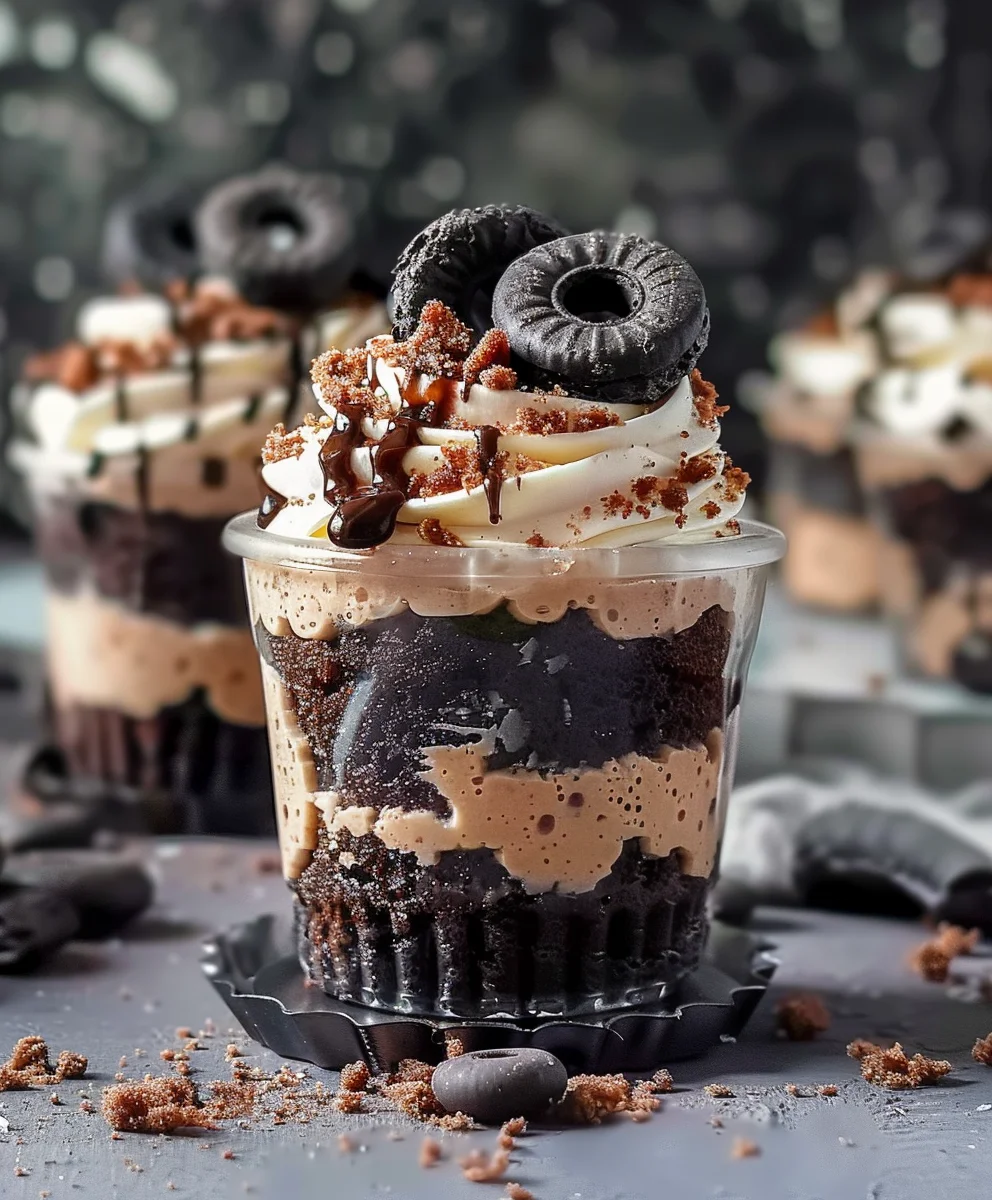
Fun Graveyard Dirt Cake Cups are an absolute showstopper, especially when I’m looking for a dessert that’s as delightful to look at as it is to eat! Imagine a dessert so charmingly spooky, so incredibly delicious, and yet surprisingly simple to whip up. These individual servings are not just a treat for the taste buds; they’re a miniature edible landscape, perfect for adding a touch of playful ghoulishness to your next gathering, be it a Halloween party, a fall festival, or simply a fun family night in. I promise you’ll love how easily these come together and the joy they bring!
Why We Adore This Spooky Sweet Treat
While dirt cake itself has been a beloved, no-bake staple in American households for decades, evolving from simple pudding and cookie layers to elaborate themed creations, the “graveyard” rendition takes on a special significance, particularly around autumn holidays. I’ve found people absolutely adore this dish for a multitude of reasons. Firstly, the combination of rich, creamy pudding, smooth whipped topping, and crunchy crushed chocolate cookies creates an irresistible symphony of textures and flavors. Each spoonful offers a delightful contrast that keeps everyone coming back for more. Beyond the incredible taste, the convenience factor is unparalleled; there’s no baking involved, making it a fantastic project for cooks of all skill levels, including little helpers in the kitchen. And let’s be honest, who can resist the whimsical charm of gummy worms peeking out from an “earthy” topping or a tiny cookie tombstone? These Fun Graveyard Dirt Cake Cups are truly a crowd-pleaser, delivering both smiles and satisfaction with every bite.

Ingredients:
- 3 packages (14.3 ounces each) chocolate sandwich cookies (like Oreos), finely crushed
- 2 packages (3.4 ounces each) instant chocolate pudding mix
- 4 cups cold milk (whole milk works best for richness, but 2% is fine too)
- 1 package (8 ounces) cream cheese, softened to room temperature
- 1/2 cup (1 stick) unsalted butter, softened
- 1 cup powdered sugar (also known as confectioners’ sugar)
- 1 teaspoon vanilla extract
- 1 container (12 ounces) frozen whipped topping, thawed (like Cool Whip)
- 12-16 clear plastic cups or small jars (6-8 ounce capacity)
- Assorted Halloween candies for decoration: gummy worms, candy pumpkins, candy tombstones, bone sprinkles, ghost sprinkles, candy corn, or even small chocolate graves.
Preparing the “Dirt” Crumble
- Unleash the Chocolatey Goodness: Grab your three packages of chocolate sandwich cookies. The first step to creating our incredible Fun Graveyard Dirt Cake Cups is transforming these classic cookies into the perfect “dirt” texture. You have a couple of options here, so choose the method that suits you best!
- Food Processor Method (My personal favorite for speed and consistency): If you have a food processor, this is undoubtedly the quickest and most efficient way to achieve beautifully fine crumbs. Break the cookies into smaller pieces and place them in the food processor in batches. Pulse them on high until they form fine crumbs. I like to leave a few slightly larger bits in there for a more authentic “dirt” texture – it adds a nice visual and textural variety that truly enhances the graveyard theme. Be careful not to over-process them into a paste; we’re aiming for crumbly soil, not a muddy blob! Once processed, transfer the crumbs to a large bowl and set aside.
- Ziploc Bag Method (A great option for a little stress relief and no special equipment): If a food processor isn’t an option, don’t worry! You can achieve excellent results with a large, heavy-duty Ziploc bag and a rolling pin (or even a sturdy can). Place about half a package of cookies into the bag, seal it tightly, pressing out as much air as possible. Then, using your rolling pin, gently but firmly roll over the cookies, crushing them until they turn into fine crumbs. Again, a few larger pieces are absolutely welcome. Repeat this process until all cookies are crushed. This method can be a fun activity, especially if you have little helpers who want to get involved in making these Fun Graveyard Dirt Cake Cups! Pour the crushed cookies into a large bowl and reserve about 1 cup of the crumbs for later decoration. The rest will form the delicious base layers.
Making the Cream Cheese Layer
- Bring it to Room Temperature: Before you even think about mixing, make sure your cream cheese and butter are thoroughly softened to room temperature. This is a crucial step that ensures a silky-smooth, lump-free mixture. If they’re too cold, you’ll end up with stubborn clumps, and nobody wants that in their creamy “mud”! I usually take them out of the fridge at least an hour before I plan to start.
- Creaming the Foundation: In a large mixing bowl, combine the softened cream cheese and softened unsalted butter. Using an electric mixer (either a stand mixer with a paddle attachment or a hand mixer), beat these two ingredients together on medium speed until they are light, fluffy, and perfectly combined. This should take about 2-3 minutes. Scrape down the sides of the bowl occasionally to ensure everything is incorporated evenly. You’re creating the rich, tangy backbone of our creamy “mud” layer.
- Sweetening the Deal: Gradually add the powdered sugar to the cream cheese and butter mixture, beating on low speed until fully incorporated. Once the sugar is mostly mixed in, increase the speed to medium-high and continue beating for another 2-3 minutes until the mixture is incredibly smooth and airy. The powdered sugar dissolves beautifully, contributing to that velvety texture we’re aiming for.
- A Touch of Vanilla: Finally, beat in the vanilla extract. This simple addition elevates all the other flavors, adding a wonderful warmth and depth to your cream cheese mixture. Give it one last good scrape down and beat for about 30 seconds to ensure the vanilla is perfectly distributed. Set this bowl aside for a moment.
Whisking Up the Pudding
- The “Mud” Base Begins: In a separate, even larger bowl, empty the contents of both packages of instant chocolate pudding mix. This is where the core flavor of our “mud” layer comes from!
- Adding the Milk: Pour in the 4 cups of cold milk. It’s important that the milk is cold; this helps the instant pudding set up properly and quickly.
- Whisk Away Those Lumps!: Using a whisk, vigorously beat the pudding mix and milk together for exactly 2 minutes. Don’t skimp on this step! Whisking thoroughly ensures that all the pudding granules dissolve completely and prevents any dreaded lumps. You’ll notice the mixture start to thicken quite dramatically as you whisk. After 2 minutes, let the pudding stand for another 5 minutes to allow it to fully set. It should become quite firm and jiggly – a perfect “mud” consistency!
Combining Layers for the “Mud” Base
- Introducing the Whipped Topping: Now comes the delightful airy component! Gently fold in the thawed whipped topping into the prepared cream cheese mixture. Use a spatula and a light hand, folding until no streaks of whipped topping remain. The goal here is to keep as much air in the whipped topping as possible, which contributes to the lightness and creaminess of the final “mud” layer.
- The Grand Combination: Once the whipped topping is fully incorporated into the cream cheese mixture, it’s time to bring everything together. Add the set chocolate pudding to the cream cheese and whipped topping mixture.
- Folding for Perfection: Again, using your spatula, gently fold the pudding into the cream cheese and whipped topping mixture until everything is just combined. Be careful not to overmix! We want to maintain that lovely, fluffy texture. What you’re left with is a wonderfully rich, creamy, and decadent “mud” mixture – the heart and soul of our Fun Graveyard Dirt Cake Cups. This combined mixture should be thick, smooth, and utterly irresistible. Taste a small spoonful if you like – I dare you not to!
Assembling Your Fun Graveyard Dirt Cake Cups
- Gather Your Vessels: Line up your 12-16 clear plastic cups or small jars. Using clear containers is key for this dessert, as it allows everyone to see the delightful layers of “dirt” and “mud,” truly enhancing the graveyard theme.
- First Layer of “Dirt”: Spoon about 2-3 tablespoons of your crushed cookie “dirt” into the bottom of each cup. This forms the very foundation of your graveyard. Press it down ever so slightly to create a firm base. This first layer is important for both visual appeal and structural integrity.
- The “Mud” Layer Follows: Next, spoon a generous layer of your creamy “mud” mixture over the cookie crumbs. Aim for about 1/4 to 1/3 cup, depending on the size of your cups. Gently spread it out to cover the cookie layer. You can use a piping bag for a neater application, but a spoon works perfectly fine and gives a more rustic, “dug up” look which fits our theme!
- Alternate and Build: Repeat the layering process: add another layer of cookie “dirt,” followed by another layer of “mud” mixture. Continue alternating layers until your cups are nearly full, leaving about half an inch from the rim for the final topping and decorations. I typically get about 3 layers of “dirt” and 3 layers of “mud” in each cup. Each layer you add makes these Fun Graveyard Dirt Cake Cups more visually appealing and delicious!
- The Final “Dirt” Topping: Once your cups are filled with alternating layers, top each cup with a final, generous layer of the reserved crushed cookie “dirt.” This is the topsoil of your graveyard, ready for all your spooky decorations! You want it to look like freshly turned earth.
- Time for Spooky Creativity – Decorating!: Now for the most fun part – bringing your graveyard to life! This is where your Fun Graveyard Dirt Cake Cups truly shine.
- Gummy Worms: “Plant” a few gummy worms into the top “dirt” layer, letting some peek out as if they’re wiggling their way to the surface. Some can be fully submerged with just their heads showing, while others can be half-buried.
- Candy Tombstones: If you have candy tombstones, carefully insert one or two into the “dirt” topping of each cup. These are excellent for marking the “graves.” You can even use simple chocolate wafer cookies or Milano cookies for this; just use a food-safe marker to write “RIP” if you’re feeling extra crafty!
- Pumpkins and Bones: Scatter small candy pumpkins, bone sprinkles, or ghost sprinkles around the tombstones and worms. These small details add so much character and make each cup unique.
- Get Creative: Don’t be afraid to experiment! Maybe a candy corn border, or a few chocolate rocks? The sky’s the limit for your spooky imagination when creating these personalized Fun Graveyard Dirt Cake Cups.
Remember, the more varied and playful your decorations, the more “fun” your graveyard will be!
Chilling and Serving
- The Waiting Game (It’s worth it!): Once all your Fun Graveyard Dirt Cake Cups are assembled and decorated, cover them loosely with plastic wrap. Place them in the refrigerator to chill for at least 2-4 hours. Chilling allows the layers to set firmly, the flavors to meld beautifully, and the “dirt” to absorb some moisture from the “mud,” making for a wonderfully moist and cohesive dessert. Overnight chilling is even better if you can resist!
- Serve and Enjoy!: When you’re ready to serve, simply pull your beautifully crafted Fun Graveyard Dirt Cake Cups from the fridge. Take a moment to admire your handiwork. Each cup is a miniature edible masterpiece, perfect for parties, gatherings, or just a fun treat any time of year. Serve them with a small spoon, and watch the delight on everyone’s faces as they dig into these whimsical and delicious creations. They are always a crowd-pleaser and bring a smile to anyone who gets to enjoy them!
Conclusion:
Well, my friends, we’ve reached the end of our spooky, sweet journey, and I genuinely hope you’re feeling as excited as I am about this incredible recipe. If there’s one dessert that perfectly encapsulates fun, simplicity, and irresistible flavor, it’s this one. It’s truly a must-try for so many reasons. First and foremost, it’s delightfully easy to put together, making it accessible for bakers of all skill levels, even those who might shy away from more complicated creations. You don’t need fancy equipment or advanced techniques to achieve spectacular results. The process itself is a joy, especially if you’re making it with little helpers whose enthusiasm for crushing cookies and arranging gummy worms is contagious! Beyond its ease, the taste is absolutely divine – a creamy, rich pudding base perfectly complemented by the crunchy, chocolatey “dirt” and chewy candy surprises. It’s a textural wonderland in every spoonful.
But it’s not just about ease and taste; the visual appeal of these Fun Graveyard Dirt Cake Cups is what truly sets them apart. They are absolute showstoppers, guaranteed to elicit smiles and compliments at any gathering. Whether it’s a Halloween party, a casual get-together, or just a fun treat for the family, these cups bring a playful, festive spirit that few other desserts can match. They invite creativity and storytelling, sparking conversations and memories around the table. It’s more than just a dessert; it’s an experience, a miniature edible landscape waiting to be explored.
Serving Suggestions and Creative Variations
While these individual cups are absolutely charming and convenient, offering neat portions for everyone, don’t feel limited! You could easily scale this recipe up and present it in a larger trifle bowl or a clear serving dish for a communal, dramatic centerpiece. Imagine a sprawling graveyard scene, complete with multiple “tombstones” and a whole colony of gummy creatures!
The beauty of this recipe also lies in its incredible versatility. Feel free to customize it to your heart’s content! Instead of classic chocolate pudding, why not experiment with vanilla, white chocolate, or even a cheesecake-flavored pudding for a different base? For the “dirt,” while chocolate sandwich cookies are traditional, you could try chocolate wafers, crushed brownies, or even a mix of different dark biscuits for varying shades and textures. Want to add an extra layer of flavor? A hint of peppermint extract in the pudding, especially around the holidays, could be surprisingly delightful, or a splash of coffee liqueur for an adult version.
And let’s talk about the decorations! Gummy worms are a classic, but the possibilities are endless. Consider using candy pumpkins, candy corn, edible googly eyes, or even small chocolate bones for extra ghoulish charm. Crushed graham crackers or vanilla wafers can be used to create lighter “dirt” patches, or shaped into “tombstones” that you can then personalize with edible markers. For a truly macabre touch, a drizzle of raspberry coulis on top can create a “bloody” effect that’s both delicious and delightfully unsettling. You could also layer in fresh raspberries or blueberries for a burst of fruity freshness that cuts through the richness.
Your Turn to Create and Share!
So now it’s your turn to unleash your inner mad scientist (or just a fun-loving baker!). I genuinely encourage you to give this recipe a try. Dive in, have fun with it, and make it your own. Don’t be afraid to experiment with the flavors and decorations. The true magic of baking often comes from personal touches and a willingness to play. Whether you follow the recipe to the letter or put your own unique spin on it, I promise you’ll end up with a dessert that brings joy and a little bit of spooky fun to your day.
Once you’ve whipped up your batch of these incredible cups, I would absolutely love to hear about your experience! Did you stick to the classic? Did you create a new variation? What kind of candy critters did you use? Please share your creations and your feedback! There’s nothing I love more than seeing how you all bring these recipes to life in your own kitchens. Happy baking, and enjoy every delightful, dirt-filled spoonful!
Spooky Fun Graveyard Dirt Cake Cups
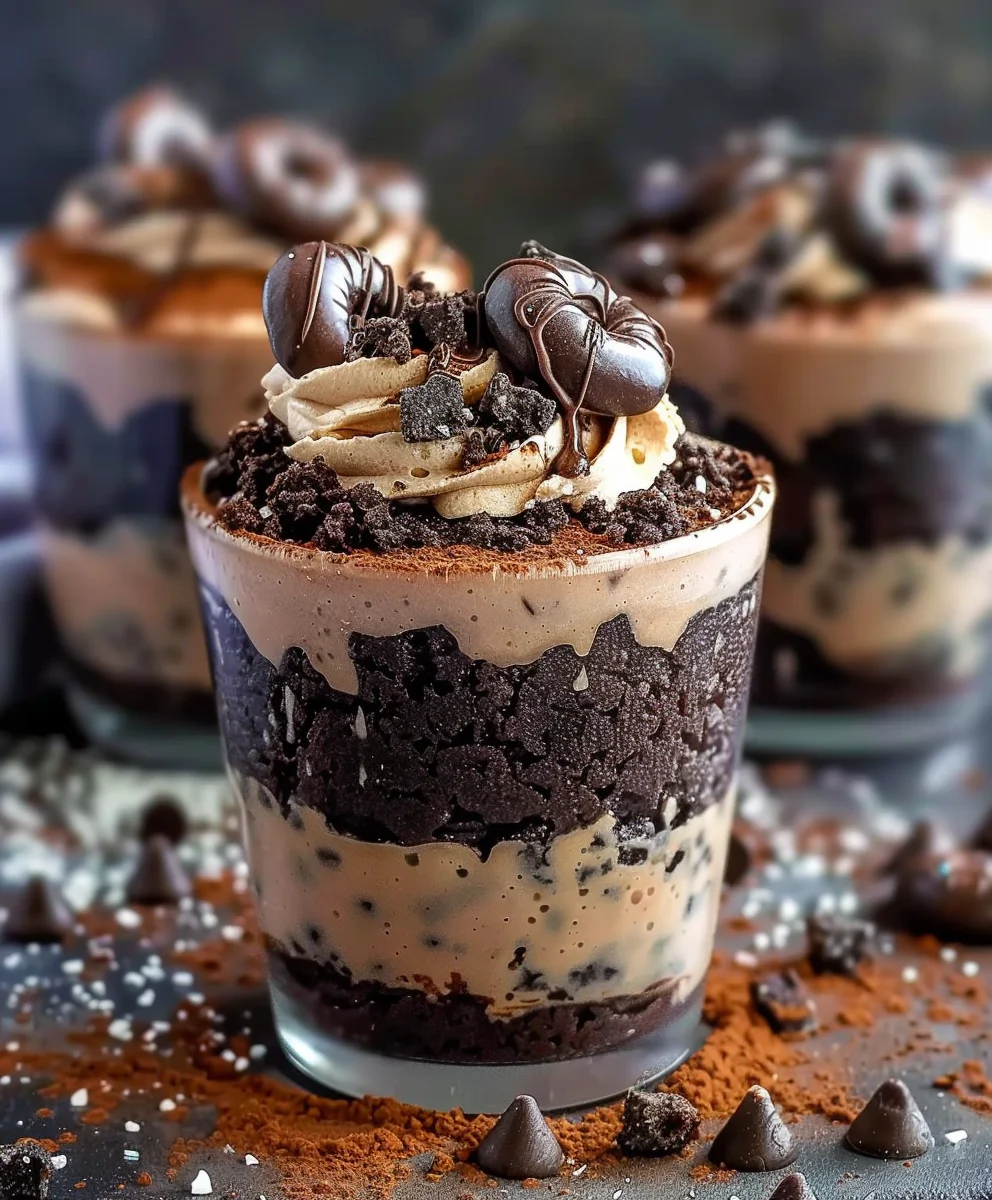
Fun Graveyard Dirt Cake Cups are a delightful and easy no-bake Halloween dessert, combining creamy pudding, whipped topping, and crushed chocolate cookies. Perfect for parties and family fun, these charmingly spooky individual servings are a true crowd-pleaser.
Ingredients
-
3 packages (14.3 oz each) chocolate sandwich cookies, finely crushed
-
2 packages (3.4 oz each) instant chocolate pudding mix
-
4 cups cold milk
-
1 package (8 oz) cream cheese, softened
-
1/2 cup unsalted butter, softened
-
1 cup powdered sugar
-
1 tsp vanilla extract
-
16 oz whipped topping, thawed
-
12-16 clear plastic cups or small jars (6-8 oz capacity)
-
Assorted Halloween candies for decoration (gummy worms, candy pumpkins, tombstones, sprinkles)
Instructions
- Step 1
Finely crush chocolate sandwich cookies using a food processor or a Ziploc bag and rolling pin. Reserve 1 cup of crumbs for topping; set the remaining aside. - Step 2
In a large mixing bowl, beat softened cream cheese and butter with an electric mixer until light and fluffy (2-3 minutes). Gradually add powdered sugar, beating until smooth, then beat in vanilla extract. Set aside. - Step 3
In a separate, larger bowl, whisk instant chocolate pudding mix with 4 cups cold milk for exactly 2 minutes until thickened. Let stand for 5 minutes to fully set. - Step 4
Gently fold the thawed whipped topping into the cream cheese mixture until no streaks remain. Then, add the set chocolate pudding to this mixture and gently fold until just combined, creating a rich, creamy “mud” mixture. - Step 5
Assemble the cups: Spoon 2-3 tablespoons of crushed cookie “dirt” into the bottom of each clear cup. Top with a generous layer (about 1/4 to 1/3 cup) of the “mud” mixture. - Step 6
Repeat the layering process, alternating between crushed cookies and the “mud” mixture, until cups are nearly full (typically 3 layers of each). Finish with a final, generous layer of the reserved crushed cookie “dirt” on top. - Step 7
Decorate each cup creatively with assorted Halloween candies, such as gummy worms peeking out, candy tombstones, mini candy pumpkins, and sprinkles, to create a spooky graveyard scene. - Step 8
Cover the assembled cups loosely with plastic wrap and refrigerate for at least 2-4 hours to allow the layers to set and flavors to meld. Overnight chilling is ideal. Serve chilled and enjoy your edible masterpieces!
Important Information
Nutrition Facts (Per Serving)
It is important to consider this information as approximate and not to use it as definitive health advice.
Allergy Information
Please check ingredients for potential allergens and consult a health professional if in doubt.