Witch Hat Cookies are an absolute staple for anyone, including myself, looking to add a touch of playful enchantment to their autumn celebrations, especially as Halloween approaches. I find that these adorable, miniature edible hats immediately conjure images of delightful magic, and I know they always bring smiles when guests spot them perfectly perched on the dessert table! There’s something undeniably charming about these treats that instantly evokes the spirit of the season, making them a beloved tradition in my home during October.
While the exact origin of Witch Hat Cookies might be shrouded in a delightful culinary mystery, their popularity undeniably peaks around Halloween. I believe they perfectly embody the whimsical, spooky fun associated with trick-or-treating and festive gatherings. People, myself included, adore this dish not only for its incredibly festive appearance but also for its delightful combination of flavors and textures – often a sweet, crisp cookie base topped with rich, melting chocolate. Furthermore, their ingenious simplicity makes them an absolute dream for busy parents, amateur bakers, or anyone, like me, looking for a quick yet impactful treat. They are an effortless way to bring magic into your kitchen and delight everyone with a wonderfully themed, delicious snack.

Ingredients:
-
For the Chocolate Cookie Base:
- 1 cup (2 sticks or 226g) unsalted butter, softened to room temperature. It’s incredibly important for your butter to be truly soft, but not melted, as this greatly affects the texture of your cookies and how well it creams with the sugar.
- 1 ½ cups (300g) granulated sugar. This will provide the foundational sweetness and help with the crisp-chewy texture we’re aiming for.
- 2 large eggs. Ensure these are also at room temperature; it helps them emulsify better with the other ingredients, leading to a smoother batter.
- 1 teaspoon pure vanilla extract. Don’t skimp on good quality vanilla; it really enhances the chocolate flavor.
- 2 cups (240g) all-purpose flour. Make sure to level off your scoops for accuracy.
- ¾ cup (75g) unsweetened cocoa powder, preferably Dutch-processed for a darker color and smoother flavor, perfect for our dark “witch hat” aesthetic.
- 1 teaspoon baking soda. This leavening agent will give our cookies a slight lift and tender texture.
- ½ teaspoon salt. A little salt is essential to balance the sweetness and bring out the chocolate notes.
-
For the Orange Buttercream Frosting:
- ½ cup (1 stick or 113g) unsalted butter, softened to room temperature. Again, temperature is key for a perfectly smooth frosting.
- 4 cups (480g) powdered sugar (confectioners’ sugar), sifted. Sifting is non-negotiable here to avoid lumps in your beautiful frosting.
- 2-3 tablespoons milk (dairy or non-dairy), or cream. Start with 2 and add more as needed to reach your desired consistency.
- 1 teaspoon pure vanilla extract.
- A few drops of orange food coloring (gel food coloring works best for vibrant results). This is where the magic happens for that classic Halloween orange!
-
For the Witch Hat “Cones”:
- Approximately 24-30 Hershey’s Kisses or similar small chocolate candies. I usually opt for classic milk chocolate, but dark chocolate or even caramel-filled ones could be a fun twist!
-
Optional Decorations:
- Halloween sprinkles or sanding sugar. A little sparkle can really make your Witch Hat Cookies pop!
Preparing the Cookie Base:
- Creaming Butter and Sugar: In a large mixing bowl, using an electric mixer (either a stand mixer with a paddle attachment or a hand mixer), cream together the softened unsalted butter and granulated sugar on medium speed. You’ll want to beat this mixture until it’s light and fluffy, usually about 2-3 minutes. This step is crucial for incorporating air, which contributes to the cookies’ texture. I always aim for a pale, almost whipped appearance.
- Adding Eggs and Vanilla: Scrape down the sides of the bowl with a spatula to ensure everything is well combined. Then, add the two large eggs, one at a time, mixing well after each addition. Be sure to mix until each egg is fully incorporated before adding the next. Finally, stir in the pure vanilla extract. The mixture might look a little curdled at first, but keep mixing until it comes back together.
- Combining Dry Ingredients: In a separate medium bowl, whisk together the all-purpose flour, unsweetened cocoa powder, baking soda, and salt. Whisking them together ensures that the leavening agent and salt are evenly distributed throughout the flour, preventing any pockets of unmixed ingredients in your final cookies. I love seeing the rich, dark color of the cocoa powder when I whisk it in!
- Gradually Adding Dry to Wet: With the mixer on low speed, gradually add the dry ingredients to the wet ingredients, mixing until just combined. Be careful not to overmix! Overmixing develops the gluten in the flour too much, which can result in tough cookies. Stop mixing as soon as you no longer see streaks of dry flour. The dough will be quite thick and sticky.
- Chilling the Dough: Cover the bowl tightly with plastic wrap and refrigerate the dough for at least 1 hour, or up to overnight. Chilling is a critical step for these Witch Hat Cookies. It not only makes the dough much easier to handle when rolling and cutting but also helps prevent the cookies from spreading too much in the oven, ensuring they maintain their shape beautifully. I often find an hour is sufficient, but an overnight chill really deepens the flavor.
- Preheating Oven and Preparing Baking Sheets: Once your dough has chilled sufficiently, preheat your oven to 375°F (190°C). Line two large baking sheets with parchment paper or silicone baking mats. This prevents sticking and makes cleanup a breeze.
- Rolling and Cutting the Dough: On a lightly floured surface, roll out about half of the chilled cookie dough to a thickness of about ¼ inch. You want them thick enough to hold their shape, but not so thick they become too cakey. Use a 2 to 2 ½ inch round cookie cutter to cut out circles. Carefully transfer the cutouts to your prepared baking sheets, leaving about 1 inch between each cookie. Re-roll any scraps until all dough is used.
- Baking the Cookies: Bake the cookies for 8-10 minutes, or until the edges are set and the centers look slightly puffed. Don’t overbake! These chocolate Witch Hat Cookies are meant to be soft and chewy, and overbaking can make them hard. Since they are dark, it can be tricky to tell when they’re done, so watch for those set edges.
- Cooling: Let the cookies cool on the baking sheets for 5 minutes before carefully transferring them to a wire rack to cool completely. They are quite delicate when warm, so be gentle. It’s essential that the cookies are completely cool before you start frosting them, otherwise, your beautiful orange buttercream will melt and slide right off. I usually give them a good 30 minutes to an hour on the wire rack.
Crafting the Frosting and Assembly Prep:
- Preparing the Orange Buttercream: In a large mixing bowl, again using an electric mixer, cream the softened unsalted butter until it’s light and fluffy, about 2 minutes. This aeration is key for a light buttercream.
- Adding Powdered Sugar: Gradually add the sifted powdered sugar, one cup at a time, mixing on low speed until combined, then increasing to medium speed. Scrape down the sides of the bowl frequently. This is where I start to see that beautiful, fluffy consistency forming.
- Achieving Desired Consistency and Color: Once all the sugar is incorporated, add the milk (or cream), vanilla extract, and a few drops of orange food coloring. Start with 2 tablespoons of milk and a few drops of coloring. Mix on medium-high speed until the frosting is light, fluffy, and reaches your desired shade of vibrant orange. If the frosting is too thick, add a little more milk, ½ teaspoon at a time, until it reaches a spreadable consistency. If it’s too thin, you can add a little more sifted powdered sugar. We want a frosting that’s firm enough to hold its shape but soft enough to pipe smoothly. I usually go for a bright, cheerful orange that screams Halloween!
- Unwrapping Chocolate Kisses: Unwrap all of your Hershey’s Kisses. This might seem like a small detail, but trust me, having them all ready to go before you start assembling will make the process much smoother and less messy, especially if you have little helpers!
Assembling Your Spooky Witch Hat Cookies:
- Getting Ready for Frosting: Now for the fun part – assembling our Witch Hat Cookies! Place the cooled chocolate cookies on a clean surface or wire rack. Transfer the orange buttercream frosting to a piping bag fitted with a round tip (a size 1A or 1M works well) or simply use a Ziploc bag with a corner snipped off. If you don’t have a piping bag, you can also use a small offset spatula or a butter knife to spread the frosting, but piping gives a neater, more defined “brim” to the hat.
- Piping the Frosting “Brim”: Take one cooled chocolate cookie. Carefully pipe a generous ring of orange buttercream around the outer edge of the cookie, leaving the very center clear. This ring of frosting will serve as the vibrant orange “brim” of our witch hat. I like to make sure the ring is thick enough to create a nice visual contrast and also to provide a stable base for the chocolate “hat” part. The contrast between the dark cookie and the bright orange frosting is what makes these Witch Hat Cookies so charming!
- Placing the Chocolate Hat: Gently place one unwrapped Hershey’s Kiss, point-side up, directly in the center of the piped orange frosting ring. The base of the Kiss should sit firmly on the cookie, surrounded by the frosting. Lightly press down to secure it. The frosting will act like glue, holding the chocolate hat in place.
- Repeating the Process: Continue piping frosting and placing Hershey’s Kisses on all of your remaining chocolate cookies. This is a wonderfully repetitive and satisfying process, and you’ll quickly get into a rhythm.
- Adding Optional Decorations: If desired, immediately after placing the Kisses, sprinkle some Halloween-themed sprinkles or orange/black sanding sugar onto the orange frosting “brim.” The frosting is still fresh and tacky at this point, which will help the sprinkles adhere beautifully. This adds an extra touch of festivity and texture to your Witch Hat Cookies.
Finishing Touches and Storage:
- Allowing Frosting to Set: Let the Witch Hat Cookies sit at room temperature for about 15-30 minutes, or until the frosting has slightly set. This helps to firm up the buttercream and ensures that the Kisses are securely attached, making them easier to handle and transport without anything shifting.
- Serving: Your spooky and delicious Witch Hat Cookies are now ready to be served! They are perfect for Halloween parties, school treats, or just a fun autumn dessert. Everyone, especially children, absolutely loves these delightful treats because they are not only tasty but also incredibly cute and festive. I always get compliments on how charming they look!
- Storage: Store any leftover Witch Hat Cookies in an airtight container at room temperature for up to 3-4 days. If your kitchen is particularly warm, or if you prefer a firmer frosting, you can store them in the refrigerator, but allow them to come to room temperature for about 15-20 minutes before serving for the best texture and flavor. The cookies will stay fresh and delicious, ready for whenever a sweet craving strikes. Enjoy your homemade, perfectly enchanting Witch Hat Cookies!
Conclusion:
So, there you have it! We’ve journeyed through the simple magic of creating a truly enchanting treat that I believe is an absolute must-try for anyone looking to add a touch of whimsy and delight to their baking repertoire. These aren’t just any ordinary cookies; they are an invitation to create, to share, and to savour a moment of pure, unadulterated joy. From their charming appearance to their utterly delicious taste, I’m confident that once you whip up a batch, you’ll understand exactly why I’m so enthusiastic about them. They offer that perfect blend of straightforward baking with a spectacular, smile-inducing result that never fails to impress both young and old alike.
Why These Witch Hat Cookies Are an Irresistible Treat
What makes these particular cookies so special, you ask? Well, for starters, the sheer ease of preparation is a game-changer. You don’t need to be a seasoned baker to achieve picture-perfect results. The steps are intuitive, the ingredients are readily available, and the payoff is simply immense. Think about the satisfaction of presenting a platter of these delightful creations, knowing you crafted something so visually striking and incredibly tasty with minimal fuss. They are the ideal project for a rainy afternoon with kids, a fun activity to share with friends, or even a relaxing solo baking session when you just need to unleash a little culinary creativity. The combination of a soft, tender cookie base with that sweet, creamy frosting and the perfect chocolatey “hat” creates a textural and flavor experience that is truly addictive. They stand out on any dessert table, sparking conversation and bringing an instant sense of festivity wherever they go. Trust me when I say, once you taste one, you’ll find it hard to stop!
Serving Suggestions and Creative Variations to Elevate Your Baking
Now, let’s talk about how to enjoy these fantastic treats and how you can truly make them your own. While these cookies are undeniably perfect on their own, fresh from the cooling rack, their versatility allows for some wonderful serving suggestions. Imagine them as the star of a Halloween party dessert bar, nestled amongst other spooky delights. They make an excellent accompaniment to a warm mug of hot cocoa, a comforting cup of coffee, or a tall glass of milk on a chilly evening. For a thoughtful homemade gift, stack a few in a cello bag tied with a festive ribbon – they’re always a welcome present! As for variations, the sky’s the limit! Don’t feel confined to the exact ingredients mentioned in the recipe. Consider swapping out the base cookie for a different flavor; a chocolate cookie base would create a dramatically dark and delicious look, or perhaps a peanut butter cookie for a fun flavor twist. For the “hat,” while the classic chocolate kiss is perfect, you could experiment with mini Reese’s Peanut Butter Cups for a different shape and flavor, or even a piece of dark chocolate molded into a point. Get creative with your frosting colors too! Beyond the traditional orange, green, or purple, think about using bright blues or even a shimmery white for a truly magical, ethereal effect. You can add edible glitter, various sprinkles, or even tiny candy eyes to personalize each cookie. For a more sophisticated touch, try adding a hint of almond extract to your frosting, or a pinch of cinnamon to your cookie dough. These adjustments allow you to adapt the recipe for different holidays or themes beyond just Halloween, turning them into charming wizard hats or festive party favors any time of year.
I truly believe that baking should be a joyous and accessible experience, and this recipe embodies that spirit perfectly. It’s about creating something beautiful and delicious, but more importantly, it’s about the smiles it brings. So, please, do yourself a favor and set aside some time this week to give these wonderful Witch Hat Cookies a try. I promise you won’t regret it! Once you’ve baked your batch, I would absolutely love to hear about your experience. Did you stick to the original recipe, or did you get creative with your own unique variations? What were your favorite parts of the process? Your stories and photos inspire me and the entire baking community, so don’t hesitate to share your culinary triumphs. Tag me or use a specific hashtag if you’re sharing on social media – I’m always thrilled to see what you create!
Happy baking, my friends, and may your kitchen always be filled with the sweet scent of success and the joyful sounds of creation!
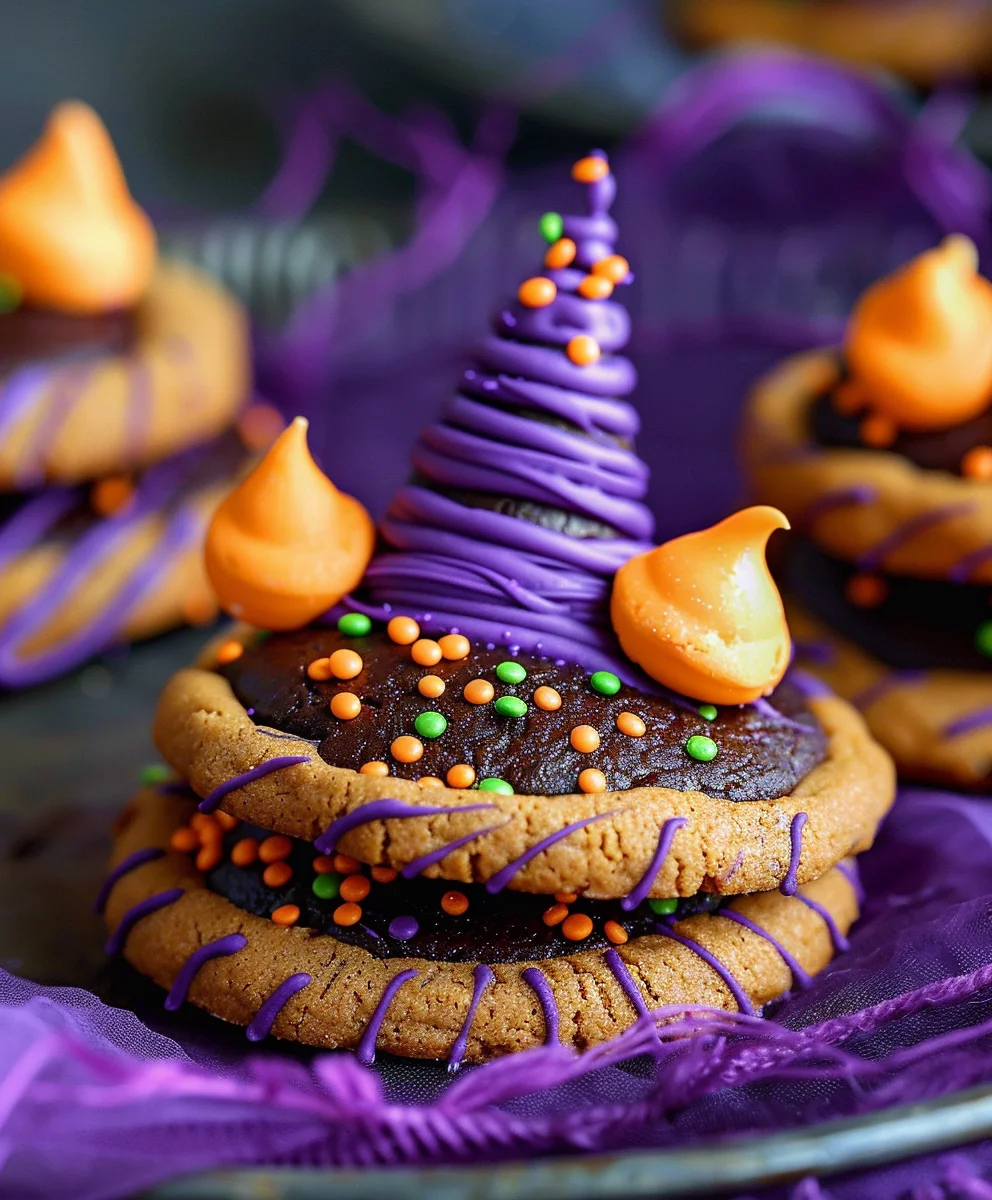
Witch Hat Cookies Recipe: Spooky, Fun & Easy Treat!
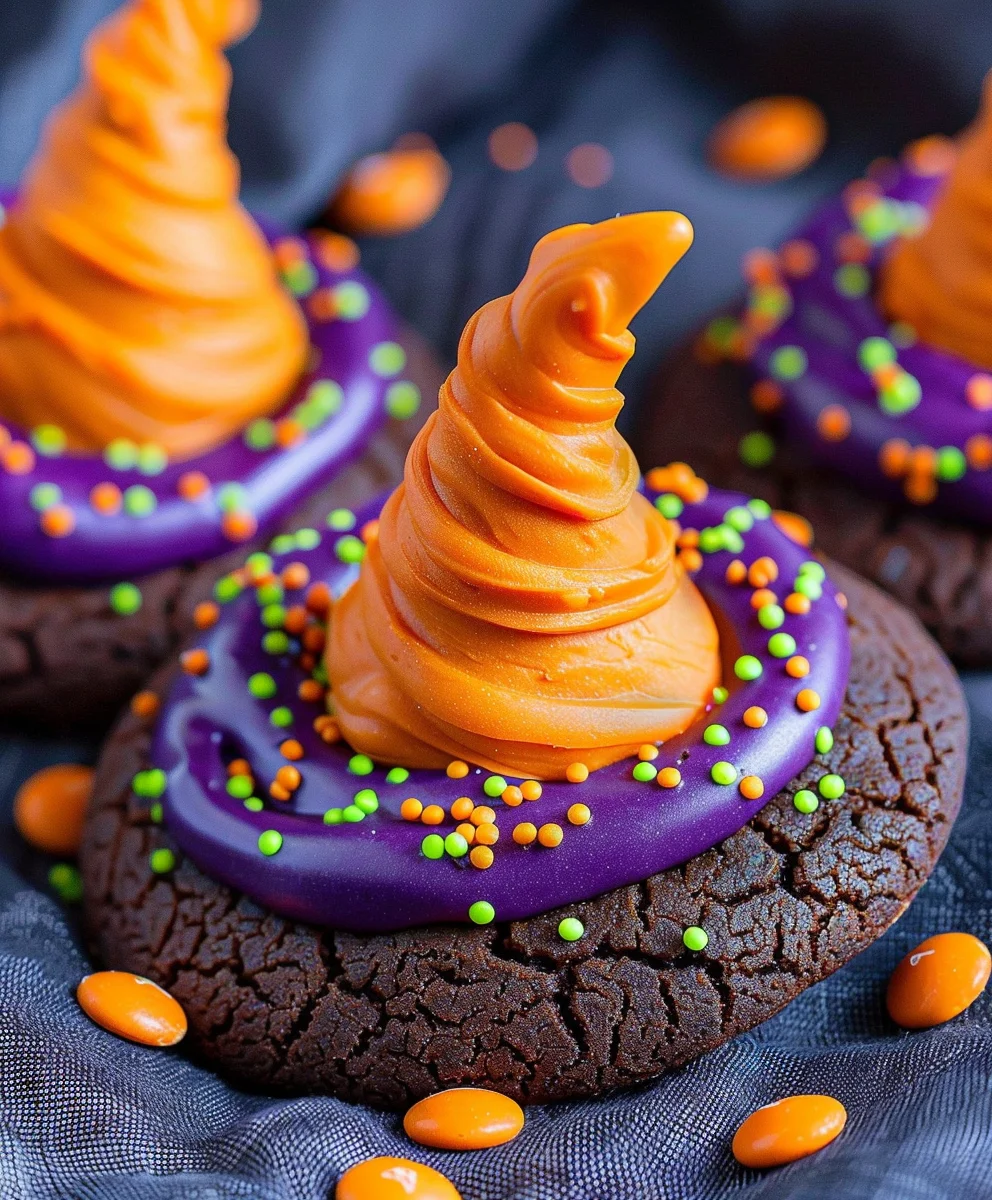
These fun Witch Hat Cookies are a delightful treat for autumn celebrations, especially Halloween. Featuring a charming appearance and delicious flavors, they are easy to make and bring a touch of playful enchantment to any gathering. This recipe uses a peanut butter cookie base with purple frosting.
Ingredients
-
1 ½ cups all-purpose flour
-
2 teaspoons cornstarch
-
½ teaspoon baking soda
-
¼ teaspoon baking powder
-
⅛ teaspoon fine sea salt
-
½ cup unsalted butter, softened
-
1 cup granulated sugar
-
1 large egg
-
¾ cup creamy peanut butter
-
1 teaspoon vanilla extract
-
Purple gel food coloring
-
Halloween sprinkles or purple sanding sugar
-
33 Chocolate Kisses or Hugs candies, unwrapped
Instructions
-
Step 1
In a bowl, cream ½ cup softened unsalted butter and 1 cup granulated sugar until light and fluffy. Beat in 1 large egg, ¾ cup creamy peanut butter, and 1 teaspoon vanilla extract. In a separate bowl, whisk together 1 ½ cups all-purpose flour, 2 teaspoons cornstarch, ½ teaspoon baking soda, ¼ teaspoon baking powder, and ⅛ teaspoon fine sea salt. Gradually add dry ingredients to wet, mixing until just combined. Do not overmix. -
Step 2
Cover dough and refrigerate for at least 1 hour. Preheat oven to 375°F (190°C). Line baking sheets with parchment. On a lightly floured surface, roll dough to ¼-inch thickness. Cut into 2 to 2 ½ inch rounds; transfer to prepared baking sheets. Bake for 8-10 minutes until edges are set. Cool on baking sheets for 5 minutes, then transfer to a wire rack to cool completely. -
Step 3
In a mixing bowl, cream ½ cup softened unsalted butter until light and fluffy. Gradually add 4 cups sifted powdered sugar. Mix in 2-3 tablespoons milk, 1 teaspoon vanilla extract, and purple gel food coloring until the frosting is light, fluffy, and vibrant purple. (Note: Butter, powdered sugar, and milk for the frosting base are common buttercream ingredients; their specific quantities are inferred from the article’s original recipe to create a functional frosting.) -
Step 4
Unwrap 33 chocolate Kisses. Place cooled cookies on a clean surface. Pipe a generous ring of purple buttercream around the outer edge of each cookie, leaving the center clear. Gently place one chocolate Kiss, point-side up, in the center of the frosting ring, pressing lightly to secure. -
Step 5
Immediately sprinkle Halloween sprinkles or purple sanding sugar onto the purple frosting brim. Let cookies sit at room temperature for 15-30 minutes for the frosting to set before serving or storing. Store in an airtight container at room temperature for up to 3-4 days.
Important Information
Nutrition Facts (Per Serving)
It is important to consider this information as approximate and not to use it as definitive health advice.
Allergy Information
Please check ingredients for potential allergens and consult a health professional if in doubt.