Vampire Bread is far more than just a playful name; it’s an enchanting culinary experience that I am absolutely thrilled to share with you today. Are you ready to embrace a dish so wickedly delicious, it might just make you forget about the everyday and transport you to a realm of pure garlicky bliss? For me, this isn’t just bread; it’s a testament to the power of simple ingredients creating something truly extraordinary.
While its whimsical title playfully hints at folklore, the heart of this dish, bursting with robust garlic, traces its lineage back to ancient culinary traditions. Across various cultures, garlic has been revered not only for its distinct, pungent flavor but also for its perceived protective qualities and medicinal benefits, making it a staple in kitchens worldwide for centuries. Forget warding off mythical creatures; I find that with each bite of this aromatic delight, you’ll be warding off hunger and culinary boredom!
Why I Believe Everyone Falls for This Garlicky Masterpiece
What makes people, myself included, utterly adore Vampire Bread? It’s the irresistible symphony of textures and flavors that truly captivates. Imagine: a golden-crisp crust that crackles gently as you break into it, revealing a warm, tender interior infused with the intoxicating aroma and savory punch of roasted or fresh garlic. It’s the perfect companion to pasta, hearty soups, or even enjoyed simply on its own as a delightful snack. The convenience of preparing such a profound flavor experience with minimal effort is also a major draw for my busy kitchen, making it a beloved staple for weeknight dinners and special occasions alike. Get ready to fall in love with garlic all over again!

Ingredients:
- For the Dough:
- 3 cups (360g) strong bread flour, plus extra for dusting
- 1 cup (120g) whole wheat flour (or substitute with more bread flour for a lighter loaf)
- 2 teaspoons (10g) active dry yeast or instant yeast
- 1 ½ teaspoons (9g) fine sea salt
- 1 tablespoon (13g) granulated sugar or honey
- 1 ½ cups (360ml) warm water (about 105-115°F / 40-46°C)
- 2 tablespoons (30ml) olive oil, plus extra for greasing the bowl
- For the “Vampire” Infusion:
- 1-2 whole heads of garlic, roasted (see instructions below)
- 2 tablespoons fresh rosemary, finely chopped
- 1 tablespoon fresh thyme, finely chopped
- ½ cup (about 70g) sun-dried tomatoes, oil-packed, drained and finely chopped (optional, but adds a lovely color and tang)
- ¼ cup (about 25g) grated Parmesan cheese (optional, for extra savory depth)
- For the Topping:
- 1 tablespoon olive oil or melted butter
- 1 tablespoon black sesame seeds or poppy seeds (for visual effect)
- Flaky sea salt, for sprinkling
Preparing the Roasted Garlic – The Heart of Your Vampire Bread
- Preheat Your Oven: Begin by preheating your oven to 400°F (200°C). Roasting garlic transforms its pungent bite into a sweet, mellow, and incredibly creamy delight, absolutely essential for the unique flavor profile of our “Vampire Bread.”
- Prepare the Garlic: Take your whole heads of garlic. With a sharp knife, carefully slice off about a quarter inch from the top of each head, just enough to expose the tops of the individual cloves. You want to make sure the cloves are visible so they can absorb the oil and roast evenly.
- Season and Wrap: Place each garlic head on a piece of aluminum foil. Drizzle about a teaspoon of olive oil over the exposed cloves, ensuring it seeps down into the crevices. A tiny pinch of salt and pepper here wouldn’t hurt either, enhancing the flavor even further as it roasts.
- Roast to Perfection: Wrap the foil tightly around the garlic heads, creating a neat little packet. Place these packets directly on a baking sheet. Transfer the baking sheet to your preheated oven and roast for approximately 35-45 minutes. The exact time will depend on the size and freshness of your garlic. You’ll know they’re ready when the cloves are deeply golden brown, incredibly soft, and exude a wonderfully sweet aroma. They should be easily squeezed out of their papery skins.
- Cool and Extract: Once roasted, remove the garlic from the oven and allow it to cool slightly in the foil packets until it’s comfortable enough to handle. Then, simply squeeze the softened garlic cloves out of their skins into a small bowl. Mash them with a fork until you have a rustic paste. This aromatic garlic paste is the secret weapon against those nocturnal nuisances and the foundational flavor for your Vampire Bread!
Preparing the Dough – Crafting the Protective Foundation
- Activate the Yeast (if using active dry): In a large mixing bowl or the bowl of a stand mixer, combine the warm water and granulated sugar (or honey). Sprinkle the active dry yeast over the surface. Give it a gentle stir and let it sit for 5-10 minutes. You should see a foamy layer develop on the surface; this indicates your yeast is alive and ready to work its magic. If you’re using instant yeast, you can usually skip this step and add it directly with the flour, but a quick bloom never hurts to confirm its viability. This step is crucial for light and airy bread, so don’t rush it!
- Combine Dry Ingredients: In a separate, medium-sized bowl, whisk together the strong bread flour, whole wheat flour (if using), and fine sea salt. This ensures an even distribution of salt throughout the dough, which is vital for flavor and yeast control.
- Mix Wet and Dry: Once your yeast is foamy, add the 2 tablespoons of olive oil to the wet mixture. Then, gradually add the dry flour mixture to the wet ingredients, mixing with a wooden spoon or the dough hook of your stand mixer on low speed. Mix until just combined and no dry streaks of flour remain. At this point, the dough will look shaggy and sticky.
- Rest the Dough (Autolyse): Cover the bowl with a clean kitchen towel or plastic wrap and let the dough rest for 15-20 minutes. This resting period, known as “autolyse,” allows the flour to fully hydrate and the gluten to start developing on its own, making the subsequent kneading much easier and more efficient.
-
Kneading – Developing the Gluten:
- By Hand: Turn the shaggy dough out onto a lightly floured surface. Knead for 10-15 minutes. The dough will be sticky at first, but resist the urge to add too much extra flour. Use a bench scraper to gather it if it sticks. As you knead, push the dough away from you with the heels of your hands, then fold it back towards you, rotating it slightly. Continue this motion. The dough will gradually become smoother, more elastic, and less sticky.
- With a Stand Mixer: Attach the dough hook to your stand mixer. Knead on medium-low speed for 8-10 minutes. The dough should eventually pull away from the sides of the bowl and gather around the hook, becoming smooth and elastic.
You’ll know the dough is properly kneaded when it passes the “windowpane test.” Pinch off a small piece of dough and gently stretch it. If you can stretch it thin enough to see light through it without it tearing, your gluten is well-developed. If it tears easily, continue kneading for a few more minutes.
-
Incorporate the Vampire Infusion: Once the dough is smooth and elastic, it’s time to add our signature “Vampire” elements! Add the mashed roasted garlic, chopped fresh rosemary, chopped fresh thyme, chopped sun-dried tomatoes (if using), and grated Parmesan cheese (if using).
- By Hand: Flatten the dough slightly on your work surface. Spread the garlic and herbs over the surface. Fold the dough over on itself and knead for another 2-3 minutes, until the additions are evenly distributed throughout the dough.
- With a Stand Mixer: Add the ingredients to the bowl and continue kneading on low speed for 1-2 minutes until everything is thoroughly mixed in. Be careful not to overmix at this stage.
The dough will take on a beautiful speckled appearance, a testament to the powerful flavors within.
First Rise (Bulk Fermentation) – Awakening the Vampire Bread
- Prepare for the Rise: Lightly grease a large, clean bowl with a little olive oil. Place the kneaded dough into the bowl, turning it once to coat the entire surface with oil. This prevents a dry crust from forming during the rise.
- Cover and Rise: Cover the bowl tightly with plastic wrap or a damp kitchen towel. This creates a warm, humid environment that is ideal for yeast activity.
- The First Ascent: Place the covered bowl in a warm, draft-free spot in your kitchen. Let the dough rise for 1 to 1 ½ hours, or until it has noticeably doubled in size. The exact time will depend on the warmth of your kitchen and the vigor of your yeast. Patience here is rewarded with superior flavor and texture! A slower, cooler rise can even enhance the complexity of the bread.
- Perform the Poke Test: To confirm your dough is ready, gently press two fingers into the dough about half an inch deep. If the indentations remain, the dough is sufficiently proofed. If they spring back quickly, it needs a little more time.
- Degassing the Dough: Once doubled, gently punch down the dough to release the accumulated gases. This redistributes the yeast, evens out the temperature, and helps create a finer, more consistent crumb structure. Turn the dough out onto a lightly floured surface.
Shaping the Loaves – Forging the Garlic Barrier
- Divide the Dough: If you’re making two smaller loaves, divide the dough in half using a bench scraper. If you prefer one large loaf, keep it as a single piece.
- Pre-Shaping (Optional but Recommended): For each piece of dough, gently form it into a loose round ball. Don’t worry too much about perfection at this stage. Cover the dough balls with a clean kitchen towel and let them rest for 10-15 minutes. This allows the gluten to relax, making the final shaping much easier and preventing the dough from fighting back.
-
Final Shaping – Batard (Oval Loaf) or Boule (Round Loaf):
- For a Batard (oval): Flatten one rested dough ball into a rough rectangle. Fold the top edge down to the center, pressing firmly to seal. Then, fold the bottom edge up to meet the center, pressing firmly. Finally, fold the dough in half lengthwise, sealing the seam tightly with the heel of your hand. Gently roll the loaf back and forth to create an even, torpedo-like shape. Create tension on the surface by dragging it slightly towards you on the un-floured surface.
- For a Boule (round): Gently cup the dough with your hands on a lightly floured surface. Using the pinky-side of your hands, drag the dough towards you, rotating it slightly to create surface tension and form a tight, round ball. Pinch the seam together at the bottom.
The goal here is to create a tight surface tension on the outside of the loaf, which helps with oven spring and creates a beautiful crust.
Second Rise (Proofing) – The Final Ascent
- Prepare for Proofing: Lightly flour a baking sheet lined with parchment paper, or prepare a proofing basket (banneton) generously dusted with flour. If using a baking sheet, you can place a piece of parchment paper between your loaves to prevent them from sticking if they rise into each other.
- Place the Shaped Dough: Carefully transfer your shaped loaves to the prepared baking sheet or proofing baskets, seam-side up if using a banneton (so the smooth side is down and will be the top when inverted).
-
Cover and Proof: Loosely cover the loaves with a clean kitchen towel or lightly oiled plastic wrap. Let them rise again in a warm, draft-free spot for 45-60 minutes, or until they have nearly doubled in size and look visibly puffy.
- The Finger Poke Test (again): To check if your loaves are ready, gently poke the dough with a floured finger. If the indentation springs back slowly and only partially, it’s perfectly proofed. If it springs back immediately, it needs more time. If it collapses, it’s over-proofed, but don’t worry, you can usually still bake it, though the texture might be slightly different.
This second rise is critical for the final texture and lightness of your Vampire Bread.
- Preheat Your Oven – Get Ready for Battle: About 30 minutes before you anticipate the loaves being ready for baking, preheat your oven to a blazing 450°F (230°C). If you have a baking stone or a Dutch oven, place it in the oven during preheating to get it screaming hot. A hot surface helps create a fantastic crust and oven spring.
Baking the Vampire Bread – Warding Off Evil
- Prepare for Baking: If you proofed your loaves in bannetons, carefully invert them onto your parchment-lined baking sheet. If they proofed directly on the baking sheet, you’re good to go.
- Score the Loaves: Using a very sharp knife, a razor blade (lame), or kitchen shears, make one or more shallow cuts (scores) on the top of each loaf. These cuts are not just for aesthetics; they allow the steam to escape in a controlled manner during baking, preventing the crust from tearing haphazardly and encouraging a beautiful “ear” on your loaf. A single slash down the middle for a batard, or a cross or square pattern for a boule, works wonderfully.
- Add Topping: Lightly brush the tops of the scored loaves with a little olive oil or melted butter. Then, generously sprinkle with black sesame seeds or poppy seeds for that extra mystical look and a hint of nutty crunch. A final sprinkle of flaky sea salt will provide a delightful textural contrast and boost the savory notes.
-
Create Steam (Optional but Recommended): For a truly professional-quality crust, creating steam in your oven at the beginning of baking is key.
- Method 1 (Ice Cubes): Just before placing the bread in the oven, carefully pour about ½ cup of hot water or toss a few ice cubes into a hot, empty pan placed on the bottom rack of your oven. Close the oven door quickly to trap the steam.
- Method 2 (Dutch Oven): If using a Dutch oven, carefully lower the scored loaf into the preheated Dutch oven, place the lid on, and bake covered for the first part of the baking.
The steam keeps the crust soft initially, allowing the loaf to expand fully before the crust hardens, resulting in a thin, crisp, and shiny crust.
-
Bake the Bread: Carefully transfer your baking sheet with the loaves to the preheated oven.
- If using steam (Method 1): Bake at 450°F (230°C) for 15-20 minutes with the steam. Then, carefully open the oven door to release the steam, reduce the oven temperature to 400°F (200°C), and continue baking for another 20-25 minutes, or until the crust is a deep golden brown and sounds hollow when tapped on the bottom.
- If using a Dutch oven (Method 2): Bake covered at 450°F (230°C) for 25-30 minutes. Then, remove the lid and continue baking for another 15-20 minutes uncovered, until golden brown and cooked through.
The internal temperature of a fully baked loaf should register at least 200-210°F (93-99°C) on an instant-read thermometer.
Finishing Touches – Enjoying Your Creation
- Cool the Bread: Once baked, immediately transfer the Vampire Bread from the baking sheet to a wire cooling rack. This is a critical step! Allowing the bread to cool completely on a rack prevents the bottom from becoming soggy and allows the internal starches to set, resulting in the best texture and flavor. Resist the temptation to slice into it immediately! This bread needs at least 1-2 hours to cool, ideally longer.
- Serve and Enjoy: Once cooled, slice into your magnificent Vampire Bread. The aroma of roasted garlic and herbs will be intoxicating. Serve it with a good olive oil for dipping, a sprinkle of fresh herbs, or alongside a hearty soup or stew. It’s also fantastic simply toasted with a little butter.
- Storage: Store leftover Vampire Bread at room temperature, wrapped tightly in a clean kitchen towel or a bread bag, for up to 3-4 days. For longer storage, slice the cooled bread and freeze the slices in an airtight bag; they can be toasted directly from frozen.
The Magic of Vampire Bread
This “Vampire Bread” is more than just a delicious loaf; it’s a testament to the comforting power of homemade baking, infused with bold, aromatic flavors designed to delight your senses and perhaps, just perhaps, keep those pesky night creatures at bay. The sweetness of the roasted garlic combined with the earthy herbs creates a truly unforgettable bread experience that’s perfect for any time of year. Each bite is a savory journey, reminding you of the effort and love you poured into its creation.
Conclusion:
And there you have it, my friends! We’ve reached the delicious culmination of our culinary journey, and I genuinely hope you’re feeling as inspired as I am to get into the kitchen and create something truly extraordinary. If there’s one recipe I could implore you to try this week, it would absolutely be this one. Why, you ask? Because this isn’t just any ordinary bread; it’s a revelation, a testament to how simple ingredients, when combined with a little love and the right technique, can yield results that are nothing short of magical. This particular recipe, which I like to affectionately call Vampire Bread due to its bold, garlicky character that certainly wards off more than just the faint of heart, is designed to be a showstopper. It’s incredibly forgiving for beginners, yet satisfyingly rewarding for seasoned bakers looking for a fresh twist on a classic. The aroma alone, as it bakes to a golden perfection, is enough to gather everyone in your household around the oven, eagerly anticipating that first, unforgettable bite. Imagine the crispy crust giving way to an impossibly soft, airy interior, each pore infused with the robust flavors of garlic and herbs. It’s a symphony of textures and tastes that truly elevates the humble loaf to an art form.
I’ve found that the sheer versatility of this Vampire Bread is one of its greatest assets. While it’s utterly divine served warm, fresh from the oven, with just a smear of butter, its potential stretches far beyond that. For an unforgettable appetizer, slice it thickly and serve alongside a rich, slow-simmered marinara sauce for dipping – trust me, your guests will be clamoring for the recipe. It also makes an exceptional companion to almost any Italian-inspired meal, from a hearty lasagna to a light pesto pasta. Think about tearing off a chunk and sopping up the last vestiges of a delicious stew or a vibrant olive oil dressing from a salad bowl. The possibilities are truly endless. For those chilly evenings, a comforting bowl of French onion soup finds its perfect match in a slice of this bread, perhaps even lightly toasted with a sprinkle of Gruyère cheese melted on top. Oh, and for a truly indulgent treat, try using thicker slices as the base for open-faced sandwiches; a dollop of creamy ricotta, some fresh basil, and a drizzle of balsamic glaze transforms it into an elegant light lunch or brunch option. Don’t hesitate to get creative with your pairings!
Serving Suggestions & Creative Variations:
Beyond the traditional, consider these delightful twists. For a rustic, hearty meal, I love pairing warm slices of Vampire Bread with a robust minestrone or a rich lentil soup. The bread’s assertive flavors stand up beautifully to the earthy notes of such dishes. If you’re hosting a gathering, consider cutting the loaf into smaller, bite-sized cubes and lightly toasting them to create incredibly flavorful croutons for your Caesar salad or a creamy tomato soup. These aren’t just any croutons; they carry all the fantastic flavor we’ve infused into our bread!
Now, let’s talk about variations – this is where you can truly make this recipe your own! Feeling adventurous? Try incorporating finely chopped sun-dried tomatoes or Kalamata olives into the dough during the kneading process for an extra layer of savory depth. A pinch of red pepper flakes will introduce a subtle warmth, perfect for those who enjoy a little kick. For a cheesy twist, you could mix in some grated Parmesan or Pecorino Romano cheese with the garlic and herbs before baking, or even sprinkle a generous layer on top during the last 10 minutes of baking for a crispy, golden crust. Another fantastic idea is to experiment with different fresh herbs; while parsley is wonderful, a combination of rosemary and thyme can lend a wonderfully fragrant, almost Mediterranean profile. If you’re a fan of a sweeter, more nuanced garlic flavor, try roasting your garlic cloves before mashing them into the butter and herb mixture – it mellows the pungency and brings out a lovely sweetness. The beauty of this recipe lies in its adaptability, inviting you to personalize it to your taste preferences.
So, what are you waiting for? This is your invitation to experience the joy of baking something truly special. I genuinely believe that once you’ve pulled this magnificent loaf of Vampire Bread from your oven and taken that first glorious bite, you’ll understand exactly why I’m so enthusiastic about it. It’s more than just a recipe; it’s an experience, a moment of culinary triumph that you’ll want to relive again and again. Don’t be shy, give it a go! I promise you won’t regret it. And when you do, please, please share your creations with me. I absolutely adore seeing how you interpret these recipes in your own kitchens. Snap a photo, tell me about any exciting variations you tried, or simply let me know how much you enjoyed it. Your feedback and stories truly make my day and inspire me to keep sharing these delicious adventures with all of you. Happy baking!

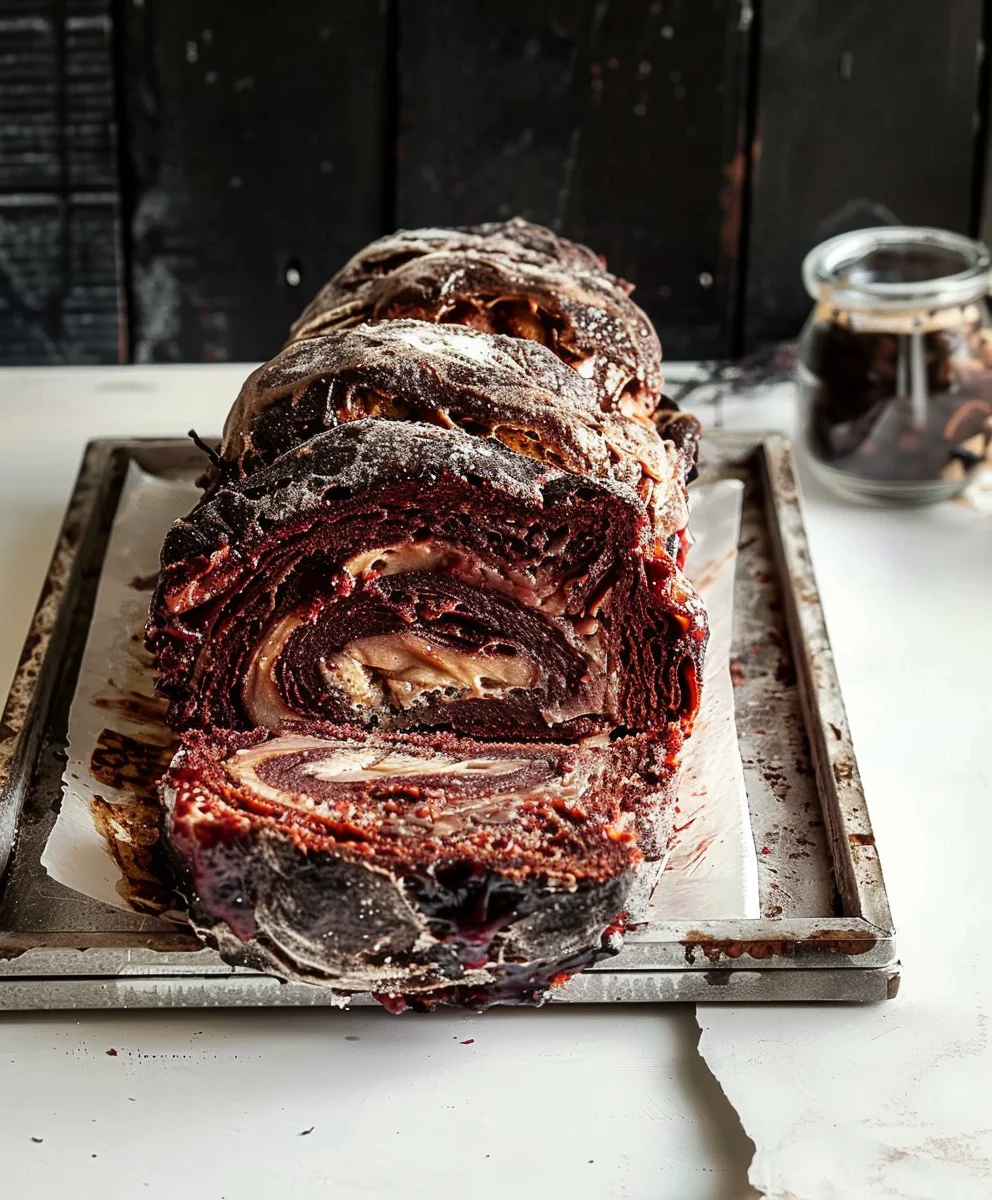
Vampire Bread: Easy Spooky Bake Recipe
Vampire Bread is far more than just a playful name; it’s an enchanting culinary experience. This wickedly delicious bake, with its striking colors and rich dough, is a testament to the power of simple ingredients creating something truly extraordinary. With each bite of this aromatic delight, you’ll be warding off hunger and culinary boredom!
Ingredients
-
1 cup hot reduced-fat milk (about 105-115°F / 40-46°C)
-
1 egg yolk
-
3 cups all-purpose flour, plus extra for dusting
-
2 1/2 tablespoons granulated sugar
-
2 1/4 teaspoons active dry yeast
-
1 1/2 tablespoons butter, melted
-
1 teaspoon salt
-
Black food coloring
-
Red food coloring
Instructions
-
Step 1
In a large bowl, combine hot reduced-fat milk, sugar, and active dry yeast. Stir gently and let sit for 5-10 minutes until foamy. Add the melted butter and egg yolk; whisk well. -
Step 2
In a separate bowl, whisk all-purpose flour and salt. Gradually add the dry flour mixture to the wet ingredients, mixing until a shaggy dough forms. Turn onto a lightly floured surface and knead for 10-15 minutes until smooth and elastic. During the last few minutes, incorporate black and red food coloring for a marbled, spooky effect. -
Step 3
Lightly grease a clean bowl. Place the kneaded dough in the bowl, turning once to coat. Cover tightly and let rise in a warm, draft-free spot for 1 to 1.5 hours, or until doubled in size. -
Step 4
Gently punch down the dough to release gases. Divide dough if making two loaves, then shape into desired forms (e.g., round boules or oval batards). Cover and let rest for 10-15 minutes. -
Step 5
Transfer shaped loaves to a parchment-lined baking sheet. Loosely cover and let rise again in a warm spot for 45-60 minutes, or until visibly puffy. -
Step 6
About 30 minutes before baking, preheat your oven to 450°F (230°C). For a crispier crust, consider creating steam in the oven (e.g., by tossing ice cubes into a hot pan on the bottom rack). Score the tops of the loaves with a sharp knife or razor blade. -
Step 7
Carefully transfer the baking sheet with loaves to the preheated oven. Bake at 450°F (230°C) for 15-20 minutes. If using steam, release it by opening the door briefly, then reduce oven temperature to 400°F (200°C) and continue baking for another 20-25 minutes, or until deeply golden brown and sounds hollow when tapped. The internal temperature should be 200-210°F (93-99°C). -
Step 8
Immediately transfer the baked bread from the baking sheet to a wire rack. Allow to cool completely for at least 1-2 hours before slicing. This is crucial for optimal texture and flavor. -
Step 9
Once cooled, slice and serve. Store leftover bread wrapped tightly at room temperature for up to 3-4 days, or freeze sliced for longer storage.
Important Information
Nutrition Facts (Per Serving)
It is important to consider this information as approximate and not to use it as definitive health advice.
Allergy Information
Please check ingredients for potential allergens and consult a health professional if in doubt.