Tres Leches Cake, a dessert so divinely moist and utterly irresistible, it’s no wonder it’s a staple at celebrations across Latin America and beyond! Have you ever taken a bite of cake and felt like you were transported to a cloud of creamy, sweet perfection? That’s the magic of this incredible dessert. This isn’t just any cake; it’s an experience.
The history of Tres Leches Cake is as rich and layered as the cake itself. While its exact origins are debated, many believe it emerged in Nicaragua sometime in the 20th century, possibly influenced by the condensed and evaporated milk industries. From there, it spread like wildfire throughout Latin America, each country adding its own unique touch. It quickly became a symbol of festive occasions, from birthdays to weddings, always bringing joy and a sense of shared celebration.
But what makes this cake so universally loved? It’s the symphony of textures and flavors, of course! The light and airy sponge cake, soaked in a luscious blend of three milks – evaporated milk, condensed milk, and heavy cream – creates an unparalleled moistness that simply melts in your mouth. The creamy topping, often a light whipped cream or meringue, adds a delicate sweetness that perfectly complements the richness of the cake. It’s a dessert that’s both comforting and elegant, perfect for impressing guests or simply indulging in a little self-care. Plus, while it might seem fancy, it’s surprisingly easy to make at home, making it a winner in my book!

Ingredients:
- For the Cake:
- 1 ½ cups all-purpose flour
- 1 teaspoon baking powder
- ½ teaspoon baking soda
- ¼ teaspoon salt
- 5 large eggs, separated
- 1 ½ cups granulated sugar, divided
- ⅓ cup milk
- 1 teaspoon vanilla extract
- For the Three Milks Mixture:
- 1 (12 ounce) can evaporated milk
- 1 (14 ounce) can sweetened condensed milk
- 1 cup heavy cream
- For the Whipped Cream Topping:
- 2 cups heavy cream
- ¼ cup powdered sugar
- 1 teaspoon vanilla extract
- Optional Garnish:
- Ground cinnamon
- Fresh berries (strawberries, raspberries)
Preparing the Cake Batter:
- Preheat and Prep: First things first, let’s get that oven ready! Preheat your oven to 350°F (175°C). Grease and flour a 9×13 inch baking pan. I like to use baking spray with flour already in it – it makes life so much easier! Make sure you get into all the corners.
- Dry Ingredients: In a medium bowl, whisk together the flour, baking powder, baking soda, and salt. Whisking is key here to ensure everything is evenly distributed. Nobody wants a pocket of baking soda in their cake! Set this bowl aside for now.
- Separate the Eggs: This is a crucial step! Carefully separate the egg yolks from the egg whites. Make sure no yolk gets into the whites, as this can prevent them from whipping up properly. Place the yolks in a large bowl and the whites in a separate, clean, and dry bowl.
- Beat the Egg Yolks: Add ¾ cup of the granulated sugar to the egg yolks. Using an electric mixer (handheld or stand mixer), beat the yolks and sugar together until they are pale yellow and slightly thickened. This usually takes about 3-5 minutes. You’ll notice a significant change in color and texture.
- Add Milk and Vanilla: Pour in the milk and vanilla extract to the yolk mixture. Mix on low speed until just combined. Don’t overmix at this point.
- Combine Wet and Dry: Gradually add the dry ingredients to the wet ingredients, mixing on low speed until just combined. Be careful not to overmix; overmixing can lead to a tough cake. Mix until you see no more streaks of flour.
- Whip the Egg Whites: In the bowl with the egg whites, use a clean electric mixer to beat the egg whites until soft peaks form. This means the whites will hold their shape but the tips will droop slightly.
- Add Sugar Gradually: Gradually add the remaining ¾ cup of granulated sugar to the egg whites, beating until stiff, glossy peaks form. The peaks should stand straight up when you lift the beaters. Be careful not to overwhip, or the whites will become dry and clumpy.
- Fold in the Egg Whites: This is where the magic happens! Gently fold the egg whites into the batter in two additions. The first addition can be mixed in a bit more vigorously to lighten the batter. The second addition should be folded in very gently to maintain the air in the whites. Use a spatula and cut down through the center of the batter, then lift and fold the batter over the whites. Rotate the bowl and repeat until just combined. Avoid stirring, as this will deflate the whites.
- Pour into Pan: Pour the batter into the prepared baking pan and spread it evenly.
Baking the Cake:
- Bake: Bake in the preheated oven for 30-35 minutes, or until a wooden skewer inserted into the center comes out clean. The cake should be golden brown on top and spring back lightly when touched.
- Cool: Let the cake cool in the pan for about 10 minutes before poking holes all over the top with a fork or skewer. This is essential for the milk mixture to soak in properly. Don’t be shy – poke lots of holes!
Preparing the Three Milks Mixture:
- Combine the Milks: In a large bowl or pitcher, whisk together the evaporated milk, sweetened condensed milk, and heavy cream until well combined. This is your “tres leches” mixture!
Soaking the Cake:
- Pour the Milk Mixture: Slowly and evenly pour the three milks mixture over the cooled cake, making sure to saturate the entire surface. It might seem like a lot of liquid, but the cake will absorb it all.
- Refrigerate: Cover the cake with plastic wrap and refrigerate for at least 4 hours, or preferably overnight. This allows the cake to fully absorb the milk mixture and become incredibly moist and delicious. The longer it sits, the better it gets!
Preparing the Whipped Cream Topping:
- Chill the Bowl and Beaters: For the best whipped cream, chill your mixing bowl and beaters in the freezer for about 15-20 minutes before you start. This helps the cream whip up faster and hold its shape better.
- Whip the Cream: Pour the heavy cream into the chilled bowl. Using an electric mixer, beat the cream until soft peaks form.
- Add Sugar and Vanilla: Gradually add the powdered sugar and vanilla extract to the cream, beating until stiff peaks form. Be careful not to overwhip, or the cream will become grainy.
Assembling and Serving:
- Frost the Cake: Spread the whipped cream evenly over the soaked cake.
- Garnish (Optional): Sprinkle the top with ground cinnamon and/or arrange fresh berries on top for a beautiful presentation.
- Serve: Cut the cake into squares and serve chilled. Enjoy every single, delicious bite! This cake is best served cold, straight from the refrigerator.
Conclusion:
Okay, friends, let’s be honest. If you’ve made it this far, you’re probably already drooling. And rightfully so! This Tres Leches Cake isn’t just dessert; it’s an experience. It’s the kind of cake that makes you close your eyes and savor every single, milky, melt-in-your-mouth bite. The sponge is light and airy, the three milks soak in perfectly, creating a texture that’s both decadent and surprisingly refreshing, and the whipped cream topping adds the perfect touch of sweetness and elegance. It’s a symphony of flavors and textures that will have everyone begging for seconds (and the recipe!).
But what truly makes this Tres Leches Cake a must-try is its versatility. While the classic recipe is divine, don’t be afraid to experiment! Feeling adventurous? Try adding a hint of cinnamon or nutmeg to the milk mixture for a warm, comforting twist. Or, for a more vibrant flavor, incorporate a splash of rum or brandy. You could even infuse the milk with citrus zest, like orange or lime, for a bright and zesty kick. The possibilities are endless!
And the serving suggestions? Oh, let me count the ways! Of course, it’s absolutely perfect on its own, but consider pairing it with fresh berries, like strawberries, raspberries, or blueberries, for a beautiful and flavorful contrast. A scoop of vanilla ice cream or a dollop of dulce de leche would also be heavenly additions. For a more sophisticated presentation, dust the top with cocoa powder or garnish with edible flowers. And if you’re feeling extra fancy, you can even brûlée the top of the whipped cream for a caramelized crunch. No matter how you choose to serve it, this cake is guaranteed to impress.
I know baking can sometimes seem intimidating, but trust me, this recipe is surprisingly straightforward. I’ve broken it down into easy-to-follow steps, and I’m confident that even beginner bakers can achieve amazing results. The key is to be patient and follow the instructions carefully. Don’t rush the soaking process – that’s where the magic happens! And remember, even if it’s not perfect the first time, it will still taste delicious. Baking is all about learning and experimenting, so don’t be afraid to make mistakes and have fun!
So, what are you waiting for? Preheat that oven, gather your ingredients, and get ready to create a truly unforgettable dessert. I promise you won’t regret it. And once you’ve made it, please, please, please share your experience with me! I’d love to hear how it turned out, what variations you tried, and what your family and friends thought. Tag me in your photos on social media, leave a comment below, or send me an email. I can’t wait to see your creations and hear your stories. Happy baking, and enjoy every single bite of this incredible Tres Leches Cake!
Seriously, go make this cake. You deserve it.
Tres Leches Cake: The Ultimate Recipe and Baking Guide
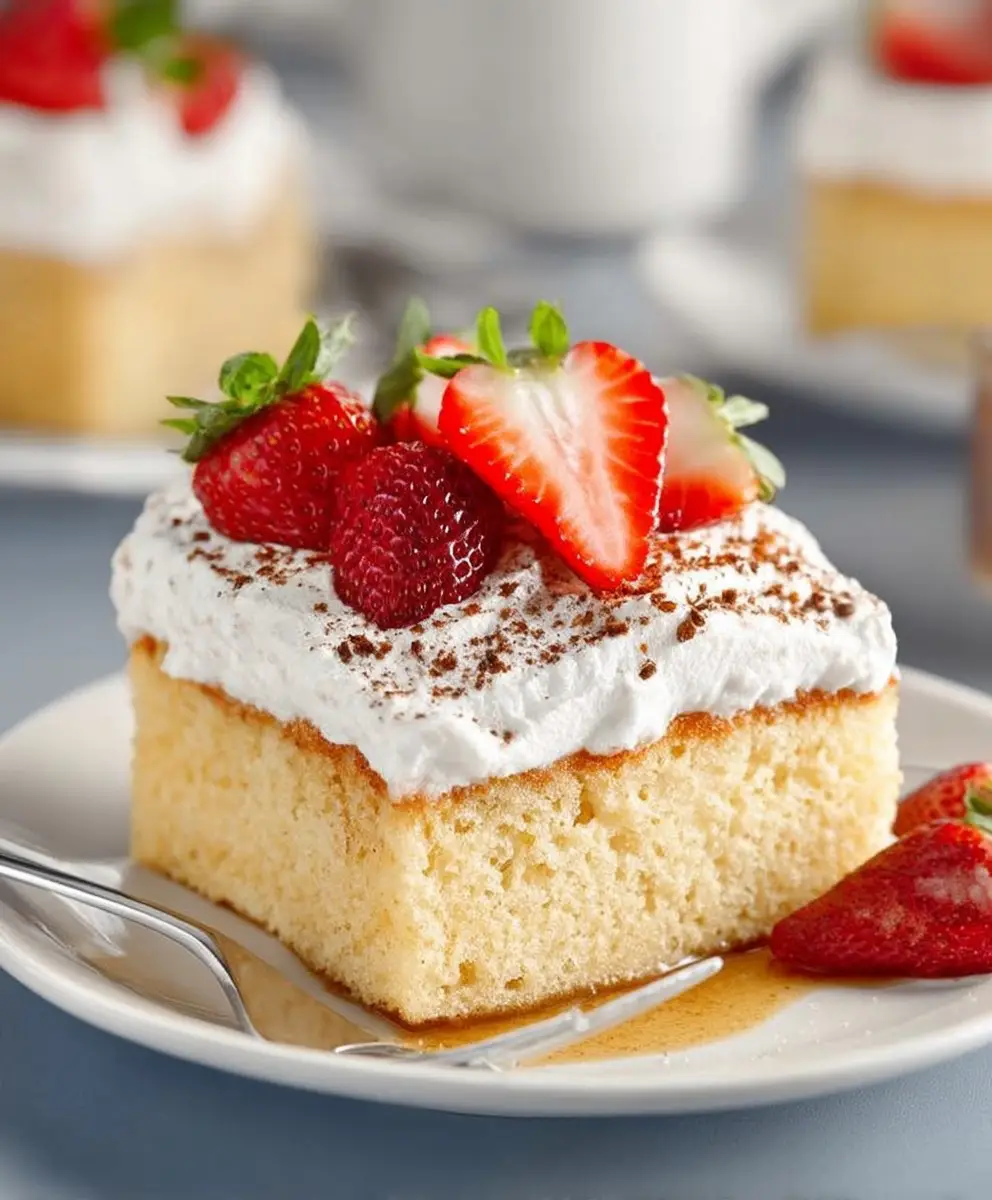
Light, airy sponge cake soaked in a sweet three-milk mixture, topped with whipped cream.
Ingredients
Instructions
Recipe Notes
- Make sure no yolk gets into the whites, as this can prevent them from whipping up properly.
- Don’t overmix the batter; overmixing can lead to a tough cake.
- Poke lots of holes in the cake after baking to allow the milk mixture to soak in properly.
- Chilling the bowl and beaters helps the cream whip up faster and hold its shape better.
- The longer the cake sits in the refrigerator, the better it gets!