Strawberry Earthquake Cake
Oh boy, get ready for a dessert that’s going to shake up your taste buds – literally! Strawberry Earthquake Cake is not just a catchy name; it’s a promise of an incredibly fun and delicious baking adventure. What makes this cake so special, you ask? Well, it’s all about the glorious “earthquake” effect: a beautiful, cracked top that hides a secret world of gooey, creamy, strawberry-studded delight underneath.
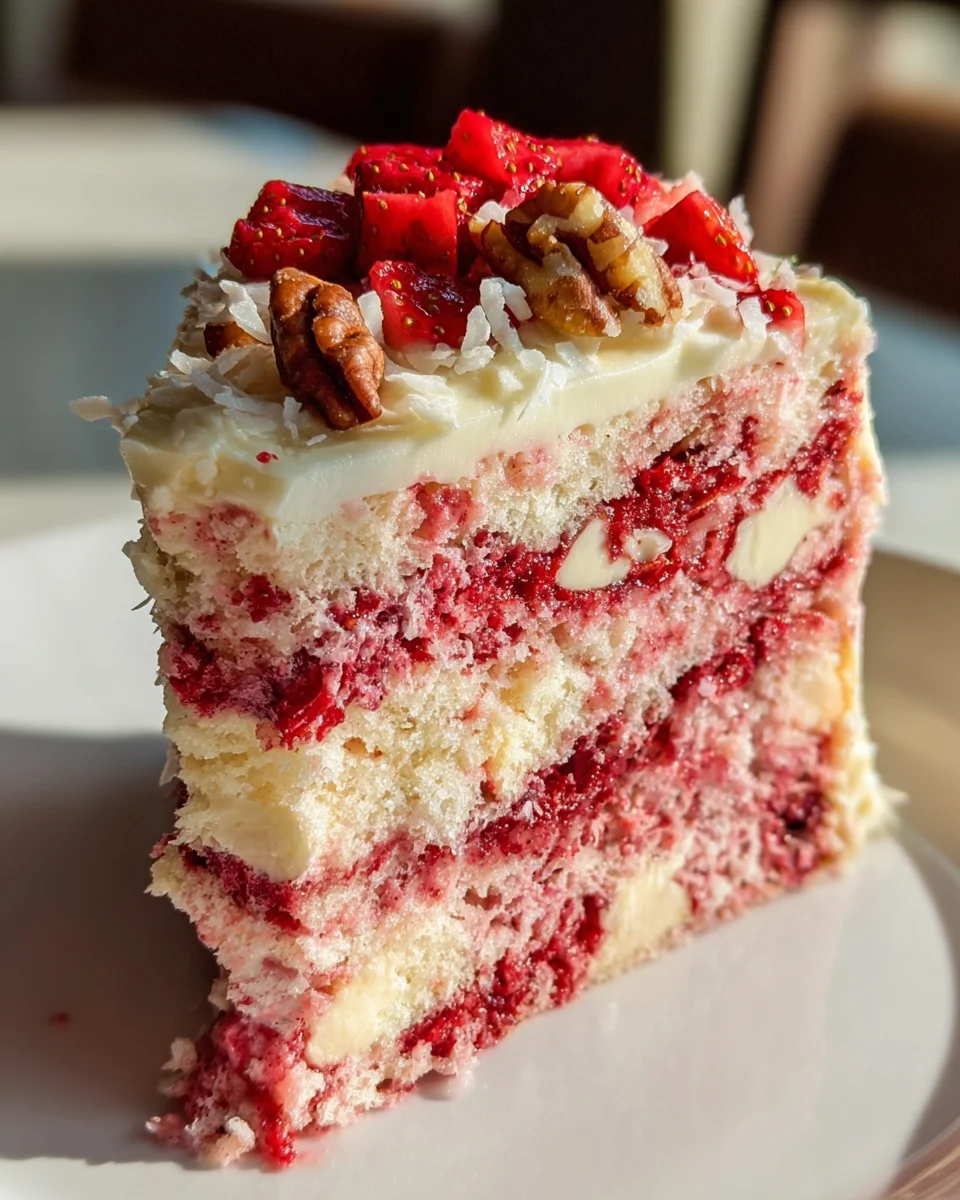
You are going to absolutely adore this cake because it’s a showstopper that’s surprisingly easy to make, delivering incredible flavor with minimal fuss. Imagine a rich, moist cake base, smothered in a sweet, luscious cream cheese and coconut mixture, then generously dotted with fresh, vibrant strawberries. As it bakes, these elements meld and shift, creating those signature cracks and an absolutely irresistible texture. Every spoonful is a delightful surprise, bursting with fruity sweetness and a melt-in-your-mouth creamy center.
It’s the perfect dessert for potlucks, parties, or just a cozy evening at home when you’re craving something extraordinary. Forget boring cakes; this one offers an explosion of flavor and texture that will have everyone asking for the recipe. Trust me, once you dive into this delicious Strawberry Earthquake Cake, you’ll understand why it’s become a beloved classic!

Ingredient Notes
Creating my Strawberry Earthquake Cake is such a joy, and it all starts with gathering the right ingredients. While the full recipe specifies exact measurements, understanding the role each component plays is key to achieving that perfectly cracked, gooey, and strawberry-infused delight. Think of these notes as my personal insights into what makes this cake truly special.
- Cake Mix: I typically reach for a white or vanilla cake mix as my base. Why? It provides a wonderfully neutral canvas that allows the vibrant strawberry flavor to truly shine. If you’re feeling adventurous and want to amp up the strawberry intensity even further, a strawberry cake mix can absolutely work, but sometimes I find it can be a bit too much with all the fresh fruit we’re adding. Alternatively, for a completely from-scratch experience, your favorite vanilla or butter cake recipe would be a fantastic foundation. Just ensure it yields enough batter for a 9×13 inch pan.
- Cream Cheese: This is the star of our “earthquake” filling! I always insist on full-fat block cream cheese, softened to room temperature. Trust me, the texture and richness it brings to the filling are unparalleled. Low-fat or whipped cream cheese simply won’t give you that decadent, gooey consistency that sinks into the cake in all the right ways.
- Unsalted Butter: Paired with the cream cheese, softened unsalted butter contributes to the luxurious, smooth texture of our filling. Using unsalted butter gives me control over the overall saltiness of the cake, allowing the sweetness to come through perfectly.
- Powdered Sugar (Confectioners’ Sugar): For that sweet, melt-in-your-mouth cream cheese layer, powdered sugar is a must. It dissolves beautifully, ensuring a smooth filling without any graininess.
- Sweetened Condensed Milk: Ah, the secret weapon for ultimate gooeyness! Drizzling this over the warm cake after it comes out of the oven is what really takes it to the next level. It seeps into those earthquake cracks, creating pockets of rich, sweet moisture that are absolutely irresistible. Don’t skip this step!
- Fresh Strawberries: These are the heart and soul of my Strawberry Earthquake Cake. I prefer fresh, ripe strawberries, hulled and chopped into small pieces. They add bursts of natural sweetness, a lovely tartness, and beautiful color. If fresh aren’t available, frozen unsweetened sliced strawberries (thawed and drained well) can work in a pinch, but the fresh ones truly elevate the experience.
- Strawberry Gelatin (Optional, for extra flavor/color): Sometimes, if I want to really boost the strawberry flavor and give the cake a lovely pink hue, I’ll dissolve a small packet of strawberry gelatin in a little hot water and stir it into the cake batter. It’s a fun trick to intensify that strawberry goodness.
- White Chocolate Chips (Optional): While not strictly traditional for a “strawberry” earthquake cake, I’ve found that a handful of white chocolate chips sprinkled into the cream cheese mixture or over the batter before baking adds another layer of sweetness and a lovely textural contrast. White chocolate and strawberries are a match made in heaven!
Step-by-Step Instructions
Alright, let’s get baking! My approach to making this Strawberry Earthquake Cake is all about building layers of flavor and texture, leading to that spectacular “fault line” appearance. Follow these steps, and you’ll be well on your way to a show-stopping dessert.
- Prepare Your Pan and Oven: First things first, preheat your oven to the temperature specified on your cake mix box (usually around 350°F or 175°C). While the oven is heating, generously grease and flour a 9×13 inch baking pan. I like to use baking spray with flour to make sure nothing sticks – it’s heartbreaking when a beautiful cake doesn’t release cleanly!
- Whip Up the Cake Batter: Now, for the cake base. In a large mixing bowl, combine your white or vanilla cake mix with the ingredients listed on its package (typically eggs, water, and oil). Beat according to the package directions until the batter is smooth. This is where, if I’m using it, I’d gently fold in any dissolved strawberry gelatin to give the batter that extra pink pop and a hint more strawberry flavor. Don’t overmix; just until everything is combined.
- Craft the Cream Cheese Filling: In a separate medium bowl, it’s time to create our luscious cream cheese filling. Using an electric mixer, beat the softened cream cheese and softened unsalted butter together until they are wonderfully smooth and creamy. Then, gradually add the powdered sugar, beating until it’s light and fluffy. A splash of vanilla extract here really enhances the flavor. You want this filling to be velvety and easy to dollop.
- Assemble the Earthquake Layers: Pour the prepared cake batter evenly into your greased and floured 9×13 inch baking pan. Now for the fun part! Take spoonfuls of your cream cheese mixture and dollop them randomly over the cake batter. Don’t worry about perfect placement; the more irregular, the better for that “earthquake” effect.
- Add the Strawberry Burst: Next, scatter your chopped fresh strawberries (and optional white chocolate chips, if using) all over the top of the batter and cream cheese dollops. Some pieces will naturally sink a bit, which is exactly what we want. You can take a knife or skewer and gently swirl through the layers once or twice, but don’t overdo it. The goal is to encourage some sinking and mixing, not to completely combine the layers. The less you swirl, the more distinct those “fault lines” will be!
- Bake to Perfection: Carefully place your pan in the preheated oven. Bake for approximately 45-55 minutes, or until a wooden skewer or toothpick inserted into the cake part (not the gooey cream cheese center) comes out mostly clean. The top should be beautifully golden brown and will have developed those characteristic “earthquake” cracks, with the cream cheese mixture bubbling up and sinking down in places.
- The Sweet Condensed Milk Drizzle: Immediately after taking the cake out of the oven, while it’s still piping hot, evenly drizzle the sweetened condensed milk all over the top. This magical step allows the milk to seep down into all those cracks and crevices, creating an incredibly moist and gooey cake.
- Cool and Serve: Allow the cake to cool completely on a wire rack before serving. This allows the filling to set up properly and for the flavors to meld beautifully. I know it’s hard to wait, but it’s worth it for the best experience!
Tips & Suggestions
Over the years of perfecting my Strawberry Earthquake Cake, I’ve gathered a few invaluable tips and tricks that I love to share. These little insights can make all the difference, ensuring your cake is not just good, but truly unforgettable!
- Room Temperature Ingredients are Your Friend: This is a golden rule, especially for the cream cheese and butter in your filling. Softened ingredients combine much more smoothly and create a wonderfully uniform, lump-free filling. If your cream cheese or butter is cold, you’ll end up with a clumpy mixture, and it won’t incorporate into the cake as beautifully. Just pull them out of the fridge about an hour before you plan to start baking.
- Don’t Overmix the Cake Batter: When mixing your cake batter, whether from a box or from scratch, mix only until the ingredients are just combined and smooth. Overmixing develops the gluten in the flour, which can lead to a tough, dense cake. We want a light and tender crumb to contrast with our gooey filling.
- Embrace the “Earthquake”: The beauty of an earthquake cake is its rustic, cracked appearance. When you dollop the cream cheese mixture and add the strawberries, resist the urge to over-swirl or make it look “perfect.” The less you fuss with it, the more natural and dramatic those fault lines will be. Let the oven do its magic of sinking and swirling!
- Quality Strawberries Matter: Since strawberries are a star component, choose ripe, fragrant, and firm berries. They’ll give you the best flavor and texture. If your strawberries are a bit tart, you might consider tossing them with a teaspoon of sugar before adding them to the cake.
- To Chill or Not to Chill: While the cake is delicious warm, the flavors really deepen and the filling sets up beautifully after a few hours, or even overnight, in the refrigerator. I often find it’s even better the next day once everything has had a chance to meld.
- Serving Suggestions: My favorite way to enjoy a slice of Strawberry Earthquake Cake is slightly warmed (a quick zap in the microwave for 20-30 seconds works wonders) with a scoop of vanilla bean ice cream or a dollop of fresh whipped cream. The contrast of warm cake and cold toppings is pure bliss! A sprinkle of fresh mint also adds a lovely garnish and freshness.
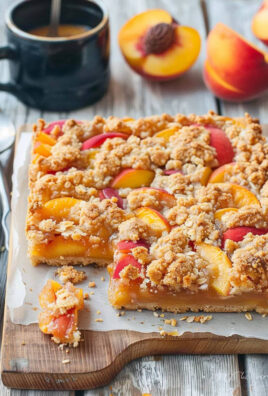
- Flavor Variations: Don’t be afraid to experiment! While strawberry is divine, you could easily adapt this concept. Imagine a Raspberry Earthquake Cake with dark chocolate chips, or a Peach Crumble Earthquake Cake with a streusel topping. The base concept is very forgiving and open to creative twists.
- Check for Doneness Carefully: Remember to insert your toothpick into a “cake” section, not directly into a pool of cream cheese, when checking for doneness. The cream cheese filling will remain gooey, but the cake itself should be baked through.
Storage
Knowing how to properly store your Strawberry Earthquake Cake is important, especially with that lovely cream cheese filling. Here’s how I keep mine fresh and delicious, ensuring you can enjoy every last crumb!
- Refrigeration is Key: Because of the cream cheese in the filling and the fresh strawberries, this cake absolutely needs to be stored in the refrigerator. Leaving it at room temperature for extended periods isn’t advisable for food safety or for maintaining the best texture.
- Airtight Container: Once your cake has completely cooled (and trust me, waiting is the hardest part!), transfer any leftovers to an airtight container. If you’re storing a large piece or the entire cake in the pan, cover it tightly with plastic wrap or aluminum foil. This prevents the cake from drying out and absorbing any refrigerator odors.
- How Long It Lasts: Stored properly in an airtight container in the refrigerator, your Strawberry Earthquake Cake will stay fresh and utterly delicious for about 3-4 days. After that, while it might still be safe to eat, the quality and freshness start to decline.
- Freezing for Longer Storage: Yes, you can freeze this cake! If you want to make it ahead or save some for later, I recommend cutting the cake into individual servings. Wrap each slice tightly in plastic wrap, then again in aluminum foil. Place the wrapped slices in a freezer-safe bag or container. It will keep well in the freezer for up to 1-2 months.
- Thawing and Reheating: To enjoy a frozen slice, simply transfer it from the freezer to the refrigerator and let it thaw overnight. If you’re craving that warm, gooey experience, you can gently reheat a thawed slice in the microwave for about 20-30 seconds, or until it’s just warmed through. Be careful not to overheat, as this can dry out the cake.
- Serving Temperature: While it stores best in the fridge, I often find the cake tastes best when brought to slightly cooler than room temperature, or gently warmed. Taking it out of the refrigerator about 30 minutes before serving can enhance its flavors and texture.
Final Thoughts
And there you have it! We’ve journeyed through the creation of the incredible Strawberry Earthquake Cake, and I truly hope you’re as excited to try it as I am to share it with you. This isn’t just any cake; it’s a delightful experience waiting to happen.
What makes the Strawberry Earthquake Cake an absolute must-try? It’s that perfect harmony of a moist, tender crumb infused with the vibrant sweetness of strawberries, all dramatically punctuated by those irresistible pockets of gooey deliciousness that make an earthquake cake so unique. Each slice offers a burst of fresh flavor, complemented by the surprising textures that emerge from its “cracked” surface, making every bite a delightful adventure.
Whether you’re looking to impress guests at a gathering, bring a touch of joy to a family dinner, or simply treat yourself to something extraordinary, the Strawberry Earthquake Cake rises to the occasion. It’s simple enough to tackle, yet yields results that look and taste impressively complex. So, go on, give this recipe a whirl. I promise, your taste buds will thank you for experiencing the sheer delight that is the Strawberry Earthquake Cake!

The Best Strawberry Earthquake Cake Recipe – Sweet & Simple
- Total Time: 1 hour 15 minutes
- Yield: 12 servings 1x
Description
Get ready for a dessert that’s going to shake up your taste buds! Strawberry Earthquake Cake is a delightful combination of a rich, moist cake base with a gooey, creamy, strawberry-studded filling.
Ingredients
- 1 package white or vanilla cake mix
- eggs, water, and oil (as specified on cake mix package)
- 8 oz full-fat block cream cheese, softened
- 1/2 cup unsalted butter, softened
- 2 cups powdered sugar (confectioners' sugar)
- 1 can sweetened condensed milk
- 2 cups fresh strawberries, hulled and chopped
- 1 packet strawberry gelatin (optional, for extra flavor/color)
- 1/2 cup white chocolate chips (optional)
Instructions
- Preheat your oven to the temperature specified on your cake mix box (usually around 350°F or 175°C). Grease and flour a 9×13 inch baking pan.
- In a large mixing bowl, combine your white or vanilla cake mix with the ingredients listed on its package. Beat according to the package directions until the batter is smooth. If using, gently fold in any dissolved strawberry gelatin.
- In a separate medium bowl, beat the softened cream cheese and softened unsalted butter together until smooth and creamy. Gradually add the powdered sugar, beating until light and fluffy. Add a splash of vanilla extract for enhanced flavor.
- Pour the prepared cake batter evenly into the greased and floured 9×13 inch baking pan. Dollop spoonfuls of the cream cheese mixture randomly over the cake batter.
- Scatter the chopped fresh strawberries (and optional white chocolate chips) all over the top of the batter and cream cheese dollops. Gently swirl through the layers once or twice, but do not overmix.
- Bake for approximately 45-55 minutes, or until a wooden skewer or toothpick inserted into the cake part comes out mostly clean.
- Immediately after taking the cake out of the oven, drizzle the sweetened condensed milk evenly over the top while it's still hot.
- Allow the cake to cool completely on a wire rack before serving.
- Prep Time: 20 mins
- Cook Time: 55 mins
- Category: Dessert
- Method: Baking
- Cuisine: American
Nutrition
- Serving Size: 1 slice
- Calories: 350
- Sugar: 30 g
- Sodium: 200 mg
- Fat: 15 g
- Saturated Fat: 8 g
- Unsaturated Fat: 5 g
- Trans Fat: 0 g
- Carbohydrates: 50 g
- Fiber: 1 g
- Protein: 4 g
- Cholesterol: 50 mg
Keywords: Use room temperature ingredients for a smoother filling. Don't overmix the cake batter to maintain a light texture. Quality strawberries are essential for the best flavor.