Crunchy Chicken Caesar Sandwich – isn’t that a mouthful of pure delight? Today, I am absolutely thrilled to share with you a recipe that elevates a classic salad into an irresistibly satisfying meal. Imagine sinking your teeth into a sandwich where every bite delivers a harmonious symphony of textures and flavors: the satisfying crispness of perfectly cooked chicken, the fresh crunch of romaine lettuce, the savory tang of a rich Caesar dressing, all nestled within your favorite bread.
The original Caesar salad, legend has it, was born out of improvisation by Caesar Cardini in Tijuana. While our sandwich is a modern marvel, it pays homage to that iconic creation, taking its beloved components and reimagining them for the ultimate handheld experience. People absolutely adore this dish because it combines the fresh, vibrant taste of a classic Caesar salad with the heartiness and convenience of a sandwich. It’s the perfect blend of creamy, crunchy, savory, and fresh, making it a truly gourmet yet approachable option for lunch or dinner. You’ll quickly understand why this Crunchy Chicken Caesar Sandwich is quickly becoming a household favorite!

Ingredients:
- For the Crunchy Chicken Cutlets:
- 2 large boneless, skinless chicken breasts (about 1.5 lbs total), pounded to ½-inch thickness
- 1 cup all-purpose flour
- 2 large eggs, whisked with 1 tablespoon water or milk
- 2 cups Panko breadcrumbs (for superior crunch!)
- 1 teaspoon garlic powder
- 1 teaspoon onion powder
- 1 teaspoon smoked paprika
- ½ teaspoon dried oregano
- ½ teaspoon salt, plus more to taste
- ¼ teaspoon black pepper, freshly ground, plus more to taste
- Vegetable oil or canola oil for frying (about 3-4 cups, depending on pan size)
- For the Homemade Zesty Caesar Dressing:
- 2 large egg yolks (pasteurized if you have concerns about raw eggs)
- 2 cloves garlic, minced very finely or grated
- 1 tablespoon Dijon mustard
- 2 tablespoons fresh lemon juice (from about 1 medium lemon)
- 1 teaspoon Worcestershire sauce
- ½ teaspoon anchovy paste, or 2 anchovy fillets, mashed (don’t skip this for authentic flavor!)
- ½ cup extra virgin olive oil, high quality
- ¼ cup neutral oil (like canola, grapeseed, or vegetable oil)
- ½ cup finely grated Parmesan cheese, plus more for garnish
- Salt and freshly ground black pepper to taste
- For Assembling the Crunchy Chicken Caesar Sandwich:
- 4 sturdy sandwich rolls or ciabatta loaves, about 6-8 inches long (you can also use a baguette and cut into portions)
- 1 large head of crisp romaine lettuce, washed, dried, and roughly chopped
- ¼ cup shaved Parmesan cheese (use a vegetable peeler for beautiful ribbons)
- Optional: 4 slices crispy cooked bacon, crumbled
- Optional: A handful of crushed croutons or plain potato chips for extra texture inside the sandwich
Part 1: Preparing Your Crunchy Chicken Cutlets
The foundation of our incredible Crunchy Chicken Caesar Sandwich is, of course, the chicken! We want it incredibly crisp on the outside, juicy on the inside, and perfectly seasoned to complement our Caesar flavors. This part requires a little care, but I promise the results are absolutely worth it.
- Prepare the Chicken: Start by patting your chicken breasts very dry with paper towels. This is a crucial step for achieving that beautiful, crisp crust. Next, lay each breast between two pieces of plastic wrap or in a large zip-top bag. Using a meat mallet or the bottom of a heavy skillet, pound the chicken to an even ½-inch thickness. This ensures even cooking and a tender bite. Once pounded, cut each breast in half crosswise, creating four smaller, more manageable cutlets.
- Set Up the Breading Station: Now, let’s get ready to make these cutlets wonderfully crunchy. Grab three shallow dishes or pie plates.
- In the first dish, combine the all-purpose flour with 1 teaspoon garlic powder, 1 teaspoon onion powder, 1 teaspoon smoked paprika, ½ teaspoon dried oregano, ½ teaspoon salt, and ¼ teaspoon black pepper. Whisk these seasonings together thoroughly to ensure every part of the chicken gets coated in flavor.
- In the second dish, whisk your 2 large eggs with 1 tablespoon of water or milk. This creates our binding liquid.
- In the third dish, pour your 2 cups of Panko breadcrumbs. Panko is a Japanese-style breadcrumb that is lighter and flakier than traditional breadcrumbs, which is exactly what we want for maximum crunch!
- Bread the Chicken: This is where the magic happens for our crunchy exterior. Take one pounded chicken cutlet and dredge it thoroughly in the seasoned flour, ensuring it’s completely coated. Shake off any excess flour. Next, dip the floured chicken into the whisked egg mixture, letting any excess drip off. Finally, carefully transfer the chicken to the Panko breadcrumbs, pressing the breadcrumbs firmly onto both sides of the cutlet to ensure an even, thick coating. Really press them on there! Place the breaded cutlet on a wire rack set over a baking sheet and repeat with the remaining chicken pieces.
- Chill for Maximum Crunch (Optional but Recommended): For the absolute best crispiness, I highly recommend placing the breaded chicken cutlets in the refrigerator for at least 15-30 minutes. This helps the breading adhere better to the chicken, preventing it from falling off during cooking and leading to a much crispier result. You can even prepare them a few hours ahead of time.
- Fry the Chicken to Golden Perfection:
Now it’s time to cook our star! You have a couple of options here, but frying truly delivers on the “crunchy” promise.
For Frying:
Pour enough vegetable or canola oil into a large, heavy-bottomed skillet (like cast iron) to reach a depth of about ½ to ¾ inch. Heat the oil over medium-high heat until it reaches 350-375°F (175-190°C). If you don’t have a thermometer, you can test the oil by dropping a tiny pinch of Panko in; it should sizzle vigorously but not burn instantly.
Carefully place 2 chicken cutlets into the hot oil, making sure not to overcrowd the pan. Overcrowding will drop the oil temperature and lead to soggy chicken. Fry for 4-6 minutes per side, or until the chicken is beautifully golden brown, wonderfully crispy, and cooked through (internal temperature should reach 165°F or 74°C). The exact time will depend on the thickness of your chicken. Use tongs to gently flip the chicken and ensure even browning.
Once cooked, transfer the crispy chicken cutlets to a clean wire rack set over paper towels to drain any excess oil. Immediately season lightly with a pinch of salt and pepper. Repeat with the remaining chicken, ensuring the oil returns to temperature between batches.
For Baking/Air Frying (Alternative for less oil, but slightly less crunch):
If you prefer a lighter option, you can bake or air fry them. For baking, preheat your oven to 400°F (200°C). Lightly spray the breaded chicken with cooking spray or brush with a little oil. Bake on a wire rack set over a baking sheet for 20-25 minutes, flipping halfway, until golden and cooked through. For air frying, preheat your air fryer to 375°F (190°C). Spray the chicken lightly with oil and air fry for 12-18 minutes, flipping halfway, until golden and crispy.
Part 2: Crafting Your Zesty Caesar Dressing
A Crunchy Chicken Caesar Sandwich isn’t complete without a vibrant, punchy Caesar dressing. While store-bought is an option, making your own is surprisingly easy and tastes infinitely better. It’s the creamy, savory heart of our sandwich!
- Prepare the Aromatics: In a medium bowl, add your 2 finely minced garlic cloves and the ½ teaspoon of anchovy paste (or 2 mashed anchovy fillets). The anchovy is key here; it doesn’t make the dressing taste fishy, but instead adds a deep umami richness that defines Caesar dressing. You can use the back of a spoon or a fork to mash the garlic and anchovy together into a paste.
- Build the Base: Add the 2 egg yolks, 1 tablespoon of Dijon mustard, 2 tablespoons of fresh lemon juice, and 1 teaspoon of Worcestershire sauce to the bowl with the garlic and anchovy paste. Whisk vigorously until all ingredients are well combined and the mixture is slightly lighter in color and frothy.
- Emulsify the Dressing: This is the step that makes our dressing creamy and thick. While continuously whisking, slowly, and I mean very slowly, drizzle in the ½ cup of extra virgin olive oil. Start with a tiny stream, almost drop by drop, until you see the mixture begin to emulsify and thicken. Once it starts to thicken, you can gradually increase the stream, but continue whisking consistently. After the olive oil is incorporated, add the ¼ cup of neutral oil in the same slow, steady drizzle, whisking all the while. The dressing should transform into a thick, creamy, pale yellow emulsion.
- Finish and Season: Stir in the ½ cup of finely grated Parmesan cheese. This adds another layer of nutty, salty flavor and helps thicken the dressing further. Taste the dressing and season generously with salt and freshly ground black pepper. Caesar dressing should be bold and well-seasoned. If it tastes a bit flat, add a tiny bit more lemon juice or a pinch more salt. If it’s too thick, you can whisk in a teaspoon or two of cold water to reach your desired consistency. Cover the dressing and refrigerate it while you prepare the remaining components. This allows the flavors to meld beautifully.
Part 3: Prepping the Fresh Elements and Bread
With our crunchy chicken cutlets golden and our zesty dressing chilling, it’s time to gather the fresh components that will bring texture and lightness to our Crunchy Chicken Caesar Sandwich.
- Prepare the Romaine Lettuce: Take your large head of romaine lettuce. Remove any outer leaves that look wilted or bruised. Wash the remaining leaves thoroughly under cold running water, paying attention to the creases where dirt can hide. For the best crispness, use a salad spinner to dry the lettuce completely. If you don’t have a spinner, gently pat the leaves dry with clean paper towels. Roughly chop the lettuce into bite-sized pieces. We want enough to provide a refreshing crunch in every bite of our sandwich. Place the chopped lettuce in a bowl and keep it cool.
- Shave the Parmesan: Grab a block of good quality Parmesan cheese (Parmigiano-Reggiano if you can!). Using a vegetable peeler, carefully shave off beautiful, delicate ribbons of Parmesan cheese. These shavings will melt slightly from the warmth of the chicken and add a wonderful salty, nutty bite. Set aside.
- Prepare and Toast the Rolls: Our sandwich needs a sturdy, yet yielding, vehicle. Slice your 4 sandwich rolls or ciabatta loaves lengthwise, without cutting all the way through, so they open like a book. If using a baguette, cut it into 6-8 inch portions and then slice. You can lightly toast these rolls for added texture and to prevent them from getting soggy from the dressing.
Toasting Options:
- Oven: Preheat your oven or toaster oven to 350°F (175°C). Place the open rolls face up on a baking sheet and toast for 3-5 minutes, or until lightly golden and warmed through.
- Skillet: You can also lightly butter or brush the cut sides of the rolls with olive oil and toast them in a dry skillet over medium heat for 2-3 minutes until golden brown.
Once toasted, set them aside, ready for assembly.
Part 4: Assembling Your Ultimate Crunchy Chicken Caesar Sandwich
This is it! The moment we’ve been waiting for. Bringing all these delicious components together to create the perfect Crunchy Chicken Caesar Sandwich. Get ready for a symphony of flavors and textures.
- Dress the Lettuce: In a large bowl, take your chopped romaine lettuce. Drizzle a generous amount of your homemade Caesar dressing over the lettuce. Toss gently to ensure every leaf is lightly coated. You want the lettuce to be dressed, but not swimming in dressing, as we’ll be adding more to the bread as well. This pre-dressing step ensures you get that classic Caesar flavor throughout your sandwich.
- Prepare the Rolls: Take your toasted sandwich rolls. On the bottom half of each roll, spread another generous layer of your zesty Caesar dressing. Don’t be shy here; this adds moisture and even more flavor to the bread, preventing it from tasting dry and ensuring every bite is packed with Caesar goodness.
- Layer the Crunchy Chicken: Place one perfectly crispy chicken cutlet on the bottom half of each dressed roll. If your chicken cutlets are large, you might need to slice them in half or angle them to fit well within the bread. The warmth of the chicken will slightly soften the dressing and the bread, creating a delightful contrast.
- Add the Freshness and Extra Crunch:
Pile a generous mound of the dressed romaine lettuce on top of the chicken. We want that vibrant green color and refreshing crispness cutting through the richness of the chicken and dressing. This is a Crunchy Chicken Caesar Sandwich, so we need that fresh crunch!
Next, scatter some of your beautiful shaved Parmesan cheese over the lettuce. If you opted for crispy bacon, now is the time to sprinkle those delicious crumbled bits over the lettuce as well. For an ultimate textural experience, you can even add a small handful of crushed croutons or plain potato chips on top of the lettuce for an unexpected burst of crunch in every bite. This really takes the “crunchy” aspect to the next level.
- Top it Off and Serve: Place the top half of the sandwich roll over your glorious creation. Gently press down to compact the fillings slightly. Serve your magnificent Crunchy Chicken Caesar Sandwich immediately while the chicken is still warm and at its peak crispiness. These sandwiches are best enjoyed fresh, but if you absolutely must store them, keep the components separate and assemble just before eating to maintain that incredible crunch.
- Enjoy Your Masterpiece: Take a big bite and savor the symphony of textures and flavors: the satisfying crunch of the chicken and lettuce, the creamy, tangy Caesar dressing, the savory chicken, and the salty Parmesan all coming together in a perfectly balanced bite. This is truly a sandwich experience you won’t forget!
Conclusion:
Well, my friends, we’ve reached the delicious culmination of our culinary journey, and I genuinely hope you’re as excited as I am about what we’ve created together! This isn’t just another sandwich recipe; it’s an experience waiting to happen, a truly delightful fusion of flavors and textures that will undoubtedly earn a permanent spot in your rotation. I’m talking about a recipe that elevates the humble sandwich to an art form, making every bite an absolute pleasure. It’s a game-changer for lunch, a quick win for dinner, and an absolute showstopper for any gathering where simple, sensational food is appreciated. The magic lies in the perfect interplay of the tender, seasoned chicken, the creamy, garlicky Caesar dressing, and, of course, that irresistible crunch that truly defines its character.
What makes this particular creation a must-try, you ask? Beyond the obvious deliciousness, it’s the thoughtful layering of components that ensures every forkful – or hand-held bite, if you’re going traditional – delivers a symphony of sensations. We’ve meticulously balanced the bright, tangy notes of the dressing with the savory depth of the chicken and the fresh crispness of the lettuce. But let’s be honest, the true star, the element that truly sets this recipe apart, is that magnificent texture. The satisfying shatter of the crunchy element isn’t just an afterthought; it’s integral to the entire profile, transforming a classic combination into something unexpectedly vibrant and exciting. This isn’t just a meal; it’s a moment of pure, unadulterated culinary joy that you absolutely deserve to experience.
Making It Your Own: Serving Suggestions & Creative Variations
Now, while the classic preparation of this sandwich is undeniably perfect, one of the beauties of a truly great recipe is its adaptability. You can absolutely enjoy your newly mastered Crunchy Chicken Caesar Sandwich as is, perhaps alongside a simple bowl of tomato soup for a comforting lunch, or with a handful of your favorite potato chips for that extra layer of crunch. A crisp green salad, dressed lightly with a vinaigrette, also makes a fantastic accompaniment, offering a fresh counterpoint to the richness of the sandwich. For those who love a bit of tang, don’t forget a few pickle spears on the side!
But why stop there? Let your creativity flow! Think about different bread options: a crusty baguette would make for a heartier, more substantial meal, while a soft ciabatta roll would soak up all those delicious flavors beautifully. For a lighter take, consider serving the chicken Caesar mixture in a vibrant lettuce wrap, or even transform it into an open-faced sandwich on toasted sourdough. Want to amp up the flavor? A slice of crispy bacon tucked inside adds a smoky, salty dimension that’s utterly divine. Sliced avocado offers a creamy richness, while a few slivers of red onion or a sprinkle of fresh chives can introduce a lovely aromatic bite. You could even add a dash of your favorite hot sauce to the dressing for a fiery kick! If you’re hosting a party, consider making mini versions of these sandwiches on slider buns, or even serving the mixture as a dip with sturdy crackers and crudités. The possibilities are truly endless, and each variation promises its own unique delight.
Your Turn: Try, Share, and Inspire!
This is where I pass the baton to you! I sincerely hope that reading through this recipe has sparked your culinary imagination and given you the confidence to dive in and create this magnificent sandwich in your own kitchen. There’s something incredibly rewarding about preparing a meal from scratch, especially one that brings such a unique combination of comfort and excitement to the table. Don’t hesitate, don’t overthink it – just gather your ingredients and get ready to impress yourself and anyone lucky enough to share this meal with you.
Once you’ve experienced the sheer deliciousness and satisfying crunch of this particular creation, I would absolutely love to hear about it! What did you love most about it? Did you try any of the variations I suggested, or did you come up with your own brilliant twist? Did you make it for a quick weeknight dinner, or was it the star of your weekend brunch? Please, share your experiences, your photos, and your modifications. Your culinary adventures not only inspire me but also encourage other home cooks to embark on their own delicious journeys. Let’s build a community around great food and shared joy. Happy cooking, and I can’t wait to hear all about your incredible Crunchy Chicken Caesar Sandwich!
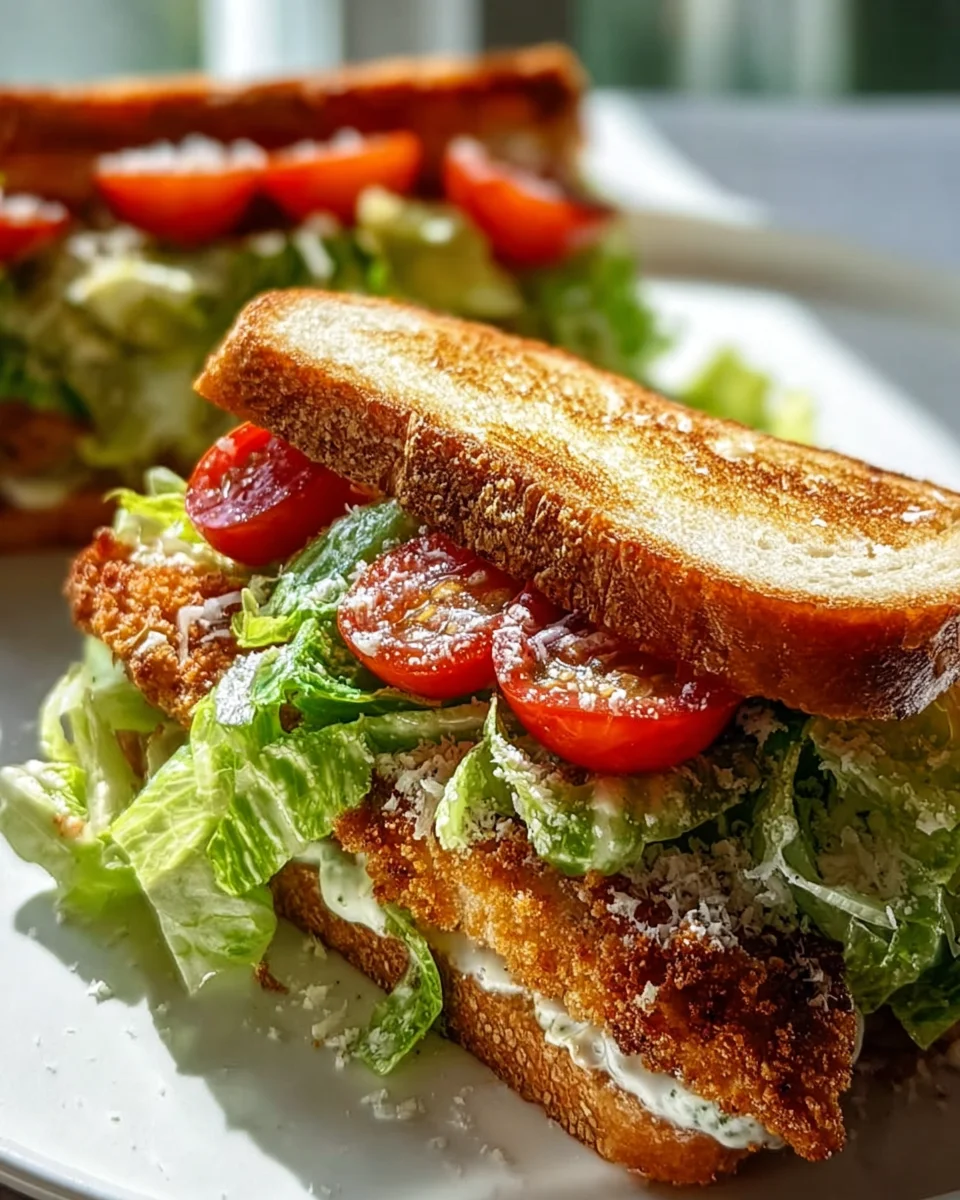
Crunchy Chicken Caesar Sandwich
Elevate a classic salad into an irresistibly satisfying meal with this Crunchy Chicken Caesar Sandwich. Featuring crispy chicken, fresh romaine, zesty Caesar dressing, and Parmesan, all nestled within toasted sourdough bread.
Ingredients
Instructions
Important Information
Nutrition Facts (Per Serving)
It is important to consider this information as approximate and not to use it as definitive health advice.
Allergy Information
Please check ingredients for potential allergens and consult a health professional if in doubt.