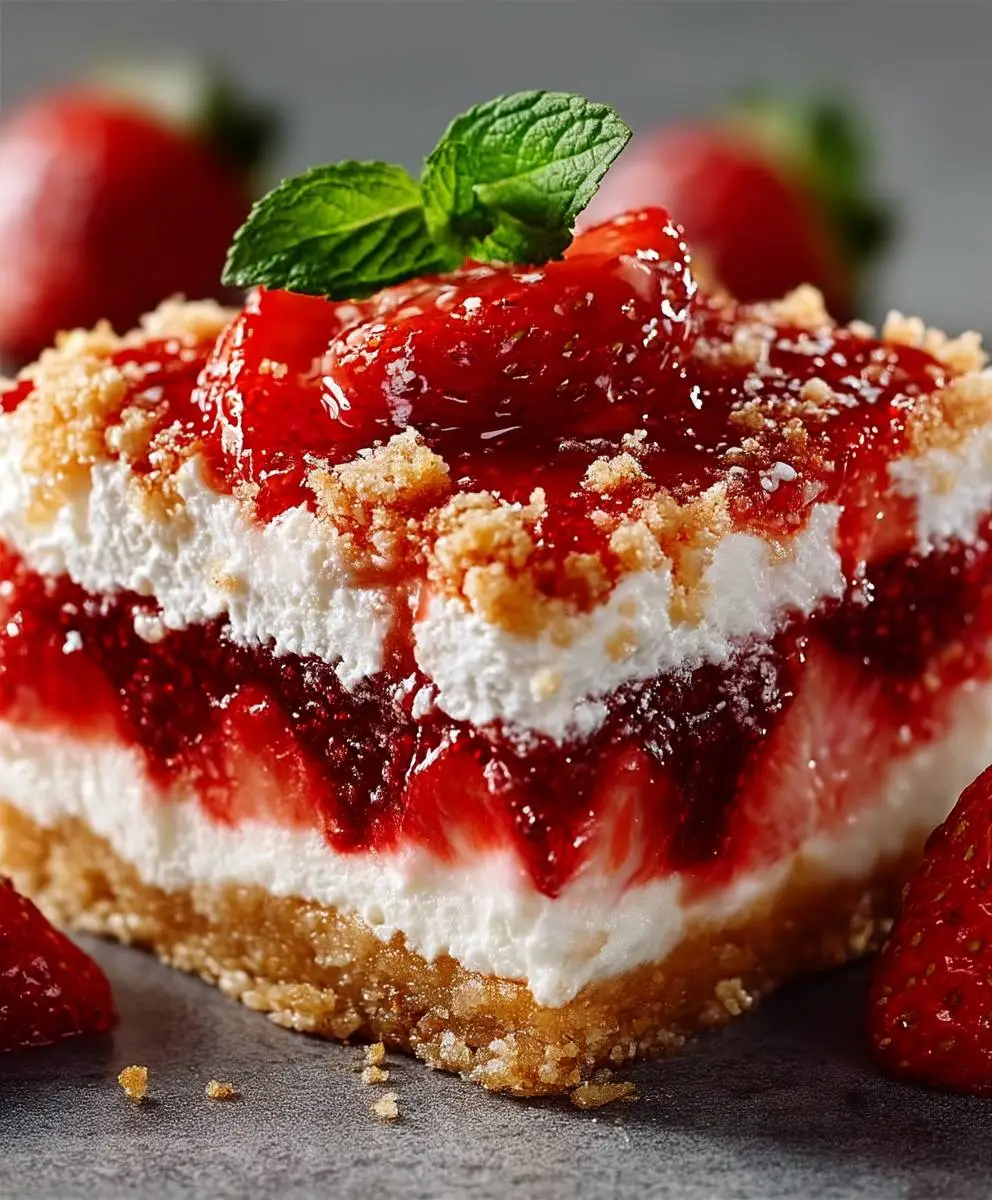
Strawberry shortcake bars: Prepare to be amazed! Imagine the delightful taste of classic strawberry shortcake, but in an easier, more portable, and utterly irresistible bar form. These aren’t your grandma’s fussy individual shortcakes; these are a modern twist on a beloved dessert, perfect for potlucks, picnics, or simply a sweet treat on a warm afternoon.
The history of strawberry shortcake stretches back centuries, with variations appearing in different cultures. The combination of sweet berries, crumbly biscuit, and whipped cream has always been a winning formula. But let’s be honest, sometimes we crave that comforting flavor without the effort of assembling individual servings. That’s where these strawberry shortcake bars come in!
What makes these bars so special? It’s the perfect balance of textures and flavors. The buttery, slightly sweet shortbread crust provides a sturdy base for the juicy, macerated strawberries. And the creamy, dreamy topping? Well, that’s the icing on the (short)cake! People adore this dish because it captures the essence of summer in every bite. It’s easy to make, travels well, and is guaranteed to be a crowd-pleaser. Plus, who can resist the combination of fresh strawberries and a buttery, crumbly crust? I know I can’t!

Ingredients:
- For the Crust:
- 1 ½ cups all-purpose flour
- ½ cup (1 stick) cold unsalted butter, cut into cubes
- ½ cup granulated sugar
- ¼ teaspoon salt
- 1 large egg yolk
- 2-3 tablespoons ice water
- For the Strawberry Filling:
- 2 pounds fresh strawberries, hulled and sliced
- ½ cup granulated sugar
- 2 tablespoons cornstarch
- 1 tablespoon lemon juice
- Pinch of salt
- For the Crumble Topping:
- ¾ cup all-purpose flour
- ½ cup packed light brown sugar
- ½ cup rolled oats
- ½ teaspoon ground cinnamon
- ¼ teaspoon salt
- 6 tablespoons (¾ stick) cold unsalted butter, cut into cubes
- For the Optional Glaze:
- 1 cup powdered sugar
- 2-3 tablespoons milk or cream
- ½ teaspoon vanilla extract
Preparing the Crust:
- Combine Dry Ingredients: In a large bowl, whisk together the flour, granulated sugar, and salt. This ensures the salt is evenly distributed, which is crucial for flavor.
- Cut in the Butter: Add the cold, cubed butter to the flour mixture. Using a pastry blender or your fingertips, cut the butter into the flour until the mixture resembles coarse crumbs. The butter should be in small pieces, about the size of peas. This step is vital for creating a flaky crust. Don’t overwork the dough, as this will result in a tough crust.
- Add Egg Yolk and Water: In a small bowl, whisk together the egg yolk and 2 tablespoons of ice water. Pour this mixture over the flour and butter mixture.
- Mix the Dough: Gently mix the ingredients together until the dough just comes together. If the dough is too dry, add the remaining tablespoon of ice water, one teaspoon at a time, until it forms a cohesive ball. Be careful not to overmix.
- Press into Pan: Press the dough evenly into the bottom of a 9×13 inch baking pan. You can use your fingers or the bottom of a measuring cup to ensure it’s packed firmly.
- Pre-bake the Crust: Preheat your oven to 350°F (175°C). Bake the crust for 15-20 minutes, or until it is lightly golden brown. This pre-baking step helps prevent the crust from becoming soggy when the strawberry filling is added. Let the crust cool slightly while you prepare the filling.
Making the Strawberry Filling:
- Prepare the Strawberries: Wash, hull, and slice the strawberries. I like to slice them about ¼ inch thick.
- Combine Ingredients: In a large bowl, gently toss the sliced strawberries with the granulated sugar, cornstarch, lemon juice, and salt. The cornstarch will help thicken the filling as it bakes, and the lemon juice brightens the flavor.
- Let it Sit: Allow the strawberry mixture to sit for about 10-15 minutes. This allows the sugar to draw out some of the juices from the strawberries, creating a more flavorful and syrupy filling.
Preparing the Crumble Topping:
- Combine Dry Ingredients: In a medium bowl, whisk together the flour, brown sugar, rolled oats, cinnamon, and salt. The cinnamon adds a warm, comforting flavor to the crumble.
- Cut in the Butter: Add the cold, cubed butter to the flour mixture. Using a pastry blender or your fingertips, cut the butter into the flour until the mixture resembles coarse crumbs. Again, the butter should be in small pieces.
- Mix Until Crumbly: Continue mixing until the mixture is evenly crumbly. You should have a mixture of small and slightly larger clumps.
Assembling and Baking:
- Pour in the Filling: Pour the strawberry filling evenly over the pre-baked crust. Make sure the strawberries are distributed evenly across the crust.
- Sprinkle with Crumble: Sprinkle the crumble topping evenly over the strawberry filling. Try to cover the entire surface of the filling with the crumble.
- Bake: Bake in the preheated oven for 35-40 minutes, or until the crumble topping is golden brown and the strawberry filling is bubbly. Keep an eye on it towards the end of the baking time to prevent the topping from burning.
- Cool Completely: Remove the bars from the oven and let them cool completely in the pan before cutting. This is important because the filling will continue to thicken as it cools. Cooling completely will also make the bars easier to cut cleanly. I usually let them cool for at least 2-3 hours, or even overnight in the refrigerator.
Optional Glaze:
- Whisk Ingredients: In a small bowl, whisk together the powdered sugar, milk (or cream), and vanilla extract until smooth. Add more milk, one teaspoon at a time, until you reach your desired consistency. The glaze should be thin enough to drizzle but thick enough to hold its shape slightly.
- Drizzle Over Bars: Once the bars are completely cooled and cut, drizzle the glaze evenly over the top.
- Let Glaze Set: Allow the glaze to set for about 15-20 minutes before serving.
Cutting and Serving:
- Cut into Bars: Use a sharp knife to cut the cooled bars into squares or rectangles. The size of the bars is up to you!
- Serve and Enjoy: Serve the strawberry shortcake bars chilled or at room temperature. They are delicious on their own, but you can also serve them with a dollop of whipped cream or a scoop of vanilla ice cream.
Conclusion:
And there you have it! These Strawberry Shortcake Bars are truly a must-try recipe, and I’m confident they’ll become a new favorite in your household. The combination of the buttery, crumbly shortbread crust, the sweet and slightly tart strawberry filling, and the creamy glaze is simply irresistible. It’s a dessert that’s both comforting and elegant, perfect for any occasion, from a casual weeknight treat to a special celebration.
What makes these bars so special? It’s the ease of preparation combined with the incredible flavor payoff. Unlike traditional strawberry shortcake, which can be a bit messy to assemble, these bars are neat, portable, and perfect for sharing. Plus, they’re incredibly versatile!
Serving Suggestions and Variations:
While these bars are delicious on their own, there are plenty of ways to customize them to your liking. For an extra touch of indulgence, try serving them with a scoop of vanilla ice cream or a dollop of freshly whipped cream. A sprinkle of chopped nuts, like almonds or pecans, would also add a delightful crunch.
If you’re feeling adventurous, consider experimenting with different fruit fillings. Blueberry, raspberry, or even peach shortcake bars would be equally delicious. You could also add a hint of lemon zest to the shortbread crust for a brighter, more citrusy flavor. For a chocolate twist, drizzle melted dark chocolate over the cooled bars.
Another fun variation is to use a different type of glaze. A simple powdered sugar glaze is classic, but you could also try a cream cheese glaze for a richer, tangier flavor. Or, for a vegan option, use a plant-based butter and milk alternative in the shortbread crust and glaze.
These Strawberry Shortcake Bars are also fantastic for meal prepping. They can be stored in an airtight container in the refrigerator for up to three days, making them a convenient make-ahead dessert. They’re also perfect for picnics, potlucks, and bake sales.
Why You Should Make These Strawberry Shortcake Bars:
I truly believe that everyone should have a go-to strawberry dessert recipe, and these bars are mine. They’re easy to make, incredibly delicious, and always a crowd-pleaser. The recipe is forgiving, so don’t be afraid to experiment and make it your own.
The best part about baking is sharing your creations with others. Imagine the smiles on your friends’ and family’s faces when you present them with a plate of these beautiful and delicious bars. It’s a simple way to spread joy and create lasting memories.
So, what are you waiting for? Gather your ingredients, preheat your oven, and get ready to bake up a batch of these amazing Strawberry Shortcake Bars. I promise you won’t be disappointed.
Share Your Experience!
I’m so excited for you to try this recipe! Once you’ve made your own batch of Strawberry Shortcake Bars, I’d love to hear about your experience. Did you make any variations? What did your family and friends think? Share your photos and comments in the comments section below. I can’t wait to see your creations! Happy baking!
Strawberry Shortcake Bars: The Ultimate Easy Dessert Recipe
Buttery strawberry shortcake bars with a sweet strawberry filling and crumbly oat topping. Perfect for summer!
Ingredients
Instructions
Recipe Notes
- For the flakiest crust, make sure the butter is very cold and don’t overwork the dough.
- Pre-baking the crust prevents it from becoming soggy.
- Letting the strawberry filling sit allows the sugar to draw out the juices, creating a more flavorful filling.
- Cool the bars completely before cutting for clean slices.
- Store leftover bars in an airtight container in the refrigerator.