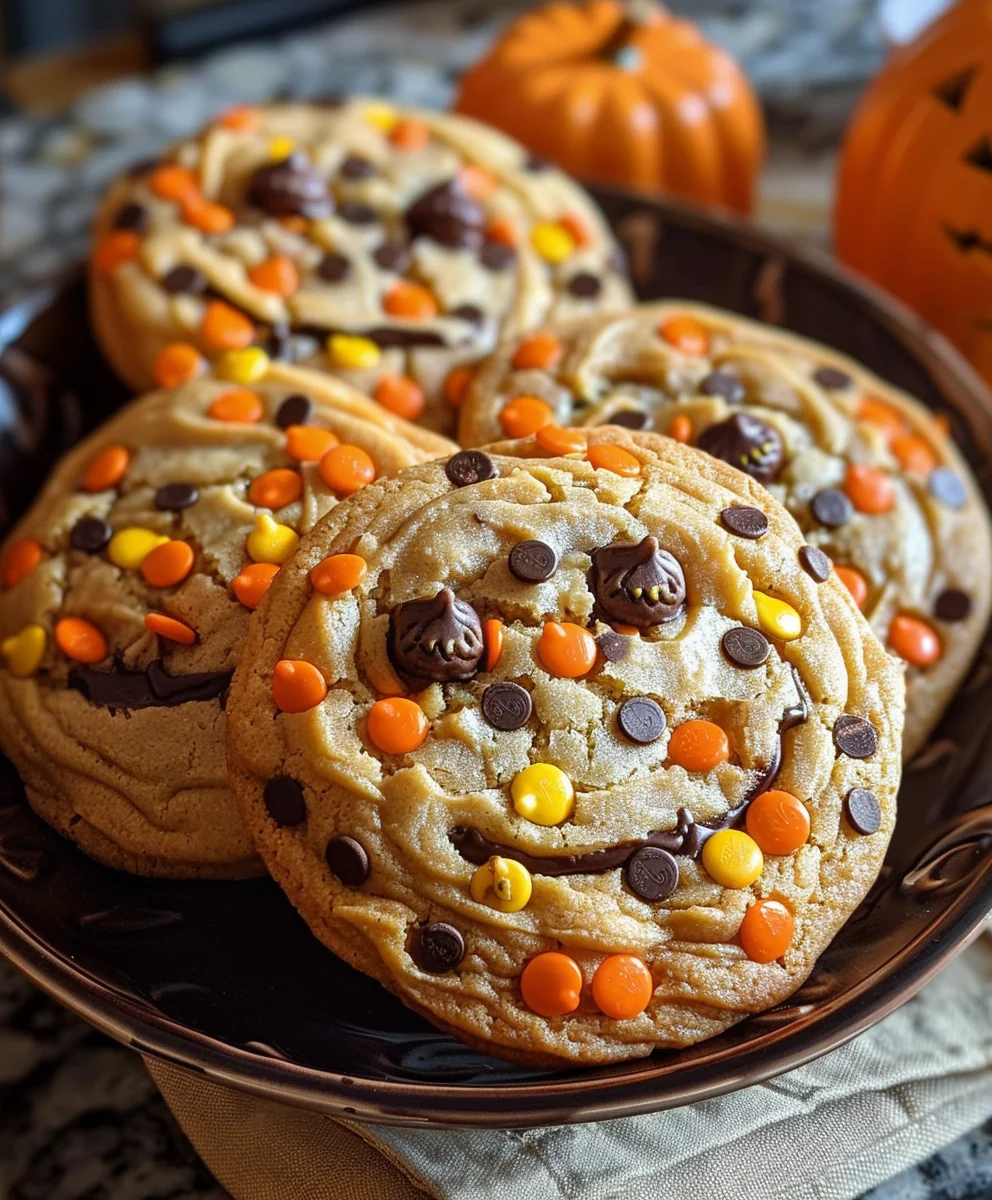
Halloween Cauldron Cookie Creation is more than just baking; it’s an enchanting foray into the spooky spirit of the season, transforming simple ingredients into edible works of art. As autumn leaves fall and the air grows crisp, our thoughts naturally turn to ghoulish delights and festive treats that capture the imagination. I find immense joy in crafting desserts that tell a story, and these cauldron cookies certainly cast a spell of delight, promising a unique and memorable addition to your holiday festivities.
These captivating treats perfectly embody the playful mysticism of Halloween, evoking images of witches’ brews and magical concoctions without any of the actual fright!
It’s no wonder people adore this Halloween Cauldron Cookie Creation; they offer a unique blend of visual charm, a satisfying chewiness, and a taste that is simply irresistible.
Whether you’re hosting a haunted gathering or simply looking for a fun activity to share with family, these cookies provide a wonderfully creative outlet. They are surprisingly easy to make, ensuring a magical and delicious experience for bakers of all skill levels, promising to be the bewitching highlight of any Halloween spread.

Ingredients:
- For the Dark Cauldron Cookies:
- 2 ½ cups (300g) all-purpose flour, sifted
- ¾ cup (75g) unsweetened cocoa powder, preferably Dutch-processed for a darker color, sifted
- 1 teaspoon baking soda
- ½ teaspoon fine sea salt
- 1 cup (226g) unsalted butter, softened to room temperature – this is crucial for a smooth mixture!
- 1 ½ cups (300g) granulated sugar
- 1 large egg, at room temperature
- 1 teaspoon pure vanilla extract
- 2 tablespoons whole milk, at room temperature (or any plant-based milk if preferred)
- For the Bubbling Green Royal Icing:
- 3 large egg whites, at room temperature (or 5 tablespoons meringue powder mixed with 7 tablespoons warm water for an egg-free alternative)
- 4 cups (480g) confectioners’ sugar (powdered sugar), sifted – you might need a little more or less depending on your desired consistency
- ½ teaspoon pure vanilla extract (or clear vanilla extract to avoid discoloring your white icing if you skip the green color)
- ¼ teaspoon cream of tartar (helps stabilize the egg whites and gives a better sheen)
- Green gel food coloring – a high-quality gel will give you a vibrant, deep green without thinning the icing too much
- A few drops of black gel food coloring (optional, to deepen the green for a more spooky cauldron look)
- For the Spooky Decorations:
- Assorted Halloween sprinkles (bats, spiders, ghosts, etc.) – tiny green, black, or purple nonpareils work wonderfully for “bubbles”
- Edible candy eyeballs, various sizes (optional, but they add so much character!)
- Black sanding sugar or edible glitter (optional, for a shimmery cauldron effect)
- Additional small candies or chocolates for extra flair (e.g., small chocolate rocks, gummy worms)
Phase 1: Crafting the Cauldron Cookie Dough
Ah, the heart of our Halloween Cauldron Cookie Creation begins with the dough! This is where we lay the foundation for those sturdy, delicious cookies that will soon become our edible cauldrons. Precision and patience are your best friends here, my dear bakers.
- Gather and Sift Your Dry Ingredients: In a medium-sized bowl, please take a moment to sift together your all-purpose flour, rich cocoa powder, baking soda, and fine sea salt. Sifting is not merely a suggestion; it’s a crucial step that ensures there are no lumps in your finished dough and that all the leavening agents are evenly distributed. This uniformity is key to a perfectly baked cookie. Once sifted, give these dry ingredients a gentle whisk to combine them thoroughly. Set this bowl aside for just a moment.
- Cream the Butter and Sugar to Perfection: Now, in the bowl of your stand mixer fitted with the paddle attachment (or a large bowl with a hand mixer), place your softened unsalted butter and granulated sugar. Turn your mixer to medium speed and let it work its magic for about 3-5 minutes. You’re looking for a transformation here: the mixture should become beautifully light and fluffy, almost pale in color. This creaming process incorporates air, which contributes to the tender texture of our finished cookies. Don’t rush this step; it’s vital for texture!
- Introduce the Wet Elements: With the mixer still running on medium-low, crack in your large egg, ensuring it’s at room temperature for better emulsion. Mix until it is fully incorporated, scraping down the sides of the bowl as needed to ensure everything is evenly blended. Next, pour in your pure vanilla extract – the aroma alone will start getting you in the Halloween spirit! Finally, add the two tablespoons of room-temperature whole milk. Mix until just combined. Overmixing at this stage can develop too much gluten, leading to tougher cookies, so keep an eye on it.
- Combine Wet and Dry: It’s time to bring our two mixtures together! Gradually add your sifted dry ingredients to the wet ingredients in two or three additions, mixing on the lowest speed possible. Mix only until just combined. The moment you no longer see streaks of dry flour, stop the mixer. Overmixing at this stage is the enemy of a tender cookie! If your dough still looks a little crumbly, that’s perfectly normal.
- Form and Chill the Dough: Turn the dough out onto a clean, lightly floured surface. Using your hands, gently bring the dough together and form it into a nice, flat disk. Wrap this disk tightly in plastic wrap. Now, for arguably the most important step for cookie cutters: place the wrapped dough into your refrigerator to chill for at least 1-2 hours. If you can leave it for longer, even overnight, that’s even better! Chilling the dough helps firm up the butter, preventing the cookies from spreading too much in the oven and ensuring they hold their cauldron shape beautifully. This also makes the dough much easier to roll out.
Phase 2: Shaping and Baking Your Edible Cauldrons
Once your dough is perfectly chilled and firm, we move on to the fun part: bringing our cauldrons to life and getting them oven-ready! This phase of our Halloween Cauldron Cookie Creation requires a steady hand and a keen eye for detail to ensure your cookies bake up perfectly.
- Prepare Your Workspace and Preheat: Before you even think about unwrapping that glorious dough, preheat your oven to 350°F (175°C). Line two large baking sheets with parchment paper or silicone baking mats. This is essential for preventing sticking and ensuring even baking. Lightly flour your work surface – a little flour goes a long way here; too much can dry out your dough.
- Roll Out the Dough with Care: Take your chilled cookie dough out of the refrigerator. If it’s been chilling for a long time, let it sit at room temperature for about 5-10 minutes to make it slightly more pliable, but don’t let it get too soft. Place the dough on your lightly floured surface. Using a rolling pin, roll the dough out to an even thickness of about ¼ inch (approximately 6mm). Consistency is key here! If the dough is too thin, your cookies will be brittle; too thick, and they might not bake through properly. Try to roll from the center outwards, rotating the dough periodically to prevent sticking.
- Cut Out Your Cauldron Shapes: Now for the creative bit! Use a cauldron-shaped cookie cutter to cut out your cookies. If you don’t have a specific cauldron cutter, a small round or oval cutter can work as a base, and you can gently indent the top to create the rim of a cauldron, or even use a knife to carefully shape them. Press the cutter firmly into the dough, then gently lift. Carefully transfer the cut-out shapes to your prepared baking sheets, leaving about an inch of space between each cookie to allow for slight spreading. Gather any dough scraps, gently re-roll them, and continue cutting until all the dough is used.
- Bake to Perfection: Place your baking sheets into the preheated oven. Bake for approximately 8-12 minutes. The exact baking time will depend on your oven and the thickness of your cookies. You’ll know they’re done when the edges are set and firm, and the centers no longer look wet or shiny. Keep a close eye on them, especially during the last few minutes, as cocoa cookies can be hard to tell when they’re truly done since they’re already dark. Underbaked cookies will be soft and crumble, while overbaked ones will be dry and hard.
- Cool Completely: Once baked, remove the baking sheets from the oven. Let the cookies cool on the sheets for 5 minutes before carefully transferring them to a wire rack to cool completely. This resting period on the hot sheet helps them firm up without breaking. It is absolutely crucial that your cookies are completely cool before you even think about decorating them with royal icing. Warm cookies will melt the icing, creating a messy situation. Patience, my friend, patience!
Phase 3: The Enchanting Green Brew – Royal Icing Preparation
Now that our dark, mysterious cauldron cookies are cooled and ready, it’s time to prepare the magical, bubbling brew that will fill them! This green royal icing is not just for looks; it adds a delightful sweetness and a smooth finish to our Halloween Cauldron Cookie Creation. Royal icing can be a little finicky, but with these detailed steps, you’ll master it in no time!
- Prepare Your Egg Whites or Meringue Powder: If using fresh egg whites, ensure your mixing bowl and whisk attachment are impeccably clean and free of any grease, as even a tiny bit can prevent the egg whites from whipping up properly. Place the egg whites and cream of tartar into the bowl of your stand mixer. If using meringue powder, combine the meringue powder with the specified warm water in your mixing bowl and whisk briefly until combined.
- Whip to Soft Peaks: Begin whipping the egg whites (or meringue powder mixture) on medium speed. You’ll notice them getting foamy and increasing in volume. Continue whipping until they reach soft peaks – this means when you lift the whisk, the peaks will gently curl over.
- Gradually Add Confectioners’ Sugar: With the mixer running on low speed, slowly begin adding the sifted confectioners’ sugar, one cup at a time. Once all the sugar is incorporated, increase the speed to medium-high and beat for another 5-7 minutes. You are looking for stiff, glossy peaks. When you lift the whisk, the peaks should hold their shape firmly.
- Incorporate Flavor and Color: Stir in the pure vanilla extract. Now for the green! Add your green gel food coloring, starting with a few drops and gradually adding more until you achieve your desired vibrant, spooky green. For a deeper, more ominous cauldron brew, you can add a tiny drop of black gel food coloring – it really makes the green pop and look more aged and mysterious. Mix until the color is completely uniform.
- Achieve the Right Consistency for Outlining: This is where royal icing consistency becomes an art form! You’ll need two main consistencies for our cookies: outlining and flooding. For the outlining consistency, you want it to be thick enough to hold its shape but still flow smoothly from a piping bag. If your icing is too thick, add a tiny bit of water (a ¼ teaspoon at a time) and mix thoroughly. Test it: when you pull a spoon through the icing, it should take about 15-20 seconds for the line to disappear. Transfer about ⅓ of your green icing to a piping bag fitted with a small round tip (like a PME #1.5 or #2, or Wilton #2).
- Achieve the Right Consistency for Flooding: For the remaining ⅔ of your green icing, we need a “flooding” consistency. This should be thinner than the outlining icing, allowing it to spread and fill in areas smoothly without being so thin that it runs off the cookie. Gradually add water, a ¼ teaspoon at a time, mixing well after each addition. The ideal flooding consistency should be like warm honey or thick syrup. Test it: when you pull a spoon through the icing, the line should disappear completely within 8-10 seconds. Transfer this flooding icing to a separate piping bag, or a squeeze bottle, for easier application.
- Keep Icing Covered: Royal icing dries incredibly fast when exposed to air! Always keep any icing not being used covered tightly with plastic wrap directly touching the surface, or in airtight containers. This prevents it from crusting over and becoming unusable.
Phase 4: Bringing Your Halloween Cauldron Cookie Creation to Life
This is the grand finale, the moment our cauldron cookies truly come alive with vibrant green brew and spooky embellishments! This stage of our Halloween Cauldron Cookie Creation is where your artistic flair really gets to shine. Take your time, enjoy the process, and don’t be afraid to get a little messy – it’s all part of the fun!
- Outline Your Cauldron: Take your piping bag filled with the outlining consistency green royal icing. Carefully pipe an outline around the top edge of each cooled cauldron cookie, following its shape. This outline acts as a dam, preventing the thinner flooding icing from spilling over the sides. You can also pipe a thin border around the base of the cauldron if you wish, creating a defined edge. Let this outline set for about 10-15 minutes to firm up slightly. This short waiting period is crucial for preventing the outline and flood from merging.
- Flood with the Green Brew: Once the outline has set, take your flooding consistency green royal icing (either from a piping bag with a larger hole or a squeeze bottle). Fill in the outlined area of each cookie, gently squeezing the icing to spread it evenly. Use a toothpick or a scribe tool to gently nudge the icing to the edges and pop any air bubbles that may appear. Aim for a smooth, even surface. This is your bubbling brew!
- Add Your Bubbles and Spooky Embellishments (Wet-on-Wet Technique): While the green flood icing is still wet (this is important for “wet-on-wet” effects!), immediately add your tiny green, black, or purple nonpareils or small round sprinkles to create the illusion of bubbles. You can sprinkle them randomly or strategically place them in clusters. If you want to add small candy eyeballs or other flat sprinkles that will sink slightly into the icing for a seamless look, do it now while the icing is still wet. This technique allows them to merge slightly with the flood, looking more integrated into the “brew.”
- Allow for Initial Drying: Once all your cookies are flooded and decorated with wet-on-wet elements, carefully transfer them to a flat surface or baking tray where they can dry undisturbed. Let them sit at room temperature for at least 4-6 hours, or ideally overnight (12-24 hours). This extended drying time is essential for the royal icing to fully harden. If you try to stack or handle them too soon, you’ll risk smudging your beautiful work.
- Add Final Decorations (Optional, but highly recommended!): Once your green royal icing is completely dry and hard to the touch, you can add any additional decorations. This is where you can glue on larger candy eyeballs with a tiny dot of fresh royal icing or even black gel icing. You can also use black sanding sugar or edible glitter around the edges of the cauldron for a mystical, shimmery effect. Perhaps a small edible spider or bat sprinkle can be strategically placed on the cauldron’s rim, giving the impression it’s about to dive into the brew!
- Admire Your Halloween Cauldron Cookie Creation: Step back and marvel at your spooky masterpieces! These cookies are not just treats; they are edible art. Once fully dry, they can be stored in an airtight container at room temperature for up to two weeks, though I doubt they’ll last that long once your friends and family get a peek at these enchanting delights. Share them, display them, and enjoy the magic you’ve created!
Conclusion:
Well, my friends, we’ve reached the end of our culinary journey, and I genuinely hope you’re as excited as I am about the possibilities this recipe holds. This isn’t just about baking another batch of cookies; it’s about crafting an experience, a moment of pure, edible enchantment that will delight anyone who lays eyes on it, let alone takes a bite. Imagine the gleam in your loved ones’ eyes when they encounter these whimsical, bubbling cauldrons, each one a miniature masterpiece overflowing with a vibrant ‘potion’ of flavor. This recipe is a must-try because it effortlessly combines visual spectacle with incredible taste, delivering a truly unique treat that stands head and shoulders above typical holiday sweets. It’s forgiving enough for beginners, yet offers endless creative avenues for seasoned bakers to explore, making it universally appealing. We’re talking about a dessert that not only satisfies the sweet tooth but also sparks conversation and ignites the imagination, making every gathering feel a little more magical.
I truly believe that what makes this particular treat so special is its ability to transform simple ingredients into something truly extraordinary. It’s more than just a cookie; it’s a statement, a delightful exclamation point on your festive celebrations. The joy of pulling these beauties from the oven, with their perfect shape and vibrant centers, is incredibly satisfying. It’s the kind of recipe that makes you feel like a kitchen wizard, conjuring up smiles and gasps of delight with every batch. Whether you’re aiming to impress at a spooky soirée or simply want to bring some playful magic to your family’s snack time, these cookies are your secret weapon. They’re a celebration of creativity, taste, and the sheer fun of baking. Get ready to impress everyone with these unbelievably charming and delicious treats.
Unleash Your Creativity: Serving & Variation Ideas
Once your magical treats have cooled, the fun doesn’t stop there! Think about how you’ll present your delightful creations. They make an absolutely charming centerpiece for any dessert table, especially when arranged on a dark platter or atop a bed of festive, crinkly paper. Pair them with a tall glass of cold milk for a classic indulgence, or elevate the experience with a mug of rich hot cocoa, perhaps with a dollop of whipped cream, making them the ultimate cozy companion on a crisp evening. They also make incredibly thoughtful and unique gifts. Package a few in a small, clear box tied with a festive ribbon, and you have a handmade present that’s far more impressive and personal than anything store-bought. Imagine gifting these to teachers, neighbors, or colleagues – they’re sure to be a talking point!
And don’t even get me started on the variations! This recipe is a fantastic canvas for your own culinary artistry. For different ‘potion’ colors, feel free to experiment with various shades of food coloring in your jelly or frosting filling – think bright green for a ‘toxic brew,’ deep purple for a ‘midnight potion,’ or even a swirling mix of two colors for a truly dynamic effect. You could also swap out the gummy worms for other small, fun candies like edible eyeballs, candy corn, or even mini chocolate chips for a different textural surprise. Consider adding a touch of edible glitter to the ‘potion’ for an extra sparkle, or use different flavored extracts in your cookie dough – a hint of almond or orange could transform the entire profile. For those who love chocolate, a cocoa-based cookie dough would add a wonderfully rich depth. You could even try making miniature versions for bite-sized delights or supersized ones for a truly dramatic statement. The possibilities are truly boundless, limited only by your imagination!
Your Turn to Conjure Some Magic!
Now that you’re armed with all the tips and tricks, I wholeheartedly encourage you to dive into your kitchen and experience the pure joy of baking these fantastic cookies. There’s something incredibly therapeutic and rewarding about bringing such a whimsical idea to life. Don’t hesitate to put your own spin on them – that’s where the real fun lies! Once you’ve whipped up your own batch, I would absolutely love to hear about your experience. Please, share your delicious results, your creative variations, and any funny anecdotes from your baking journey with me. Tag your photos and tell us all about your incredible Halloween Cauldron Cookie Creation. Let’s create a community of baking enthusiasts who aren’t afraid to get a little spooky and a lot delicious in the kitchen. Your triumphs and creative twists inspire us all! Happy baking, and may your cauldrons bubble with joy!
Halloween Cauldron Cookie Creation
These Halloween Cauldron Cookies are a delightful way to celebrate the spooky season, transforming simple ingredients into festive edible treats. Perfect for haunted gatherings or family fun, these cookies offer a satisfying chewiness and a taste that is simply irresistible, making them a bewitching highlight of any Halloween spread.
Ingredients
-
1 cup unsalted butter, softened
-
1 cup granulated sugar
-
1 cup packed brown sugar
-
2 large eggs
-
2 tsp vanilla extract
-
3 cups all-purpose flour
-
1 tsp baking soda
-
1/2 tsp salt
-
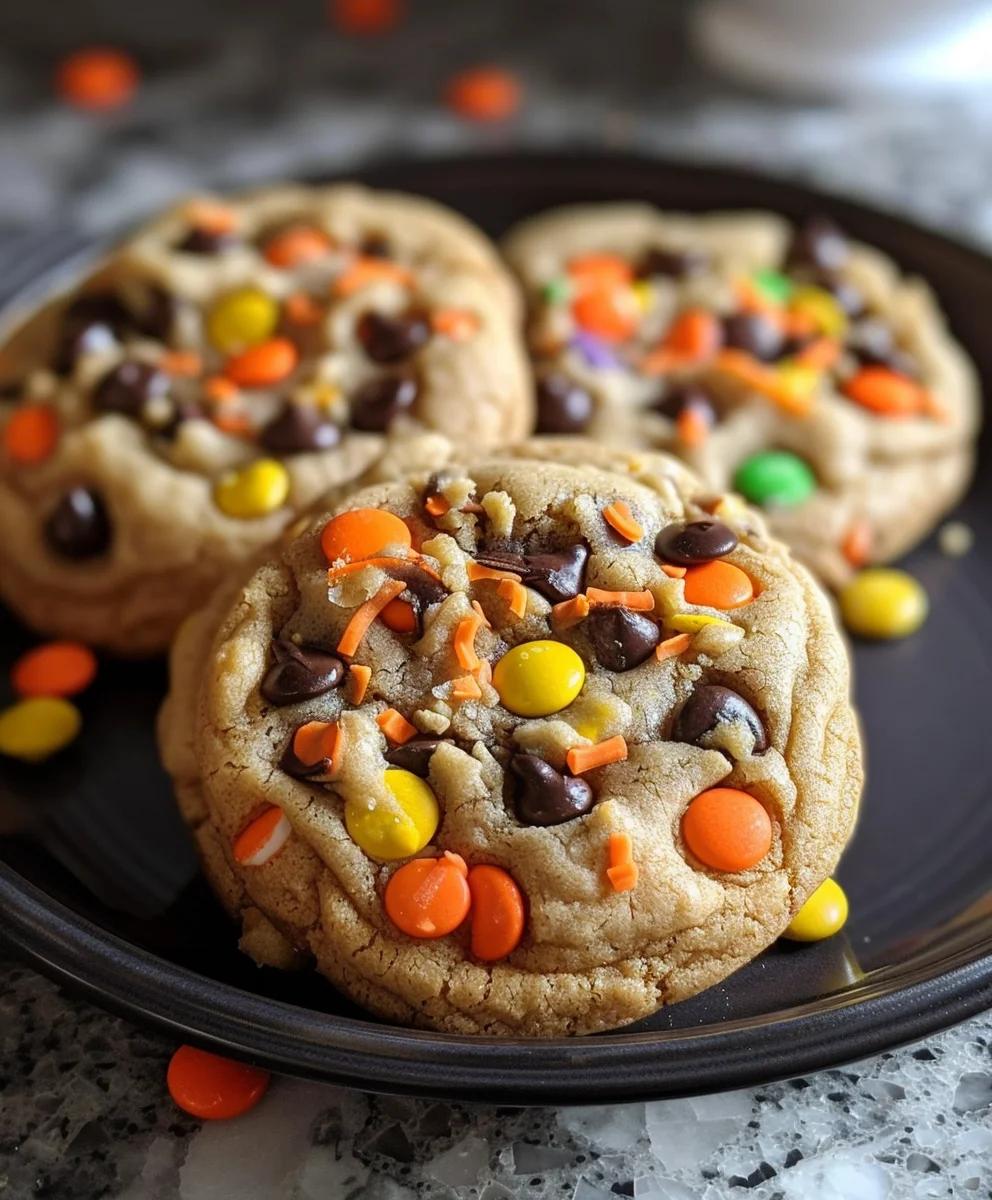
1 cup chocolate chips
-
1 cup candy corn
Instructions
-
Step 1
In a medium bowl, whisk together the all-purpose flour, baking soda, and salt. Set aside. -
Step 2
In the bowl of a stand mixer with the paddle attachment, cream softened unsalted butter with granulated sugar and packed brown sugar on medium speed until the mixture is light and fluffy, about 3-5 minutes. -
Step 3
Beat in the large eggs one at a time until fully incorporated, scraping down the sides of the bowl as needed. Mix in the vanilla extract. -
Step 4
Gradually add the sifted dry ingredients to the wet ingredients, mixing on low speed only until just combined and no streaks of dry flour remain. Overmixing will lead to tough cookies. -
Step 5
Gently fold in the chocolate chips and candy corn. Turn the dough out onto a clean surface, form it into a flat disk, and wrap tightly in plastic wrap. Refrigerate for at least 1 hour, or up to overnight, to firm up the dough. -
Step 6
Preheat your oven to 350°F (175°C). Line two large baking sheets with parchment paper or silicone mats. Lightly flour your work surface. -
Step 7
Remove the chilled dough from the refrigerator. Roll the dough out to an even thickness of about ¼ inch (6mm). Use a cookie cutter (e.g., cauldron-shaped or round) to cut out shapes. Carefully transfer the cut-out cookies to the prepared baking sheets, leaving about an inch of space between each. -
Step 8
Bake for approximately 8-12 minutes. Cookies are done when the edges are set and firm, and the centers no longer look wet. -
Step 9
Once baked, remove cookies from the oven and let them cool on the baking sheets for 5 minutes. Then, carefully transfer them to a wire rack to cool completely. Ensure cookies are fully cooled before handling further.
Important Information
Nutrition Facts (Per Serving)
It is important to consider this information as approximate and not to use it as definitive health advice.
Allergy Information
Please check ingredients for potential allergens and consult a health professional if in doubt.