Spooky Cheese Ball
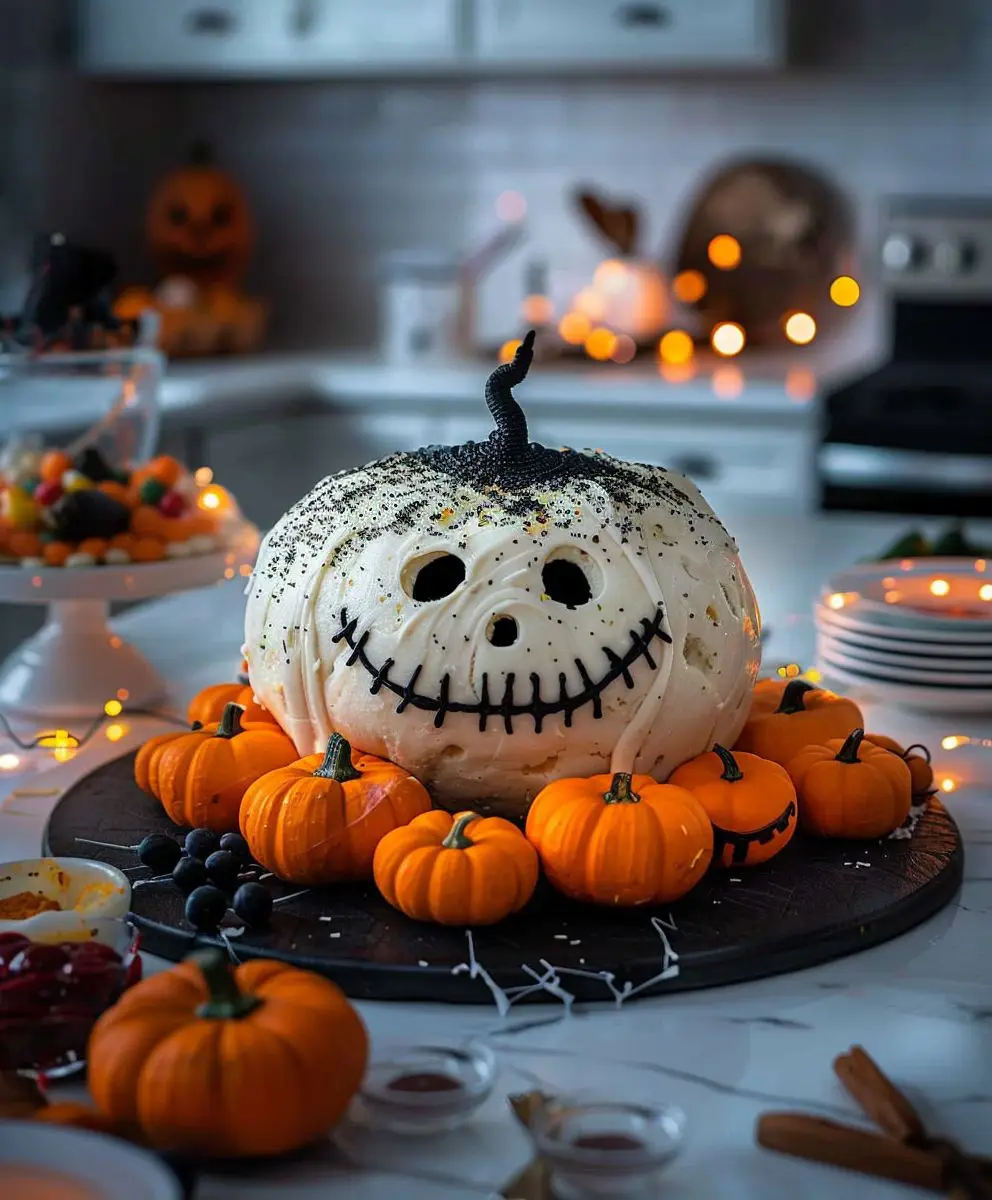
Spooky Cheese Ball – just the name conjures up images of Halloween gatherings, doesn’t it? This isn’t your average cheese ball; oh no, this is a culinary creation designed to delight and terrify in equal measure! I’ve perfected this recipe over the years, adding my own spooky twists to a classic appetizer that’s been a staple at parties for decades.
While the precise origins of the cheese ball are a bit murky, its popularity exploded in the mid-20th century, becoming a quintessential party snack. Its simple elegance and adaptability made it a hit at everything from casual get-togethers to more formal affairs. This Spooky Cheese Ball, however, takes the classic concept and injects it with a healthy dose of Halloween fun, making it perfect for your upcoming festivities.
What makes this particular cheese ball so beloved? It’s the perfect blend of creamy, savory, and tangy flavors. The texture is wonderfully smooth and rich, making it a delightful bite. Beyond the taste, its convenience is a major draw. It can be prepared ahead of time, freeing you up to focus on other aspects of your Halloween party. And let’s be honest, the sheer fun of presenting this Spooky Cheese Ball, adorned with its creepy crawly decorations, is half the appeal!
So, gather your ingredients and prepare to be amazed as we embark on this deliciously spooky culinary adventure together. Get ready to create a Spooky Cheese Ball that will be the talk of your Halloween party!

Ingredients:
- 1 (8 ounce) package cream cheese, softened
- 1/2 cup mayonnaise
- 1/4 cup shredded cheddar cheese
- 1/4 cup shredded Monterey Jack cheese
- 1/4 cup finely chopped green onions
- 2 tablespoons finely chopped black olives
- 1 tablespoon Worcestershire sauce
- 1 teaspoon garlic powder
- 1/2 teaspoon onion powder
- 1/4 teaspoon black pepper
- 1/2 cup crushed pretzels or potato chips, for rolling
- Optional: Various small candies or snacks for decoration (e.g., gummy worms, candy eyeballs, mini pretzels)
Preparing the Cheese Mixture:
- First, I always make sure my cream cheese is nice and soft. Leaving it out at room temperature for about 30 minutes before starting usually does the trick. This makes it much easier to mix smoothly.
- In a medium-sized bowl, I combine the softened cream cheese and mayonnaise. I use a sturdy spoon or spatula and mix until they’re completely incorporated and the mixture is smooth and creamy. Don’t rush this step; a well-mixed base is key to a delicious cheese ball.
- Next, I add the shredded cheddar and Monterey Jack cheeses. I gently fold them into the cream cheese mixture until they’re evenly distributed. I try not to overmix at this stage, as I want to keep the cheese a little bit chunky for texture.
- Now for the flavor boost! I stir in the finely chopped green onions, black olives, Worcestershire sauce, garlic powder, onion powder, and black pepper. I taste the mixture at this point and adjust the seasonings as needed. Sometimes I add a little extra Worcestershire for a deeper savory flavor, or a pinch more garlic powder if I feel like it needs a bit more zing.
- Important Note: At this stage, you can refrigerate the cheese mixture for at least 30 minutes to allow the flavors to meld. This step is optional, but I highly recommend it for a more intense flavor profile. If you’re short on time, you can skip this step, but the flavor will be slightly less developed.
Shaping and Rolling the Cheese Ball:
- Once the cheese mixture is well-chilled (or if you skipped chilling, straight away), I transfer it to a large piece of plastic wrap. I form the mixture into a large ball, using my hands to gently shape it. I try to make it as round as possible, but don’t worry about perfection; it’s going to be covered anyway!
- I tightly wrap the cheese ball in the plastic wrap, ensuring it’s completely sealed. This helps to keep its shape and prevents it from drying out. I then place the wrapped cheese ball in the refrigerator for at least another 30 minutes to firm up. This chilling step is crucial for easier rolling and prevents the coating from sticking.
- After the chilling period, I remove the cheese ball from the refrigerator and carefully unwrap it. I place the crushed pretzels or potato chips in a shallow dish. I then roll the cheese ball in the crushed chips, pressing gently to ensure they adhere to the surface. I continue rolling until the entire cheese ball is evenly coated.
- Tip: If you find the crushed chips aren’t sticking well, you can lightly brush the cheese ball with a little bit of water or melted butter before rolling. This helps the chips adhere better.
Decorating the Spooky Cheese Ball:
- Now comes the fun part – decorating! I use various small candies and snacks to create a spooky theme. I carefully press gummy worms into the cheese ball to look like creepy crawlies. Candy eyeballs add a particularly spooky touch. Mini pretzels can be used to create a cobweb effect, or to add extra texture.
- Creative Ideas: You can get really creative with your decorations! Consider using food-safe markers to draw spooky faces or designs on the cheese ball. You could also use different colored crushed chips or nuts to create patterns.
- Once I’m happy with the decoration, I place the cheese ball on a serving platter and refrigerate it until ready to serve. This allows the decorations to set and prevents them from falling off.
- Serving Suggestion: Serve the spooky cheese ball with crackers, breadsticks, or vegetable sticks. It’s a great appetizer for Halloween parties or any spooky gathering.
- Storage: Store leftover cheese ball in an airtight container in the refrigerator for up to 3 days. The decorations might lose some of their vibrancy over time, but the cheese ball will still be delicious.
Conclusion:
So there you have it – my Spooky Cheese Ball recipe! I truly believe this recipe is a must-try for several reasons. First, it’s incredibly easy to make. Even if you’re a beginner in the kitchen, you’ll find this recipe straightforward and achievable. The ingredients are readily available at most grocery stores, and the process itself is quick and simple, perfect for a last-minute appetizer or a fun addition to your Halloween spread. Second, and perhaps most importantly, it’s absolutely delicious! The creamy, cheesy center is perfectly complemented by the spooky, festive exterior. It’s the perfect balance of savory and fun, guaranteed to impress your guests.
Beyond its ease and deliciousness, the Spooky Cheese Ball offers incredible versatility. This is where you can really get creative and make it your own! For example, you can easily adjust the spice level by adding more or less cayenne pepper to the cream cheese mixture. Want a different flavor profile? Try swapping out some of the cheddar for pepper jack or Monterey Jack for a spicier kick, or incorporate some crumbled bacon for a smoky twist. Feel free to experiment with different herbs and spices to find your perfect combination. You could even add a touch of Worcestershire sauce for a deeper, umami flavor.
The presentation is also a huge part of this recipe’s charm. While I’ve provided a spooky Halloween theme, the possibilities are endless! You can easily adapt the decorations to suit any occasion or holiday. For Christmas, consider using red and green sprinkles and pretzel sticks to create a festive look. For a summer party, use colorful candies and fresh herbs. The base recipe remains the same, but the decorative possibilities are truly limitless, making it a perfect centerpiece for any gathering.
Serving Suggestions:
This Spooky Cheese Ball is best served with an array of crackers, vegetables, or even pretzels. I personally love serving it with water crackers, wheat thins, and sliced baguette. For a more elegant presentation, consider arranging the crackers and vegetables artfully on a platter around the cheese ball. You can also add a small bowl of your favorite dipping sauce, such as a spicy mustard or a sweet chili sauce, to complement the cheese ball’s flavors.
Variations to Explore:
To make this Spooky Cheese Ball even more exciting, consider these variations:
- Spicy Spooky Cheese Ball: Add a pinch of cayenne pepper or a dash of your favorite hot sauce to the cream cheese mixture for an extra kick.
- Herb-Infused Spooky Cheese Ball: Incorporate fresh herbs like chives, dill, or parsley for a fresh and herbaceous twist.
- Gourmet Spooky Cheese Ball: Use high-quality cheeses like goat cheese or brie for a more sophisticated flavor profile.
Don’t Forget to Share!
I genuinely hope you give this Spooky Cheese Ball recipe a try. It’s a guaranteed crowd-pleaser, perfect for any occasion, and a fantastic way to add a touch of fun and deliciousness to your next gathering. Once you’ve made it, I’d love to hear about your experience! Share your photos and feedback on social media using #SpookyCheeseBall – I can’t wait to see your creations!
Remember, the best part of cooking is sharing your culinary adventures. So, gather your ingredients, get creative with the decorations, and enjoy the process of making this unforgettable Spooky Cheese Ball. Happy cooking!
Spooky Cheese Ball: A Halloween Party Appetizer Recipe
Easy Halloween appetizer! Customize this spooky cheese ball with your favorite candies and snacks.
Ingredients
Instructions
Recipe Notes
- Softening the cream cheese is crucial for easy mixing.
- Chilling the cheese mixture enhances the flavor and makes it easier to shape and roll.
- Get creative with your decorations! Use food-safe markers, different colored chips, or nuts for added flair.
- Serve with crackers, breadsticks, or vegetable sticks.
- Store leftovers in an airtight container in the refrigerator for up to 3 days.