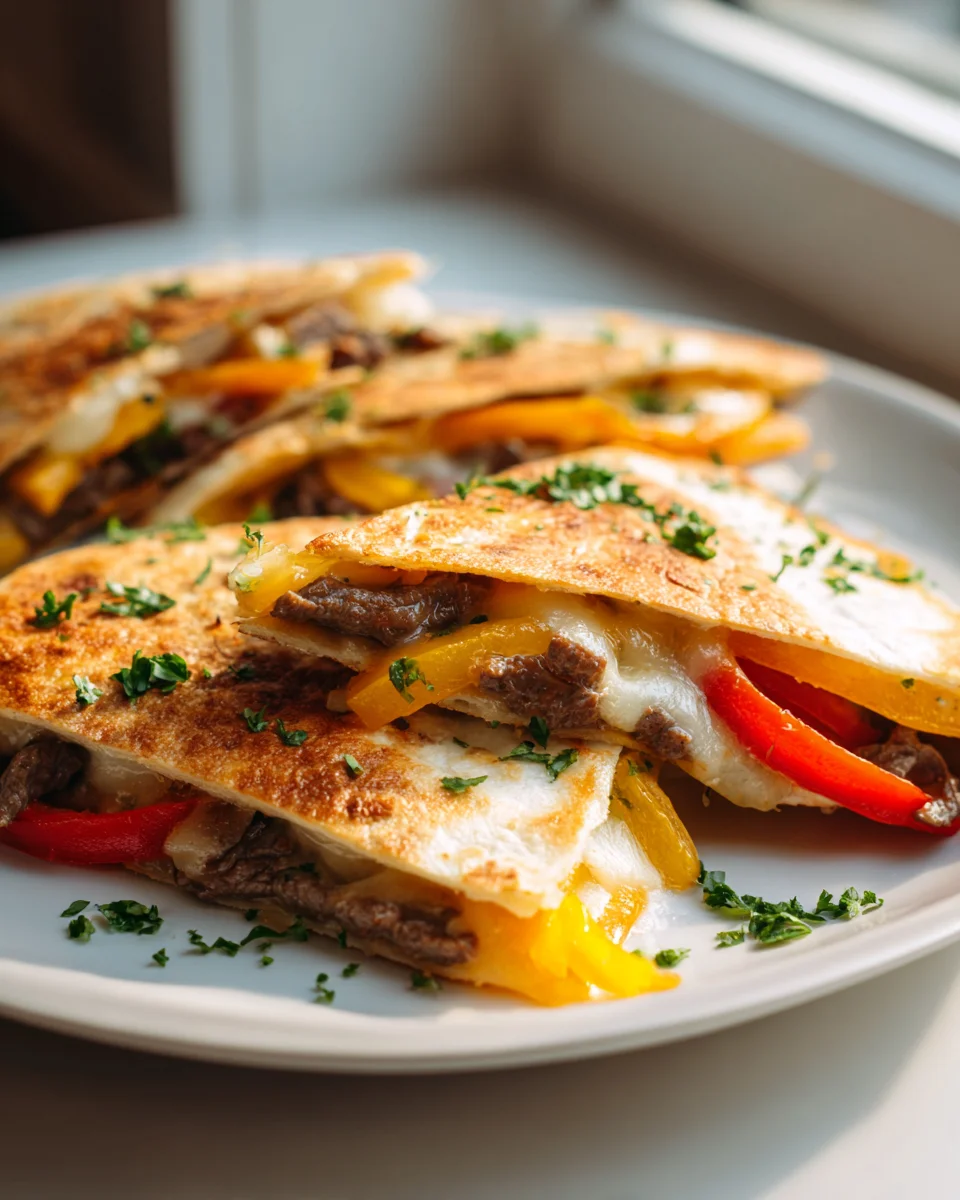
Philly Cheesesteak Quesadilla Melt
Oh, prepare yourselves, because I’ve got something truly special for you today! Get ready to dive headfirst into the glorious world of the Philly Cheesesteak Quesadilla Melt. You know how much I love taking two amazing things and smashing them together into one epic creation? Well, that’s exactly what we’re doing here!
Imagine the ultimate comfort food mash-up: all the savory, cheesy, beefy goodness of your favorite Philly Cheesesteak, tucked snugly inside a perfectly golden, crispy quesadilla. It’s not just a quesadilla; it’s a melt – a gooey, irresistible explosion of flavor and texture that I promise you’ll crave again and again. Forget the struggle of keeping all that deliciousness inside a roll; here, every bite is perfectly contained and utterly satisfying. This is why you’ll absolutely adore it!
So, what exactly are we creating? We’re taking tender, thinly sliced beef, perfectly caramelized onions and peppers, and then layering them generously with plenty of melty cheese between two tortillas. Grilled until golden brown and the cheese is gloriously ooey-gooey, it’s a handheld masterpiece that’s fantastic for a quick weeknight dinner, a fun game day snack, or anytime you just need a serious flavor boost. Trust me, your taste buds are in for a treat!

Ingredient Notes
Crafting the perfect Philly Cheesesteak Quesadilla Melt relies on a few key players. I’ve found that getting these ingredients right, or knowing suitable substitutions, makes all the difference in achieving that glorious blend of classic cheesesteak flavor with a crispy, gooey quesadilla twist.
- Thinly Sliced Beef: This is the absolute star of our show! I always recommend using a good quality cut like ribeye or top sirloin, sliced as thin as you can possibly get it. The thinness is crucial for quick cooking and achieving that tender, melt-in-your-mouth texture that’s characteristic of a great cheesesteak. If you can’t find pre-sliced “shaved steak,” a great trick is to partially freeze your steak for about 30-45 minutes before slicing it yourself – it makes it much easier to get those super-thin pieces against the grain.
- Large Flour Tortillas: For the “quesadilla” part, large flour tortillas are essential. They need to be big enough to hold a generous amount of filling and fold over easily. I usually go for a 10-12 inch size. Their soft, pliable nature crisps up beautifully in the pan, creating that satisfying crunch around our savory filling.
- Cheese: Ah, the “melt” aspect! For an authentic Philly experience, I love using a mix. Sliced Provolone gives a sharp, tangy bite and a fantastic melt. American cheese offers incredible creaminess and meltability, often seen in classic cheesesteaks. For those who love the iconic bright orange, a drizzle of Cheez Whiz can even be added after cooking or mixed in. Don’t be shy about combining a couple of types for the best flavor and texture!
- Onions: Sautéed onions are non-negotiable for me when making a cheesesteak. Yellow or white onions, thinly sliced, will caramelize beautifully and add a sweet, savory depth to the beef. They truly complete the classic flavor profile.
- Bell Peppers (Optional but Recommended): While a traditional Philly cheesesteak often omits bell peppers, for a quesadilla melt, I find they add a wonderful extra layer of flavor, color, and a slight crunch that really complements the quesadilla format. Green bell peppers are classic, but red or yellow can add a touch more sweetness. Feel free to include them or leave them out based on your preference.
- Cooking Fat: Butter or olive oil are my go-to choices for cooking both the vegetables and crisping up the quesadilla. Butter adds a richer flavor, especially to the tortillas, while olive oil is a great neutral option.
- Seasonings: Keep it simple! Salt and freshly cracked black pepper are fundamental. Sometimes I’ll add a dash of garlic powder or a splash of Worcestershire sauce to the beef while it cooks for an extra layer of umami.
Step-by-Step Instructions
Making a Philly Cheesesteak Quesadilla Melt is surprisingly straightforward, and the result is incredibly rewarding. Here’s how I bring this delicious fusion to life in my kitchen:
- Prepare Your Ingredients: This step is key for a smooth cooking process.
- If slicing your own beef, partially freeze it for 30-45 minutes, then slice it against the grain into very thin strips or small pieces.
- Thinly slice your onions and bell peppers (if using).
- If your cheese isn’t already sliced, shred it or have your slices ready to go.
- Cook the Vegetables: Heat a large skillet or griddle over medium-high heat. Add a tablespoon of olive oil or butter. Once hot, add the sliced onions and bell peppers. Sauté them, stirring occasionally, until they are softened and lightly caramelized, about 5-7 minutes. Remove the cooked vegetables from the pan and set them aside in a bowl.
- Sear the Beef: Increase the heat to high. Add another tablespoon of oil or butter to the same skillet. Once the pan is screaming hot, add the thinly sliced beef in a single layer. Don’t overcrowd the pan; you might need to do this in batches. Cook the beef for just 1-2 minutes per side, breaking it up with a spatula as it cooks, until it’s no longer pink. Season generously with salt and black pepper while it cooks. Once cooked, drain any excess liquid from the pan to prevent a soggy quesadilla.
- Combine the Filling: Return the cooked vegetables to the skillet with the beef. Stir everything together well, ensuring the flavors are nicely combined. Turn off the heat or reduce it to very low while you prepare the quesadillas.
- Assemble the Quesadilla Melts: Clean your skillet (or use a fresh, clean one) and reduce the heat to medium-low. Lightly butter or oil one side of a large flour tortilla. Place the tortilla, buttered-side down, in the warm skillet.
- On one half of the tortilla, sprinkle a generous layer of your chosen cheese.
- Spoon about 1/2 to 3/4 cup of the beef and vegetable filling evenly over the cheese.
- Top the filling with another generous layer of cheese. This double layer ensures maximum meltiness!
- Carefully fold the other half of the tortilla over the filling.
- Cook to Golden Perfection: Cook the quesadilla melt for 3-5 minutes per side, or until the tortilla is golden brown and crispy, and the cheese inside is completely melted and gooey. I like to gently press down on the quesadilla with a spatula as it cooks, which helps with even browning and ensures good contact for the cheese to melt. Repeat this process for any remaining quesadillas.
- Slice and Serve: Carefully transfer the finished quesadilla melt to a cutting board. Let it rest for a minute, then slice it into wedges or strips using a sharp knife or pizza cutter. Serve immediately while it’s hot and the cheese is gloriously stretchy!
Tips & Suggestions
After making countless Philly Cheesesteak Quesadilla Melts, I’ve picked up a few tricks that consistently elevate this dish from good to absolutely amazing. Here are my top tips and suggestions:
- The Thinner, The Better for Beef: Seriously, I cannot stress this enough! Whether you buy shaved steak or slice it yourself, aim for paper-thin pieces. This not only helps it cook super fast but also gives you that tender, almost melt-away texture that’s quintessential for a cheesesteak. Partially freezing the steak before slicing is a game-changer for achieving this at home.
- Don’t Overstuff Your Quesadilla: It’s tempting to pack in as much delicious filling as possible, but resist the urge! Overstuffing can lead to quesadillas that are difficult to fold, don’t cook evenly, and spill their delicious contents. A good rule of thumb is to leave about an inch of space around the edges when you’re spooning on the filling.
- Embrace the Cheese Blend: While I love classic Provolone or American, don’t be afraid to experiment with your cheese. A mix of shredded Monterey Jack for extra stretch and sharp cheddar for flavor can be fantastic. The key is to use a cheese that melts well. And for that extra authentic touch, a drizzle of warm Cheez Whiz over the top after it’s cooked is surprisingly good!
- Achieve Ultimate Crispiness: The contrast between a crispy tortilla and a gooey filling is what makes this dish so satisfying. Use medium-low heat and a bit of butter or oil for cooking the quesadilla. Don’t rush it; letting it cook slowly allows the tortilla to get beautifully golden and crisp without burning. Pressing down gently with a spatula also helps create an even crust.
- Pre-Cooked Filling for Quick Melts: If you’re planning to make these for a quick weeknight dinner or for guests, you can cook the beef and vegetable filling ahead of time. Store it in an airtight container in the refrigerator for up to 2-3 days. When you’re ready, simply reheat the filling gently and proceed with assembling and cooking the quesadillas.
- Serving Suggestions: While they are perfect on their own, I often serve these with a side of ketchup (a classic Philly pairing!), a dash of hot sauce for a kick, or even a simple side salad to balance out the richness. For an extra layer of flavor, try a little garlic aioli or a quick homemade pepper relish.
Storage
Once you’ve devoured your first Philly Cheesesteak Quesadilla Melt, you might find yourself with leftovers (if you’re lucky!). Proper storage and reheating are key to enjoying them again without sacrificing too much of that delicious texture.
- Cooling Down: Before storing, I always make sure the quesadilla melts have cooled down completely to room temperature. This prevents condensation from building up in your storage container, which can lead to sogginess.
- Refrigeration: For immediate storage, wrap individual quesadilla wedges tightly in plastic wrap or aluminum foil, or place them in an airtight container. They will keep well in the refrigerator for up to 2-3 days. Beyond that, the tortilla might start to dry out or become too soft.
- Reheating for Best Results:
- Skillet (My Top Choice): This is hands down the best way to reheat your quesadilla melts if you want to bring back some of that original crispiness. Heat a dry non-stick skillet over medium-low heat. Place the quesadilla melt in the pan and cook for 3-5 minutes per side, or until it’s heated through and the tortilla is re-crisped and golden. You can add a tiny bit of butter if you like.
- Oven or Toaster Oven: Another excellent method for maintaining crispiness. Preheat your oven or toaster oven to 350°F (175°C). Place the quesadilla melts directly on a baking sheet or toaster oven rack. Bake for 10-15 minutes, flipping once halfway through, until warmed through and crispy.
- Microwave (Fastest, but Least Ideal for Texture): While it’s the quickest option, microwaving will make the tortilla soft and lose its crispness. If you’re in a pinch, microwave for 30-60 seconds, or until heated through. Be prepared for a softer, chewier texture.
- Freezing: You can freeze cooked Philly Cheesesteak Quesadilla Melts, though I find they are best enjoyed fresh or from the fridge. To freeze, wrap individual cooled quesadillas tightly in plastic wrap, then again in aluminum foil, and place them in a freezer-safe bag or container. They can be stored for up to 1 month. When reheating from frozen, I recommend using the oven or skillet method directly from frozen, adding an extra 5-10 minutes to the cooking time, making sure they are heated through to a safe internal temperature. The filling itself also freezes very well on its own if you want to prep ahead!
Final Thoughts
So there you have it! My delightful creation, the Philly Cheesesteak Quesadilla Melt. I truly believe this recipe is a must-try for anyone looking to elevate their comfort food game. It’s the perfect marriage of two beloved classics, delivering that iconic savory beef and melty cheese goodness from a traditional Philly cheesesteak, all wrapped up in a wonderfully crispy, golden quesadilla. The tender, seasoned beef, caramelized onions, and gooey cheese exploding from every bite make this Philly Cheesesteak Quesadilla Melt an absolute flavor bomb that’s impossible to resist. Whether you’re whipping it up for a quick weeknight dinner, impressing guests on game day, or simply treating yourself to something truly special, I promise this Philly Cheesesteak Quesadilla Melt will be a resounding success. Give it a go – you won’t regret it!

Sizzling Philly Cheesesteak Quesadilla Melt – Best Ever!
- Total Time: 45 minutes
- Yield: 4 servings
Description
Dive into the glorious world of the Philly Cheesesteak Quesadilla Melt, where savory, cheesy, beefy goodness meets a perfectly crispy quesadilla. This handheld masterpiece is fantastic for any occasion, delivering irresistible flavor in every bite.
Ingredients
- Thinly Sliced Beef (ribeye or top sirloin)
- Large Flour Tortillas (10-12 inch size)
- Sliced Provolone Cheese
- American Cheese
- Cheez Whiz (optional)
- Onions (yellow or white, thinly sliced)
- Bell Peppers (green, red, or yellow, optional but recommended)
- Butter or Olive Oil (for cooking)
- Salt
- Freshly Cracked Black Pepper
- Garlic Powder (optional)
- Worcestershire Sauce (optional)
Instructions
- Prepare Your Ingredients: If slicing your own beef, partially freeze it for 30-45 minutes, then slice it against the grain into very thin strips or small pieces. Thinly slice your onions and bell peppers (if using). If your cheese isn't already sliced, shred it or have your slices ready to go.
- Cook the Vegetables: Heat a large skillet or griddle over medium-high heat. Add a tablespoon of olive oil or butter. Once hot, add the sliced onions and bell peppers. Sauté them, stirring occasionally, until they are softened and lightly caramelized, about 5-7 minutes. Remove the cooked vegetables from the pan and set them aside in a bowl.
- Sear the Beef: Increase the heat to high. Add another tablespoon of oil or butter to the same skillet. Once the pan is screaming hot, add the thinly sliced beef in a single layer. Don't overcrowd the pan; you might need to do this in batches. Cook the beef for just 1-2 minutes per side, breaking it up with a spatula as it cooks, until it's no longer pink. Season generously with salt and black pepper while it cooks. Once cooked, drain any excess liquid from the pan to prevent a soggy quesadilla.
- Combine the Filling: Return the cooked vegetables to the skillet with the beef. Stir everything together well, ensuring the flavors are nicely combined. Turn off the heat or reduce it to very low while you prepare the quesadillas.
- Assemble the Quesadilla Melts: Clean your skillet (or use a fresh, clean one) and reduce the heat to medium-low. Lightly butter or oil one side of a large flour tortilla. Place the tortilla, buttered-side down, in the warm skillet. On one half of the tortilla, sprinkle a generous layer of your chosen cheese. Spoon about 1/2 to 3/4 cup of the beef and vegetable filling evenly over the cheese. Top the filling with another generous layer of cheese. Carefully fold the other half of the tortilla over the filling.
- Cook to Golden Perfection: Cook the quesadilla melt for 3-5 minutes per side, or until the tortilla is golden brown and crispy, and the cheese inside is completely melted and gooey. Gently press down on the quesadilla with a spatula as it cooks. Repeat this process for any remaining quesadillas.
- Slice and Serve: Carefully transfer the finished quesadilla melt to a cutting board. Let it rest for a minute, then slice it into wedges or strips using a sharp knife or pizza cutter. Serve immediately while it's hot and the cheese is gloriously stretchy!
- Prep Time: 15 mins
- Cook Time: 30 mins
- Category: Dinner
- Method: Grilling
- Cuisine: American
Nutrition
- Serving Size: 1 quesadilla
- Calories: 600
- Sugar: 2 g
- Sodium: 800 mg
- Fat: 30 g
- Saturated Fat: 15 g
- Unsaturated Fat: 10 g
- Trans Fat: 0 g
- Carbohydrates: 50 g
- Fiber: 3 g
- Protein: 35 g
- Cholesterol: 100 mg
Keywords: Aim for paper-thin pieces of beef for the best texture. Don't overstuff your quesadilla to ensure even cooking. Experiment with different cheese blends for enhanced flavor. Use medium-low heat for perfect crispiness.