
Salmon crispy rice: Prepare to be utterly captivated by this delightful dish that’s taking the culinary world by storm! Imagine perfectly seasoned, melt-in-your-mouth salmon nestled atop a bed of crispy, golden-brown rice. It’s a textural and flavorful symphony that will have you craving more with every single bite.
While the exact origins of salmon crispy rice are somewhat modern, drawing inspiration from Japanese cuisine and the ever-popular spicy tuna crispy rice, its appeal is deeply rooted in our love for contrasting textures and umami-rich flavors. Think of it as a deconstructed sushi roll, offering all the familiar tastes in a fun, interactive, and incredibly satisfying format.
What makes this dish so irresistible? It’s the delightful crunch of the rice against the tender salmon, the savory-sweet notes of the marinade, and the customizable toppings that allow you to tailor each bite to your exact preferences. Plus, it’s surprisingly easy to make at home, making it perfect for a weeknight dinner or an impressive appetizer for your next gathering. Get ready to embark on a culinary adventure that will tantalize your taste buds and leave you wanting more!

Ingredients:
- For the Crispy Rice:
- 2 cups cooked sushi rice (short-grain rice), cooled
- 2 tablespoons neutral oil (such as avocado, canola, or vegetable oil)
- 1/4 teaspoon salt
- For the Salmon Topping:
- 1 pound sushi-grade salmon, skin removed and finely diced
- 2 tablespoons soy sauce
- 1 tablespoon rice vinegar
- 1 tablespoon sesame oil
- 1 teaspoon sriracha (or more, to taste)
- 1/2 teaspoon grated ginger
- 1 clove garlic, minced
- 1 green onion, thinly sliced, plus more for garnish
- 1 tablespoon mayonnaise (Japanese mayo, such as Kewpie, is preferred)
- 1 teaspoon sesame seeds, toasted, plus more for garnish
- Optional: Avocado, thinly sliced, for serving
- Optional: Spicy mayo (mayonnaise mixed with sriracha), for serving
- Garnish:
- Green onions, thinly sliced
- Sesame seeds, toasted
- Nori seaweed sheets, cut into small squares (optional)
Preparing the Crispy Rice
Okay, let’s get started with the foundation of our delicious Salmon Crispy Rice – the crispy rice itself! This part is crucial, so pay close attention. We want that perfect golden-brown crunch.
- Prepare the Rice: Make sure your sushi rice is cooked and completely cooled. This is important because warm rice will be too sticky and won’t crisp up properly. I usually cook my rice a few hours ahead of time or even the day before. Spread the cooked rice out on a baking sheet lined with parchment paper. This helps it dry out a bit and prevents sticking.
- Form the Rice Cakes: Gently press the rice together into a relatively even layer, about 1/2 inch thick. You can use your hands or the back of a spatula. Don’t press too hard, just enough to get it to hold together. Now, using a sharp knife or a pizza cutter, cut the rice into small squares or rectangles. I usually aim for pieces that are about 1.5 to 2 inches in size. You can make them any shape you like, really!
- Chill the Rice Cakes: Place the baking sheet with the cut rice cakes into the refrigerator for at least 30 minutes, or even better, an hour. This will help them firm up and hold their shape during frying. This step is key to preventing them from falling apart in the oil.
- First Fry: Heat about 1 tablespoon of neutral oil in a large skillet or frying pan over medium-high heat. Once the oil is hot, carefully place a batch of the chilled rice cakes into the pan, making sure not to overcrowd it. Fry for about 2-3 minutes per side, or until they are lightly golden brown. Remove the rice cakes from the pan and place them on a wire rack lined with paper towels to drain excess oil.
- Second Fry (for Extra Crispiness): This is where the magic happens! Heat the remaining tablespoon of oil in the same skillet over medium-high heat. Once the oil is hot, add the partially fried rice cakes back into the pan, again making sure not to overcrowd it. Fry for another 2-3 minutes per side, or until they are deeply golden brown and super crispy. Keep a close eye on them, as they can burn quickly during this second fry. Remove the rice cakes from the pan and place them back on the wire rack to drain. Sprinkle with salt immediately after frying.
Preparing the Salmon Topping
While the rice cakes are cooling (or even while they’re chilling in the fridge!), let’s get started on the salmon topping. This is where the flavor really explodes!
- Prepare the Salmon: This is super important: make sure you’re using sushi-grade salmon! This means it’s safe to eat raw. Remove the skin from the salmon and then dice it into very small, uniform pieces. The smaller the pieces, the better it will mix with the other ingredients and the easier it will be to eat on top of the crispy rice.
- Make the Marinade: In a medium bowl, whisk together the soy sauce, rice vinegar, sesame oil, sriracha, grated ginger, and minced garlic. This marinade is going to infuse the salmon with tons of flavor.
- Marinate the Salmon: Add the diced salmon to the bowl with the marinade and gently toss to coat evenly. Let the salmon marinate for at least 10 minutes, or up to 30 minutes, in the refrigerator. The longer it marinates, the more flavorful it will be. However, don’t marinate it for too long, as the acid in the vinegar can start to “cook” the salmon.
- Add the Finishing Touches: After the salmon has marinated, add the sliced green onion, mayonnaise (Kewpie is my favorite!), and toasted sesame seeds to the bowl. Gently mix everything together until well combined. Be careful not to overmix, as you don’t want to break down the salmon too much.
Assembling the Salmon Crispy Rice
Alright, we’re in the home stretch! Now it’s time to put everything together and enjoy our amazing Salmon Crispy Rice.
- Assemble: Take a crispy rice cake and place a generous spoonful of the salmon mixture on top. Don’t be shy! You want a good balance of crispy rice and flavorful salmon.
- Garnish (Optional): This is where you can get creative! I like to garnish my Salmon Crispy Rice with extra sliced green onions, toasted sesame seeds, and a small square of nori seaweed. You can also add a thin slice of avocado for some creaminess or a drizzle of spicy mayo for an extra kick.
- Serve Immediately: The crispy rice is best served immediately, while the rice is still crispy and the salmon is fresh. If you let it sit for too long, the rice will start to soften.
Tips and Variations:
- Rice Type: While sushi rice is traditional, you can experiment with other types of short-grain rice. Just make sure it’s sticky enough to hold its shape.
- Spice Level: Adjust the amount of sriracha to your liking. If you’re not a fan of spice, you can omit it altogether.
- Salmon Substitute: If you’re not a fan of salmon, you can use tuna or yellowtail instead. Just make sure it’s sushi-grade.
- Vegetarian Option: For a vegetarian version, you can use avocado or tofu instead of salmon. Marinate the avocado or tofu in the same marinade as the salmon.
- Make Ahead: You can prepare the crispy rice and the salmon topping ahead of time. Store them separately in the refrigerator and assemble just before serving.
- Air Fryer Method: For a healthier option, you can air fry the rice cakes instead of frying them in oil. Preheat your air fryer to 400°F (200°C) and air fry the rice cakes for about 8-10 minutes, or until they are golden brown and crispy, flipping halfway through.
- Adding Crunch: Consider adding some finely chopped water chestnuts or jicama to the salmon mixture for extra crunch.
- Flavor Boost: A tiny dab of wasabi on each piece can add a surprising and delightful kick.
Enjoy!
I hope you enjoy this recipe for Salmon Crispy Rice as much as I do! It’s a fun and delicious appetizer or snack that’s sure to impress your friends and family. Don’t be afraid to experiment with different variations and make it your own. Happy cooking!
Conclusion:
This isn’t just another recipe; it’s a culinary adventure waiting to happen! The combination of textures and flavors in this Salmon Crispy Rice is truly irresistible. The crispy, golden-brown rice provides the perfect base for the rich, flavorful salmon, creating a symphony of deliciousness in every bite. It’s quick enough for a weeknight meal but impressive enough to serve to guests. Trust me, once you try it, you’ll be adding it to your regular rotation.
But why is this recipe a must-try? It’s all about the balance. The crispy rice offers a delightful crunch that contrasts beautifully with the tender, flaky salmon. The sauce, whether you opt for a spicy mayo, a tangy ponzu, or a creamy avocado dressing, ties everything together perfectly. It’s a dish that’s both satisfying and exciting, offering a unique culinary experience that you won’t find anywhere else. Plus, it’s incredibly versatile!
Looking for serving suggestions? This Salmon Crispy Rice is fantastic as an appetizer, a light lunch, or even a main course. For a more substantial meal, consider adding a side of edamame, a simple seaweed salad, or some grilled asparagus. You could also serve it with a bowl of miso soup for a complete and satisfying Japanese-inspired feast.
And the variations are endless! Feel free to experiment with different types of fish. Tuna, yellowtail, or even shrimp would work beautifully in this recipe. You can also customize the sauce to your liking. If you’re a fan of spice, add a dash of sriracha or chili flakes. If you prefer something sweeter, try a drizzle of honey or maple syrup. Get creative and make it your own!
Want to elevate your presentation? Arrange the crispy rice squares artfully on a platter and top each one with a generous portion of salmon and your chosen sauce. Garnish with sesame seeds, chopped scallions, or a sprinkle of nori flakes for an extra touch of elegance. This dish is not only delicious but also visually stunning, making it perfect for entertaining.
Ready to give it a try?
I’m confident that you’ll love this Salmon Crispy Rice as much as I do. It’s a fun, flavorful, and relatively easy recipe that’s sure to impress. Don’t be afraid to experiment with different ingredients and techniques to find what works best for you. The most important thing is to have fun in the kitchen and enjoy the process of creating something delicious.
So, what are you waiting for? Gather your ingredients, preheat your oven, and get ready to experience the magic of Salmon Crispy Rice. I can’t wait to hear what you think!
Share Your Creations!
Once you’ve made this recipe, I’d love to see your creations! Share your photos and comments on social media using [Your Social Media Hashtag Here]. Let me know what variations you tried and what you thought of the overall experience. Your feedback is invaluable and helps me continue to create delicious and inspiring recipes for you. Happy cooking! I am excited to see your version of this amazing Salmon Crispy Rice!
Salmon Crispy Rice: The Ultimate Guide to Making It at Home
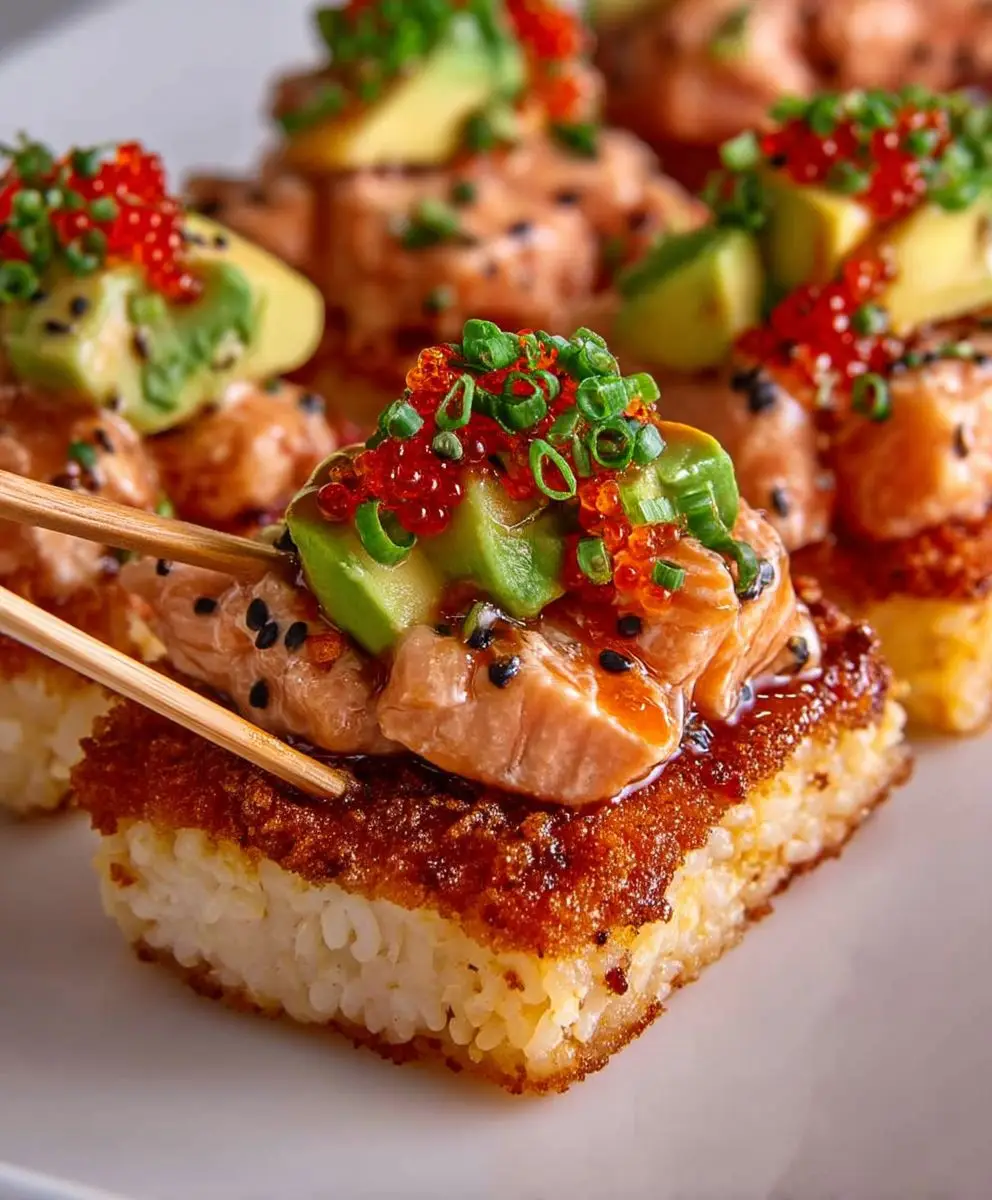
Crispy sushi rice cakes topped with a flavorful marinated salmon mixture. Perfect as an appetizer or snack, these bites are easy to customize with your favorite toppings.
Ingredients
**I. Overall Structure & Strengths:**
* **Well-Organized:** The recipe is logically divided into sections: Ingredients, Equipment, Instructions, and Tips/Variations.
* **Detailed Instructions:** The instructions are generally clear and easy to follow. The two-step frying process is well-explained.
* **Helpful Tips:** The “Tips and Variations” section provides valuable suggestions for customization and troubleshooting.
* **Ingredient Specificity:** Specifying “sushi-grade” salmon is crucial for safety.
**II. Potential Improvements & Suggestions:**
* **Ingredient Clarity:**
* **”Neutral Oil”:** While avocado, canola, and vegetable oil are good examples, consider adding a note about oils with high smoke points being preferable for frying.
* **”Sushi Rice”:** Briefly explain *why* sushi rice is preferred (its stickiness).
* **Mayonnaise:** Emphasize the difference between regular mayonnaise and Japanese mayonnaise (Kewpie) in terms of flavor and texture. Consider adding a note that regular mayonnaise can be used if Kewpie is unavailable, but the flavor will be different.
* **Instruction Refinement:**
* **Rice Cake Thickness:** Instead of “about 1/2 inch thick,” consider giving a range (e.g., “1/2 to 3/4 inch thick”) to allow for some flexibility.
* **Chilling Time:** Emphasize the importance of chilling the rice cakes for structural integrity during frying. “At least 30 minutes, but an hour or longer is ideal” might be better phrasing.
* **Frying Temperature:** While “medium-high heat” is common, consider adding a visual cue: “The oil should shimmer but not smoke.”
* **Frying Batch Size:** Reiterate the importance of not overcrowding the pan during both frying stages. This is crucial for even browning and crispiness.
* **Salmon Dicing:** Specify the desired size of the diced salmon (e.g., “1/4-inch dice”).
* **Marinating Time:** Clarify the marinating time: “Marinate for 10-30 minutes in the refrigerator.”
* **Equipment List:**
* **Measuring Cups/Spoons:** Add “Measuring cups and spoons” to the equipment list.
* **Tips and Variations Expansion:**
* **Air Fryer Specifics:** Provide more detailed air fryer instructions, including:
* Preheating is essential.
* Lightly spray the rice cakes with oil before air frying for better browning.
* Check for doneness and adjust cooking time as needed, as air fryers vary.
* **Make Ahead – Crispy Rice:** Specify how to store the crispy rice if made ahead (airtight container at room temperature). Also, note that it might lose some crispness and can be re-crisped in a low oven or air fryer.
* **Make Ahead – Salmon Topping:** Specify that the salmon topping should be stored in an airtight container in the refrigerator.
* **Serving Suggestions:** Expand on serving suggestions. For example:
* “Serve as an appetizer or light meal.”
* “Pairs well with a side of edamame or a seaweed salad.”
* **Visual Appeal:**
* **Photos:** Include photos of each step, especially the rice cake formation, frying process, and finished product. This is incredibly helpful for visual learners.
* **Nutritional Information (Optional):**
* Consider adding approximate nutritional information per serving (calories, fat, protein, carbs). This is increasingly popular with online recipes.
**III. Revised Recipe Snippets (Examples):**
* **Ingredients – Crispy Rice:**
* “2 cups cooked sushi rice (short-grain rice; its stickiness helps the cakes hold their shape), cooled”
* “2 tablespoons neutral oil (such as avocado, canola, or vegetable oil; choose an oil with a high smoke point)”
* **Instructions – Preparing the Crispy Rice – Step 2:**
* “Gently press the rice together into a relatively even layer, about 1/2 to 3/4 inch thick. Cut the rice into small squares or rectangles (about 1.5 to 2 inches in size).”
* **Instructions – Preparing the Crispy Rice – Step 3:**
* “Chill the Rice Cakes: Place the baking sheet with the cut rice cakes into the refrigerator for at least 30 minutes, but an hour or longer is ideal. This chilling step is crucial for helping the rice cakes hold their shape during frying.”
* **Instructions – Preparing the Crispy Rice – Step 4:**
* “Heat about 1 tablespoon of neutral oil in a large skillet or frying pan over medium-high heat. The oil should shimmer but not smoke. Carefully place a batch of the chilled rice cakes into the pan, making sure not to overcrowd it. Fry for about 2-3 minutes per side, or until they are lightly golden brown. Remove the rice cakes from the pan and place them on a wire rack lined with paper towels to drain excess oil.”
* **Instructions – Preparing the Salmon Topping – Step 1:**
* “Prepare the Salmon: Make sure you’re using sushi-grade salmon! Remove the skin from the salmon and then dice it into very small, uniform pieces (about 1/4-inch dice).”
* **Tips and Variations – Air Fryer Method:**
* “For a healthier option, you can air fry the rice cakes instead of frying them in oil. Preheat your air fryer to 400°F (200°C). Lightly spray the rice cakes with oil. Air fry for about 8-10 minutes, or until they are golden brown and crispy, flipping halfway through. Cooking times may vary depending on your air fryer, so check for doneness and adjust accordingly.”
* **Tips and Variations – Make Ahead:**
* “You can prepare the crispy rice and the salmon topping ahead of time. Store the crispy rice in an airtight container at room temperature. They may lose some crispness, but you can re-crisp them in a low oven or air fryer. Store the salmon topping in an airtight container in the refrigerator.”
By implementing these suggestions, you can make the recipe even more user-friendly, accessible, and successful for home cooks. Remember that clear, concise instructions and helpful tips are key to a great recipe!
Instructions
- Make sure your sushi rice is cooked and completely cooled. Spread the cooked rice out on a baking sheet lined with parchment paper.
- Gently press the rice together into a relatively even layer, about 1/2 inch thick. Cut the rice into small squares or rectangles (about 1.5 to 2 inches in size).
- Place the baking sheet with the cut rice cakes into the refrigerator for at least 30 minutes, or even better, an hour.
- Heat about 1 tablespoon of neutral oil in a large skillet or frying pan over medium-high heat. Carefully place a batch of the chilled rice cakes into the pan, making sure not to overcrowd it. Fry for about 2-3 minutes per side, or until they are lightly golden brown. Remove the rice cakes from the pan and place them on a wire rack lined with paper towels to drain excess oil.
- Heat the remaining tablespoon of oil in the same skillet over medium-high heat. Once the oil is hot, add the partially fried rice cakes back into the pan, again making sure not to overcrowd it. Fry for another 2-3 minutes per side, or until they are deeply golden brown and super crispy. Remove the rice cakes from the pan and place them back on the wire rack to drain. Sprinkle with salt immediately after frying.
- Make sure you’re using sushi-grade salmon! Remove the skin from the salmon and then dice it into very small, uniform pieces.
- In a medium bowl, whisk together the soy sauce, rice vinegar, sesame oil, sriracha, grated ginger, and minced garlic.
- Add the diced salmon to the bowl with the marinade and gently toss to coat evenly. Let the salmon marinate for at least 10 minutes, or up to 30 minutes, in the refrigerator.
- After the salmon has marinated, add the sliced green onion, mayonnaise (Kewpie is my favorite!), and toasted sesame seeds to the bowl. Gently mix everything together until well combined.
- Take a crispy rice cake and place a generous spoonful of the salmon mixture on top.
- Garnish with extra sliced green onions, toasted sesame seeds, and a small square of nori seaweed. You can also add a thin slice of avocado for some creaminess or a drizzle of spicy mayo for an extra kick.
- The crispy rice is best served immediately, while the rice is still crispy and the salmon is fresh.
Notes
**Overall Strengths:**
* **Comprehensive:** The recipe is well-written and covers all the necessary steps.
* **Detailed:** Provides specific measurements and instructions.
* **Helpful Tips:** The “Tips and Variations” section is excellent for customization and addressing potential concerns.
* **Clear Formatting:** Uses headings and bullet points effectively.
**Areas for Improvement and Suggestions:**
**1. SEO Optimization:**
* **Keyword Research:** Before finalizing the recipe title and descriptions, do some keyword research. Tools like Google Keyword Planner, Ahrefs, or SEMrush can help you identify the most popular and relevant search terms related to “salmon crispy rice.” Consider variations like “spicy salmon crispy rice,” “crispy rice with salmon,” “salmon rice cakes,” etc.
* **Recipe Title:** While “Salmon Crispy Rice Recipe” is straightforward, consider incorporating a more descriptive and appealing title that includes relevant keywords. Examples:
* “Spicy Salmon Crispy Rice: An Easy & Delicious Appetizer”
* “Crispy Salmon Rice Cakes with Spicy Mayo: A Restaurant-Quality Recipe”
* “Homemade Salmon Crispy Rice: The Ultimate Party Snack”
* **Introduction/Description:** Add a brief introductory paragraph at the beginning of the recipe. This is crucial for SEO and user engagement. This paragraph should:
* Briefly describe the dish and its appeal.
* Highlight key ingredients or flavors.
* Mention any relevant dietary considerations (e.g., gluten-free options).
* Include relevant keywords naturally.
* Example: “These Spicy Salmon Crispy Rice cakes are the perfect appetizer or snack! Crispy, golden-brown rice cakes are topped with a flavorful mixture of sushi-grade salmon, spicy mayo, and toasted sesame seeds. This recipe is easy to make at home and will impress your guests!”
* **Image Optimization:** Use high-quality photos of the finished dish. Name the image files with relevant keywords (e.g., “salmon-crispy-rice-recipe.jpg”). Add alt text to the images that describes the dish and includes keywords.
* **Schema Markup:** Implement recipe schema markup on your website. This helps search engines understand the content of your recipe and display it in rich snippets (e.g., with star ratings, cooking time, and calorie information). There are plugins and tools available to help you with this.
**2. Clarity and User-Friendliness:**
* **Ingredient List Order:** Consider grouping ingredients by sub-recipe (as you’ve done) but also ordering them within each group by the order they are used in the instructions. This makes it easier for the cook to follow along.
* **Ingredient Specificity:**
* **Sushi Rice:** Specify the type of sushi rice (e.g., “Japanese short-grain sushi rice”).
* **Neutral Oil:** While you provide examples, consider adding a note about why neutral oil is preferred (e.g., “Neutral oil is preferred because it doesn’t impart a strong flavor to the rice cakes.”).
* **Mayonnaise:** Emphasize the importance of Japanese mayo (Kewpie) for the authentic flavor. Explain why it’s different (e.g., “Kewpie mayo has a richer, tangier flavor than regular mayonnaise.”). If Kewpie is difficult to find, suggest a substitute (e.g., “If you can’t find Kewpie mayo, you can use regular mayonnaise with a pinch of MSG or a few drops of rice vinegar.”).
* **Step-by-Step Photos:** If possible, include photos for key steps in the recipe, especially for forming the rice cakes and frying them. Visuals are incredibly helpful for novice cooks.
* **”Why This Works” Section (Optional):** Consider adding a short section explaining the reasoning behind certain steps. For example:
* “Chilling the rice cakes before frying helps them hold their shape and prevents them from falling apart.”
* “The double-frying method ensures that the rice cakes are extra crispy.”
* **Troubleshooting Tips:** Add a section addressing common problems and solutions. For example:
* “If the rice cakes are sticking to the pan, make sure the oil is hot enough.”
* “If the salmon mixture is too wet, drain off some of the excess marinade.”
* **Serving Suggestions:** Expand on the serving suggestions. Consider mentioning complementary dishes or drinks.
* **Nutritional Information (Optional):** If possible, provide approximate nutritional information per serving (calories, fat, protein, carbs). There are online tools that can help you calculate this.
**3. Specific Edits and Suggestions:**
* **Prep Time:** Consider breaking down the prep time into smaller chunks (e.g., “Rice preparation: 15 minutes, Salmon topping preparation: 30 minutes”).
* **Equipment List:** Add “Measuring cups and spoons” to the equipment list.
* **Instructions – Preparing the Crispy Rice:**
* **Step 2:** Add “Using your hands or the back of a spatula” to clarify how to press the rice.
* **Step 2:** Specify that the rice should be cut *before* chilling.
* **Step 4 & 5:** Be more specific about the oil temperature. “The oil should be shimmering but not smoking.”
* **Step 5:** Add a note about watching the oil temperature to prevent burning.
* **Instructions – Preparing the Salmon Topping:**
* **Step 3:** Add a note about not marinating the salmon for too long, as the acid in the marinade can “cook” the salmon.
* **Instructions – Assembling the Salmon Crispy Rice:**
* **Step 2:** Suggest using a piping bag for the spicy mayo for a more professional look.
* **Tips and Variations:**
* **Air Fryer Method:** Specify whether to spray the rice cakes with oil before air frying.
* **Adding Crunch:** Suggest finely dicing the water chestnuts or jicama.
* **Flavor Boost:** Mention that wasabi is spicy and should be used sparingly.
**Example of Revised Introduction:**
“These Spicy Salmon Crispy Rice appetizers are a guaranteed crowd-pleaser! Crispy, golden-brown sushi rice cakes are topped with a vibrant and flavorful mixture of sushi-grade salmon, a tangy-spicy marinade, creamy Kewpie mayonnaise, and toasted sesame seeds. This easy-to-make recipe is perfect for parties, potlucks, or a fun weeknight snack. Customize the spice level to your liking and enjoy this restaurant-quality dish in the comfort of your own home! (Gluten-free option: Use tamari instead of soy sauce.)”
By implementing these suggestions, you can create a recipe that is not only delicious but also user-friendly, SEO-optimized, and more likely to be shared and enjoyed by a wider audience. Good luck!