Thanksgiving Turkey Recipe – this phrase alone conjures images of festive tables, warm gatherings, and the undeniable aroma of roasted perfection. I’m incredibly excited to guide you through creating the ultimate centerpiece for your holiday feast this year. For centuries, the turkey has stood as the quintessential symbol of abundance and gratitude during Thanksgiving celebrations, a tradition deeply rooted in American history and cultural heritage. It’s more than just a meal; it’s the heart of the celebration, bringing families together around a shared culinary experience.
What makes a perfect Thanksgiving turkey so beloved? Is it the crispy, golden-brown skin that crackles with flavor? Or perhaps the incredibly moist, tender meat that falls away from the bone? I believe it’s the combination of these elements, coupled with the cherished memories they create. This isn’t just any Thanksgiving Turkey Recipe; it’s one meticulously crafted to ensure every bite is a testament to the joy of the season. I’ve perfected this approach to guarantee your turkey is succulent, flavorful, and unforgettable, making your holiday meal truly special.

Ingredients:
Preparing a truly memorable Thanksgiving Turkey is all about starting with high-quality ingredients and a few carefully chosen aromatics. Here’s what you’ll need to create a juicy, flavorful centerpiece for your holiday feast.
- For the Turkey:
- 1 (12-16 pound) whole turkey, fresh or fully thawed (ensure giblets and neck are removed from the cavity). I usually opt for a fresh turkey if I can find one, as it often yields a more tender result, but a properly thawed frozen bird works wonderfully too!
- Kosher salt, for salting the turkey a day in advance (if not brining)
- Freshly ground black pepper
- For the Simple Brine (Optional, but highly recommended for juiciness and flavor):
- 1 gallon vegetable broth or chicken broth
- 1 cup kosher salt
- ½ cup granulated sugar (brown sugar can also be used for a slightly deeper flavor)
- 4 sprigs fresh rosemary
- 4 sprigs fresh thyme
- 1 tablespoon black peppercorns
- 2 oranges, halved
- 2 lemons, halved
- 5-6 cloves garlic, smashed
- 1 gallon cold water (or enough to fully submerge the turkey in your chosen brining vessel)
- For the Aromatic Compound Butter:
- 1 cup (2 sticks) unsalted butter, softened to room temperature. This is crucial for easy mixing and application!
- 4 cloves garlic, minced very finely
- 2 tablespoons fresh rosemary, finely chopped
- 2 tablespoons fresh thyme, finely chopped
- 1 tablespoon fresh sage, finely chopped
- 1 teaspoon orange zest (from one orange, avoid the white pith)
- ½ teaspoon kosher salt
- ¼ teaspoon freshly ground black pepper
- For the Roasting Pan Aromatics:
- 2 yellow onions, quartered
- 3 carrots, peeled and cut into large chunks
- 3 celery stalks, cut into large chunks
- 1 head garlic, cut in half horizontally
- 2 cups chicken or turkey broth (or water) for the bottom of the roasting pan
- For the Turkey Cavity Aromatics:
- 1 yellow onion, quartered
- 1 lemon, halved
- Several sprigs of fresh rosemary and thyme
- 2-3 bay leaves
- For the Gravy (After Roasting):
- Pan drippings from the roasted turkey
- ¼ cup all-purpose flour (or cornstarch for a gluten-free option)
- 3-4 cups extra chicken or turkey broth
- Salt and freshly ground black pepper to taste
- A splash of dry white wine or sherry (optional, for depth of flavor)
Prepping Your Magnificent Thanksgiving Turkey: The Foundation of Flavor
- Thawing Your Turkey (if frozen): If you’re using a frozen turkey, this step is critical and requires ample time. Thaw your turkey in the refrigerator, allowing approximately 24 hours for every 4-5 pounds. For a 12-16 pound turkey, that means 3-4 days in the fridge. Place the turkey, still in its original packaging, on a tray or in a pan to catch any drips. Never thaw at room temperature for food safety reasons!
- Prepare the Brine (12-24 hours before roasting):
- In a large stockpot, combine the vegetable or chicken broth, kosher salt, granulated sugar, rosemary, thyme, black peppercorns, orange halves, lemon halves, and smashed garlic cloves.
- Bring the mixture to a boil over high heat, stirring occasionally until the salt and sugar are completely dissolved. This process extracts maximum flavor from your aromatics.
- Once dissolved, remove the pot from the heat. Allow the brine to cool completely to room temperature. This is extremely important; adding a warm turkey to warm brine can create a food safety hazard. You can speed up the cooling process by placing the pot in an ice bath in your sink.
- Once cooled, pour the brine into a large brining bag, food-grade bucket, or an extra-large stockpot. Add the gallon of cold water (or enough to ensure the turkey will be fully submerged).
- Remove the turkey from its packaging, making sure to extract the neck and giblets from both cavities (usually in a small paper bag). You can save these for gravy or discard them. Rinse the turkey thoroughly inside and out under cold running water.
- Gently lower the turkey into the cooled brine, ensuring it is completely submerged. If parts float, you can use a plate or a weighted bowl to keep it under.
- Cover the brining vessel and refrigerate for 12-24 hours. I find 18-20 hours is usually perfect for a turkey of this size, resulting in incredibly juicy meat. Don’t brine for too long, or your turkey can become overly salty.
- Prepare the Aromatic Compound Butter (While turkey is brining, or just before roasting):
- In a medium bowl, combine the softened unsalted butter with the minced garlic, finely chopped rosemary, thyme, and sage, orange zest, ½ teaspoon kosher salt, and ¼ teaspoon black pepper.
- Using a fork or a rubber spatula, mix all ingredients together until well combined and uniform. The butter needs to be quite soft for easy application. Set aside at room temperature if using immediately, or cover and refrigerate if preparing in advance (let it come to room temperature before use).
- Prepare the Turkey for Roasting (The day of, after brining):
- Remove the brined turkey from the refrigerator. Carefully lift it out of the brine and discard the brine. Rinse the turkey thoroughly under cold running water, both inside and out, to remove any excess salt from the brine. This step is crucial for preventing an overly salty final product.
- Pat the turkey completely dry with paper towels. I mean really dry. Inside and out. A dry skin is key to achieving that beautiful, crispy, golden-brown skin everyone loves.
- Apply the Compound Butter: Gently loosen the skin over the breast and thigh areas by carefully sliding your fingers between the skin and the meat. Be delicate to avoid tearing the skin. Spoon about two-thirds of the compound butter under the skin, pushing it evenly over the breast and thigh meat. Use the remaining butter to rub all over the exterior skin of the turkey. This butter layer under the skin is my secret weapon for a moist, flavorful breast and crispy skin.
- Stuff the Cavity with Aromatics: Loosely stuff the main cavity of the turkey with the quartered onion, lemon halves, fresh rosemary and thyme sprigs, and bay leaves. These will infuse flavor from the inside out. Do not pack it tightly if you’re not using traditional stuffing, as air circulation is important for even cooking.
- Truss the Turkey (Optional, but recommended): If you want a more compact, evenly cooked bird and a prettier presentation, you can truss the turkey. Use kitchen twine to tie the legs together, and tuck the wing tips under the body (or tie them). This prevents the wing tips from burning and helps the turkey cook more evenly.
- Prepare the Roasting Pan: Arrange the quartered onions, large chunks of carrots, celery, and halved head of garlic in the bottom of your large roasting pan. Pour 2 cups of chicken or turkey broth (or water) over the vegetables. This aromatic bed will protect the turkey from direct heat, add moisture to the oven, and become the flavor base for your gravy.
- Place a V-rack or sturdy roasting rack on top of the vegetables in the pan. Position the prepared turkey, breast-side up, on the rack.
The Grand Roast: Achieving Perfection for Your Thanksgiving Turkey
This is where the magic happens! Roasting a turkey to perfection involves a balance of heat, timing, and careful monitoring. My goal is always a deeply golden, crispy skin and incredibly juicy meat.
- Preheat Your Oven: Preheat your oven to a blazing 425°F (220°C) with a rack in the lowest position. Starting at a high temperature helps to crisp up the skin quickly.
- Initial High-Heat Roast: Place the turkey in the preheated oven. Roast at 425°F (220°C) for 30 minutes. During this initial burst of heat, the skin will start to brown beautifully, and the fat will render, contributing to that sought-after crispiness.
- Lower the Temperature and Continue Roasting: After 30 minutes, reduce the oven temperature to 325°F (160°C). Do not open the oven door during this transition. Continue roasting, budgeting approximately 12-15 minutes per pound for an unstuffed turkey (this estimate can vary based on oven calibration and turkey shape). For a 12-16 pound turkey, total roasting time will likely be between 2.5 to 3.5 hours after the initial high-heat roast.
- Basting (Optional, but I love doing it): While the compound butter under the skin does most of the work to keep the breast moist, I still like to baste my turkey every 45-60 minutes with the pan drippings from the bottom of the roasting pan. This helps to promote even browning and adds another layer of flavor to the skin. If your drippings start to look too dark or burnt, add another cup of broth or water to the pan.
- Monitor and Tent for Even Browning: If the turkey skin, particularly the breast or wing tips, starts to brown too quickly, loosely tent those areas with aluminum foil. This will protect them from over-browning while the rest of the turkey catches up.
- Check for Doneness with a Meat Thermometer: This is the most crucial step for a safe and perfectly cooked turkey. Approximately 30-45 minutes before the estimated finish time, start checking the internal temperature using a reliable meat thermometer.
- Insert the thermometer into the thickest part of the thigh, making sure it doesn’t touch the bone. The temperature here should read 175°F (80°C).
- Then, check the thickest part of the breast, avoiding the bone. The breast temperature should read 165°F (74°C).
- If you’ve stuffed the turkey with traditional stuffing (though I recommend not doing so in the bird itself for safety), the stuffing itself should also reach 165°F (74°C). For this recipe, since we are only using aromatics, the internal turkey temperature is your primary concern.
- Cook until these temperatures are consistently met. Remember that the temperature will rise slightly during resting.
Crafting the Silky Gravy: A Golden Opportunity
While your magnificent turkey rests, it’s the perfect time to transform those flavorful pan drippings into a rich, luscious gravy. This is a must-have for any Thanksgiving table!
- Deglaze and Collect Drippings:
- Carefully remove the turkey and the roasting rack from the pan, transferring the turkey to a carving board or large platter to rest.
- Place the roasting pan directly over two burners on your stovetop over medium heat.
- Using a wooden spoon or spatula, scrape up all the delicious browned bits (fond) from the bottom of the pan. These bits are pure flavor!
- If you like, add a splash of dry white wine or sherry (about ¼ cup) to deglaze the pan further. Let it simmer for a minute, scraping.
- Carefully pour the pan drippings and vegetables through a fine-mesh sieve into a large heatproof measuring cup or fat separator. Press on the solids to extract as much liquid as possible. Discard the spent vegetables and aromatics.
- Separate the Fat: Allow the drippings to sit for a few minutes. The fat will rise to the top. Skim off most of the fat using a spoon or use a fat separator. You’ll want to reserve about ¼ cup of the fat for making the roux. If you don’t have enough fat, you can use unsalted butter.
- Make the Roux:
- In a medium saucepan, melt the reserved ¼ cup of turkey fat (or butter) over medium heat.
- Once melted and shimmering, whisk in ¼ cup of all-purpose flour. Cook, stirring constantly with a whisk, for 1-2 minutes until the mixture forms a smooth paste (a roux) and turns a light golden-brown color. This cooks out the raw flour taste.
- Whisk in Liquids: Gradually whisk in the de-fatted turkey drippings (you should have about 1.5-2 cups) and then slowly add 3-4 cups of extra chicken or turkey broth. Whisk continuously to prevent lumps from forming.
- Simmer and Season: Bring the gravy to a simmer over medium heat, stirring occasionally. Let it simmer for 5-10 minutes, or until it thickens to your desired consistency. If it’s too thick, add more broth; if too thin, let it simmer longer.
- Taste and Adjust: Taste the gravy and season generously with salt and freshly ground black pepper. This is your moment to make it perfect!
- Strain (Optional, for extra smoothness): For an exceptionally silky gravy, you can strain it through a fine-mesh sieve again before serving. I often do this for a truly refined texture.
Resting and Carving for a Flawless Serve
You’ve put in all the hard work, now don’t rush the final steps! Resting and proper carving are paramount to a delicious and presentable Thanksgiving Turkey.
- Rest Your Turkey: This step is non-negotiable! Once your turkey reaches its target temperature, transfer it to a large carving board or platter. Loosely tent it with aluminum foil and allow it to rest for at least 20-30 minutes, or even up to 45 minutes for a larger bird. This resting period allows the juices to redistribute throughout the meat, resulting in an incredibly moist and tender turkey. If you skip this, all those delicious juices will run out onto your cutting board, leaving you with dry meat.
- Carve Your Turkey:
- After resting, remove the trussing string if you used it.
- First, remove the legs and thighs by cutting through the joint that connects them to the body. Separate the drumsticks from the thighs.
- Next, remove the wings in a similar fashion.
- Then, carve the breast meat. Slice down along the breastbone, guiding your knife along the rib cage until the entire breast half is removed in one piece. Repeat on the other side.
- Slice the breast meat against the grain into desired thickness. Arrange the carved turkey beautifully on a platter.
- Serve Immediately: Present your glorious Thanksgiving Turkey on a large platter, surrounded by fresh herbs for garnish if you wish. Serve with your homemade gravy on the side, ready for your guests to ladle generously over their turkey and mashed potatoes. Enjoy the fruits of your labor – this will be a Thanksgiving feast to remember!
Conclusion:
And there you have it, my friends! We’ve journeyed through what I truly believe is not just a recipe, but a promise – a promise of succulent flavors, unforgettable aromas, and a meal that will leave a lasting impression on anyone lucky enough to gather around your table. This isn’t just another dish to cook; it’s an experience waiting to unfold in your kitchen, transforming simple ingredients into something truly magical. I poured my heart into perfecting this, and I genuinely believe it delivers on every front, whether you’re a seasoned chef or a confident home cook looking to impress. The combination of its deeply savory profile, the incredible texture, and the sheer joy it brings to the palate makes it an absolute triumph. You’ll find yourself wondering how something so seemingly complex can be achieved with such straightforward steps, and that, to me, is the true beauty of this creation.
What sets this recipe apart, and why it’s an absolute must-try, lies in its meticulous balance of flavors and the incredible tenderness it consistently achieves. We’re talking about a dish that boasts a golden-crisp exterior, giving way to an unbelievably juicy and flavorful interior. Every bite is a testament to the care and attention to detail baked into its core, designed to awaken your senses and make your taste buds sing with delight. It’s designed to be approachable yet yield results that feel gourmet, making you look like a culinary superstar without the undue stress. Trust me, the aroma alone as it cooks will draw everyone into the kitchen, creating an atmosphere of warmth and anticipation that’s truly priceless. It’s the kind of dish that makes you feel proud, not just of your cooking, but of the moments it helps create. This recipe is an investment in pure, unadulterated deliciousness, and I promise you, it pays dividends in smiles and satisfied sighs.
Now, let’s talk about making this masterpiece your own, because while the core recipe is fantastic, the possibilities for customization are endless. For serving, I highly recommend pairing it with classic comfort sides like creamy mashed potatoes, a vibrant green bean casserole, or perhaps some roasted root vegetables to complement its rich flavors. A dollop of homemade cranberry sauce or a generous pour of rich gravy made from the pan drippings would elevate the experience even further. But don’t stop there! Think about seasonal variations: in the fall, incorporate apples or figs into the roasting pan for a touch of sweetness and acidity. For a lighter summer feel, serve it with a fresh herb salad. And let’s not forget the glorious leftovers! Transform them into gourmet sandwiches with a tangy aioli, create a hearty pot pie, or whip up a flavorful turkey hash for brunch. The versatility of this dish extends well beyond the initial meal, offering delicious opportunities for days to come. This particular Thanksgiving Turkey Recipe, for instance, is absolutely phenomenal when repurposed into next-day sliders with a dollop of cranberry mayo; it’s practically a new culinary adventure each time you revisit it. Or, if you’re feeling adventurous, try adding a smoky paprika rub to the skin before roasting for an extra layer of complexity, or stuff it with a wild rice and mushroom stuffing to absorb all those incredible juices. The beauty is truly in your hands.
So, my dear food enthusiasts, I implore you: don’t just read about this recipe – make it! Embrace the opportunity to create something truly special in your own kitchen. I am genuinely excited for you to experience the magic firsthand, to savor every exquisite bite, and to share this incredible dish with your loved ones. Once you’ve given it a go, I would absolutely love to hear about your experience. Did you add your own twist? What were your favorite serving companions? Did it become an instant family favorite? Please, share your stories, your photos, and your triumphs! Your feedback means the world to me, and it inspires me to continue sharing recipes that bring joy and deliciousness into your homes. Let’s build a community of enthusiastic cooks who aren’t afraid to dive in and create culinary masterpieces. Your kitchen adventure starts now, and I can’t wait to see what you create!
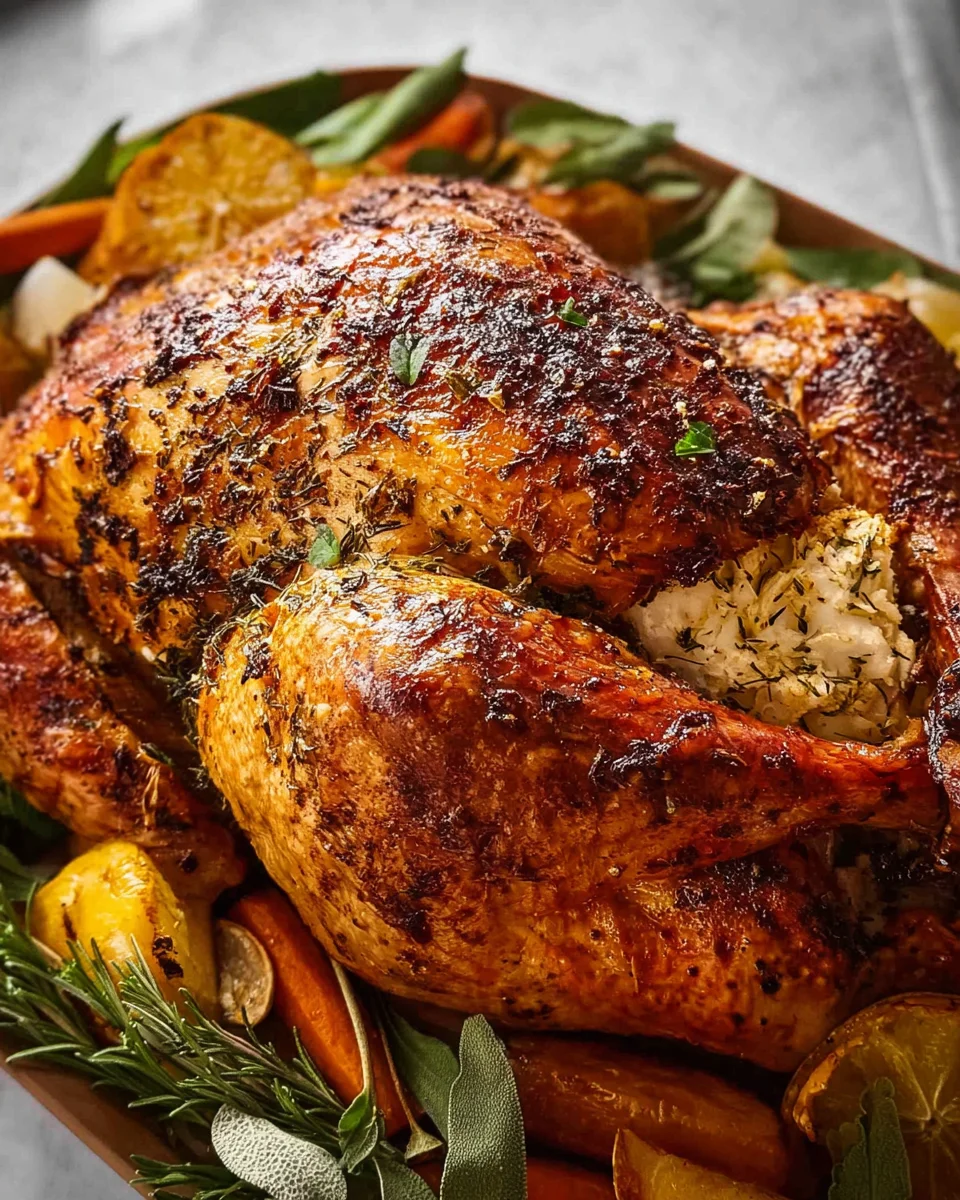
Perfect Thanksgiving Turkey Recipe – Juicy & Flavorful!
Craft the ultimate centerpiece for your Thanksgiving feast with this meticulously crafted turkey recipe. Achieve incredibly moist, tender meat and crispy, golden-brown skin, making your holiday meal truly special and unforgettable.
Ingredients
Instructions
Important Information
Nutrition Facts (Per Serving)
It is important to consider this information as approximate and not to use it as definitive health advice.
Allergy Information
Please check ingredients for potential allergens and consult a health professional if in doubt.