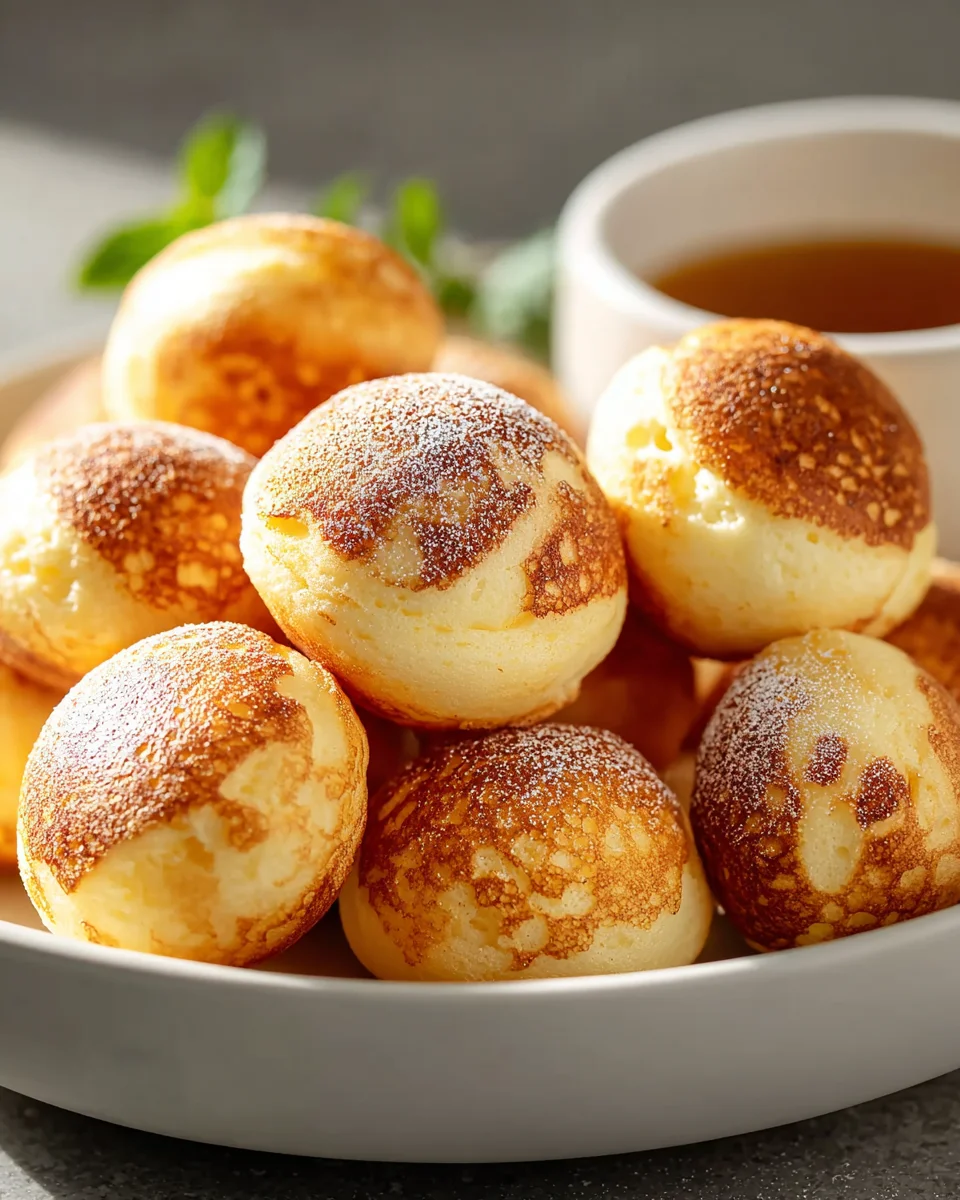
Pancake Poppers are about to transform your breakfast experience from ordinary to absolutely extraordinary! Forget the fuss of flipping individual pancakes and the sticky syrup aftermath; imagine instead a delightful collection of bite-sized, golden-brown spheres, perfectly fluffy on the inside and just crisp enough on the outside to deliver a burst of joy with every munch. While traditional pancakes have a rich and diverse history, gracing breakfast tables in various forms across cultures for thousands of years – from ancient Greek tagenites to French crêpes – this innovative, convenient iteration brings that beloved comfort food into the 21st century with unparalleled ease and fun. I find them to be an absolutely brilliant twist on a timeless classic.
Why Do People Fall Head Over Heels for These Delightful Creations?
It’s simple: they combine the classic, comforting taste of homemade pancakes with a playful, grab-and-go format that makes them ideal for busy mornings, relaxed brunch gatherings, or even a delightful sweet snack. Children adore them for their fun shape and dip-ability, while adults appreciate the reduced mess and effortless enjoyment. I promise you, once you try these incredible Pancake Poppers, you’ll wonder how you ever started your day without them. They’re not just breakfast; they’re a miniature celebration in every bite!

Ingredients:
Creating delightful Pancake Poppers starts with gathering the right ingredients. Here’s what you’ll need for a batch of about 25-30 scrumptious poppers, perfect for sharing or a truly indulgent breakfast.
- All-Purpose Flour: 1 ½ cups (approximately 180g). This is the structural backbone of our Pancake Poppers, providing that classic tender crumb. I always recommend using a good quality unbleached all-purpose flour for the best texture and flavor.
- Granulated Sugar: 2 tablespoons. Just enough to add a touch of sweetness to our poppers without making them overly sweet, allowing any toppings or fillings to shine. You can adjust this slightly to your preference; a little less if you’re planning very sweet toppings, or a little more if you like them sweeter plain.
- Baking Powder: 2 teaspoons. This is our primary leavening agent, responsible for giving our Pancake Poppers their characteristic light and fluffy texture, ensuring they puff up beautifully in the pan. Make sure your baking powder is fresh for optimal lift!
- Baking Soda: ½ teaspoon. Working in conjunction with the baking powder, and reacting with the buttermilk, baking soda adds an extra boost of tenderness and contributes to a lovely golden-brown exterior.
- Salt: ½ teaspoon. A crucial ingredient often overlooked, salt balances the sweetness and enhances all the other flavors in the batter, making our Pancake Poppers taste truly spectacular.
- Large Egg: 1, at room temperature. The egg acts as a binder, bringing all our ingredients together and adding richness and structure to the poppers. Letting it come to room temperature helps it incorporate more smoothly into the batter.
- Buttermilk: 1 ¼ cups (approximately 300ml). Buttermilk is key for truly tender and moist pancakes. Its acidity reacts with the baking soda to create air pockets, resulting in an incredibly soft interior. If you don’t have buttermilk, you can make a quick substitute by adding 1 tablespoon of white vinegar or lemon juice to a measuring cup, then filling the rest with regular milk to 1 ¼ cups and letting it sit for 5-10 minutes until it slightly curdles.
- Unsalted Butter: 3 tablespoons, melted and slightly cooled, plus extra for greasing the pan. Melted butter adds a wonderful richness and flavor to the batter, contributing to a golden crust and tender interior for our Pancake Poppers. Make sure it’s not too hot when adding to the egg mixture, as it could scramble the egg.
- Vanilla Extract: 1 teaspoon. A touch of pure vanilla extract elevates the flavor profile, adding a warm, comforting aroma and taste that is simply irresistible.
- Optional Fillings/Toppings:
- Mini chocolate chips
- Fresh berries (blueberries, raspberries, diced strawberries)
- Chopped cooked bacon or sausage bits (for savory poppers)
- Powdered sugar for dusting
- Maple syrup, honey, or fruit compote for dipping
- Whipped cream
- Nutella or peanut butter
Preparing the Pancake Poppers Batter
The secret to perfect, fluffy Pancake Poppers lies in how you mix the batter. It’s all about gentle handling and avoiding overmixing.
- Combine Dry Ingredients: In a large mixing bowl, I start by whisking together all the dry ingredients. That’s the all-purpose flour, granulated sugar, baking powder, baking soda, and salt. I find that whisking them really well ensures that all the leavening agents and flavorings are evenly distributed throughout the flour. This means every single Pancake Popper will rise beautifully and consistently. There’s nothing worse than an unevenly risen pancake, is there? I give it a good minute or two of vigorous whisking to make sure everything is thoroughly combined.
- Whisk Wet Ingredients: In a separate, medium-sized bowl, I whisk together the wet ingredients. First, I crack in the large egg and give it a good whisk until it’s light and frothy. Then, I pour in the buttermilk, the melted and slightly cooled unsalted butter, and the vanilla extract. I whisk these vigorously until they are well combined and smooth. It’s important that the melted butter isn’t too hot, as mentioned before, otherwise, it can cook the egg, leading to an undesirable texture in your Pancake Poppers. The mixture should look homogenous and slightly pale.
- Combine Wet and Dry Mixtures: Now for the crucial step of bringing everything together! I create a well in the center of my dry ingredients. Then, I pour the entire wet mixture into that well. Using a whisk or a spatula, I gently fold the wet ingredients into the dry. The key word here is gently. I mix just until the flour streaks disappear. It’s absolutely vital not to overmix the batter. Overmixing develops the gluten in the flour too much, which will result in tough, chewy Pancake Poppers, rather than the light and tender ones we’re aiming for. It’s perfectly fine, and even desirable, to have a few small lumps in the batter. Those lumps will mostly disappear during the resting period.
- Rest the Batter: Once the batter is just combined, I cover the bowl loosely with plastic wrap or a clean kitchen towel and let it rest on the counter for about 10-15 minutes. This resting period is a game-changer for really great Pancake Poppers. It allows the gluten to relax, the flour to fully hydrate, and the baking powder to start working its magic, producing those tiny bubbles that contribute to an incredibly fluffy texture. During this time, you’ll notice the batter might thicken slightly and become even more luscious.
Cooking Your Delicious Pancake Poppers
This is where the magic happens! To achieve those perfectly spherical, golden-brown Pancake Poppers, I highly recommend using an Aebleskiver pan (a Danish pancake ball pan) or a Takoyaki pan. If you don’t have one, don’t worry, you can still make smaller, thicker pancakes on a griddle, though they won’t be perfectly round poppers.
- Preheat and Prepare Your Pan: I place my Aebleskiver or Takoyaki pan over medium-low heat. It’s crucial to preheat the pan properly and evenly. I let it warm up for about 3-5 minutes. To test if it’s ready, I flick a few drops of water onto the surface; if they sizzle and evaporate immediately, the pan is good to go. Once heated, I lightly brush each well of the pan with a little extra melted butter or a neutral cooking oil. You don’t need too much, just enough to prevent sticking and encourage a beautiful golden crust. I sometimes use a folded paper towel dipped in oil to quickly swipe each well, ensuring even coverage.
- Fill the Wells: Once the pan is ready and lightly oiled, I pour the prepared Pancake Poppers batter into each well, filling them about two-thirds to three-quarters full. I use a small ladle or a squeeze bottle for this, as it gives me more control and helps prevent spills. Be careful not to overfill, as the poppers will expand significantly as they cook. Overfilling can lead to them spilling over the edges and not forming perfect spheres.
- Add Optional Fillings (Now’s the Time!): This is the exciting part! If you’re using fillings like mini chocolate chips, blueberries, or small pieces of cooked bacon, now is the ideal time to add them. I sprinkle or place a few pieces of your chosen filling directly into the center of each batter-filled well, right after pouring the batter. As the poppers start to cook, the batter will rise around the filling, encasing it perfectly inside your delicious Pancake Poppers.
- The First Turn: After about 2-3 minutes, depending on your heat and pan, the edges of the Pancake Poppers batter will start to set, and small bubbles will appear on the surface. The bottom should be a lovely golden brown. This is the moment for the first turn. I use a wooden skewer, a chopstick, or two small spatulas to carefully loosen each popper and turn it about one-quarter of the way around. The goal is to rotate them just enough so that the uncooked batter flows into the newly exposed, empty part of the well, beginning to form the spherical shape.
- Adding More Batter (Optional, for Extra Roundness): For truly spherical and larger Pancake Poppers, once you’ve done the first quarter turn and the uncooked batter has flowed, you can add a tiny dollop more fresh batter into the wells on top of the already partially cooked poppers. This helps fill out the sphere even further and ensures a beautiful, plump shape. This step is optional but highly recommended for the best results.
- Continue Turning and Cooking: Now, I continue to turn the Pancake Poppers gradually, a quarter turn at a time, every 1-2 minutes. The aim is to slowly rotate them, allowing each side to cook evenly and brown beautifully, until they have formed a complete ball. This gentle, continuous rotation ensures they cook through to the center without burning the exterior. The process should take about 6-10 minutes in total for each batch, depending on how quickly your pan heats and holds temperature. I adjust the heat as needed to prevent burning; if they’re browning too quickly, I’ll reduce the heat slightly.
- Check for Doneness: To ensure your Pancake Poppers are cooked all the way through, I gently press on one with a skewer or toothpick. If it springs back, it’s likely done. For an even more precise check, you can insert a toothpick into the center of a popper; if it comes out clean, they are ready. They should be uniformly golden brown on all sides and feel firm but springy to the touch.
- Remove and Repeat: Once fully cooked, I carefully remove the golden-brown Pancake Poppers from the pan using my skewer or a small fork. I transfer them to a wire rack set over a baking sheet to keep them warm in a low oven (around 200°F / 95°C) while I cook the remaining batter. Before starting a new batch, I make sure to re-grease the pan lightly if needed.
Serving and Customizing Your Pancake Poppers
Your beautiful batch of Pancake Poppers is ready to be devoured! These little golden spheres are incredibly versatile and can be enjoyed in countless ways, making them perfect for breakfast, brunch, or even a fun dessert.
- Serve Immediately: For the absolute best experience, I always recommend serving Pancake Poppers fresh off the pan. They are at their peak when they’re warm, fluffy, and slightly crispy on the outside. Arrange them artfully on a platter for a lovely presentation, especially if you have a variety of fillings or toppings.
- Classic Toppings: The simplest and often most satisfying way to enjoy these is with a dusting of powdered sugar. I use a small sieve to gently sprinkle it over the warm poppers, creating a beautiful snowy effect. A generous drizzle of pure maple syrup or honey is also a timeless choice that perfectly complements the rich flavor of the poppers. For a bit of creamy decadence, a dollop of freshly whipped cream is always a hit.
- Fruitful Delights: Fresh fruit adds a burst of freshness and color. I love serving them with a side of mixed berries – blueberries, raspberries, and sliced strawberries – or even a quick fruit compote made from simmering berries with a little sugar and lemon juice. Sliced bananas are also fantastic, perhaps with a sprinkle of cinnamon.
- Chocolate Indulgence: If you included chocolate chips in your Pancake Poppers, leaning into that chocolatey goodness is a must. A drizzle of chocolate syrup or a warm ganache can take them to the next level. Nutella is another fantastic option for dipping, especially if you have any hazelnut lovers at your table.
- Savory Surprises: Don’t limit your Pancake Poppers to just sweet! If you opted for savory fillings like bacon bits or sausage, serve them with a side of hot sauce, a sprinkle of fresh chives, or even a dollop of sour cream. These savory poppers make a fantastic appetizer or a unique breakfast side dish. You could even create a savory dipping sauce like a maple-mustard glaze.
- Dipping Bar Fun: For a really interactive and fun meal, especially for kids or a brunch gathering, I like to set up a “Pancake Poppers Dipping Bar.” Arrange small bowls of various syrups, sauces, and toppings like sprinkles, chopped nuts, mini marshmallows, and different fruit options. Let everyone customize their own poppers! This makes for a memorable and highly enjoyable culinary experience, ensuring there’s something for everyone’s taste.
- Storage and Reheating: If by some miracle you have any leftover Pancake Poppers, they store quite well. Once completely cooled, I place them in an airtight container and refrigerate them for up to 3 days. To reheat, you can pop them in a toaster oven or air fryer at 350°F (175°C) for 5-7 minutes until warmed through and slightly crispy again. A microwave will work, but they might lose some of their crispness. Reheating them gently will help maintain their lovely texture, so you can enjoy these delightful treats even beyond the day they were made.
- Experiment and Enjoy! The beauty of Pancake Poppers is their versatility. Feel free to experiment with different extracts, spices (like a pinch of nutmeg or cardamom in the batter), or even citrus zests to create your own signature flavor profiles. The most important thing is to have fun with the process and savor every delicious bite! These little bundles of joy are sure to bring smiles to everyone who tries them.
Conclusion:
Well, we’ve reached the end of our delightful journey into the world of these incredible breakfast bites, and I truly hope you’re as excited as I am to whip up a batch. What makes this particular recipe an absolute game-changer, you ask? It’s the perfect blend of simplicity, fun, and undeniable deliciousness that transforms an ordinary breakfast into something truly special. These aren’t just any ordinary pancakes; they are perfectly portioned pockets of fluffy goodness that are incredibly easy to make, even for the most novice baker. They eliminate the mess of flipping large pancakes, offering a bite-sized experience that’s perfect for little hands and adults alike. Plus, the sheer joy of popping one of these warm, golden spheres into your mouth is an experience in itself, making them an instant crowd-pleaser for any morning gathering or lazy weekend brunch. I genuinely believe this recipe is a must-try because it takes the beloved classic and makes it even more accessible and enjoyable, guaranteeing smiles around the table every single time.
Now, let’s talk about taking your creations to the next level with some amazing serving suggestions and creative variations. While these delightful morsels are fantastic straight out of the pan, a drizzle of warm maple syrup is always a classic, comforting choice. But don’t stop there! Think about pairing them with a dollop of fresh whipped cream and a sprinkle of berries for an elegant touch, or a generous scoop of vanilla ice cream for a truly decadent dessert experience. For those who prefer a more savory breakfast, I highly recommend serving them alongside crispy bacon, scrambled eggs, or a side of breakfast sausage; the sweet and savory combination is simply divine. A bowl of Greek yogurt topped with a few of these delightful morsels and some granola also makes for a surprisingly satisfying and balanced meal. And for a truly whimsical presentation, consider a platter with various dipping sauces like chocolate sauce, caramel, or even a fruit compote. The possibilities are truly endless, allowing you to tailor each serving to your specific cravings.
Speaking of tailoring, the versatility of this recipe extends brilliantly to variations as well. Feel free to unleash your inner chef! Imagine adding a handful of mini chocolate chips or fresh blueberries into the batter before cooking for a burst of flavor in every bite. Sliced bananas and a pinch of cinnamon can transform them into a comforting, tropical treat. For those who love a bit of texture, finely chopped nuts like pecans or walnuts can be a wonderful addition. And if you’re feeling adventurous, a sprinkle of orange zest or a dash of vanilla extract can elevate the aroma and taste to new heights. You can also easily adapt this recipe to suit different dietary needs; swap out regular flour for your favorite gluten-free blend, or use plant-based milk and an egg substitute for a dairy-free and vegan-friendly version. Don’t be afraid to experiment with different flavor combinations to discover your family’s new favorite. This recipe is incredibly forgiving and encourages creativity, making it a perfect canvas for your culinary imagination.
So, what are you waiting for? I sincerely encourage you to roll up your sleeves, gather your ingredients, and give this recipe a try this weekend. I promise you won’t regret it. The joy of seeing these perfect, golden spheres emerge, and the incredible taste, will make you wonder why you hadn’t tried them sooner. There’s something uniquely satisfying about creating something so delicious and visually appealing from scratch. These Pancake Poppers are more than just a breakfast item; they are an experience, a delightful bite that brings smiles and creates wonderful memories. Once you’ve enjoyed your own batch, I would absolutely love to hear about your experience! Did you stick to the classic toppings, or did you get creative with your own variations? What was your favorite part of making them? Please share your stories, your photos, and your tips in the comments below. Your insights not only inspire me but also help other readers embark on their own delicious journey.
Ultimately, this recipe is about embracing the joy of cooking and sharing delicious food with loved ones. It’s simple, it’s fun, and it’s incredibly tasty. I am confident these will become a beloved staple in your breakfast repertoire. Happy cooking, and enjoy every single bite!
Pancake Poppers Recipe: Easy, Fun Breakfast Bites!
Transform your breakfast with Pancake Poppers! These delightful, bite-sized golden-brown spheres are perfectly fluffy inside and crisp outside. An innovative twist on classic pancakes, they offer a convenient, fun, and mess-free way to enjoy a beloved comfort food, perfect for any morning or brunch.
Ingredients
Instructions
Important Information
Nutrition Facts (Per Serving)
It is important to consider this information as approximate and not to use it as definitive health advice.
Allergy Information
Please check ingredients for potential allergens and consult a health professional if in doubt.