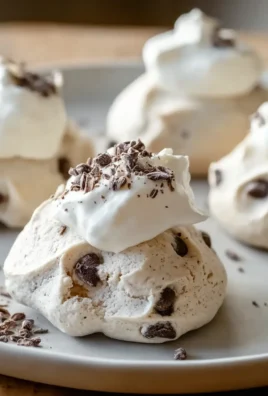
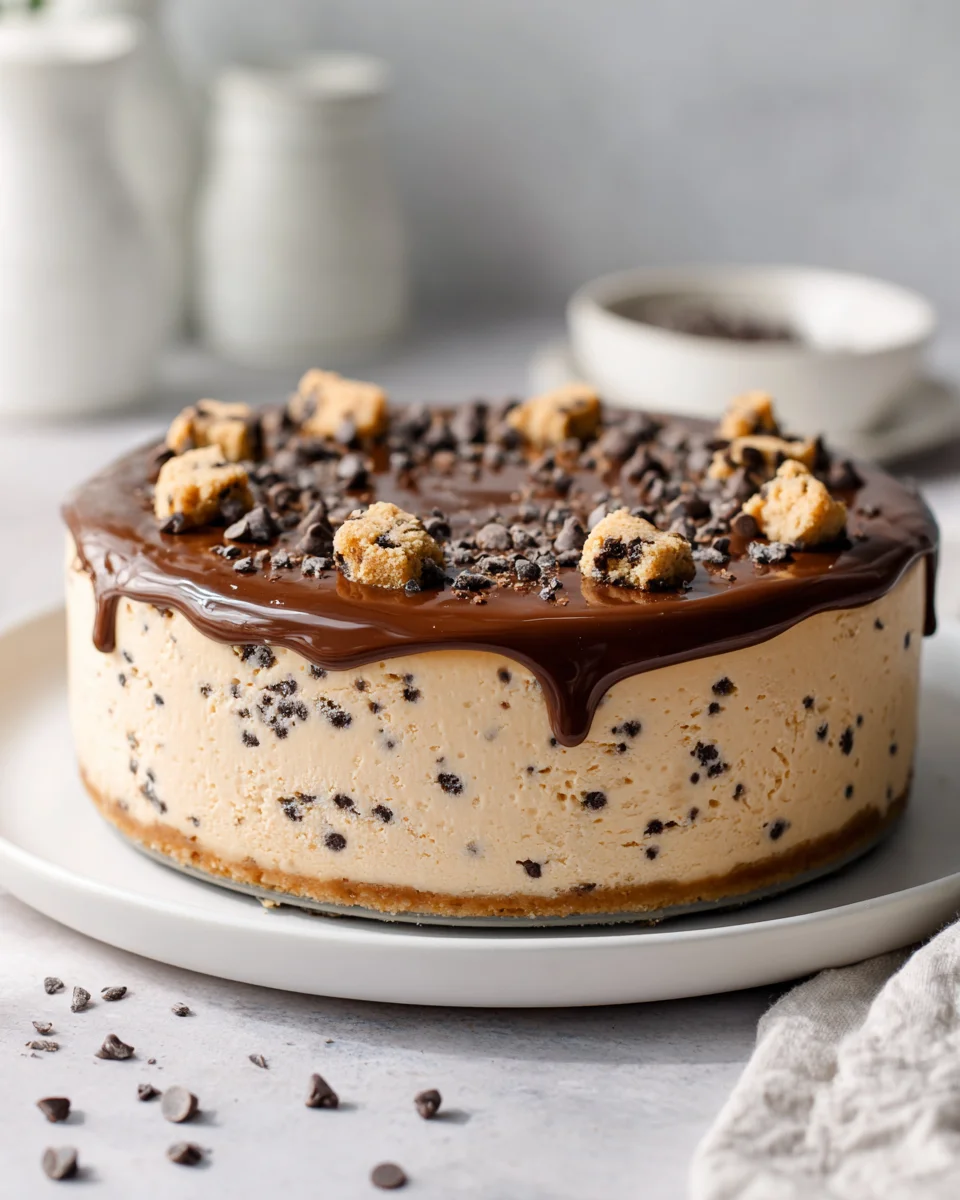
No Bake Cookie Dough Cheesecake
Oh my goodness, get ready to meet your new favorite dessert! I’m so excited to share my recipe for No Bake Cookie Dough Cheesecake because, let’s be honest, who doesn’t adore cookie dough? And cheesecake? And anything “no bake”? This particular creation is truly special because it brings together everything we love: the creamy, tangy indulgence of a classic cheesecake, but without ever needing to turn on your oven, combined with generous, delicious chunks of edible cookie dough swirled throughout. It’s truly the best of both worlds!
You are absolutely going to love this recipe, especially if you’re looking for an impressive dessert that’s ridiculously easy to make. Imagine: no fussy water baths, no cracked tops, just pure, unadulterated deliciousness that comes together in a snap and chills to perfection. It’s a fantastic choice for summer gatherings, potlucks, or simply when you’re craving something sweet and satisfying without all the fuss. Each bite delivers that dreamy cheesecake smoothness perfectly complemented by the familiar, comforting texture and sweetness of cookie dough. Trust me, it’s a showstopper that will have everyone asking for seconds!

Ingredient Notes
Making a delicious No Bake Cookie Dough Cheesecake starts with understanding the role each ingredient plays. I’ve broken down the key players and shared some of my favorite tips and potential substitutions to help you create this show-stopping dessert.
- For the Graham Cracker Crust:
- Graham Cracker Crumbs: These form the sturdy, sweet base of our cheesecake. I find about 1 ½ cups of fine crumbs are perfect. You can easily make your own by pulsing whole graham crackers in a food processor until fine.
- Melted Unsalted Butter: This is the binding agent for our crust, holding all those crumbs together. Unsalted butter gives you control over the overall saltiness, but salted works in a pinch – just consider reducing any added salt in the crust if you use it.
- Granulated Sugar: A little bit of sugar in the crust enhances its sweetness and helps achieve that perfect crunch.
- Substitution Tip: If you’re not a fan of graham crackers, feel free to use crushed Oreo cookies (cream filling included!) for a chocolatey crust, or even digestive biscuits. Both make excellent alternatives.
- For the Edible Cookie Dough:
- All-Purpose Flour: This is a crucial ingredient, but one that requires a little extra attention. Since we’re not baking the cookie dough, it’s essential to heat-treat the flour first to kill any potential bacteria. Don’t skip this step!
- Unsalted Butter: Room temperature butter is key for a smooth, creamy cookie dough.
- Brown Sugar (Packed) & Granulated Sugar: The combination of these two sugars gives our cookie dough its classic chewy texture and rich flavor. Brown sugar adds moisture and a hint of molasses.
- Vanilla Extract: Pure vanilla extract brings warmth and depth to the cookie dough flavor.
- Milk (any kind): Just a tablespoon or two helps bring the dough together to the right consistency. Whole milk, 2%, or even a non-dairy alternative will work.
- Mini Chocolate Chips: I prefer mini chocolate chips for the cookie dough layer as they distribute more evenly throughout the cheesecake, ensuring every bite gets that satisfying chocolatey crunch.
- Substitution Tip: Feel free to experiment with different types of chocolate chips – milk, semi-sweet, dark, or even white chocolate. You could also add a pinch of sea salt to the dough to enhance the flavors.
- For the No-Bake Cheesecake Filling:
- Full-Fat Cream Cheese: This is the star of our cheesecake! Make sure it’s full-fat and, most importantly, at room temperature. This will ensure a super smooth, lump-free filling. Don’t try to rush it straight from the fridge; it won’t incorporate properly.
- Powdered Sugar (Confectioners’ Sugar): Powdered sugar dissolves easily into the cream cheese, giving us a silky smooth texture without any graininess.
- Vanilla Extract: Again, pure vanilla extract enhances the rich, creamy flavor of the cheesecake.
- Heavy Cream (Cold): This is what gives our no-bake cheesecake its light, airy, yet stable texture. It’s crucial that the heavy cream is very cold when you whip it – this helps it whip up quickly and hold its shape. Do not use half-and-half or light cream, as they won’t whip properly.
- Substitution Tip: While some people try to use lower-fat cream cheese, I highly recommend sticking with full-fat for the best texture and flavor in a no-bake cheesecake. It makes a significant difference.
Step-by-Step Instructions
Let’s get cooking (or, rather, no-cooking!) and put together this amazing No Bake Cookie Dough Cheesecake. Follow these steps carefully, and you’ll have a showstopper dessert in no time.
- Prepare the Crust:
- In a medium bowl, combine the graham cracker crumbs, melted butter, and granulated sugar. Mix until the crumbs are evenly moistened.
- Press the mixture firmly into the bottom of a 9-inch springform pan. You can use the bottom of a glass or a flat measuring cup to get an even, compact layer.
- Place the crust in the refrigerator to chill while you prepare the other components.
- Make the Edible Cookie Dough:
- Heat-Treat the Flour: This step is critical for food safety. Spread the flour onto a microwave-safe plate or baking sheet. Microwave on high for 1 minute, stirring every 15-20 seconds, until it reaches 160°F (71°C) on an instant-read thermometer. Alternatively, bake in a preheated oven at 300°F (150°C) for 5-7 minutes, stirring halfway, until it reaches the same temperature. Let it cool completely.
- In a medium bowl, cream together the softened unsalted butter, brown sugar, and granulated sugar until light and fluffy.
- Stir in the vanilla extract.
- Gradually add the cooled, heat-treated flour, mixing until just combined.
- Mix in the milk, one tablespoon at a time, until the dough comes together to a soft, pliable consistency.
- Fold in the mini chocolate chips.
- Set aside about half of the cookie dough (you can shape it into small balls or crumbles) for the topping later. Cover the remaining dough and refrigerate briefly while you prepare the cheesecake filling.
- Prepare the Cheesecake Filling:
- In a large bowl, using an electric mixer, beat the room temperature full-fat cream cheese until smooth and creamy, about 2-3 minutes.
- Gradually add the powdered sugar and vanilla extract, continuing to beat until fully incorporated and smooth. Scrape down the sides of the bowl as needed.
- In a separate, very cold bowl (I like to chill my bowl and whisk attachment beforehand), whip the cold heavy cream on high speed until stiff peaks form. Be careful not to over-whip, or it will become grainy.
- Gently fold the whipped cream into the cream cheese mixture in two additions until just combined. Be careful not to deflate the whipped cream.
- Assemble the Cheesecake:
- Remove the chilled crust from the refrigerator.
- Spread about half of the cheesecake filling evenly over the crust.
- Crumble or dollop about half of the prepared edible cookie dough (from the portion you set aside earlier) over the first cheesecake layer.
- Carefully spread the remaining cheesecake filling over the cookie dough layer, smoothing the top with an offset spatula or the back of a spoon.
- Chill Thoroughly:
- Cover the springform pan loosely with plastic wrap.
- Refrigerate the cheesecake for a minimum of 6-8 hours, but preferably overnight. This chilling time is absolutely crucial for the cheesecake to set properly and become firm enough to slice cleanly.
- Garnish and Serve:
- Once the cheesecake is fully set, carefully remove it from the springform pan.
- Crumble or arrange the remaining edible cookie dough (the portion you reserved earlier) on top of the cheesecake. You can also sprinkle with extra mini chocolate chips.
- Slice with a hot, clean knife for best results and serve!
Tips & Suggestions
Achieving the perfect No Bake Cookie Dough Cheesecake is all about a few key techniques. Here are my go-to tips and suggestions to ensure your cheesecake turns out absolutely fabulous every time!
- Room Temperature Ingredients are Non-Negotiable: This is probably the most important tip for any cheesecake, especially a no-bake one. Make sure your full-fat cream cheese and butter for the cookie dough are at true room temperature. Cold cream cheese will result in a lumpy filling, no matter how much you beat it. For butter, it should be soft enough to indent with your finger without melting.
- Don’t Skip Heat-Treating the Flour: I cannot stress this enough! Raw flour can contain bacteria that can make you sick. A quick zap in the microwave or a few minutes in the oven makes it completely safe for consumption in your edible cookie dough. Let it cool completely before adding it to your other cookie dough ingredients.
- Whip Your Heavy Cream Cold: For the best volume and stability, ensure your heavy cream is very cold straight from the fridge. I also like to chill my mixing bowl and whisk attachment in the freezer for 10-15 minutes before whipping. This helps the cream whip up faster and achieve those perfect stiff peaks.
- Fold, Don’t Stir, the Whipped Cream: When combining the whipped cream with the cream cheese mixture, use a gentle folding motion with a spatula. You want to incorporate them just until no streaks remain. Over-mixing will deflate the air you’ve worked so hard to incorporate, resulting in a denser, less airy cheesecake.
- Chill Time is Your Best Friend: I know it’s hard to wait, but the extended chilling time (minimum 6-8 hours, preferably overnight) is absolutely essential for a no-bake cheesecake to properly set. This allows the cream cheese and whipped cream to firm up and create that beautiful, sliceable texture. Rushing it will lead to a messy, unset dessert.
- Use a Springform Pan: While technically you could make this in a regular pie dish, a springform pan is designed to make removing the cheesecake incredibly easy without damaging the sides. If you don’t have one, lining a regular pan with parchment paper slings can help, but a springform is highly recommended for best results.
- For Clean Slices: Dip a sharp knife into hot water, wipe it clean, and then make your cut. Repeat this process for each slice. This will help you get those perfectly clean, Instagram-worthy slices of cheesecake.
- Customize Your Cookie Dough: Feel free to get creative with your edible cookie dough! Swap out mini chocolate chips for regular-sized ones, add sprinkles, or even a different type of chip like peanut butter or white chocolate.
Storage
Properly storing your No Bake Cookie Dough Cheesecake will ensure it stays fresh and delicious, allowing you to enjoy it for days or even save some for later. Here’s how I recommend storing this delightful dessert.
- In the Refrigerator:
- This cheesecake should always be stored in the refrigerator due to its dairy-based filling.
- Make sure it’s tightly covered with plastic wrap or stored in an airtight container. This prevents it from absorbing odors from other foods in the fridge and keeps it from drying out.
- When stored correctly, your No Bake Cookie Dough Cheesecake will last for 3-5 days in the refrigerator.
- If you have leftover slices, it’s best to place them in an airtight container rather than leaving the whole cheesecake exposed.
- In the Freezer:
- Yes, you can freeze this cheesecake! It’s a great option if you want to make it ahead of time or save portions for a later date.
- For Freezing Slices: Place individual slices on a plate or small baking sheet and freeze until firm (about 1-2 hours). Once firm, wrap each slice tightly in plastic wrap, then an additional layer of aluminum foil. Place the wrapped slices in a freezer-safe bag or container.
- For Freezing a Whole Cheesecake: After the cheesecake is fully set and firm, remove it from the springform pan. Place the cheesecake on a sturdy freezer-safe plate or cardboard round. Wrap the entire cheesecake tightly in several layers of plastic wrap, followed by a layer of aluminum foil.
- Freezer Duration: The cheesecake can be stored in the freezer for up to 1-2 months. While it might still be safe to eat beyond this, the quality (texture and flavor) may start to degrade.
- Thawing: To thaw frozen cheesecake slices, simply unwrap them and place them on a plate in the refrigerator for a few hours until thawed. For a whole cheesecake, unwrap it and let it thaw in the refrigerator overnight. I don’t recommend thawing at room temperature as it can affect the texture.
- Always allow the cheesecake to thaw completely in the refrigerator before serving for the best taste and texture.
Final Thoughts
And there you have it – your very own masterpiece! I truly hope you’ve enjoyed creating this incredible No Bake Cookie Dough Cheesecake as much as I love sharing it with you. What makes this recipe an absolute game-changer? It’s the perfect blend of creamy, dreamy cheesecake and irresistible cookie dough, all without ever needing to turn on your oven. Seriously, how fantastic is that?
This isn’t just any dessert; it’s a showstopper that requires minimal effort but delivers maximum impact. Whether you’re whipping it up for a special occasion, a casual get-together, or simply to treat yourself (you totally deserve it!), the No Bake Cookie Dough Cheesecake is guaranteed to bring smiles and satisfy even the most ardent sweet tooth. Go ahead, take a slice, savor every bite, and revel in the joy of creating something so utterly delicious and delightfully easy!

No Bake Cookie Dough Cheesecake: Easy & Delicious Dessert
- Total Time: 30 minutes
- Yield: 8 servings 1x
Description
Indulge in the creamy, tangy delight of No Bake Cookie Dough Cheesecake, featuring chunks of edible cookie dough swirled throughout. This easy-to-make dessert is perfect for any gathering or when you’re craving something sweet without the fuss.
Ingredients
- 1 ½ cups Graham Cracker Crumbs
- ½ cup Melted Unsalted Butter
- 2 tablespoons Granulated Sugar
- 1 cup All-Purpose Flour (heat-treated)
- ½ cup Unsalted Butter (room temperature)
- ½ cup Brown Sugar (packed)
- ¼ cup Granulated Sugar
- 1 teaspoon Vanilla Extract
- 2 tablespoons Milk (any kind)
- ½ cup Mini Chocolate Chips
- 8 oz Full-Fat Cream Cheese (room temperature)
- 1 cup Powdered Sugar (Confectioners' Sugar)
- 1 teaspoon Vanilla Extract
- 1 cup Heavy Cream (cold)
Instructions
- Prepare the Crust: In a medium bowl, combine the graham cracker crumbs, melted butter, and granulated sugar. Mix until the crumbs are evenly moistened.
- Press the mixture firmly into the bottom of a 9-inch springform pan. You can use the bottom of a glass or a flat measuring cup to get an even, compact layer.
- Place the crust in the refrigerator to chill while you prepare the other components.
- Make the Edible Cookie Dough: Heat-Treat the Flour: Spread the flour onto a microwave-safe plate or baking sheet. Microwave on high for 1 minute, stirring every 15-20 seconds, until it reaches 160°F (71°C). Let it cool completely.
- In a medium bowl, cream together the softened unsalted butter, brown sugar, and granulated sugar until light and fluffy.
- Stir in the vanilla extract.
- Gradually add the cooled, heat-treated flour, mixing until just combined.
- Mix in the milk, one tablespoon at a time, until the dough comes together to a soft, pliable consistency.
- Fold in the mini chocolate chips.
- Set aside about half of the cookie dough for the topping later. Cover the remaining dough and refrigerate briefly while you prepare the cheesecake filling.
- Prepare the Cheesecake Filling: In a large bowl, using an electric mixer, beat the room temperature full-fat cream cheese until smooth and creamy, about 2-3 minutes.
- Gradually add the powdered sugar and vanilla extract, continuing to beat until fully incorporated and smooth.
- In a separate, very cold bowl, whip the cold heavy cream on high speed until stiff peaks form.
- Gently fold the whipped cream into the cream cheese mixture in two additions until just combined.
- Assemble the Cheesecake: Remove the chilled crust from the refrigerator.
- Spread about half of the cheesecake filling evenly over the crust.
- Crumble or dollop about half of the prepared edible cookie dough over the first cheesecake layer.
- Carefully spread the remaining cheesecake filling over the cookie dough layer, smoothing the top.
- Chill Thoroughly: Cover the springform pan loosely with plastic wrap.
- Refrigerate the cheesecake for a minimum of 6-8 hours, preferably overnight.
- Garnish and Serve: Once the cheesecake is fully set, carefully remove it from the springform pan.
- Crumble or arrange the remaining edible cookie dough on top of the cheesecake.
- Slice with a hot, clean knife for best results and serve!
- Prep Time: 30 mins
- Cook Time: 0 mins
- Category: Dessert
- Method: No-Bake
- Cuisine: American
Nutrition
- Serving Size: 1 slice
- Calories: 400
- Sugar: 30 g
- Sodium: 200 mg
- Fat: 25 g
- Saturated Fat: 15 g
- Unsaturated Fat: 5 g
- Trans Fat: 0 g
- Carbohydrates: 35 g
- Fiber: 1 g
- Protein: 5 g
- Cholesterol: 60 mg
Keywords: Ensure all ingredients are at room temperature for the best texture. Don't skip heat-treating the flour for safety. Chill the heavy cream and mixing bowl for optimal whipping.