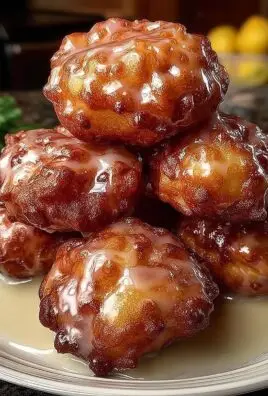
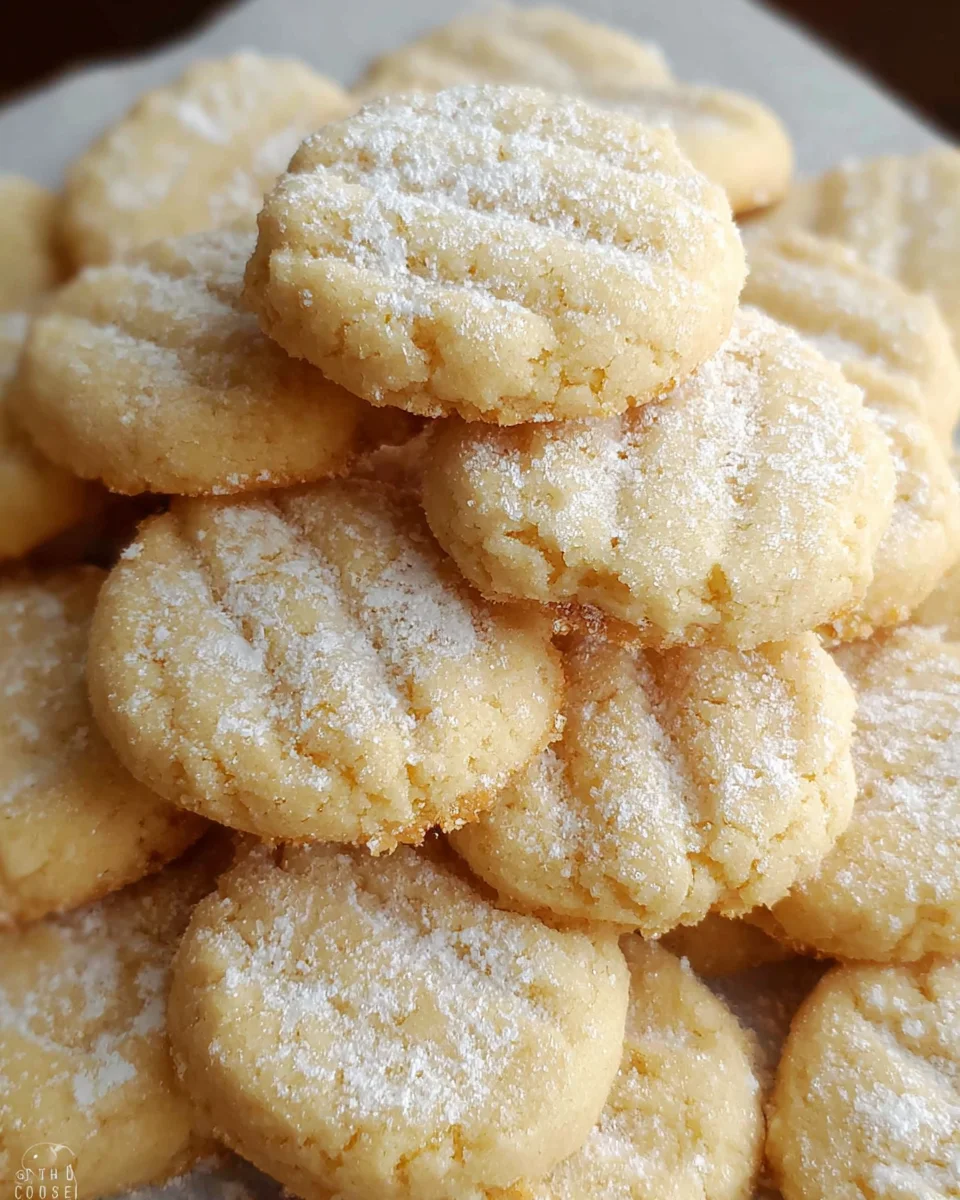
Mini Sugar Cookies are more than just a delightful bite-sized treat; they are tiny canvases for joy, celebration, and pure, unadulterated sweetness. Have you ever found yourself reaching for just one more, captivated by their charm and irresistible flavor? I certainly have! There’s something truly magical about these miniature versions of a classic, making them perfect for any occasion, from elegant tea parties to casual family gatherings, and I’m delighted to share the simple joy they bring.
The beloved sugar cookie itself boasts a rich history, with its origins often traced back to German settlers in Nazareth, Pennsylvania, in the 1700s, where they developed what was then known as the Nazareth Sugar Cookie. Over centuries, this simple yet sublime cookie evolved into the universally adored treat we know today, becoming a staple for holidays, bake sales, and comforting home baking. What makes people utterly fall in love with Mini Sugar Cookies, specifically, is their incredible versatility and undeniable cuteness. Their petite size means they bake faster, offer perfect portion control, and are incredibly fun to decorate, allowing for endless creativity. Each tender, buttery morsel delivers that familiar, comforting sweetness, often with a delicate crisp edge and a soft center, making them an instant crowd-pleaser. They evoke a sense of nostalgia, bringing back cherished memories of childhood baking and festive celebrations. Prepare to be enchanted by the ease and charm of these little wonders!

Ingredients:
- 2 ½ cups (300g) all-purpose flour: This is the foundation of our cookies. I always recommend spooning and leveling your flour rather than scooping it directly from the bag, as this prevents overpacking and adding too much flour, which can lead to dry, crumbly mini sugar cookies.
- 1 teaspoon baking powder: Just a little bit to give our mini sugar cookies a slight lift and tender texture without making them cakey.
- ½ teaspoon salt: A crucial ingredient that balances the sweetness and enhances all the other flavors in our mini sugar cookies. Don’t skip it!
- 1 cup (226g) unsalted butter, softened: Make sure your butter is truly at room temperature. It should be soft enough to leave an indentation when pressed, but not melted or greasy. This is absolutely key for creaming properly with the sugar and achieving that wonderfully tender crumb in our mini sugar cookies.
- 1 ½ cups (300g) granulated sugar: This provides the sweetness and also helps create that lovely crisp edge we adore in well-made mini sugar cookies.
- 1 large egg: At room temperature, please! A room temperature egg emulsifies better with the butter and sugar mixture, leading to a smoother, more cohesive dough. If you forget to take it out ahead of time, a quick trick is to place it in a bowl of warm (not hot!) water for 5-10 minutes.
- 2 teaspoons pure vanilla extract: For that classic, comforting sugar cookie flavor. I always suggest using a good quality extract here, as it truly makes a difference in the overall taste of your mini sugar cookies.
For the Simple Glaze (Optional, but highly recommended for decorating your Mini Sugar Cookies):
- 2 cups (240g) powdered sugar (confectioners’ sugar): Sifted, please, to avoid any lumps in your smooth glaze.
- 2-4 tablespoons milk (or lemon juice for a tangier glaze): Start with 2 tablespoons and add more a tiny bit at a time until you reach your desired consistency.
- ¼ teaspoon vanilla extract (optional): For an extra boost of flavor.
- Food coloring (gel or liquid, optional): To add vibrant hues to your adorable mini sugar cookies.
Equipment You’ll Need:
- Large mixing bowls
- Electric mixer (stand mixer with paddle attachment or hand mixer)
- Spatula
- Measuring cups and spoons
- Plastic wrap
- Rolling pin
- Small cookie cutters (for mini sugar cookies, I love using cutters that are 1-2 inches in size, like tiny stars, hearts, or circles)
- Baking sheets
- Parchment paper or silicone baking mats
- Wire cooling rack
- Piping bags and small round tips (if decorating with royal icing or doing intricate glaze work)
Phase 1: Preparing the Mini Sugar Cookie Dough
- Whisk Together Dry Ingredients: In a medium bowl, I like to whisk together my all-purpose flour, baking powder, and salt. This ensures all the dry ingredients are evenly distributed, so every single one of your mini sugar cookies gets the perfect rise and seasoning. Set this aside for now.
- Cream Butter and Sugar: In a large mixing bowl, using an electric mixer (either a stand mixer fitted with the paddle attachment or a hand mixer), I start by beating the softened unsalted butter on medium speed for about 1-2 minutes until it’s light and creamy. Then, I gradually add the granulated sugar, beating for another 2-3 minutes until the mixture is truly light, fluffy, and pale in color. This creaming process is absolutely vital; it incorporates air into the butter and sugar, which contributes significantly to the tender texture of our mini sugar cookies. Don’t rush this step!
- Add Egg and Vanilla: With the mixer on low speed, I crack in the large room temperature egg, beating just until it’s fully incorporated. Scrape down the sides of the bowl with a spatula to make sure everything is well mixed. Then, I stir in the pure vanilla extract. The mixture might look a little curdled at this point, but don’t worry, it will come together as we add the dry ingredients.
- Incorporate Dry Ingredients: Now, I gradually add the dry ingredient mixture to the wet ingredients, mixing on low speed. I’m always careful to mix only until the flour is just combined. Overmixing is the enemy of tender cookies! It develops the gluten in the flour, which can lead to tough, chewy mini sugar cookies, and we want soft, melt-in-your-mouth goodness. Once no streaks of flour remain, stop mixing.
- Chill the Dough – A Non-Negotiable Step for Perfect Mini Sugar Cookies: Divide the dough into two equal portions. Gently flatten each portion into a disk, wrap tightly in plastic wrap, and refrigerate for at least 1 hour, or preferably 2-3 hours. For best results and to prevent spreading, I sometimes even chill it overnight. This chilling process is essential for two main reasons: it allows the butter to firm up, which helps the cookies maintain their shape during baking, and it allows the flavors to meld beautifully. Do not skip chilling your mini sugar cookie dough! It makes rolling so much easier and ensures your cute little shapes hold their definition.
Phase 2: Rolling and Cutting Your Mini Sugar Cookies
- Preheat Oven and Prep Baking Sheets: About 15-20 minutes before you’re ready to bake, preheat your oven to 375°F (190°C). Line several baking sheets with parchment paper or silicone baking mats. This prevents sticking and helps ensure even baking.
- Prepare Your Work Surface: Lightly flour a clean, dry work surface and your rolling pin. Take one disk of chilled dough out of the refrigerator. If the dough is too hard, let it sit at room temperature for 5-10 minutes to soften slightly, but don’t let it get too warm.
- Roll Out the Dough: Using your floured rolling pin, roll out the dough to an even thickness of about ¼ inch (0.6 cm). I find this thickness ideal for mini sugar cookies; it’s sturdy enough to handle but still delicate when baked. Try to roll evenly to ensure consistent baking times for all your cookies.
- Cut Out Your Mini Sugar Cookies: Dip your small cookie cutters in flour before each cut to prevent sticking. Press the cutters firmly into the dough, then carefully lift them to release the shapes. Place the cut-out mini sugar cookies about 1 inch (2.5 cm) apart on your prepared baking sheets.
- Gather and Re-roll Scraps: Gently gather the dough scraps, lightly knead them together, and re-roll. You might need to chill the re-rolled dough for 10-15 minutes if it becomes too warm and sticky. I usually get 2-3 re-rolls out of my dough before it gets too tough, but I try to handle it as little as possible. The less you work the dough, the more tender your mini sugar cookies will be.
Phase 3: Baking the Perfect Mini Sugar Cookies
- Bake: Place the baking sheets in your preheated oven. Bake for 7-10 minutes. The exact baking time will depend on the thickness of your cookies and the quirks of your oven. Since we’re making mini sugar cookies, they will bake faster than larger ones, so keep a close eye on them!
- Check for Doneness: The edges of your mini sugar cookies should be lightly golden, and the centers should look set and no longer glossy. I usually look for the very edges to just start turning a very light golden brown. For a softer cookie, you can pull them out when they are still mostly pale. Be careful not to overbake! Overbaked mini sugar cookies will be hard and dry instead of tender.
- Cool on Baking Sheet: Once baked, remove the baking sheets from the oven. Let the mini sugar cookies cool on the baking sheet for 5 minutes. This allows them to firm up slightly before you move them, preventing breakage.
- Transfer to Wire Rack: After 5 minutes, carefully transfer the slightly cooled mini sugar cookies to a wire rack to cool completely. They must be completely cool before you even think about decorating them; otherwise, your beautiful glaze or icing will melt or run right off.
Phase 4: Decorating Your Adorable Mini Sugar Cookies with Simple Glaze
This simple glaze is perfect for decorating your mini sugar cookies, offering a lovely sheen and quick-drying finish.
- Make the Glaze: In a medium bowl, sift the powdered sugar. This is a very important step to avoid lumpy glaze! Gradually add 2 tablespoons of milk (or lemon juice) and the optional vanilla extract. Stir well with a spoon until smooth.
- Adjust Consistency: Add more milk, ¼ teaspoon at a time, until you reach your desired consistency. For outlining and detailed work, you’ll want a thicker consistency, like Elmer’s glue. For flooding (filling in larger areas), you’ll want a thinner consistency, more like syrup. If you accidentally add too much liquid, just add a bit more sifted powdered sugar. The ideal consistency is crucial for beautifully decorated mini sugar cookies.
- Color the Glaze (Optional): If you want to use different colors, divide the glaze into separate small bowls and add a tiny drop of gel food coloring to each, stirring until fully incorporated. Gel colors are usually preferred as they don’t add much extra liquid.
-
Decorate Your Mini Sugar Cookies:
- Method 1: Dipping. For a quick and easy approach, hold a cooled mini sugar cookie by its sides and dip the top surface into the glaze. Lift it out, let any excess drip off, and then place it glazed-side up on the wire rack to set.
- Method 2: Spreading. Use a small offset spatula or the back of a spoon to spread the glaze evenly over the top of each mini sugar cookie.
- Method 3: Piping (for more detail). Transfer the glaze to a piping bag fitted with a small round tip (like a PME #1 or #2). First, pipe an outline around the edge of the mini sugar cookie. Let this outline set for 5-10 minutes. Then, using a slightly thinner consistency of the same color glaze, “flood” the inside of the outline, gently spreading it with a toothpick or small clean brush to reach all edges.
- Add Sprinkles (Optional): If you’re adding sprinkles, do so immediately after applying the glaze, before it has a chance to set. This ensures they stick properly to your festive mini sugar cookies.
- Allow Glaze to Set: Let the decorated mini sugar cookies sit undisturbed on the wire rack for several hours, or even overnight, until the glaze is completely dry and hardened. This is important to prevent smudging and allow for easy stacking.
Tips for Success with Mini Sugar Cookies:
- Room Temperature Ingredients are Key: I cannot stress this enough! Butter, eggs, and sometimes even milk (if using in glaze) should be at room temperature. This ensures proper emulsification and a smooth, consistent dough and glaze. Cold ingredients won’t combine properly, resulting in a less cohesive texture for your mini sugar cookies.
- Don’t Overwork the Dough: After adding the flour, mix only until just combined. Overmixing develops gluten, which can lead to tough, chewy cookies. We want tender, delicate mini sugar cookies that practically melt in your mouth!
- Chilling is Crucial: Seriously, don’t skip the chilling step. It prevents spreading and helps your mini sugar cookies maintain their beautiful cut-out shapes. A minimum of one hour, but longer is always better. You can even make the dough a day or two in advance and keep it chilled.
- Roll Dough to Even Thickness: Consistency is key for even baking. If some mini sugar cookies are thicker than others, they will bake at different rates, leading to some being overbaked and some underbaked. Aim for a consistent ¼-inch thickness.
- Use Parchment Paper or Silicone Mats: These prevent sticking, help with even heat distribution, and make cleanup a breeze.
- Watch Your Oven: Every oven is different. Pay close attention to your mini sugar cookies, especially the first batch. They bake quickly due to their small size. Look for lightly golden edges.
- Cool Completely Before Decorating: Patience is a virtue here! If your mini sugar cookies are even slightly warm, your glaze will melt, run, or create a greasy mess. Ensure they are totally cool to the touch.
- Storage: Store undecorated mini sugar cookies in an airtight container at room temperature for up to 5-7 days. Decorated cookies should also be stored in an airtight container once the glaze is completely set. You can also freeze undecorated baked cookies or raw dough disks for longer storage.
Common Troubleshooting for Mini Sugar Cookies:
-
My Mini Sugar Cookies Spread Too Much!
- Possible Cause 1: Dough wasn’t chilled enough. The butter in the dough melts too quickly in the oven if it’s not firm. Solution: Ensure your dough is thoroughly chilled, ideally for at least 2 hours.
- Possible Cause 2: Butter was too soft/melted. If your butter was too warm when you started or during the mixing process, the dough’s structure will be compromised. Solution: Use truly softened, but not melted, room temperature butter. If the dough gets too warm while rolling, pop it back in the fridge for 10-15 minutes.
- Possible Cause 3: Too much flour or not enough. While less common for spreading, incorrect flour measurements can impact dough consistency. Solution: Always spoon and level your flour to ensure accuracy.
- Possible Cause 4: Oven temperature is too low. If the oven isn’t hot enough, the cookies will spread before they set. Solution: Use an oven thermometer to verify your oven’s accuracy. Preheat thoroughly.
-
My Mini Sugar Cookies are Hard and Dry!
- Possible Cause 1: Overbaked. This is the most common culprit. Small cookies bake quickly! Solution: Keep a very close eye on them. Pull them out when the edges are just barely golden and the centers look set. They will continue to set up as they cool.
- Possible Cause 2: Too much flour. Overpacking flour leads to dry dough. Solution: Spoon and level your flour.
- Possible Cause 3: Overworking the dough. Developing too much gluten makes cookies tough. Solution: Mix only until the flour streaks disappear. Handle re-rolled dough as little as possible.
-
My Mini Sugar Cookies are Sticking to the Baking Sheet!
- Possible Cause 1: No parchment paper or silicone mat. Solution: Always line your baking sheets.
- Possible Cause 2: Not cooled enough before transferring. Cookies are delicate when hot. Solution: Let them cool on the baking sheet for at least 5 minutes before attempting to move them to a wire rack.
-
My Glaze is Too Thick/Thin!
- Possible Cause: Incorrect liquid-to-powdered sugar ratio. Solution: When making the glaze, always start with less liquid and add tiny amounts (like ¼ teaspoon) until you reach the desired consistency. If it’s too thin, add more sifted powdered sugar. If it’s too thick, add a drop or two more of milk or lemon juice.
-
My Mini Sugar Cookies Don’t Have Much Flavor!
- Possible Cause: Not enough vanilla (or low-quality extract) or missing salt. Solution: Use a good quality pure vanilla extract and don’t skimp on the salt! Salt helps to enhance all the sweet flavors.
Conclusion:
Why These Cookies Will Become Your New Go-To Treat
I truly hope you’ve enjoyed following along with this recipe, because I’m absolutely convinced that what we’ve just created isn’t just another cookie; it’s a little piece of joy, an edible hug, and a testament to the fact that simple ingredients can yield truly spectacular results. This recipe isn’t merely about baking; it’s about crafting moments, whether it’s a quiet afternoon treat for yourself or a delightful surprise for loved ones. The beauty of this particular creation lies in its sheer adaptability and the consistent perfection it delivers every single time. We’re talking about a cookie that maintains its shape beautifully, offering a clean canvas for decoration, yet boasts a tender, melt-in-your-mouth texture that is utterly irresistible. It strikes that perfect balance: subtly sweet, wonderfully buttery, and never overly complicated. If you’re searching for a reliable, crowd-pleasing dessert that feels both comforting and celebratory, look no further. This recipe is destined to become a beloved staple in your kitchen, a foundation for countless happy memories and delicious experiences. The aroma alone as they bake is enough to lift spirits, filling your home with a warmth that’s as inviting as the cookies themselves. There’s a certain magic in taking basic pantry items and transforming them into something so utterly delightful, and this recipe captures that magic perfectly. You’ll find yourself reaching for these ingredients again and again, eager to replicate the success and spread the joy.
Unleash Your Creativity: Serving Suggestions & Delightful Variations
Now that you have a batch of these glorious treats, the fun truly begins! While they are absolutely divine enjoyed plain with a cup of tea or coffee, their true potential often shines through with a little embellishment. For a classic approach, a simple glaze made from powdered sugar and a splash of milk or lemon juice offers a delicate sweetness and a lovely sheen. If you’re feeling a bit more adventurous, consider whipping up a batch of royal icing for intricate designs – think delicate swirls, polka dots, or even tiny holiday-themed masterpieces. For a softer, creamier topping, a light buttercream frosting allows for endless color possibilities and a richer texture. Don’t stop at just frosting; sprinkles, edible glitter, or even finely chopped nuts can add both visual appeal and textural contrast. Imagine tiny silver nonpareils for an elegant touch, or vibrant rainbow sprinkles for a whimsical party treat. These versatile cookies are also fantastic for customizing with different flavor extracts. A few drops of almond extract instead of vanilla can create a sophisticated twist, while lemon or orange zest kneaded into the dough before baking will infuse them with a bright, citrusy aroma and taste. For a touch of spice, a pinch of cinnamon or cardamom can elevate them to a new level, perfect for autumnal gatherings. They are absolutely perfect for bake sales, birthday parties, baby showers, or simply as a thoughtful homemade gift packaged in a pretty tin. You could even use different cookie cutters to match specific themes or seasons – imagine tiny hearts for Valentine’s Day, stars for patriotic holidays, or miniature leaves for Thanksgiving. And let’s not forget the star of the show: these particular Mini Sugar Cookies are especially delightful because their petite size makes them ideal for portion control (if you can stop at just one!) and perfect for little hands. They make excellent additions to lunchboxes, fantastic edible decor for larger cakes, or simply a quick, satisfying bite when you need a sweet pick-me-up. For an extra special treat, try sandwiching two of them together with a dollop of jam or a smear of chocolate ganache.
Your Culinary Adventure Awaits – Share the Sweetness!
So, what are you waiting for? I wholeheartedly encourage you to roll up your sleeves, preheat your oven, and embark on this wonderful baking journey. This recipe is incredibly forgiving, making it perfect for bakers of all skill levels, from complete novices to seasoned pros. Don’t be shy about experimenting with the flavors and decorations – that’s where the real magic happens and where you can truly make this recipe your own. Once you’ve created your batch of these delightful treats, I would absolutely love to hear about your experience! Did you stick to the classic vanilla, or did you venture into new flavor territory? What kind of decorations did you come up with? Your creativity is an endless source of inspiration for me and for other aspiring bakers. Please feel free to share your successes, your learning moments, and any unique twists you added. There’s nothing more rewarding than seeing how a recipe sparks joy and creativity in others. So, go forth, bake with passion, and prepare to be utterly charmed by these simple yet sensational cookies. They are more than just a dessert; they are an invitation to create, to share, and to savor the sweet moments in life. Happy baking, my friends!
Mini Sugar Cookies: Easy & Adorable Bite-Sized Treats!
Mini Sugar Cookies are more than just a delightful bite-sized treat; they are tiny canvases for joy, celebration, and pure, unadulterated sweetness. Their petite size means they bake faster, offer perfect portion control, and are incredibly fun to decorate, allowing for endless creativity. Each tender, buttery morsel delivers that familiar, comforting sweetness, making them an instant crowd-pleaser. Prepare to be enchanted by the ease and charm of these little wonders!
Ingredients
Instructions
Important Information
Nutrition Facts (Per Serving)
It is important to consider this information as approximate and not to use it as definitive health advice.
Allergy Information
Please check ingredients for potential allergens and consult a health professional if in doubt.