Layered cream cheese salsa dip – just the name alone conjures images of vibrant colors and tantalizing flavors, doesn’t it? Get ready to dive into a culinary experience that’s as visually appealing as it is delicious! This isn’t just another dip; it’s a party in a dish, a fiesta for your taste buds, and the ultimate crowd-pleaser for any gathering.
While the exact origins of this particular layered dip are a bit hazy, its roots are firmly planted in the rich tapestry of Tex-Mex cuisine. Think of it as a deconstructed taco, reimagined as a shareable appetizer. The beauty of Tex-Mex food lies in its bold flavors and simple preparation, and this layered cream cheese salsa dip perfectly embodies that spirit.
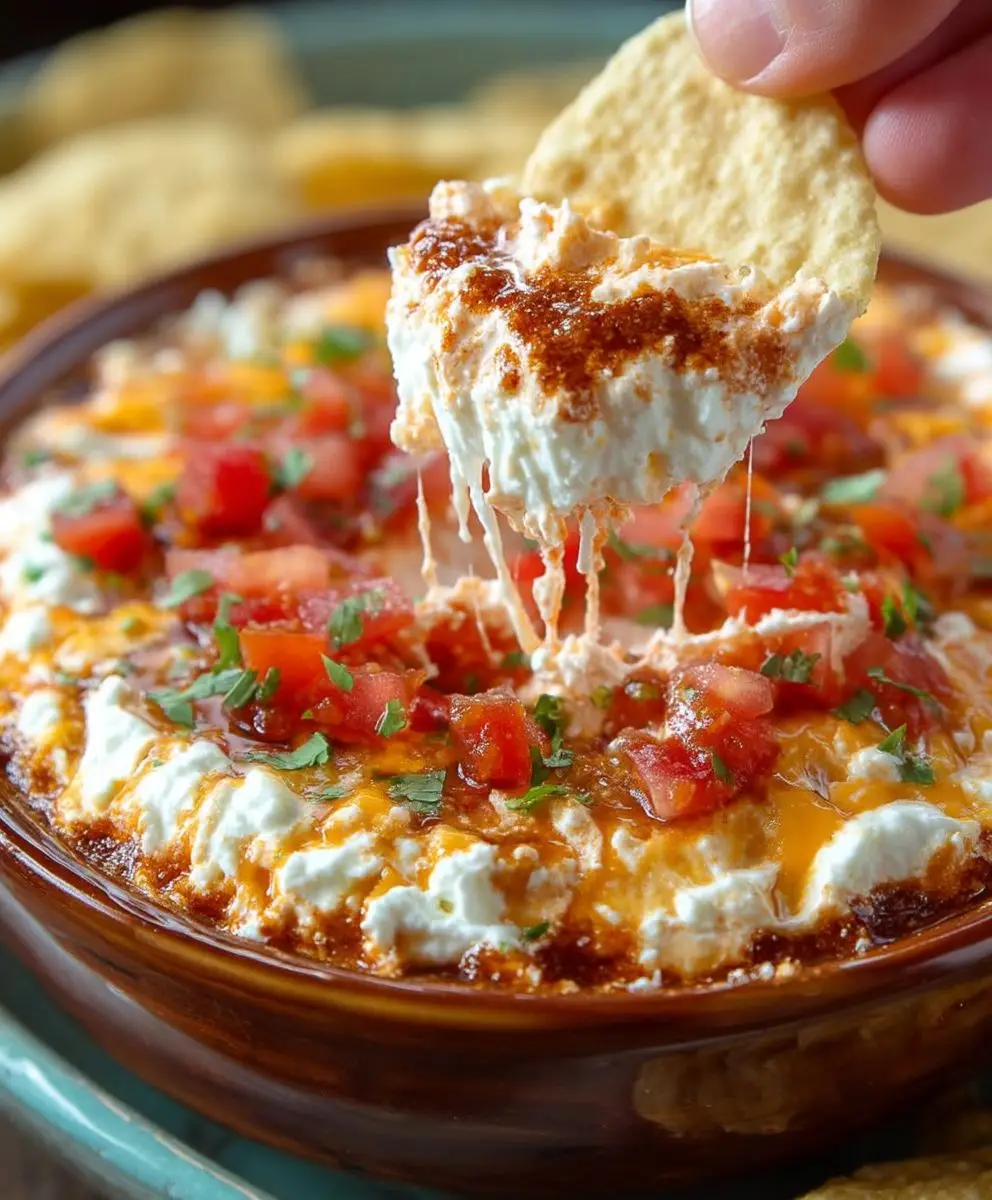
What makes this dip so irresistible? It’s the perfect marriage of creamy, tangy, and spicy. The cool, smooth cream cheese base provides a delightful contrast to the zesty salsa, while the layers of toppings add bursts of flavor and texture. From the savory seasoned ground beef (optional, of course!) to the crunchy shredded lettuce and the creamy avocado, every bite is an explosion of deliciousness. Plus, it’s incredibly easy to make – perfect for those last-minute get-togethers or when you simply crave a flavorful snack. So, grab your chips and let’s get dipping!

Ingredients:
- 16 ounces cream cheese, softened
- 1 cup sour cream
- 1 packet (1 ounce) taco seasoning
- 1 cup guacamole (store-bought or homemade)
- 1 cup salsa (your favorite kind, mild, medium, or hot)
- 1 cup shredded cheddar cheese
- 1/2 cup black olives, sliced
- 1/4 cup green onions, chopped
- 1/4 cup pickled jalapeños, diced (optional)
- Tortilla chips, for serving
Preparing the Cream Cheese Layer
Okay, let’s start with the foundation of our delicious dip – the creamy, dreamy cream cheese layer! This is where we build the flavor base, so pay attention to the details.
- Soften the Cream Cheese: This is crucial! You absolutely need to start with softened cream cheese. Take the cream cheese out of the refrigerator at least an hour before you plan to start. If you’re in a hurry, you can microwave it in 15-second intervals, checking and stirring each time, until it’s soft but not melted. We want it pliable, not liquid.
- Combine Cream Cheese and Sour Cream: In a medium-sized bowl, add the softened cream cheese and sour cream. Make sure your sour cream is also cold.
- Add Taco Seasoning: Now for the flavor bomb! Sprinkle the entire packet of taco seasoning over the cream cheese and sour cream mixture.
- Mix Thoroughly: Using an electric mixer (handheld or stand mixer), beat the ingredients together until they are completely smooth and well combined. If you don’t have a mixer, you can use a sturdy spoon, but be prepared for a bit of arm work! Make sure there are no lumps of cream cheese or pockets of taco seasoning. The mixture should be a uniform color and consistency.
- Taste and Adjust: Give the cream cheese mixture a taste. If you want a little extra kick, you can add a pinch of cayenne pepper or a dash of hot sauce. If it’s too salty, add a tablespoon more of sour cream. Remember, you can always add more, but you can’t take it away!
Layering the Dip
Now comes the fun part – building our masterpiece! This is where the visual appeal comes in, so take your time and make it look pretty.
- Choose Your Dish: Select a clear glass dish or bowl. This allows you to see all the beautiful layers. A pie plate, trifle bowl, or even a 9×13 inch baking dish will work. The size will depend on how many people you’re serving.
- Spread the Cream Cheese Layer: Evenly spread the cream cheese mixture across the bottom of your chosen dish. Use a spatula or the back of a spoon to create a smooth, even surface. This is the foundation, so make sure it’s solid!
- Add the Guacamole Layer: Gently spread the guacamole over the cream cheese layer. Be careful not to mix the layers together. If your guacamole is very thick, you might want to thin it out slightly with a little lime juice to make it easier to spread.
- Pour on the Salsa: Carefully pour the salsa over the guacamole layer. Again, try to keep the layers distinct. If your salsa is very chunky, you might want to drain some of the excess liquid before adding it to the dip.
- Sprinkle with Cheese: Generously sprinkle the shredded cheddar cheese over the salsa layer. Make sure to cover the entire surface for maximum cheesy goodness!
- Add the Olives: Scatter the sliced black olives evenly over the cheese.
- Garnish with Green Onions and Jalapeños (Optional): Sprinkle the chopped green onions over the olives. If you’re using pickled jalapeños, dice them finely and sprinkle them on as well. Remember, the jalapeños add a kick, so use them sparingly if you’re serving people who don’t like spicy food.
Chilling and Serving
Almost there! A little chill time will allow the flavors to meld together and make the dip even more delicious.
- Chill the Dip: Cover the dip with plastic wrap and refrigerate for at least 30 minutes. This allows the flavors to meld together and the layers to set. You can chill it for longer, even overnight, if you’re preparing it in advance.
- Serve with Tortilla Chips: When you’re ready to serve, remove the dip from the refrigerator and serve it with your favorite tortilla chips. I like to offer a variety of chips, such as blue corn chips, white corn chips, and even some flavored chips.
- Optional Garnishes: For an extra touch, you can add some additional garnishes just before serving, such as a dollop of sour cream, a sprinkle of fresh cilantro, or a few extra jalapeño slices.
Tips and Variations
Want to customize your dip? Here are a few ideas:
- Spice it Up: Use a hotter salsa, add a pinch of cayenne pepper to the cream cheese mixture, or use pepper jack cheese instead of cheddar.
- Make it Vegetarian/Vegan: Use vegan cream cheese, sour cream, and cheese substitutes. Make sure your taco seasoning is also vegan-friendly.
- Add Protein: Add a layer of seasoned ground beef or shredded chicken between the guacamole and salsa layers.
- Use Different Cheeses: Experiment with different cheeses, such as Monterey Jack, Colby Jack, or a Mexican cheese blend.
- Add Beans: Add a layer of refried beans or black beans between the cream cheese and guacamole layers.
- Make it a 7-Layer Dip: Add a layer of shredded lettuce on top of the cheese layer.
- Individual Servings: For parties, you can prepare individual servings of the dip in small clear cups or glasses. This makes it easier for guests to grab and go.
Storage Instructions
If you have any leftover dip (which is unlikely!), store it in an airtight container in the refrigerator for up to 3 days. The dip may become a little watery as it sits, but it will still be delicious. Just give it a good stir before serving.
Why This Recipe Works
This layered cream cheese salsa dip is a crowd-pleaser for several reasons. First, it’s incredibly easy to make. There’s no cooking involved, just mixing and layering. Second, it’s customizable to your taste preferences. You can adjust the spice level, add different toppings, and use your favorite brands of ingredients. Third, it’s visually appealing. The layers of different colors and textures make it a beautiful addition to any party spread. And finally, it’s just plain delicious! The combination of creamy, cheesy, and spicy flavors is irresistible.
Serving Suggestions
This dip is perfect for:
- Game day parties
- Birthday parties
- Potlucks
- Holiday gatherings
- Casual get-togethers
- Movie nights
- Any time you’re craving a delicious and easy appetizer!
So there you have it! My go-to recipe for layered cream cheese salsa dip. I hope you enjoy it as much as I do. Don’t be afraid to experiment with different variations and make it your own. Happy dipping!
Conclusion:
This Layered Cream Cheese Salsa Dip isn’t just another appetizer; it’s a guaranteed crowd-pleaser that’s incredibly easy to make and bursting with flavor. Seriously, from the creamy, tangy base to the vibrant, spicy salsa and the fresh, crisp toppings, every layer contributes to a symphony of textures and tastes that will have everyone reaching for more. I know I always do! It’s the perfect dish to bring to potlucks, game day gatherings, or even just a casual get-together with friends.
Why is this a must-try? Because it’s ridiculously simple! You don’t need to be a culinary expert to whip this up. It requires minimal cooking (basically none!), and the assembly is a breeze. Plus, it’s endlessly customizable. Don’t like black olives? Leave them out! Want more heat? Add a pinch of cayenne pepper to the cream cheese mixture or use a spicier salsa. The possibilities are truly endless, making it a recipe you can adapt to your own personal preferences.
But beyond the ease and adaptability, the real magic lies in the taste. The cool, creamy cream cheese provides a delightful contrast to the zesty salsa, while the shredded cheese adds a salty, savory element. And then you have the toppings – the crunch of the lettuce, the sweetness of the tomatoes, the sharpness of the red onion, and the creamy richness of the avocado. It’s a flavor explosion in every bite!
Serving Suggestions and Variations:
* Classic Presentation: Serve with tortilla chips for a classic and satisfying pairing.
* Veggie Sticks: For a healthier option, offer an array of colorful veggie sticks like carrots, celery, bell peppers, and cucumber.
* Crackers: Crackers, especially those with a hint of salt, also work wonderfully.
* Spicy Kick: Add a layer of pickled jalapeños for an extra kick of heat.
* Mediterranean Twist: Incorporate crumbled feta cheese and chopped Kalamata olives for a Mediterranean-inspired variation.
* Guacamole Layer: Add a layer of homemade or store-bought guacamole for even more creamy goodness.
* Black Bean and Corn Salsa: Substitute the regular salsa with a black bean and corn salsa for a sweeter, heartier flavor.
* Mexican Street Corn Inspired: Mix some cotija cheese, chili powder, and lime juice into the cream cheese layer for a Mexican street corn inspired flavor.
I truly believe that this layered cream cheese salsa dip will become a staple in your appetizer repertoire. It’s always a hit, and I’ve never met anyone who doesn’t love it. It’s the kind of recipe that gets requested again and again, and it’s always a source of compliments.
So, what are you waiting for? Gather your ingredients, follow the simple steps, and prepare to be amazed. I’m confident that you’ll love this recipe as much as I do. And once you’ve tried it, I’d love to hear about your experience! Did you make any variations? What did your friends and family think? Share your photos and comments below – I can’t wait to see your creations! Happy dipping!
Layered Cream Cheese Salsa Dip: The Ultimate Party Appetizer
A layered dip with taco-seasoned cream cheese, guacamole, salsa, cheddar cheese, olives, and green onions. Great for parties!
Ingredients
Instructions
Recipe Notes
- For a spicier dip, use a hotter salsa or add cayenne pepper to the cream cheese mixture.
- For a vegetarian/vegan option, use vegan cream cheese, sour cream, and cheese substitutes.
- Add a layer of seasoned ground beef or shredded chicken for added protein.
- Experiment with different cheeses like Monterey Jack or Colby Jack.
- Add a layer of refried beans or black beans for extra flavor and texture.
- For a 7-layer dip, add a layer of shredded lettuce on top of the cheese.
- Prepare individual servings in small clear cups for parties.
- Store leftovers in an airtight container in the refrigerator for up to 3 days.