Boston Cream Pie Cookies, what a concept! Imagine capturing the legendary flavors of the iconic Boston Cream Pie – the tender vanilla cake, the luscious pastry cream, and that irresistible glossy chocolate glaze – all condensed into a single, perfectly portioned cookie. I am absolutely thrilled to share this ingenious recipe with you, transforming a grand dessert into an approachable, handheld delight that is sure to become an instant favorite.
A Beloved Classic, Reimagined for Your Convenience
The original Boston Cream Pie holds a significant place in American culinary history, often credited to the Omni Parker House Hotel in the mid-19th century. Despite its name, it’s truly a cake, famed for its elegant layers and exquisite balance of textures and tastes. People adore the traditional dessert for its sophisticated profile and the sheer indulgence of its components. Now, with these Boston Cream Pie Cookies, we’ve taken that beloved experience and made it accessible for any occasion, from casual gatherings to elegant dessert tables. You get all the nostalgic comfort and luxurious flavor without needing a fork!
The combination of a soft, vanilla-infused cookie base, a creamy, sweet filling, and a rich chocolate topping delivers a symphony of flavors that is both familiar and exciting. It’s no wonder that once you try these, you’ll find yourself reaching for another. Prepare to fall in love with the sheer brilliance and deliciousness of these cookies!

Ingredients:
- For the Soft Vanilla Cookies:
- 1 ½ cups (3 sticks or 340g) unsalted butter, softened to room temperature
- 1 cup (200g) granulated sugar
- ¾ cup (150g) packed light brown sugar
- 2 large eggs, at room temperature
- 2 teaspoons pure vanilla extract (I always go for good quality here, it makes a difference!)
- 3 ½ cups (420g) all-purpose flour
- 1 teaspoon baking soda
- ½ teaspoon salt
- For the Silky Pastry Cream Filling:
- 2 cups (480ml) whole milk
- ½ cup (100g) granulated sugar, divided
- 4 large egg yolks
- ¼ cup (30g) cornstarch
- 2 tablespoons unsalted butter, cut into small pieces
- 1 ½ teaspoons pure vanilla extract
- Pinch of salt
- For the Velvety Chocolate Ganache Glaze:
- ½ cup (120ml) heavy cream (also known as whipping cream)
- 4 ounces (113g) good quality semi-sweet chocolate, finely chopped or in chip form (using good chocolate really elevates the glaze!)
- 1 tablespoon unsalted butter
- 1 teaspoon light corn syrup (optional, but gives a beautiful shine)
For the Boston Cream Pie Cookies:
- Prepare the Dry Ingredients: In a medium bowl, whisk together the all-purpose flour, baking soda, and salt. I find that a good whisking ensures all the leavening agents and salt are evenly distributed, which is crucial for a consistent cookie texture. Set this bowl aside for a moment.
- Cream the Butter and Sugars: In the bowl of a stand mixer fitted with the paddle attachment, or using a large bowl with a hand mixer, cream together the softened unsalted butter, granulated sugar, and light brown sugar on medium-high speed until the mixture is light and fluffy. This usually takes about 3-5 minutes. You’re looking for a pale yellow color and a noticeably airy texture. This step incorporates air into the butter, which contributes to the cookies’ softness. Don’t rush this step; it’s fundamental to the cookie’s final texture.
- Incorporate Eggs and Vanilla: Reduce the mixer speed to medium. Add the eggs one at a time, beating well after each addition until fully incorporated. Scrape down the sides of the bowl as needed to ensure everything is mixed evenly. Then, stir in the pure vanilla extract. The mixture might look a little curdled after adding the eggs; that’s perfectly normal, just keep mixing until it smooths out a bit.
- Combine Wet and Dry Ingredients: Gradually add the dry ingredient mixture to the wet ingredients, mixing on low speed until just combined. Be careful not to overmix the dough at this stage. Overmixing can develop the gluten in the flour too much, leading to tougher cookies. Stop mixing as soon as you no longer see streaks of dry flour. The dough will be soft and pliable.
- Chill the Cookie Dough: Divide the cookie dough in half, flatten each half into a disc, wrap them tightly in plastic wrap, and refrigerate for at least 1 hour, or up to 24 hours. Chilling the dough is an incredibly important step for several reasons: it prevents the cookies from spreading too much in the oven, deepens the flavors, and makes the dough much easier to handle when rolling and cutting. If you skip this, your cookies might spread too thin.
- Preheat Oven and Prepare Baking Sheets: Once your dough is adequately chilled, preheat your oven to 375°F (190°C). Line two large baking sheets with parchment paper or silicone baking mats. This prevents sticking and helps ensure even baking and easy cleanup.
- Roll and Cut the Cookies: On a lightly floured surface, roll out one disc of chilled cookie dough to about ¼-inch thickness. Using a 2-inch round cookie cutter, cut out as many circles as you can. Gather the scraps, gently re-roll them, and cut out more cookies until you’ve used all the dough. Repeat with the second disc of dough. Carefully transfer the cut-out cookies to the prepared baking sheets, leaving about 1 inch between them as they will spread slightly.
- Bake the Cookies: Bake for 8-10 minutes, or until the edges are lightly golden and the centers are set. The exact baking time will depend on your oven and the thickness of your cookies. Keep a close eye on them to prevent overbaking; we want these cookies to be soft and tender, not crispy. Once baked, let the cookies cool on the baking sheets for 5 minutes before transferring them to a wire rack to cool completely. They are quite delicate when warm. Ensure they are completely cool before filling them, otherwise, the pastry cream will melt!
For the Silky Pastry Cream Filling:
- Heat the Milk: In a medium saucepan, combine the whole milk and half of the granulated sugar (¼ cup). Heat over medium heat, stirring occasionally, just until the mixture begins to simmer and small bubbles appear around the edges. Do not let it boil vigorously. Remove the saucepan from the heat once it reaches this point.
- Whisk Yolks, Sugar, and Cornstarch: In a separate medium bowl, whisk together the egg yolks and the remaining ¼ cup of granulated sugar until the mixture is pale yellow and creamy. Then, whisk in the cornstarch and a pinch of salt until no lumps remain. The cornstarch is our secret weapon here for thickening the cream to the perfect consistency.
- Temper the Egg Mixture: This is a crucial step to prevent scrambling the eggs. While continuously whisking the egg yolk mixture, slowly and gradually pour about half of the hot milk mixture into the egg yolks. This slowly raises the temperature of the eggs. Once combined, pour the tempered egg mixture back into the saucepan with the remaining hot milk.
- Cook the Pastry Cream: Return the saucepan to medium heat. Whisk constantly, scraping the bottom and sides of the pan, until the pastry cream thickens significantly. This usually takes about 3-5 minutes. It should become thick enough to coat the back of a spoon and hold its shape. You will notice it change from a liquid to a pudding-like consistency. Continue whisking vigorously to prevent lumps and scorching.
- Add Butter and Vanilla: Remove the saucepan from the heat. Stir in the cold unsalted butter pieces, one at a time, until fully melted and incorporated, creating a silky smooth texture. Then, stir in the pure vanilla extract. The butter adds richness and a beautiful gloss to the cream.
- Strain and Chill: For an extra smooth and lump-free pastry cream, pour the mixture through a fine-mesh sieve into a clean bowl. This step catches any small lumps of egg or cornstarch that might have formed. Press a piece of plastic wrap directly onto the surface of the pastry cream to prevent a skin from forming. Refrigerate for at least 2-4 hours, or until completely chilled and firm. The pastry cream needs to be cold and firm before you can use it as a filling.
For the Velvety Chocolate Ganache Glaze:
- Prepare the Chocolate: Place the finely chopped semi-sweet chocolate or chocolate chips into a heatproof bowl. Using good quality chocolate here will make a noticeable difference in the flavor and texture of your ganache.
- Heat the Cream: In a small saucepan, heat the heavy cream, butter, and corn syrup (if using) over medium heat until it just begins to simmer around the edges. Do not let it come to a rolling boil. The corn syrup isn’t just for shine; it also helps prevent the ganache from seizing and gives it a lovely, pourable consistency.
- Combine and Melt: Immediately pour the hot cream mixture over the chopped chocolate in the heatproof bowl. Let it sit undisturbed for 5 minutes. This allows the heat from the cream to melt the chocolate evenly.
- Whisk to Smooth: After 5 minutes, gently whisk the mixture starting from the center and working your way outwards until it is completely smooth, glossy, and uniform. If any small pieces of chocolate remain, you can gently heat the bowl over a double boiler for a minute or two, stirring constantly, until fully melted, but be careful not to overheat it.
- Cool to Pouring Consistency: Let the ganache cool at room temperature for about 10-20 minutes, stirring occasionally, until it reaches a thick but still pourable consistency. It should be warm enough to flow smoothly but cool enough not to run off the cookies too quickly. If it’s too thick, you can gently warm it; if it’s too thin, let it cool longer.
Assembling Your Boston Cream Pie Cookies:
- Pair the Cookies: Once your cookies are completely cool, your pastry cream is thoroughly chilled and firm, and your ganache is at the perfect pourable temperature, it’s time for the fun part! Lay out all your cookies and match them into pairs of similar size and shape. You’ll be making sandwiches, so try to find good matches for each top and bottom.
- Pipe the Pastry Cream: Transfer the chilled pastry cream to a piping bag fitted with a round tip (or simply snip off the corner of a sturdy freezer bag). Pipe a generous dollop of pastry cream onto the flat side of half of your paired cookies. Don’t be shy with the filling; this is where the “cream pie” part really shines! Aim for a mound that nearly reaches the edges.
- Top with Cookies: Gently place the remaining half of the cookies on top of the piped pastry cream, flat-side down, creating a sandwich. Press lightly until the cream spreads almost to the edges. You’ll feel the gentle resistance as the cookie meets the cream.
- Glaze the Cookies: Now for the beautiful ganache topping! You have a couple of options here. You can hold each assembled cookie upside down by the base and dip the top into the ganache, letting any excess drip off before placing it on a wire rack. Alternatively, you can use a small spoon to drizzle or spread the ganache over the top of each cookie. I often prefer dipping as it gives a more uniform, professional finish.
- Allow Ganache to Set: Place the glazed Boston Cream Pie Cookies on a wire rack set over a baking sheet (to catch any drips) and allow the ganache to set. This can take anywhere from 30 minutes to an hour at room temperature, or you can speed it up by placing them in the refrigerator for about 15-20 minutes. Once the ganache is set, it will have a beautiful, shiny finish.
- Serve and Store: These Boston Cream Pie Cookies are best enjoyed fresh, but they can be stored in an airtight container in the refrigerator for up to 3 days. I find that bringing them to room temperature for about 15-20 minutes before serving enhances the flavors and texture of both the cookie and the cream.
Tips for Perfect Boston Cream Pie Cookies:
- Room Temperature Ingredients are Key: For the cookies, ensuring your butter and eggs are at room temperature helps them emulsify properly, creating a smoother, more uniform dough. This contributes significantly to the final texture of your Boston Cream Pie Cookies. Cold ingredients can lead to a lumpy dough and a less tender cookie.
- Don’t Rush the Chilling: Chilling the cookie dough isn’t just a suggestion; it’s a vital step. It prevents spreading, makes the dough easier to handle, and allows the flavors to meld. A well-chilled dough will give you perfectly shaped Boston Cream Pie Cookies with a better texture. If you’re short on time, you can chill the dough in the freezer for about 30 minutes, but keep a close eye on it.
- Achieving the Perfect Pastry Cream: When cooking the pastry cream, constant whisking is essential to prevent lumps and ensure even thickening. Don’t be afraid to whisk vigorously. If you end up with any lumps, straining the cream through a fine-mesh sieve after cooking will fix it right up, ensuring a smooth and luxurious filling for your Boston Cream Pie Cookies.
- Quality of Chocolate Matters: For the ganache, using a good quality semi-sweet chocolate will greatly enhance the flavor profile. Cheap chocolate can sometimes seize or result in a less shiny, less flavorful glaze. The best Boston Cream Pie Cookies deserve the best chocolate!
- Patience with Ganache Setting: Give the chocolate ganache enough time to set properly. This ensures a beautiful, non-sticky finish to your Boston Cream Pie Cookies. Rushing this step might result in messy cookies or a less appealing appearance. You can place them in the refrigerator for a quick set, but ensure they don’t get too cold, as this can affect the texture of the cookie and cream.
- Uniform Cookie Size: Try to roll your dough to a consistent thickness and use the same cookie cutter for all cookies. This ensures even baking and makes pairing for sandwiches much easier. Consistent sizing contributes to the elegant presentation of your Boston Cream Pie Cookies.
- Storage: Because of the dairy-based pastry cream, these Boston Cream Pie Cookies must be stored in an airtight container in the refrigerator. They are delicious when served slightly chilled, or allowed to come to room temperature for about 15-20 minutes to soften up slightly before enjoying. This allows the cookie to regain some of its tender chew and the cream to soften to a delightful consistency.
After all the delightful steps we’ve taken together, arriving at this point feels truly satisfying, much like biting into one of these exquisite treats. What we’ve created isn’t just another cookie; it’s a culinary revelation, a small but mighty masterpiece that brings the grandeur of a classic dessert into a convenient, delightful, and utterly irresistible bite-sized form. This recipe isn’t just a must-try; it’s a journey for your taste buds, transforming the familiar into something extraordinary. Imagine a tender, vanilla-infused cookie base, soft and buttery, perfectly cradling a rich, creamy vanilla custard filling that melts in your mouth with every chew. And then, the grand finale: a luscious, glossy chocolate ganache topping, rich and decadent, tying all the flavors together in perfect harmony. It’s the kind of dessert that elicits gasps of delight and requests for the recipe, a true crowd-pleaser that embodies comfort, elegance, and pure joy.
I truly believe this recipe stands out because it strikes that perfect balance between nostalgia and innovation. It takes everything we adore about the iconic Boston Cream Pie – its distinct layers of cake, custard, and chocolate – and ingeniously miniaturizes it without sacrificing an ounce of flavor or texture. The effort invested in making that velvety custard from scratch and crafting the silken ganache pays off tenfold, creating a depth of flavor that store-bought versions simply can’t match. This isn’t just a simple cookie; it’s an experience, a moment of pure bliss that you can hold in your hand. It’s perfect for those times when you crave something truly special, something that feels both indulgent and comforting. Trust me, the aroma alone as these bake and cool will be enough to convince you of their undeniable appeal.
Serving Suggestions & Creative Variations
Now that you have a fresh batch of these incredible cookies, let’s talk about how to truly make them shine or even adapt them to your unique tastes. These cookies are fantastic served simply with a tall glass of cold milk, a steaming mug of coffee, or a delicate cup of tea. They make an exceptional addition to any dessert platter for a gathering, offering a touch of sophistication that your guests will surely appreciate. For a more elegant presentation, try dusting them lightly with a sprinkle of cocoa powder or a few delicate chocolate curls just before serving. Imagine them as the star of a brunch spread, a delightful ending to a dinner party, or a thoughtful homemade gift packaged in a beautiful box.
Feeling adventurous? The beauty of a recipe like this lies in its versatility. For a fun twist, consider experimenting with different flavor profiles for the custard. A hint of almond extract instead of vanilla can create a delightful change, or perhaps a touch of orange zest folded into the custard for a brighter, citrusy note. You could even swap out the chocolate ganache for a white chocolate version, or drizzle both dark and white chocolate for a beautiful marbled effect. If you’re looking to make them even more festive, add a few colorful sprinkles on top of the wet ganache before it sets. For those who love a bit of texture, a sprinkle of toasted, finely chopped nuts like pecans or almonds on the chocolate topping could add an interesting crunch. You could also play with the size of the cookies – make them mini for a bite-sized treat perfect for a tea party, or go slightly larger for a truly decadent individual dessert. The possibilities are truly endless, and each variation offers a new way to enjoy this delightful creation.
Your Turn: Bake, Savor, and Share!
Now, it’s your turn! I’ve poured my heart into guiding you through every step, and I genuinely believe that you are going to absolutely love making and, more importantly, devouring these treats. This is more than just a recipe; it’s an invitation to create something truly magical in your own kitchen. Don’t let the thought of making custard from scratch intimidate you; it’s a wonderfully rewarding process, and the result is infinitely superior to anything store-bought. Imagine the pride you’ll feel as you present these beautiful, homemade wonders to your loved ones.
I wholeheartedly encourage you to carve out some time this week, gather your ingredients, and embark on this delicious baking adventure. These Boston Cream Pie Cookies are guaranteed to bring smiles and satisfied sighs. And when you do, please don’t keep the experience to yourself! I would be absolutely thrilled to hear about your baking journey and see your incredible creations. Share your photos, your triumphs, and even any clever variations you come up with on your social media. Tag me if you do, and let the world see the deliciousness you’ve brought to life. Your feedback and stories inspire me and our entire community of home bakers. So, preheat your ovens, get ready to mix, and prepare for a truly unforgettable dessert experience!
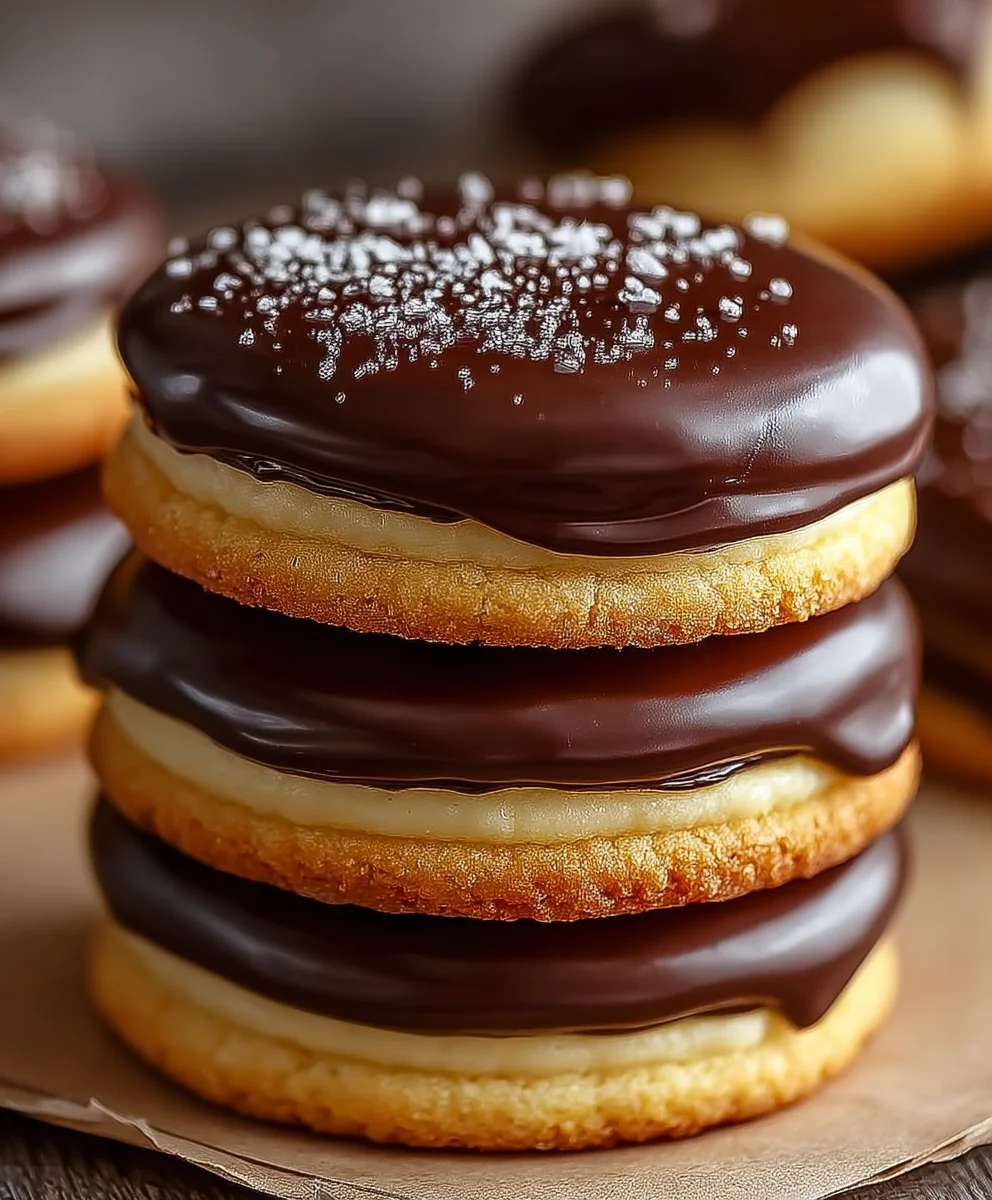
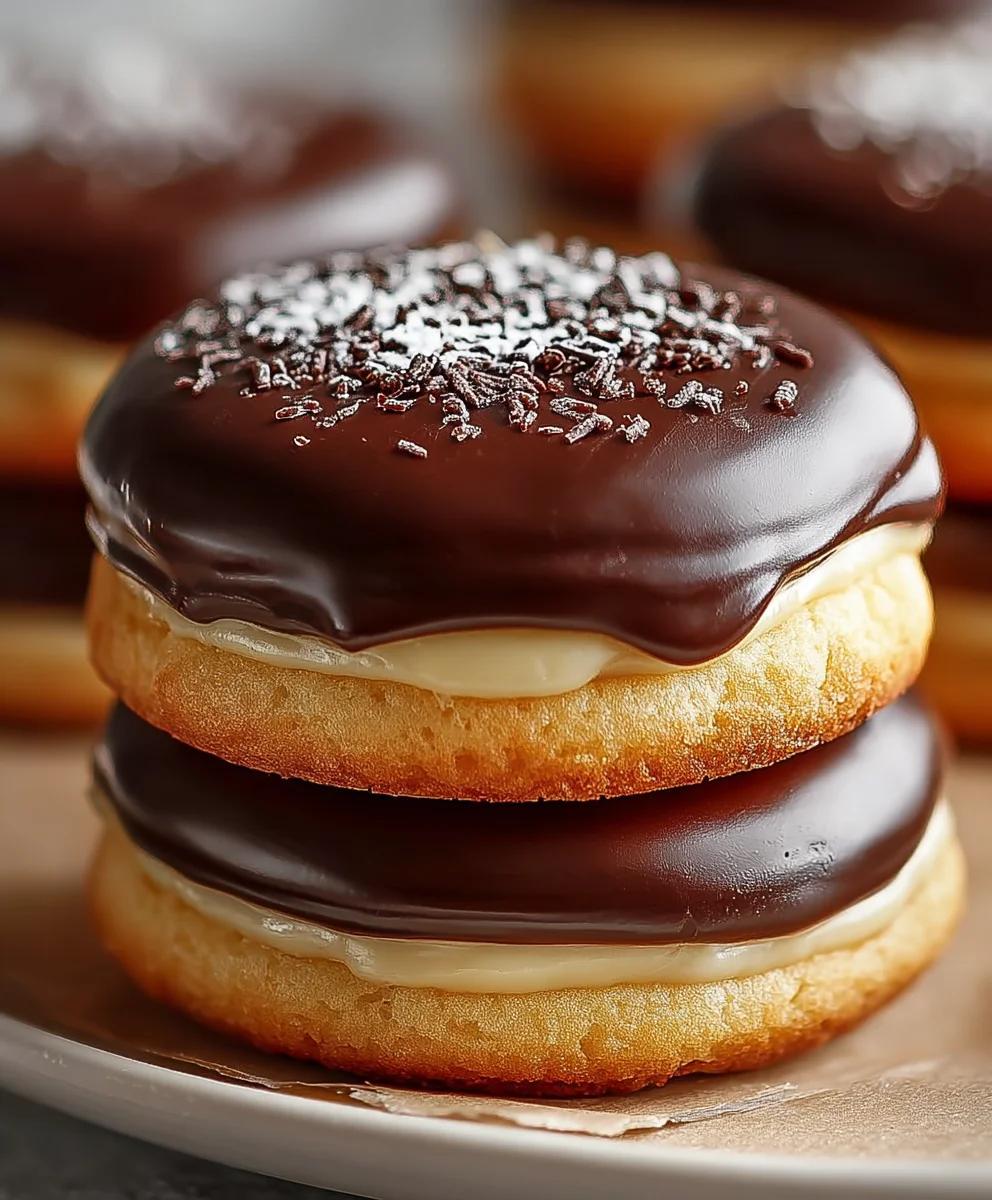
Boston Cream Pie Cookies
Capture the classic Boston Cream Pie flavors in a convenient cookie form! These delicious Boston Cream Pie Cookies feature soft vanilla cookies, a creamy whipped filling, and a smooth chocolate glaze, offering a delightful handheld treat.
Ingredients
-
1 cup unsalted butter, softened
-
1 cup granulated sugar
-
2 large eggs
-
1 teaspoon vanilla extract
-
2 cups all-purpose flour
-
1 teaspoon baking powder
-
1/2 teaspoon baking soda
-
1/4 teaspoon salt
-
1 cup heavy cream, cold
-
1/2 cup powdered sugar
-
1 teaspoon vanilla extract (for the cream filling)
-
1 cup semi-sweet chocolate chips
-
1 tablespoon vegetable oil
Instructions
-
Step 1
Whisk together flour, baking powder, baking soda, and salt. In a separate bowl, cream softened butter and granulated sugar until light and fluffy (3-5 minutes). Beat in eggs one at a time, then mix in vanilla extract. Gradually add dry ingredients to wet, mixing on low speed until just combined. Chill dough for at least 1 hour. -
Step 2
Preheat oven to 375°F (190°C). Line baking sheets with parchment. On a lightly floured surface, roll chilled dough to ¼-inch thickness and cut out 2-inch circles. Bake for 8-10 minutes, or until edges are lightly golden. Let cookies cool completely on a wire rack. -
Step 3
In a cold bowl with cold beaters, whip cold heavy cream, powdered sugar, and 1 teaspoon vanilla extract on high speed until stiff peaks form. Refrigerate until ready to use. -
Step 4
Melt chocolate chips and vegetable oil together in a microwave-safe bowl (in 30-second intervals, stirring) or over a double boiler until smooth and glossy. Let cool slightly to a thick but pourable consistency. -
Step 5
Pair cooled cookies. Pipe or spoon whipped cream filling onto the flat side of half the cookies. Top with the remaining cookies to form sandwiches. Dip or spread chocolate glaze over the top of each assembled cookie. -
Step 6
Place glazed cookies on a wire rack to allow the chocolate glaze to set (refrigerate for 15-20 minutes to speed setting). Store Boston Cream Pie Cookies in an airtight container in the refrigerator for up to 3 days.
Important Information
Nutrition Facts (Per Serving)
It is important to consider this information as approximate and not to use it as definitive health advice.
Allergy Information
Please check ingredients for potential allergens and consult a health professional if in doubt.