Honey Peach Cream Cheese: Prepare to be utterly captivated by this delightful spread! Imagine the creamy tang of cream cheese, swirled with the natural sweetness of ripe peaches and a delicate drizzle of golden honey. It’s a symphony of flavors that will elevate your breakfast, brunch, or even dessert to a whole new level.
While not steeped in ancient history, the combination of fruit and cheese has been a culinary delight for centuries. Think of the classic pairing of apples and cheddar, or grapes and brie. This Honey Peach Cream Cheese variation simply takes that timeless concept and infuses it with a modern twist, perfect for today’s discerning palate. Peaches, with their juicy sweetness, have long been a symbol of summer abundance, and honey, a natural sweetener treasured since antiquity, adds a touch of luxury and warmth.
What makes this spread so irresistible? It’s the perfect balance of sweet and tangy, creamy and fruity. The smooth texture of the cream cheese complements the soft, yielding peaches beautifully. Plus, it’s incredibly versatile! Spread it on bagels, toast, or crackers for a quick and satisfying breakfast. Use it as a filling for crepes or pastries for a decadent treat. Or, simply enjoy it straight from the spoon – we won’t judge! Its ease of preparation also makes it a winner. In just minutes, you can whip up a batch of this delicious Honey Peach Cream Cheese and transform ordinary moments into something truly special. Get ready to experience a taste of sunshine in every bite!

Ingredients:
- For the Crust:
- 1 ½ cups graham cracker crumbs
- 5 tablespoons unsalted butter, melted
- ¼ cup granulated sugar
- Pinch of salt
- For the Cream Cheese Filling:
- 2 (8 ounce) packages cream cheese, softened to room temperature
- ¾ cup granulated sugar
- 2 large eggs
- 1 teaspoon vanilla extract
- ¼ cup heavy cream
- For the Honey Peach Topping:
- 4 ripe peaches, peeled, pitted, and sliced
- ¼ cup honey
- 2 tablespoons lemon juice
- 1 tablespoon cornstarch
- Pinch of ground cinnamon (optional)
- Optional Garnish:
- Fresh mint leaves
- Extra peach slices
- Whipped cream
Preparing the Graham Cracker Crust
- Preheat the Oven: Start by preheating your oven to 350°F (175°C). This ensures the crust bakes evenly.
- Combine Dry Ingredients: In a medium bowl, combine the graham cracker crumbs, granulated sugar, and salt. Make sure everything is well mixed. This even distribution of sugar and salt is key for a flavorful crust.
- Add Melted Butter: Pour the melted butter into the dry ingredients. Use a fork or your fingers to mix until the crumbs are evenly moistened and resemble wet sand. The mixture should hold its shape when pressed together. If it’s too dry, add a tiny bit more melted butter, a teaspoon at a time.
- Press into the Pan: Press the graham cracker mixture firmly into the bottom of a 9-inch springform pan. You can use the bottom of a measuring cup or a flat-bottomed glass to ensure an even and compact crust. Pay special attention to the edges, pressing the crumbs up the sides slightly for a nice presentation.
- Bake the Crust: Bake the crust in the preheated oven for 8-10 minutes, or until lightly golden brown. This pre-baking helps the crust set and prevents it from becoming soggy when the filling is added.
- Cool Completely: Remove the crust from the oven and let it cool completely on a wire rack before adding the cream cheese filling. This is important to prevent the filling from melting the crust.
Making the Cream Cheese Filling
- Beat the Cream Cheese: In a large bowl, beat the softened cream cheese with an electric mixer until smooth and creamy. This is crucial for a lump-free filling. Make sure your cream cheese is truly at room temperature; otherwise, you’ll end up with stubborn lumps.
- Add Sugar Gradually: Gradually add the granulated sugar to the cream cheese, beating until well combined and smooth. Adding the sugar slowly helps it incorporate evenly and prevents over-mixing.
- Incorporate the Eggs: Beat in the eggs one at a time, mixing well after each addition. Be careful not to over-mix at this stage, as over-mixing can incorporate too much air and cause the cheesecake to crack during baking.
- Add Vanilla and Heavy Cream: Stir in the vanilla extract and heavy cream until just combined. The vanilla adds a lovely flavor, and the heavy cream contributes to the richness and smoothness of the filling.
- Pour into the Crust: Pour the cream cheese filling evenly over the cooled graham cracker crust. Gently smooth the top with a spatula.
Baking the Cheesecake
- Prepare a Water Bath (Optional but Recommended): For a perfectly smooth and crack-free cheesecake, a water bath is highly recommended. Wrap the bottom of the springform pan tightly with heavy-duty aluminum foil to prevent water from seeping in. Place the wrapped pan inside a larger baking pan.
- Add Hot Water: Carefully pour hot water into the outer baking pan until it reaches about halfway up the sides of the springform pan. The water bath creates a humid environment that helps the cheesecake bake evenly and prevents it from cracking.
- Bake the Cheesecake: Bake in the preheated oven for 50-60 minutes, or until the edges are set but the center still has a slight jiggle. The jiggle is important; the cheesecake will continue to set as it cools.
- Turn Off Oven and Let Cool: Turn off the oven and prop the oven door open slightly with a wooden spoon. Let the cheesecake cool in the oven for 1 hour. This slow cooling process helps prevent cracking.
- Refrigerate: Remove the cheesecake from the water bath and let it cool completely on a wire rack. Then, cover it with plastic wrap and refrigerate for at least 4 hours, or preferably overnight. This allows the cheesecake to fully set and develop its flavor.
Preparing the Honey Peach Topping
- Prepare the Peaches: In a medium saucepan, combine the sliced peaches, honey, lemon juice, cornstarch, and cinnamon (if using).
- Cook the Peach Mixture: Cook over medium heat, stirring occasionally, until the peaches are softened and the sauce has thickened, about 8-10 minutes. The cornstarch will help thicken the sauce, creating a beautiful glaze for the peaches.
- Cool Slightly: Remove the peach mixture from the heat and let it cool slightly before topping the cheesecake.
Assembling and Serving
- Release the Cheesecake: Carefully remove the cheesecake from the springform pan. Run a thin knife around the edges of the cheesecake before releasing the sides of the pan to ensure a clean release.
- Top with Peach Mixture: Spoon the honey peach topping evenly over the top of the cheesecake.
- Garnish (Optional): Garnish with fresh mint leaves, extra peach slices, or a dollop of whipped cream for an extra touch of elegance.
- Serve and Enjoy: Slice and serve the Honey Peach Cream Cheese Cheesecake. Enjoy! This cheesecake is best served chilled.

Conclusion:
This Honey Peach Cream Cheese recipe isn’t just another spread; it’s a burst of sunshine on a bagel, a delightful dip for fruit, and a secret weapon for elevating your breakfast or brunch game. I truly believe it’s a must-try because it perfectly balances the tangy cream cheese with the sweet, juicy peaches and the warm, comforting honey. The result is a flavor explosion that’s both sophisticated and incredibly easy to achieve. It’s a simple recipe that delivers maximum impact, and who doesn’t love that?
Think of it: the creamy texture, the vibrant colors, and the irresistible aroma – it’s a feast for the senses! And the best part? It’s so versatile!
Serving Suggestions and Variations:
Beyond the obvious bagel topping (which, let me tell you, is divine!), there are so many ways to enjoy this Honey Peach Cream Cheese.
* Fruit Dip Extravaganza: Serve it with sliced apples, pears, strawberries, or even grilled pineapple for a healthy and refreshing snack or dessert. The sweetness of the fruit complements the cream cheese beautifully.
* Croissant Filling: Imagine flaky, buttery croissants filled with this creamy, peachy goodness. It’s a decadent treat that’s perfect for a special occasion.
* Sandwich Spread: Elevate your everyday sandwich by using this as a spread. It pairs particularly well with turkey, ham, or even grilled chicken. Add some greens and you’ve got a gourmet lunch!
* Cheesecake Swirl: Swirl a generous amount into your favorite cheesecake batter before baking for a peachy twist on a classic dessert.
* Pancake or Waffle Topping: Ditch the syrup and top your pancakes or waffles with a dollop of this Honey Peach Cream Cheese. It’s a game-changer!
* Spice it Up: For a little kick, add a pinch of red pepper flakes or a dash of cinnamon to the mixture.
* Nutty Delight: Stir in some chopped pecans, walnuts, or almonds for added texture and flavor.
* Herbaceous Twist: A sprinkle of fresh mint or basil can add a surprising and refreshing element.
I’ve personally tried several of these variations, and each one has been a winner. The possibilities are truly endless!
I’m so confident that you’ll love this recipe as much as I do. It’s quick, easy, and incredibly satisfying. It’s the kind of recipe that you’ll find yourself making again and again, and it’s sure to impress your friends and family.
So, what are you waiting for? Gather your ingredients, follow the simple steps, and prepare to be amazed by the deliciousness of this Honey Peach Cream Cheese.
I can’t wait to hear about your experience! Please, please, please try this recipe and then come back and share your thoughts in the comments below. Did you try any of the variations? What did you serve it with? What did your family think? Your feedback is invaluable, and I’m always eager to learn from your culinary adventures. Happy cooking!
Honey Peach Cream Cheese: A Delicious & Easy Recipe
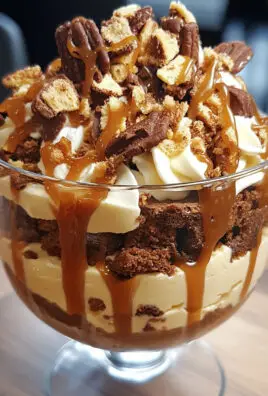
A creamy cheesecake with a graham cracker crust and a sweet, tangy honey peach topping.
Ingredients
Instructions
Recipe Notes
- For a perfectly smooth cheesecake, ensure the cream cheese is fully softened to room temperature before mixing.
- A water bath is highly recommended to prevent cracking during baking.
- Cooling the cheesecake slowly in the oven and then refrigerating it for several hours is crucial for the best texture and flavor.
- The honey peach topping can be made ahead of time and stored in the refrigerator until ready to use.