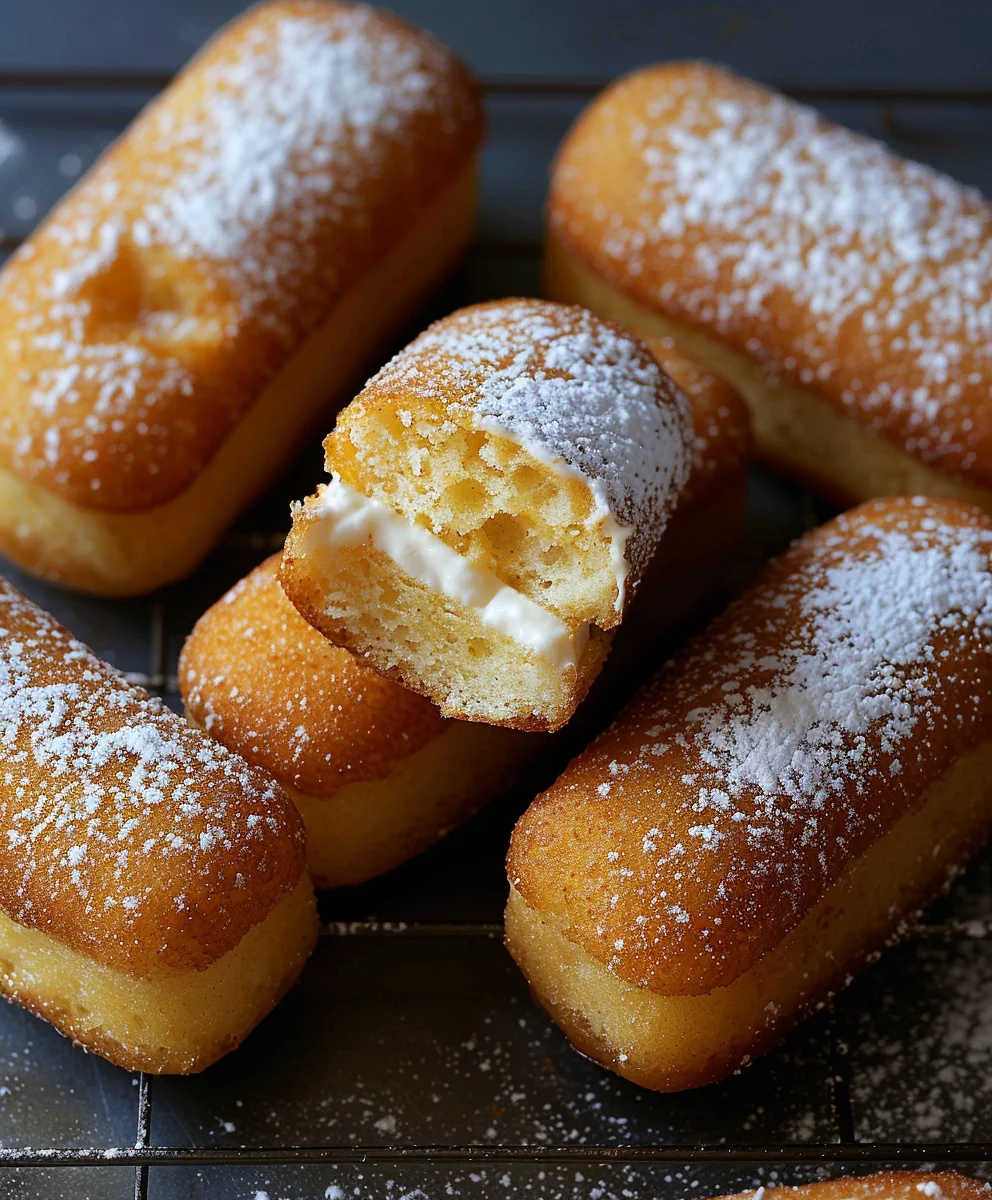
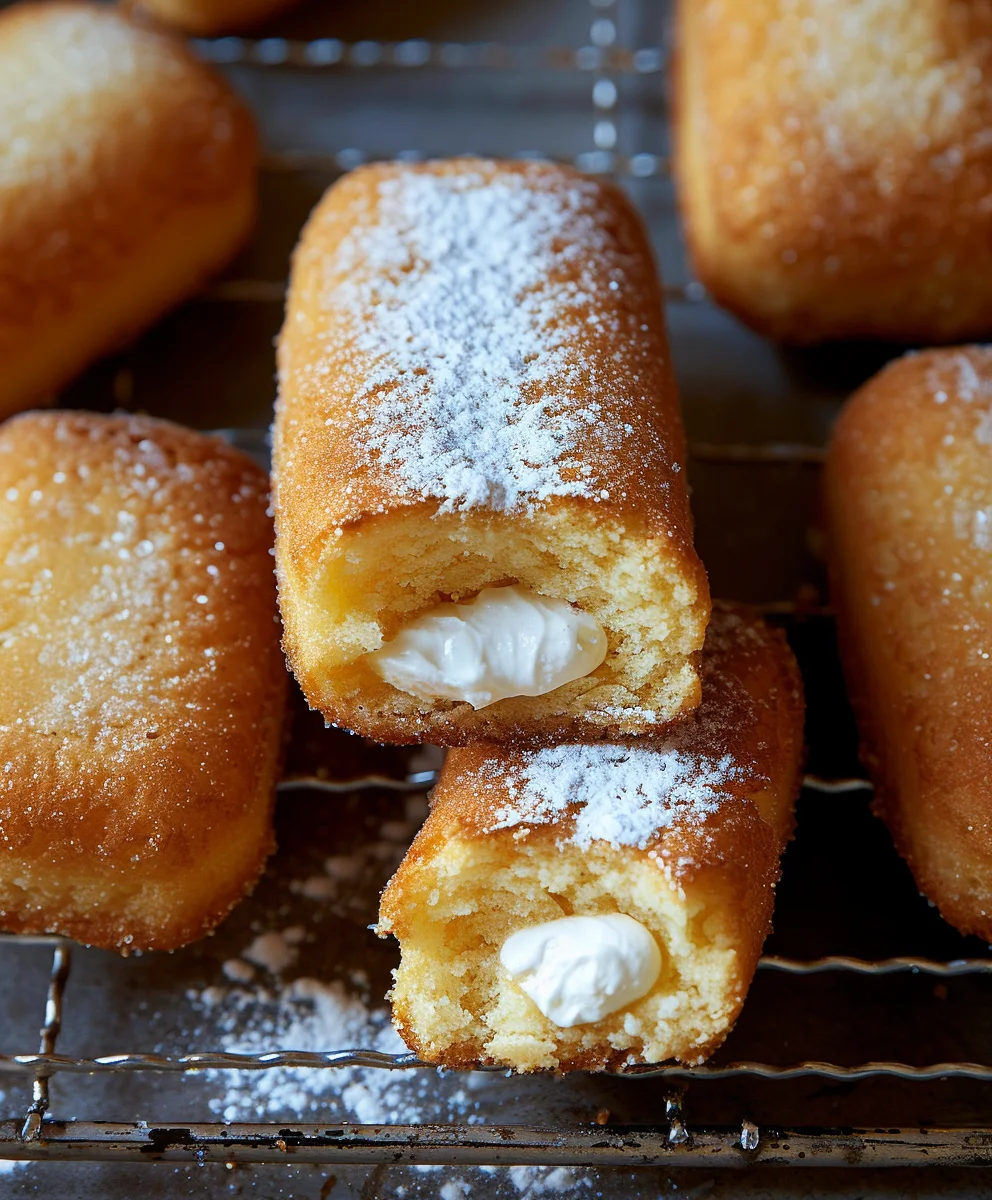
Homemade Twinkies are a truly delightful culinary adventure, promising a taste of nostalgia that’s even better than you remember. I often hear people wistfully recall the iconic golden sponge cake with its signature creamy filling, a staple of childhood lunchboxes and convenience store shelves for generations. While the original has certainly earned its place in American snack food history, spanning decades as a comforting, accessible treat, there’s an unparalleled satisfaction in recreating this beloved classic right in your own kitchen. Imagine biting into a perfectly golden, moist, and fluffy cake, yielding to a sweet, velvety cream filling that melts in your mouth – all without a single mystery ingredient.
The Irresistible Allure of Homemade
This isn’t just about baking; it’s about reclaiming a piece of culinary Americana and elevating it with fresh, wholesome ingredients. People adore Twinkies for their unique blend of light texture and rich sweetness, a perfect balance that few other snacks achieve. My recipe for these Homemade Twinkies captures that unmistakable charm, offering a superior flavor and texture that will undoubtedly impress. Prepare to rediscover a cherished classic, made with love and a touch of homemade magic, proving that some legends are even better when crafted by hand.

Ingredients:
-
For the Golden Sponge Cakes:
- 1 ½ cups (180g) all-purpose flour, sifted multiple times for an exceptionally light texture
- 1 ½ teaspoons baking powder, ensuring our cakes rise beautifully and evenly
- ½ teaspoon salt, to balance the sweetness and enhance all the wonderful flavors
- ½ cup (113g) unsalted butter, softened to room temperature – this is crucial for a smooth, creamy batter
- 1 cup (200g) granulated sugar, providing the perfect level of sweetness and that signature golden crust
- 3 large eggs, separated (yolks and whites), each playing a distinct role in the cake’s structure and richness
- 1 teaspoon pure vanilla extract, for that classic, comforting aroma and taste
- ½ cup (120ml) whole milk, at room temperature, contributing to a tender crumb
-
For the Creamy Vanilla Filling:
- ½ cup (113g) unsalted butter, softened, just like for the cake – this ensures a perfectly smooth filling
- ½ cup (100g) vegetable shortening (like Crisco), for stability and a perfectly smooth, non-gritty texture that holds its shape beautifully
- 1 teaspoon pure vanilla extract, enhancing the overall sweetness with its aromatic notes
- ½ teaspoon salt, again, to balance and highlight the other flavors
- 4 cups (480g) powdered sugar (confectioners’ sugar), sifted, to ensure a silky-smooth, lump-free filling
- 7 ounces (approx. 1 ½ cups) marshmallow fluff (or crème), the secret ingredient for that unique, airy, and distinctly “Twinkie” filling consistency
- 2-3 tablespoons whole milk or heavy cream, as needed, to adjust the consistency to a perfect piping consistency
Equipment You’ll Need:
Before we dive into creating these delightful Homemade Twinkies, let’s gather our tools. Having everything ready makes the baking process so much smoother and more enjoyable. You will need:
- Stand mixer with paddle and whisk attachments (or a large bowl and a good hand mixer)
- Several mixing bowls of various sizes
- Fine-mesh sieve for sifting dry ingredients and powdered sugar
- Measuring cups and spoons
- Rubber spatula
- Wire whisk
- Twinkie molds (often called snack cake molds or financier molds) – these are essential for getting that iconic shape. If you don’t have them, you can try a mini loaf pan, but the shape won’t be quite the same.
- Piping bag(s)
- A long, thin piping tip (a Bismark tip or a long round tip is ideal for injecting the filling)
- Wire cooling rack
- Parchment paper or non-stick spray for the molds
- Oven thermometer (to ensure your oven is at the correct temperature)
Part 1: Preparing the Golden Sponge Cake for Your Homemade Twinkies
This is where the magic begins! Crafting the perfect sponge cake is key to truly exceptional Homemade Twinkies. We want a cake that is light, airy, and has that lovely golden hue.
- Preheat and Prepare: Start by preheating your oven to 350°F (175°C). This ensures the oven is at a consistent temperature when the cakes go in, promoting even baking. Generously grease and flour your Twinkie molds, or spray them thoroughly with a non-stick baking spray that contains flour. If using silicone molds, a light spray is often sufficient. This step is critical to prevent sticking and ensure your beautiful cakes release perfectly.
- Sift the Dry Ingredients: In a medium bowl, whisk together the 1 ½ cups of sifted all-purpose flour, 1 ½ teaspoons of baking powder, and ½ teaspoon of salt. I always recommend sifting your flour at least twice for cakes like this. It really helps to aerate the flour, breaking up any clumps and ensuring an incredibly light and tender crumb in our finished sponge cakes. Set this mixture aside.
- Cream Butter and Sugar: In the bowl of your stand mixer, fitted with the paddle attachment, cream together the ½ cup of softened unsalted butter and 1 cup of granulated sugar on medium-high speed. Beat this mixture for at least 3-5 minutes, or until it becomes very light, pale, and fluffy. This creaming process is vital; it incorporates air into the butter, which contributes significantly to the cake’s final texture and volume. You should see a noticeable change in color and texture.
- Add Egg Yolks and Vanilla: Reduce the mixer speed to medium-low. Add the 3 egg yolks one at a time, beating well after each addition until fully incorporated. Scrape down the sides of the bowl as needed to ensure everything is evenly mixed. Once the yolks are in, stir in the 1 teaspoon of pure vanilla extract. The vanilla not only adds a wonderful flavor but also helps to mask any eggy notes.
- Alternate Dry and Wet Ingredients: With the mixer on low speed, begin adding the dry ingredient mixture to the butter mixture, alternating with the ½ cup of room temperature whole milk. Start and end with the dry ingredients. A typical pattern would be: one-third dry, half milk, one-third dry, second half milk, remaining one-third dry. Mix only until just combined after each addition. Overmixing at this stage can develop the gluten in the flour, leading to a tough cake, and we want a delicate, tender sponge. Scrape down the bowl as necessary.
- Whip Egg Whites: In a separate, very clean bowl (preferably a metal or glass bowl), using the whisk attachment (ensure it’s spotless and grease-free, as any fat can prevent the whites from whipping), beat the 3 egg whites on medium-high speed until soft peaks form. Then, gradually increase the speed to high and continue beating until stiff, glossy peaks form. The whites should hold their shape when the whisk is lifted. This meringue is going to provide an incredible lift and lightness to our sponge cake, making it truly exceptional for our Homemade Twinkies.
- Fold in Egg Whites: Gently fold about one-third of the whipped egg whites into the cake batter to lighten it. Then, carefully fold in the remaining egg whites in two additions, using a rubber spatula. Use a gentle, sweeping motion, going from the bottom of the bowl up and over, being careful not to deflate the air we just incorporated. This step is paramount for achieving that classic airy, spongy texture.
- Fill the Molds: Carefully spoon the batter into your prepared Twinkie molds, filling each about two-thirds to three-quarters full. It’s important not to overfill, as the cakes will rise during baking. A small ice cream scoop or two spoons can help with even distribution.
- Bake: Bake for 12-16 minutes, or until the cakes are golden brown and a wooden skewer or toothpick inserted into the center comes out clean. Baking times can vary depending on your oven and the specific size of your molds, so keep an eye on them. The cakes should spring back lightly when gently pressed.
- Cool: Once baked, remove the molds from the oven and let the cakes cool in the molds for about 5-10 minutes. This allows them to firm up slightly before you attempt to remove them. Then, carefully invert them onto a wire cooling rack to cool completely. It is absolutely crucial that the cakes are completely cool before you attempt to fill them, otherwise, the filling will melt and run out. This might take an hour or two, so patience is a virtue!
Part 2: Crafting the Iconic Creamy Filling for Your Homemade Twinkies
The filling is what truly defines a Twinkie! This creamy, dreamy, slightly marshmallowy concoction is surprisingly easy to make and tastes even better than you remember. It’s what makes these Homemade Twinkies so irresistible.
- Cream Fats and Flavorings: In the bowl of your stand mixer, fitted with the paddle attachment, combine the ½ cup of softened unsalted butter and ½ cup of vegetable shortening. Beat on medium speed for 2-3 minutes, until the mixture is very light and fluffy. The shortening is key here; it helps the filling hold its shape, gives it a wonderful smooth texture, and prevents it from melting too quickly at room temperature. Add the 1 teaspoon of pure vanilla extract and ½ teaspoon of salt, beating until well combined.
- Gradually Add Powdered Sugar: With the mixer on low speed, gradually add the 4 cups of sifted powdered sugar, one cup at a time, beating well after each addition. I cannot stress enough the importance of sifting your powdered sugar for this step. If you don’t, you’ll end up with lumps, and nobody wants lumpy filling in their Homemade Twinkies! Once all the sugar is incorporated, increase the speed to medium-high and beat for another 2-3 minutes until the mixture is light and fluffy. Scrape down the sides of the bowl frequently to ensure everything is fully combined.
- Incorporate Marshmallow Fluff: Reduce the mixer speed to low and add the 7 ounces of marshmallow fluff. Mix until it’s fully incorporated and the filling is smooth and creamy. The marshmallow fluff is the secret ingredient that gives this filling its distinctive, airy texture and signature sweetness. It truly elevates the flavor to that iconic level.
- Adjust Consistency: If the filling appears too thick to pipe easily, add 1-3 tablespoons of whole milk or heavy cream, one tablespoon at a time, beating until the desired smooth, pipeable consistency is achieved. You want it to be firm enough to hold its shape but soft enough to flow easily through a piping tip. Be careful not to add too much liquid, or your filling will be too runny.
- Prepare for Piping: Transfer the prepared filling into a piping bag fitted with a long, thin piping tip (a Bismark tip is ideal, but a very long, narrow round tip will also work). If you don’t have a special tip, you can snip the end of a regular round tip to make the opening a bit wider, or even use a sturdy ziplock bag with a corner snipped off, though it will be harder to get the filling deep into the cakes.
Part 3: Assembling Your Delicious Homemade Twinkies
Now for the most satisfying part: bringing it all together! This is where our golden sponge cakes meet their creamy, dreamy filling, transforming them into true Homemade Twinkies.
- Prepare Cakes for Filling: Ensure your sponge cakes are completely cooled. If they are even slightly warm, the filling will melt and make a mess. Using your long piping tip, or a small, sharp knife, create three small holes on the bottom (the flatter side) of each cake. Space them out somewhat evenly. These holes are where we will inject our delicious cream filling. The traditional Twinkie has three distinct injection points, and this method helps to ensure an even distribution of the filling throughout the cake.
- Inject the Filling: Insert the piping tip into one of the holes, pushing it gently almost all the way to the other end of the cake. Begin to gently squeeze the piping bag, filling the cake as you slowly withdraw the tip. You’ll feel the cake plump up slightly as it fills. You can often see the cake expanding a bit, which helps you know when it’s adequately filled.
- Repeat and Fill Evenly: Repeat this process for the other two holes on the same cake. The goal is to distribute the filling as evenly as possible throughout the entire length of the cake. Don’t be shy with the filling – part of the charm of Homemade Twinkies is their generous, creamy center! You might see a little bit of filling ooze out of the holes, which is perfectly normal and a good sign that the cake is well-filled.
- Continue with Remaining Cakes: Continue this filling process for all of your cooled sponge cakes until every one of your delightful Homemade Twinkies is filled to perfection.
- Chill (Optional, but Recommended): For the best results and to allow the filling to set up nicely, I recommend placing your freshly filled Homemade Twinkies in the refrigerator for about 30 minutes to an hour. This step helps the filling firm up, making the cakes easier to handle and giving them that authentic texture.
- Serve and Enjoy: Once chilled, your Homemade Twinkies are ready to be devoured! They are truly best enjoyed fresh, but they also store wonderfully.
Tips for the Perfect Homemade Twinkies:
Creating these nostalgic treats at home is incredibly rewarding. Here are a few extra tips to ensure your Homemade Twinkies turn out perfectly every single time:
- Room Temperature Ingredients: This is a golden rule for baking! Ensuring your butter, eggs, and milk are all at room temperature for the cake batter and your butter for the filling allows them to emulsify properly, creating a smooth, cohesive batter and a lump-free, creamy filling. Cold ingredients don’t blend as well and can result in a lumpy texture.
- Don’t Overmix: When making the cake batter, once you add the flour, mix only until just combined. Overmixing develops the gluten in the flour, which can lead to a tough, dense cake. We want a light, delicate sponge!
- Sifting is Key: For both the flour in the cake and the powdered sugar in the filling, sifting is crucial. It aerates the dry ingredients, prevents lumps, and ensures a wonderfully smooth texture for both components of your Homemade Twinkies. Don’t skip this step!
- Clean Bowl for Egg Whites: When whipping egg whites, ensure your bowl and whisk attachment are absolutely spotless and free of any grease or egg yolk. Even a tiny bit of fat can prevent the whites from whipping up to their full, voluminous potential.
- Patience in Cooling: I know it’s tempting to fill those beautiful cakes right away, but it’s essential to let them cool completely on a wire rack. Warm cakes will melt your carefully crafted filling, turning your masterpiece into a gooey mess.
- Invest in Twinkie Molds: While you can experiment with other pan shapes, dedicated Twinkie or snack cake molds truly give you that authentic, beloved shape. They are relatively inexpensive and a worthwhile investment if you plan to make these often.
- Piping Tip Matters: A long, thin piping tip (often called a Bismark tip) makes injecting the filling significantly easier and cleaner. It allows you to get the filling deep into the cake without tearing it apart.
- Storage: Store your Homemade Twinkies in an airtight container at room temperature for up to 2-3 days, or in the refrigerator for up to a week. If refrigerated, allow them to come to room temperature for about 15-20 minutes before serving for the best flavor and texture experience. You can even freeze them, individually wrapped, for up to a month. Thaw at room temperature.
- Flavor Variations: Feel free to experiment with the filling! A touch of almond extract instead of some vanilla, or even a tiny amount of lemon zest, could add a delightful twist to your Homemade Twinkies.
Conclusion:
And so, we arrive at the grand finale of our culinary adventure! I truly hope you’re feeling as excited and inspired as I am about this incredible journey into recreating a beloved classic. What we’ve just explored is more than just a recipe; it’s an invitation to experience the sheer joy and unparalleled satisfaction of bringing a nostalgic treat to life right in your own kitchen. I can confidently say that this particular rendition isn’t just a simple replication; it’s an elevation, transforming a childhood memory into an even more exquisite and memorable dessert. The delicate, golden-hued sponge cake, baked to a perfect light and airy consistency, provides the ideal canvas for that signature, irresistibly creamy, sweet filling. Every single bite is a symphony of textures and flavors, a delightful dance between the tender crumb and the luscious, cloud-like cream that will undoubtedly bring a smile to your face and transport you back to simpler, sweeter times.
There’s a magic to homemade treats that store-bought versions, no matter how iconic, simply cannot capture. The freshness of the ingredients, the absence of preservatives, and, most importantly, the love and care you pour into every step truly make all the difference. Imagine the aroma wafting through your home as these bake – a preview of the deliciousness to come! When you present these to your friends and family, prepare for gasps of delight and immediate requests for the recipe. This isn’t just a dessert; it’s a conversation starter, a nostalgic trip, and a testament to the joy of baking from scratch. Trust me, the moment you taste your very own, freshly baked Homemade Twinkies, you’ll understand why I’m so passionate about this recipe.
Elevate Your Experience: Serving Suggestions & Creative Variations
While these beauties are absolutely perfect on their own, perhaps with a tall glass of cold milk, a warm cup of coffee, or even a mug of hot cocoa, their versatility extends much further. For a truly decadent dessert, consider serving them alongside a scoop of premium vanilla bean ice cream, allowing the melting ice cream to mingle with the creamy filling for an extra layer of indulgence. They make an exceptional addition to a dessert platter at any gathering, providing a charmingly retro yet sophisticated touch. For brunch, you could even slice them and gently toast them for a few seconds, serving them with fresh berries and a dollop of whipped cream.
But why stop there? The beauty of making things yourself is the freedom to customize and innovate! Think about variations for the filling: a touch of high-quality cocoa powder could transform it into a rich chocolate cream, or a hint of citrus zest (lemon, orange, or lime) could add a refreshing zing. A drop of almond extract or even a splash of rosewater could introduce an entirely new aromatic dimension. And what about the cake itself? You could swirl a spoonful of berry jam into the batter before baking for a fruity surprise, or fold in a handful of colorful sprinkles for a festive look that’s perfect for birthdays or celebrations. For a seasonal twist, consider a pumpkin spice filling in the autumn or a peppermint cream filling during the holidays. The possibilities are truly endless, limited only by your imagination, and each variation offers a chance to make this classic treat uniquely yours.
Your Turn: Bake, Savor, and Share!
Now, dear reader, the moment of truth has arrived! I genuinely hope that all the tips, tricks, and details shared throughout this recipe have empowered you to step into your kitchen with confidence and enthusiasm. Don’t let any lingering doubts hold you back; the process is incredibly rewarding, and I promise you, the taste of your very own scratch-made creation will be worth every moment of effort. There’s something profoundly satisfying about mastering such an iconic treat, and the sense of accomplishment you’ll feel when you bite into that perfectly spongy cake with its luscious cream filling is unparalleled. This is your invitation to create not just a dessert, but a delightful memory.
I am absolutely thrilled for you to embark on this delicious adventure, and once you’ve baked your triumphant batch, I would be beyond delighted to hear all about your experience! Did you stick to the traditional approach, or did you venture into the exciting world of creative variations? What was your favorite part of the process? Did you share them with loved ones, and what were their reactions? Please, please, please share your triumphs, your tips, and especially your mouth-watering photos in the comments section below. Let’s celebrate our collective love for baking and create a vibrant community of passionate home bakers who appreciate the magic of homemade treats. Happy baking, my friends, and enjoy every single delightful bite!
Homemade Twinkies Recipe: Sweet & Creamy Golden Cakes
Recreate this beloved classic right in your own kitchen with a perfectly golden, moist, and fluffy cake, yielding to a sweet, velvety cream filling that melts in your mouth. This recipe promises a taste of nostalgia even better than you remember.
Ingredients
-
1 cup all-purpose flour, sifted
-
1 ½ teaspoons baking powder
-
½ teaspoon salt
-
½ cup (113g) unsalted butter, softened
-
2/3 cup granulated sugar
-
3 large eggs, separated
-
1 teaspoon pure vanilla extract
-
½ cup (120ml) whole milk, at room temperature
-
½ cup (113g) unsalted butter, softened (for filling)
-
½ cup (100g) vegetable shortening
-
1 teaspoon pure vanilla extract (for filling)
-
½ teaspoon salt (for filling)
-
4 cups (480g) powdered sugar, sifted
-
7 ounces (approx. 1 ½ cups) marshmallow fluff
-
2-3 tablespoons whole milk or heavy cream, as needed (for filling)
Instructions
-
Step 1
Preheat oven to 350°F (175°C). Generously grease and flour Twinkie molds. In a medium bowl, whisk sifted flour, baking powder, and salt. In a stand mixer, cream softened butter and granulated sugar until light and fluffy (3-5 mins). Beat in egg yolks one at a time, then vanilla extract. Alternately add dry ingredients and milk to the butter mixture, starting and ending with dry ingredients; mix only until just combined. -
Step 2
In a separate, very clean bowl, beat egg whites on medium-high speed until stiff, glossy peaks form. Gently fold about one-third of the whipped egg whites into the cake batter to lighten it, then carefully fold in the remaining egg whites in two additions using a rubber spatula, being careful not to deflate the air. -
Step 3
Spoon batter into prepared Twinkie molds, filling each about two-thirds to three-quarters full. Bake for 12-16 minutes, or until golden brown and a wooden skewer inserted into the center comes out clean. Cool in molds for 5-10 minutes, then invert onto a wire cooling rack to cool completely. Ensure cakes are completely cool before filling. -
Step 4
In a stand mixer, beat softened butter and vegetable shortening until very light and fluffy (2-3 mins). Add vanilla extract and salt, beating until combined. Gradually add sifted powdered sugar, one cup at a time, beating well after each addition. Increase speed to medium-high and beat for 2-3 minutes until light and fluffy. Reduce speed to low, add marshmallow fluff, and mix until smooth and creamy. Adjust consistency with 1-3 tablespoons whole milk or heavy cream as needed, to achieve a smooth, pipeable consistency. -
Step 5
Transfer the prepared filling into a piping bag fitted with a long, thin piping tip (Bismark tip recommended). Ensure cakes are completely cooled. Create three small holes on the bottom (flatter side) of each cake with your piping tip or a small knife. Insert the piping tip into one hole, gently squeeze the bag to fill the cake, slowly withdrawing the tip. Repeat for the other two holes on each cake to ensure even filling. -
Step 6
Continue the filling process for all cooled sponge cakes. For best results, place freshly filled Twinkies in the refrigerator for about 30 minutes to an hour to allow the filling to set. Serve and enjoy. Store in an airtight container at room temperature for up to 2-3 days, or in the refrigerator for up to a week.
Important Information
Nutrition Facts (Per Serving)
It is important to consider this information as approximate and not to use it as definitive health advice.
Allergy Information
Please check ingredients for potential allergens and consult a health professional if in doubt.