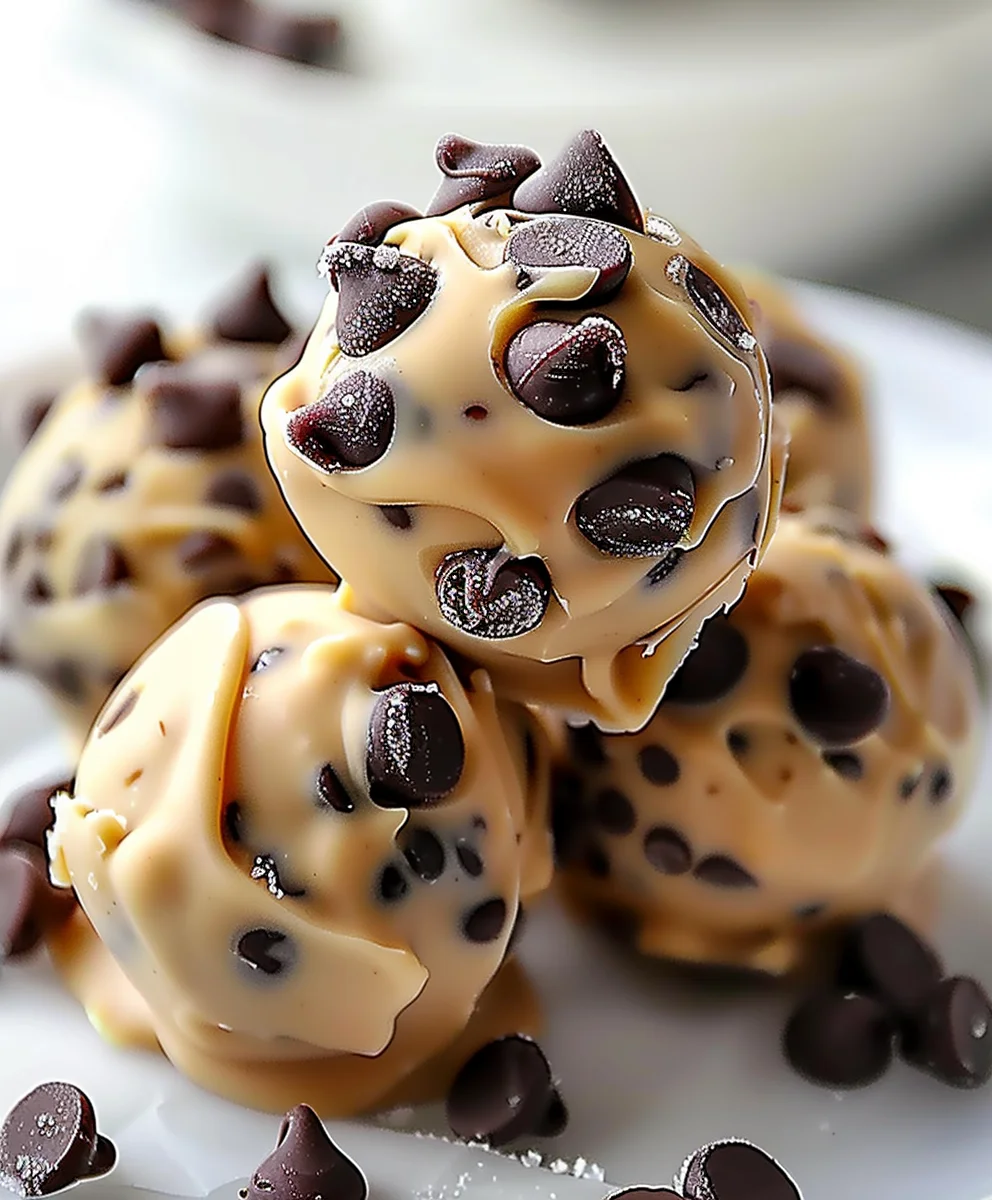
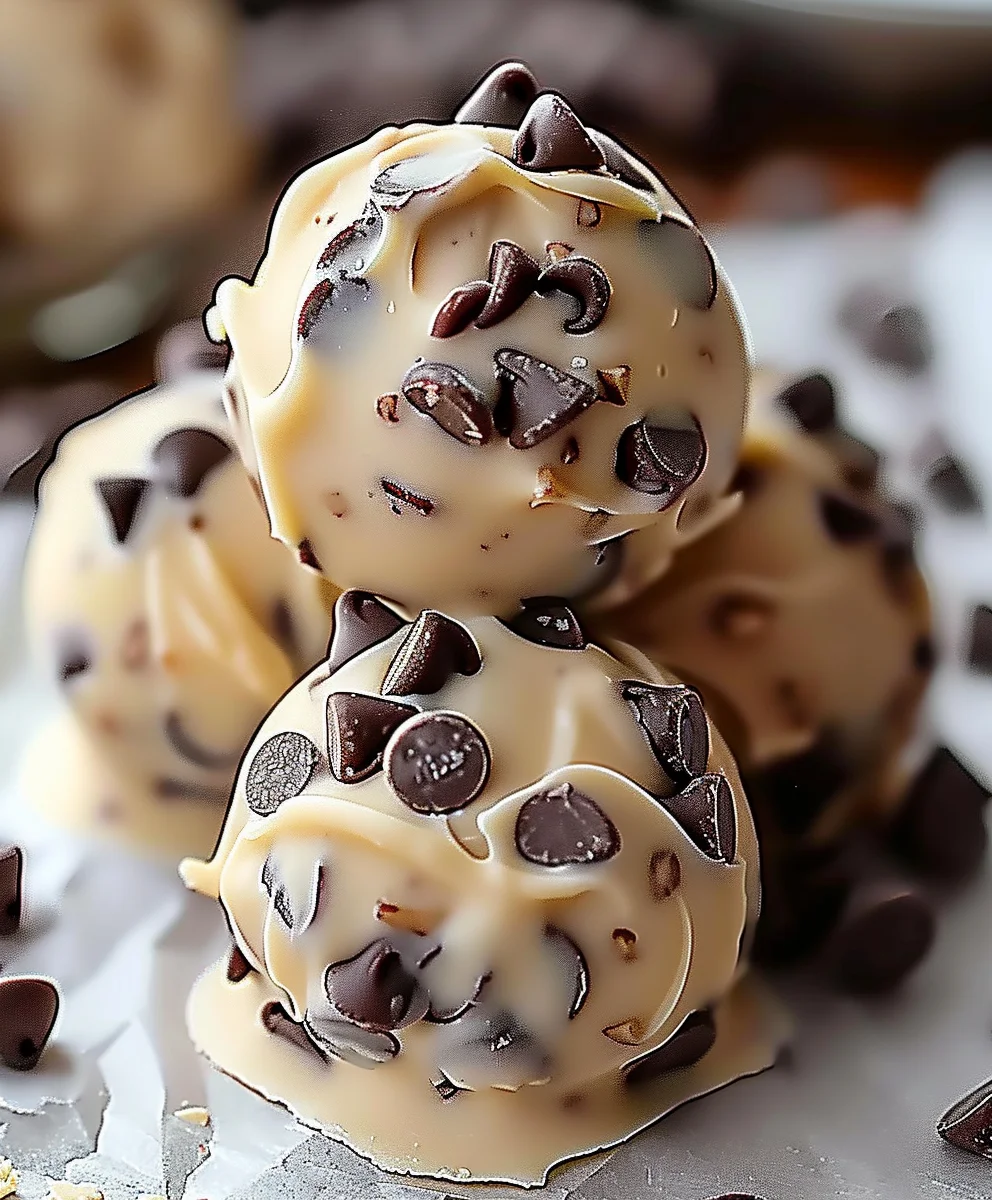
Frozen Greek Yogurt Peanut Butter Bites Chocolate Chips offer an irresistible combination that I am absolutely thrilled to share with you today. Imagine a treat that effortlessly satisfies your sweet tooth while simultaneously providing a wholesome, protein-packed boost – that’s precisely what these delightful bites deliver. They are a true revelation for anyone seeking a guilt-free indulgence, transforming simple ingredients into a creamy, satisfying frozen dessert that’s perfect for any time of day. This recipe taps into the incredible versatility of Greek yogurt, a nutritional powerhouse revered since ancient times for its rich texture and health benefits, seamlessly blended with the comforting familiarity of peanut butter, a beloved staple in many households for over a century.
I find that the marriage of tangy Greek yogurt, rich peanut butter, and the delightful burst of chocolate chips creates a symphony of flavors and textures that is truly unparalleled. People consistently rave about these bites not only for their exquisite taste but also for their remarkable convenience and minimal preparation time. They are the ideal make-ahead snack, ready to grab from the freezer whenever a craving strikes. Whether you’re a busy parent, a fitness enthusiast, or simply someone who appreciates a delicious yet healthy alternative, these Frozen Greek Yogurt Peanut Butter Bites Chocolate Chips are destined to become a firm favorite in your repertoire. I invite you to discover the joy of this simple yet profoundly satisfying creation.

Ingredients:
- 1 ½ cups (approximately 375g) Plain Greek Yogurt: I always reach for full-fat Greek yogurt because it yields the creamiest, most satisfying texture for these “Frozen Greek Yogurt Peanut Butter Bites Chocolate Chips”. It’s richer and less prone to getting icy compared to its low-fat or non-fat counterparts, which can sometimes make for a more brittle bite. Ensure it’s plain and unsweetened, as we’ll be adding our own sweetener to control the sweetness level perfectly. The thick consistency of Greek yogurt is crucial for holding its shape when frozen, providing that delightful, smooth mouthfeel we’re aiming for.
- ½ cup (approximately 128g) Natural Creamy Peanut Butter: The key here is “natural” creamy peanut butter. This means peanut butter where the only ingredients are peanuts and perhaps a touch of salt, without added sugars or hydrogenated oils. These extra ingredients can affect the texture of your bites, making them less smooth or overly sweet. If your peanut butter has separated, give it a good, thorough stir before measuring to ensure it’s fully emulsified. Almond butter or cashew butter can also be lovely alternatives if you’re not a fan of peanut butter or have an allergy, offering a slightly different but equally delicious flavor profile for your frozen bites.
- ¼ cup (60ml) Maple Syrup or Honey: This is my go-to sweetener for these bites, providing a lovely depth of flavor that complements the peanut butter beautifully. You can adjust this amount to your personal preference; if you like things a little sweeter, add another tablespoon or two. For a sugar-free option, you could use a granulated erythritol or stevia blend, dissolved in a tiny bit of warm water first to ensure it blends smoothly without a gritty texture. Liquid sweeteners tend to incorporate much better into the yogurt mixture than granulated ones, contributing to a silkier texture.
- 1 teaspoon Pure Vanilla Extract: A touch of vanilla goes a long way in enhancing all the other flavors. It adds a warm, comforting note that really rounds out the profile of our “Frozen Greek Yogurt Peanut Butter Bites Chocolate Chips”. Don’t skip this, as it adds a subtle aromatic complexity that elevates the overall taste.
- ½ cup (approximately 85g) Mini Chocolate Chips: I adore mini chocolate chips for these bites because they distribute so evenly throughout the mixture, ensuring a little bit of chocolate in every single bite. Semi-sweet or dark chocolate chips work wonderfully here, providing a slight bitterness that perfectly balances the sweetness of the yogurt mixture and the richness of the peanut butter. If you only have regular-sized chocolate chips, feel free to give them a quick chop to break them down into smaller pieces so they integrate better into the small bites.
- ¼ teaspoon Sea Salt (optional, but highly recommended): A pinch of sea salt doesn’t make the bites taste salty, but rather acts as a flavor enhancer. It really makes the peanut butter and chocolate flavors pop, bringing a wonderful balance to the overall taste profile. It’s like magic how it brightens and deepens the flavors!
- Optional Toppings/Add-ins (for extra crunch or flavor):
- 2 tablespoons Chopped Roasted Peanuts: For an extra layer of crunch and intensified peanut flavor, sprinkle these on top before freezing.
- 1 tablespoon Chia Seeds or Flax Seeds: To boost the nutritional value with healthy fats, fiber, and omega-3s without significantly altering the taste or texture.
- A drizzle of melted chocolate: For a pretty, gourmet finish after the bites are frozen solid, adding another layer of visual and textural appeal.
Preparation Phase: Blending the Base for Your Frozen Greek Yogurt Peanut Butter Bites Chocolate Chips
- Prepare Your Mixing Bowl and Utensils: First things first, grab a medium-sized mixing bowl. You’ll also want a sturdy spatula or a whisk handy. Before you even start adding ingredients, it’s a good idea to lay out all your measured ingredients on your counter. This concept, known as “mise en place,” ensures that the whole process flows smoothly and you don’t find yourself scrambling for an ingredient mid-mix. Trust me, it makes a world of difference, especially when you’re dealing with a recipe that moves from mixing to freezing fairly quickly. Having everything within reach minimizes stress and makes the cooking process more enjoyable and efficient.
- Combine the Greek Yogurt and Peanut Butter: In your prepared mixing bowl, scoop in the 1 ½ cups of plain full-fat Greek yogurt. Next, add the ½ cup of natural creamy peanut butter. Now, this is where the magic starts to happen! Using your spatula or whisk, begin to stir these two ingredients together. You’ll want to mix them thoroughly until they are completely smooth and homogenous. The peanut butter needs to be fully incorporated into the yogurt, leaving no streaks of plain yogurt or clumps of peanut butter. This might take a couple of minutes of vigorous stirring, especially if your peanut butter is on the thicker side or was just pulled from the fridge. I find that a good, sturdy rubber spatula works best here for scraping down the sides of the bowl and ensuring everything is combined perfectly. Achieving a uniform base is crucial for the consistent texture and flavor distribution of your Frozen Greek Yogurt Peanut Butter Bites Chocolate Chips. A well-blended base prevents pockets of unmixed ingredients, ensuring every bite is equally delicious.
- Sweeten and Flavor the Mixture: Once your yogurt and peanut butter are beautifully blended into a creamy base, it’s time to add the sweetness and aromatic notes. Pour in the ¼ cup of maple syrup or honey. Remember, you can always adjust this to your liking; if you prefer a less sweet bite, start with slightly less, or if you have a real sweet tooth, add a touch more. Next, add the 1 teaspoon of pure vanilla extract. If you’ve opted to include the ¼ teaspoon of sea salt, now is the time to sprinkle it in. Stir everything together once more, making sure all the new additions are evenly distributed throughout the creamy base. Take a moment to taste a tiny bit of the mixture at this stage. This is your chance to adjust the sweetness or add another pinch of salt if you feel it needs it. It’s much easier to adjust flavors now than after they’re frozen! This pre-freezing taste test is invaluable for customizing the final product to your exact preferences.
- Fold in the Chocolate Chips: Finally, gently fold in the ½ cup of mini chocolate chips. I emphasize “gently” here because you don’t want to overmix them. We want the chocolate chips to be distributed throughout the mixture, but not crushed or melted into the base. Use your spatula to incorporate them with a few careful turns, ensuring that every bite will have delightful specks of chocolate. If you’re adding any optional mix-ins like chopped nuts or chia seeds, this is also the perfect moment to fold those into the mixture. The vibrant combination of Greek yogurt, peanut butter, and chocolate chips is now ready for the next exciting phase! This careful folding technique ensures the chocolate chips remain distinct and provide that lovely textural contrast when frozen.
Assembly Phase: Shaping Your Delicious Frozen Greek Yogurt Peanut Butter Bites Chocolate Chips
- Prepare Your Baking Sheet: You’ll need a large baking sheet for this step. Line it completely with parchment paper or a silicone baking mat. This is a non-negotiable step, as it will prevent your frozen bites from sticking to the sheet and make them incredibly easy to remove once they’re solid. Trust me, trying to pry frozen yogurt off a metal sheet without a liner is a challenge you want to avoid! Ensure the parchment paper lies flat on the sheet for a neat appearance of your bites, and if it’s curling, a tiny dab of butter or a few drops of water underneath can help it adhere to the sheet.
- Portioning the Mixture: Now for the fun part – creating the individual bites! There are a couple of ways you can go about this, depending on your preferred size and tools. The goal is to make them roughly uniform so they freeze at a similar rate.
- Method 1: Using a Small Cookie Scoop (Recommended for Uniformity). This is my preferred method for ensuring all the bites are roughly the same size, which helps them freeze evenly and look professionally made. Take a small cookie scoop (about 1-1.5 tablespoon capacity) and scoop mounds of the yogurt mixture onto your prepared baking sheet. Leave a little space between each scoop, perhaps an inch or so, to prevent them from freezing together. The scoop helps create those perfectly rounded, appealing shapes that are easy to handle and eat.
- Method 2: Using Two Spoons. If you don’t have a cookie scoop, no worries at all! You can absolutely use two spoons to drop spoonfuls of the mixture onto the baking sheet. Use one spoon to scoop the mixture and the other spoon to gently push it off onto the parchment paper. While this method might result in slightly less uniform shapes, the taste will still be absolutely fantastic, and they’ll still be perfectly functional as “bites”! Aim for tablespoon-sized portions for consistency.
- Method 3: Spreading and Breaking (for a bark-like approach). For a more rustic, bark-like treat that still delivers all the same delicious flavors, you could spread the entire mixture evenly onto the lined baking sheet. Smooth it out with your spatula to about a ½-inch thickness across the whole sheet. Once frozen, you can then break it into irregular pieces, which can be quite charming. This is a great option if you’re in a hurry and don’t mind a less defined shape. However, for true, individual “bites” that are easily portioned and mess-free, I recommend the scooping methods.
Aim for around 20-24 bites from this recipe, but the exact number will depend on the size you choose to make them. Ensuring similar sizes helps in predicting freezing times and makes for a more consistent eating experience of your “Frozen Greek Yogurt Peanut Butter Bites Chocolate Chips”.
- Optional: Add Extra Toppings (Pre-Freezing): If you’re feeling fancy and want to add an extra layer of texture or flavor, now is the time to do it! Immediately after portioning the bites onto the baking sheet, you can sprinkle a tiny pinch of extra sea salt on top of each one (this really enhances the chocolate and peanut butter!), or a few chopped roasted peanuts for an added crunch, or even a tiny dash of cocoa powder for a deeper chocolate note. Gently press them down so they adhere to the soft yogurt mixture and don’t just fall off once frozen. This step adds both visual appeal and a delightful textural contrast to your “Frozen Greek Yogurt Peanut Butter Bites Chocolate Chips”. Don’t go overboard with toppings; a little goes a long way to enhance rather than overpower the core flavors.
Freezing Phase: Setting Your Frozen Greek Yogurt Peanut Butter Bites Chocolate Chips
- Initial Freeze (The Crucial Firming Stage): Carefully transfer your baking sheet with the portioned bites into your freezer. Try to place it on a flat, level surface so the bites don’t slide around or lose their shape as they begin to firm up. It’s important to allow them to freeze for at least 2 to 3 hours, or until they are completely solid. This initial freeze is absolutely critical for the structure and stability of your “Frozen Greek Yogurt Peanut Butter Bites Chocolate Chips”. If they aren’t fully frozen, they’ll be difficult to handle and will likely stick together or lose their shape when you try to transfer them. You want them to be firm enough that you can easily pick them up without them deforming or melting quickly in your hands. Depending on the strength of your freezer and the size of your bites, this could sometimes take up to 4 hours. Patience is a virtue here, as a well-frozen bite is key to their success and enjoyability.
- Transfer to an Airtight Container for Long-Term Storage: Once your “Frozen Greek Yogurt Peanut Butter Bites Chocolate Chips” are thoroughly frozen and solid, carefully remove them from the baking sheet. Because you wisely used parchment paper or a silicone mat, they should lift off easily without any fuss. Transfer the frozen bites into a freezer-safe, airtight container or a heavy-duty freezer bag. If you’re using a container, you can layer the bites, but I highly recommend placing a small piece of parchment paper between each layer to prevent them from sticking together. This thoughtful layering ensures that you can easily grab just one or two whenever a craving strikes, without having to chip away at a solid block of frozen treats! Removing air from the container or bag before sealing also helps prevent freezer burn, preserving their delicious texture and flavor.
- Enjoying Your Bites and Storage: Your delicious “Frozen Greek Yogurt Peanut Butter Bites Chocolate Chips” are now ready to be enjoyed! They are best consumed directly from the freezer, offering a wonderfully cool, creamy, and satisfying treat that slowly melts in your mouth, releasing all those delightful flavors. They will keep well in the freezer for up to 2-3 weeks. Beyond that, while still safe to eat, the texture might start to degrade slightly, potentially becoming a bit icier or developing freezer burn if not perfectly sealed. For the best experience, try to finish them within this timeframe. These bites are an incredibly convenient and healthy snack or dessert option, perfect for meal prepping your treats for the week ahead!
Optional Enhancements and Serving Suggestions for Your Frozen Greek Yogurt Peanut Butter Bites Chocolate Chips
- Elevating the Flavor Profile: You can easily customize these “Frozen Greek Yogurt Peanut Butter Bites Chocolate Chips” to suit your unique taste preferences or to add an extra nutritional punch.
- A Dash of Cinnamon: For those who love a warm spice note, a small pinch of ground cinnamon added to the yogurt mixture (alongside the vanilla extract) can create an incredibly comforting depth of flavor. Cinnamon pairs beautifully with both peanut butter and chocolate, making your bites even more irresistible and adding a cozy, autumnal feel.
- Zest Appeal: A tiny bit of orange or lemon zest folded into the mixture can add a bright, fresh counterpoint to the richness of the peanut butter and chocolate. Just be sparing, as a little zest goes a long way in providing a surprising burst of aromatic freshness.
- Protein Boost: If you’re looking to make these bites an even more substantial snack, consider adding a scoop of your favorite unflavored or vanilla-flavored protein powder to the yogurt base. You might need to add an extra tablespoon of milk (dairy or non-dairy) to maintain the desired consistency, as protein powder can thicken mixtures significantly. Make sure to blend it in very well to avoid any powdery texture, ensuring a smooth and pleasant mouthfeel.
- Different Nut Butters: While “Peanut Butter” is prominently featured in the focus keyword, don’t be afraid to experiment with other nut butters! Almond butter offers a slightly milder, sweeter flavor, while cashew butter provides an incredibly creamy, almost buttery taste. Even sunflower seed butter can be a great option for those with nut allergies, offering a distinct but equally delicious profile for your “Frozen Greek Yogurt Bites”. Each nut butter will lend its own unique nuance to the finished product.
- Drizzling for Decadence: Once your “Frozen Greek Yogurt Peanut Butter Bites Chocolate Chips” are completely frozen and you’ve transferred them to their storage container, you can add an extra layer of decadence and visual appeal. Melt about ¼ cup of chocolate chips with a teaspoon of coconut oil (the coconut oil helps thin the chocolate for a smooth drizzle and allows it to set quickly) in a microwave-safe bowl (in 30-second intervals, stirring in between) or over a double boiler until smooth. Take the frozen bites out, place them back on a parchment-lined baking sheet, and drizzle the melted chocolate over them using a spoon or a piping bag with a very small tip for more precision. Work quickly, as the chocolate will set almost instantly on the cold bites. You can then sprinkle a tiny bit more sea salt on top of the wet chocolate for that gourmet, salted chocolate touch. Pop them back into the freezer for 5-10 minutes to fully set the drizzle before returning them to their airtight container for storage. This makes them look incredibly professional and adds another layer of rich chocolate flavor and satisfying texture.
- Serving Suggestions: These versatile bites are perfect for a multitude of occasions and needs.
- Post-Workout Snack: These bites are packed with protein from the Greek yogurt and healthy fats from the peanut butter, making them an excellent choice for a quick and satisfying post-workout refuel. They help in muscle recovery and keep you feeling full.
- Healthy Dessert Alternative: Instead of reaching for a high-sugar, processed dessert, grab a couple of these “Frozen Greek Yogurt Peanut Butter Bites Chocolate Chips”. They satisfy a sweet craving without the guilt, offering a much healthier and equally delicious option.
- Mid-Day Energy Boost: When that afternoon slump hits and you need a pick-me-up, these bites offer a perfect blend of sustenance and deliciousness to get you through the rest of your day. The protein and healthy fats provide sustained energy.
- Kid-Friendly Treat: Kids absolutely adore these! They’re a much healthier alternative to many store-bought frozen treats, packed with good-for-you ingredients, and they’re so easy for little hands to pick up and enjoy. They can even help in the preparation, making it a fun family activity.
These versatile treats are not just for specific times; they’re truly a fantastic addition to any healthy eating routine, providing convenience, taste, and nutrition in every frozen bite. So go ahead, whip up a batch of these Frozen Greek Yogurt Peanut Butter Bites Chocolate Chips and enjoy the delightful fusion of flavors and textures!
Conclusion:
And there you have it, my friends! We’ve journeyed through the simple steps to create what I truly believe will become one of your new favorite guilt-free pleasures. This recipe isn’t just another snack; it’s a revelation, a perfect marriage of creamy, tangy Greek yogurt, rich, comforting peanut butter, and delightful bursts of chocolatey sweetness, all transformed into a frosty, satisfying treat. I can’t emphasize enough how much these little wonders have changed my snacking habits for the better. They offer that delightful coolness that’s just perfect on a warm day, yet their substantial texture and incredible flavor make them an anytime, any-weather indulgence. What makes them a true must-try is their sheer simplicity coupled with their impressive nutritional profile – packed with protein, far less sugar than most store-bought alternatives, and completely customizable. You’re not just making a snack; you’re crafting a healthier lifestyle choice that genuinely tastes like a decadent dessert. It’s the ultimate answer to those pesky sweet cravings, ensuring you can indulge without a single ounce of regret. I often find myself reaching for one of these instead of a less wholesome option, and the satisfaction is always immense. They truly embody the idea that healthy eating can, and should, be utterly delicious and enjoyable.
Now, let’s talk about how to truly make these your own and enjoy them in myriad ways. While fantastic straight out of the freezer, the beauty of these bites lies in their incredible versatility. For a quick, energizing breakfast on the go, grab a handful with your morning coffee; the protein will keep you full and focused. They are also an absolute lifesaver as a post-workout treat, providing essential nutrients for recovery while rewarding your efforts with something genuinely delicious. Imagine a warm evening, and instead of a heavy dessert, you can present a small platter of these delightful bites – light, refreshing, and utterly satisfying. Consider them your secret weapon for healthy entertaining! I love arranging them artfully on a small plate, perhaps with a sprig of fresh mint or a few berries for a touch of elegance. And speaking of berries, don’t be shy about serving them alongside a small bowl of fresh mixed berries for an extra antioxidant boost.
Creative Variations to Explore:
- Topping Adventures: While chocolate chips are fantastic, why stop there? Experiment with a sprinkle of shredded coconut (toasted or raw!), finely chopped nuts like almonds, pecans, or walnuts for added crunch and healthy fats, or even a dash of cinnamon or nutmeg in the yogurt mix for a cozy twist.
- Sweetness Swaps: If you’re looking to reduce sugar further, consider using sugar-free chocolate chips or a natural sweetener like stevia or erythritol in place of honey or maple syrup. A pinch of vanilla extract can also enhance the perception of sweetness without adding extra sugar.
- Fruity Fusions: For an extra layer of flavor and texture, try folding in finely diced dried cranberries, raisins, or even small pieces of freeze-dried strawberries into the yogurt mixture before freezing.
- Texture Play: For an ultra-creamy, almost mousse-like texture, blend your peanut butter, Greek yogurt, and sweetener until incredibly smooth before adding your mix-ins. If you prefer a more rustic feel, leave some small chunks of peanut butter marbled throughout.
- Drizzle Delights: Once frozen, a delicate drizzle of melted dark chocolate (perhaps tempered slightly for a nice snap), a tiny bit of honey, or even a natural fruit syrup can elevate these bites into something truly gourmet. Just ensure the drizzle isn’t too thick, so it hardens nicely.
Seriously, I urge you, if you haven’t already, to dive into your kitchen this week and give this recipe a try. You’ll be amazed at how effortlessly you can create such a wonderful, wholesome snack. The process is straightforward, the ingredients are accessible, and the payoff is immense. This isn’t just about making a delicious treat; it’s about discovering how simple it can be to incorporate healthier options into your daily routine without sacrificing flavor or satisfaction. So, please, gather your ingredients, follow the simple steps, and whip up a batch of these incredible Frozen Greek Yogurt Peanut Butter Bites Chocolate Chips. I promise you won’t regret it!
And when you do, I would absolutely love to hear about your experience! Did you stick to the original recipe, or did you put your own unique twist on it? What were your favorite variations? Did your kids love them? Your feedback, your photos, and your creative suggestions not only make my day but also inspire countless other home cooks in our community. Share your culinary adventures with us – let us know how these delightful bites have brightened your snacking repertoire. Happy freezing, and happy snacking!
Healthy Frozen Greek Yogurt PB Chocolate Chip Bites
Delicious, guilt-free frozen bites combining creamy Greek yogurt, rich peanut butter, and sweet chocolate chips. A protein-packed, wholesome treat perfect for any time of day, satisfying sweet cravings with simple ingredients.
Ingredients
-
1 cup Plain Greek Yogurt
-
1/2 cup Creamy Peanut Butter
-
1/4 cup Honey
-
1 teaspoon Vanilla Extract
-
1/2 cup Mini Chocolate Chips
-
1/4 teaspoon Sea Salt (optional)
Instructions
-
Step 1
Line a baking sheet with parchment paper. Have all measured ingredients ready. -
Step 2
In a medium bowl, combine Greek yogurt, creamy peanut butter, honey, vanilla extract, and sea salt (if using). Stir until smooth and well combined. -
Step 3
Gently fold in the mini chocolate chips until evenly distributed. -
Step 4
Using a small cookie scoop (1-1.5 tbsp capacity) or two spoons, drop tablespoon-sized mounds of the mixture onto the prepared baking sheet. Leave an inch of space between each bite. Optionally, add extra toppings like chopped peanuts before freezing. -
Step 5
Carefully transfer the baking sheet to the freezer. Freeze for at least 2-3 hours, or until the bites are completely solid. -
Step 6
Once thoroughly frozen, remove the bites from the baking sheet and transfer them to a freezer-safe, airtight container or heavy-duty freezer bag. If layering, place small pieces of parchment paper between layers to prevent sticking. -
Step 7
Serve directly from the freezer. Store in the freezer for up to 2-3 weeks for the best texture and flavor.
Important Information
Nutrition Facts (Per Serving)
It is important to consider this information as approximate and not to use it as definitive health advice.
Allergy Information
Please check ingredients for potential allergens and consult a health professional if in doubt.