Irresistible Grandmas Chocolate Pie Recipe To Delight You – what could be more comforting than a slice of homemade chocolate pie that instantly transports you back to cherished childhood memories? This isn’t just any dessert; it’s a timeless classic, a culinary hug in every single bite. For generations, chocolate pie has graced countless family tables, a staple at holiday gatherings, Sunday dinners, and celebratory moments across America. It’s the kind of dessert that speaks of warmth, tradition, and the unparalleled magic of a grandmother’s kitchen, evoking a sense of nostalgia that few other treats can match.
Why Everyone Loves This Classic Chocolate Pie
What makes this pie so universally adored? It’s that perfect harmony of a flaky, buttery crust embracing a filling so rich, so velvety smooth, and so profoundly chocolatey that it simply melts in your mouth. The intense cocoa flavor, often balanced with a subtle sweetness, creates an experience that satisfies even the most demanding sweet tooth. Whether you’re a seasoned baker or new to the kitchen, preparing this dessert is a joy, and the reward is immense. I am thrilled to share this ultimate Irresistible Grandmas Chocolate Pie Recipe To Delight You, promising not just a dessert, but a delightful journey down memory lane, creating new cherished moments with every delicious forkful.

Ingredients:
-
For the Flaky Pie Crust:
- 2 ½ cups (300g) all-purpose flour, plus more for dusting
- 1 teaspoon fine sea salt
- 1 tablespoon granulated sugar
- 1 cup (226g) unsalted butter, very cold and cut into ½-inch cubes
- ½ to ¾ cup (120-180ml) ice water
-
For the Rich Chocolate Filling:
- ¾ cup (150g) granulated sugar
- ½ cup (45g) unsweetened cocoa powder, good quality for best flavor
- ¼ cup (30g) cornstarch
- ½ teaspoon fine sea salt
- 2 ½ cups (600ml) whole milk
- 4 large egg yolks
- 4 tablespoons (56g) unsalted butter, cut into cubes
- 1 teaspoon pure vanilla extract
- 4 ounces (113g) high-quality semi-sweet or dark chocolate (60-70% cacao), finely chopped
-
For the Dreamy Whipped Cream Topping:
- 2 cups (480ml) heavy whipping cream, very cold
- ¼ cup (30g) powdered sugar (confectioners’ sugar)
- 1 teaspoon pure vanilla extract
-
For Garnish (Optional):
- Chocolate shavings or a dusting of cocoa powder
Making the Flaky Pie Crust – The Foundation of Our Irresistible Grandmas Chocolate Pie
- Combine Dry Ingredients: In a large mixing bowl, I like to whisk together my all-purpose flour, salt, and granulated sugar. Make sure these are well combined. This ensures even seasoning throughout our crust, which is crucial for that perfect balance of flavor that makes an Irresistible Grandmas Chocolate Pie Recipe To Delight You truly shine.
- Incorporate the Cold Butter: Now, this is where the magic of a flaky crust really begins. I add the very cold, cubed unsalted butter to my flour mixture. Using a pastry blender, two knives, or even my fingertips, I work the butter into the flour until the mixture resembles coarse meal with some pea-sized pieces of butter remaining. It’s so important that the butter stays cold! Cold butter creates steam in the oven, which leads to those glorious flaky layers. If your kitchen is warm, you might even consider chilling your flour mixture for 10-15 minutes before adding the butter.
- Add Ice Water Gradually: I then begin adding the ice water, one tablespoon at a time, mixing gently after each addition. I usually start with about ½ cup and add more only if absolutely necessary. The goal here is just enough water for the dough to come together when squeezed, but not so much that it becomes sticky or overly wet. You’ll notice the dough starts to clump. Be patient and gentle; overworking the dough at this stage develops too much gluten, which can make your crust tough instead of tender. This careful handling is part of what makes this an amazing Irresistible Grandmas Chocolate Pie Recipe To Delight You.
- Form and Chill the Dough: Once the dough barely comes together, I gently gather it into a cohesive ball. I then flatten it into a disc, wrap it tightly in plastic wrap, and place it in the refrigerator for at least 1 hour, or preferably 2 hours. Chilling allows the gluten to relax, which makes the dough easier to roll, and it re-chills the butter, further ensuring flakiness. This step is non-negotiable for a truly perfect crust.
- Roll Out the Dough: After chilling, I remove the dough from the refrigerator and let it sit at room temperature for about 10-15 minutes to make it slightly more pliable. On a lightly floured surface, I roll out the dough into a 12-inch circle, about ⅛-inch thick. I always try to roll from the center outwards, rotating the dough frequently to prevent sticking and to maintain a round shape. If the dough starts to crack, it’s a sign it’s still too cold; let it warm up a little longer.
- Transfer to Pie Plate: Carefully, I transfer the rolled-out dough to a standard 9-inch pie plate. The easiest way I’ve found is to gently roll the dough around my rolling pin and then unroll it over the pie plate. I then gently press the dough into the bottom and up the sides of the plate, making sure there are no air bubbles trapped underneath. I trim the edges, leaving about a ½-inch overhang.
- Crimp the Edges: Now for the pretty part! I fold the overhang under itself, creating a thicker edge. Then, I crimp the edges decoratively using my fingers or a fork. This not only looks lovely but also helps prevent the crust from shrinking too much during baking.
- Chill Again: Before blind baking, I like to pop the pie crust back into the refrigerator for at least 30 minutes. This final chill helps the butter solidify again, preventing the crust from slumping during baking. It’s a small step that makes a big difference in the final look and texture of your pie.
- Blind Bake the Crust: Preheat your oven to 375°F (190°C). Line the chilled pie crust with parchment paper and fill it with pie weights, dried beans, or rice. I make sure the weights reach all the way up the sides to support the crimped edges. I bake it for 15 minutes. Then, I carefully remove the parchment paper and pie weights and continue to bake for another 10-12 minutes, or until the crust is golden brown and looks dry. This ensures our crust is fully cooked and crisp, preventing a soggy bottom once our luscious chocolate filling goes in. Let the blind-baked crust cool completely on a wire rack before proceeding. This complete cooling is essential for an Irresistible Grandmas Chocolate Pie Recipe To Delight You.
Preparing the Rich Chocolate Filling – The Heart of Our Pie
- Whisk Dry Ingredients: In a medium-sized saucepan (preferably a heavy-bottomed one to prevent scorching), I combine the granulated sugar, unsweetened cocoa powder, cornstarch, and salt. I whisk these dry ingredients together thoroughly. This step is crucial for breaking up any lumps in the cocoa and cornstarch, ensuring a silky smooth filling later.
- Gradually Add Milk: I then slowly whisk in about half of the whole milk until a smooth paste forms. Once it’s lump-free, I add the remaining milk and continue whisking until everything is well combined.
- Temper the Egg Yolks: In a separate small bowl, I lightly whisk the egg yolks. This is one of the most important steps to ensure a creamy, lump-free filling. While the milk mixture is heating, I’ll take about ½ cup of the warm milk mixture and slowly drizzle it into the whisked egg yolks, whisking constantly. This process, called tempering, gently raises the temperature of the egg yolks, preventing them from scrambling when added to the hot milk mixture. It’s a delicate dance, but so worth it for the smooth texture of this Irresistible Grandmas Chocolate Pie Recipe To Delight You.
- Cook the Filling: Now, I place the saucepan with the milk and dry ingredients over medium heat. I stir constantly with a whisk, especially scraping the bottom corners of the pan, until the mixture thickens and comes to a gentle boil. This usually takes about 6-8 minutes. Once it boils, I continue to whisk and cook for an additional 1-2 minutes to ensure the cornstarch is fully cooked and activated, which will give our pie its perfect set. The mixture will be very thick and glossy.
- Combine Tempered Yolks with Hot Mixture: I remove the saucepan from the heat. Slowly, I pour the tempered egg yolk mixture back into the hot chocolate mixture in the saucepan, whisking vigorously the entire time. Immediately return the saucepan to low heat and cook for another 1-2 minutes, whisking constantly, allowing the egg yolks to fully incorporate and thicken the custard further. Do not let it boil at this stage, or the eggs might curdle! The goal is just to heat it through and thicken.
- Add Chocolate, Butter, and Vanilla: As soon as the filling has reached the desired thickness, I remove the saucepan from the heat completely. I immediately stir in the cubed unsalted butter, the finely chopped high-quality chocolate, and the pure vanilla extract. I continue to stir until the butter and chocolate are completely melted and the filling is gloriously smooth, shiny, and decadent. Using good quality chocolate here truly makes a difference in the depth of flavor of your Irresistible Grandmas Chocolate Pie Recipe To Delight You.
- Chill the Filling (Slightly): I pour the hot chocolate filling into a clean bowl. To prevent a skin from forming on top, which is quite undesirable, I immediately press a piece of plastic wrap directly onto the surface of the filling. I let it cool at room temperature for about 30 minutes, then transfer it to the refrigerator to chill for at least 1-2 hours, or until it’s cool but still pourable. We want it cool enough not to heat up our crust too much, but still pliable enough to settle evenly.
Whipping the Cream – The Cloud-Like Topping
- Prepare for Whipping: For the best results, I always make sure my heavy whipping cream, mixing bowl, and whisk (or beaters) are very cold. I often pop my bowl and whisk into the freezer for 10-15 minutes before I start. This helps the cream whip up faster and hold its peaks better.
- Whip the Cream: In the chilled bowl, I pour in the very cold heavy whipping cream, powdered sugar, and pure vanilla extract. Using an electric mixer (handheld or stand mixer with the whisk attachment) on medium-high speed, I beat the mixture until soft peaks form. This means when you lift the whisk, the cream will hold a peak that curls over gently.
- Achieve Stiff Peaks: I continue beating until stiff peaks form. At this stage, when you lift the whisk, the cream will hold its shape firmly without collapsing. Be careful not to overbeat, or you’ll end up with butter! This beautiful, light, and airy whipped cream is the perfect counterpoint to the rich chocolate filling, making every bite of this Irresistible Grandmas Chocolate Pie Recipe To Delight You an absolute dream.
Assembling Our Irresistible Grandmas Chocolate Pie to Delight You
- Fill the Pie Crust: Once both the blind-baked pie crust and the chocolate filling are adequately cooled (the filling should still be somewhat pourable but cool), I carefully pour the chocolate filling into the cooled, blind-baked pie crust. I use an offset spatula or the back of a spoon to gently spread the filling evenly across the bottom of the crust.
- Chill the Pie: This is a crucial step for setting the pie properly and allowing the flavors to meld beautifully. I gently cover the pie with plastic wrap, being careful not to touch the surface of the filling, and refrigerate it for at least 4 hours, or ideally overnight. Patience is key here! A well-chilled pie will slice cleanly and offer the best texture. This chilling process transforms it into a truly magnificent Irresistible Grandmas Chocolate Pie Recipe To Delight You.
- Top with Whipped Cream: Just before serving, I generously dollop or pipe the dreamy whipped cream over the top of the chilled chocolate pie. You can spread it smoothly or create lovely swirls and peaks.
- Garnish and Serve: If desired, I love to sprinkle some chocolate shavings or a light dusting of cocoa powder over the whipped cream for an elegant finish. This pie is best enjoyed within 2-3 days, kept refrigerated. Each slice of this Irresistible Grandmas Chocolate Pie Recipe To Delight You is a little piece of heaven!
Conclusion:
My dear friends, as we come to the end of our culinary journey with this magnificent dessert, I truly hope you’re as excited as I am about what we’ve discovered. This isn’t just another recipe; it’s an invitation to create something truly magical, a dish that transcends mere ingredients to become a cherished memory. What makes this pie an absolute must-try isn’t just its unbelievably rich, silky-smooth chocolate filling or its perfectly flaky, buttery crust. It’s the profound sense of warmth, comfort, and nostalgia it evokes with every single bite. It’s the kind of dessert that has a story to tell, a legacy passed down through generations, ensuring every spoonful tastes like a hug from your dearest grandma.
I can confidently say that preparing this pie is an act of love, and serving it is an act of pure delight. The way the light catches the glossy surface of the chocolate, the subtle crack as you slice through the crust, the intense aroma that fills your kitchen – these are all part of the experience that makes this recipe so incredibly special. It’s remarkably easy to follow, even for those who might feel a little intimidated by baking, yet it delivers a show-stopping result that will impress absolutely everyone at your table. Trust me when I say this pie has a way of stealing the spotlight, turning any meal into a special occasion and leaving a lasting impression on all who taste it.
Now, let’s talk about enhancing this masterpiece. While this chocolate pie is utterly perfect on its own, there are so many delightful ways to serve and personalize it. For a classic presentation, a generous dollop of freshly whipped cream, perhaps lightly sweetened with a touch of vanilla, is always a winner. The lightness of the cream perfectly balances the richness of the chocolate. For an extra touch of decadence, consider garnishing each slice with delicate chocolate shavings or a sprinkle of high-quality cocoa powder. A scoop of premium vanilla bean ice cream melting alongside a warm slice of pie is also an unforgettable combination, offering a wonderful contrast in temperatures and textures. If you’re feeling a bit more adventurous, a few fresh raspberries or a sprig of mint can add a vibrant splash of color and a refreshing counterpoint to the deep chocolate flavor.
Beyond serving suggestions, this pie is also wonderfully adaptable for variations. Imagine infusing the chocolate filling with a hint of espresso powder to deepen the chocolate notes, or adding a splash of your favorite liquor like bourbon, rum, or a coffee liqueur for an adult twist. You could experiment with different crusts too – while our traditional flaky crust is divine, a crushed Oreo cookie crust or even a graham cracker crust would offer a delightful change of pace. For an even richer experience, you could top the cooled pie with a luscious chocolate ganache or a light meringue, toasted to golden perfection. The possibilities are truly endless, allowing you to make this already incredible pie uniquely your own, reflecting your personal taste and creativity in the kitchen. Each variation only adds to the charm and versatility of this beloved recipe.
So, my friends, don’t just read about this incredible dessert; I implore you to roll up your sleeves and give it a try. Experience for yourself the magic that happens when simple ingredients come together to create something extraordinary. There’s a profound satisfaction in baking, especially when the end result is as universally loved as this pie. I promise you, one bite of this delightful creation, and you’ll understand precisely why I consider it the
Irresistible Grandmas Chocolate Pie Recipe To Delight You
. It’s more than just a dessert; it’s an heirloom, a comfort, and a celebration all rolled into one perfect slice. Once you’ve whipped up your own pie, please, please share your experience with me! I’d absolutely love to hear about your baking journey, see photos of your beautiful creations, and discover any personal touches or serving ideas you’ve come up with. Let’s keep the tradition alive and spread the joy of this truly exceptional chocolate pie far and wide!
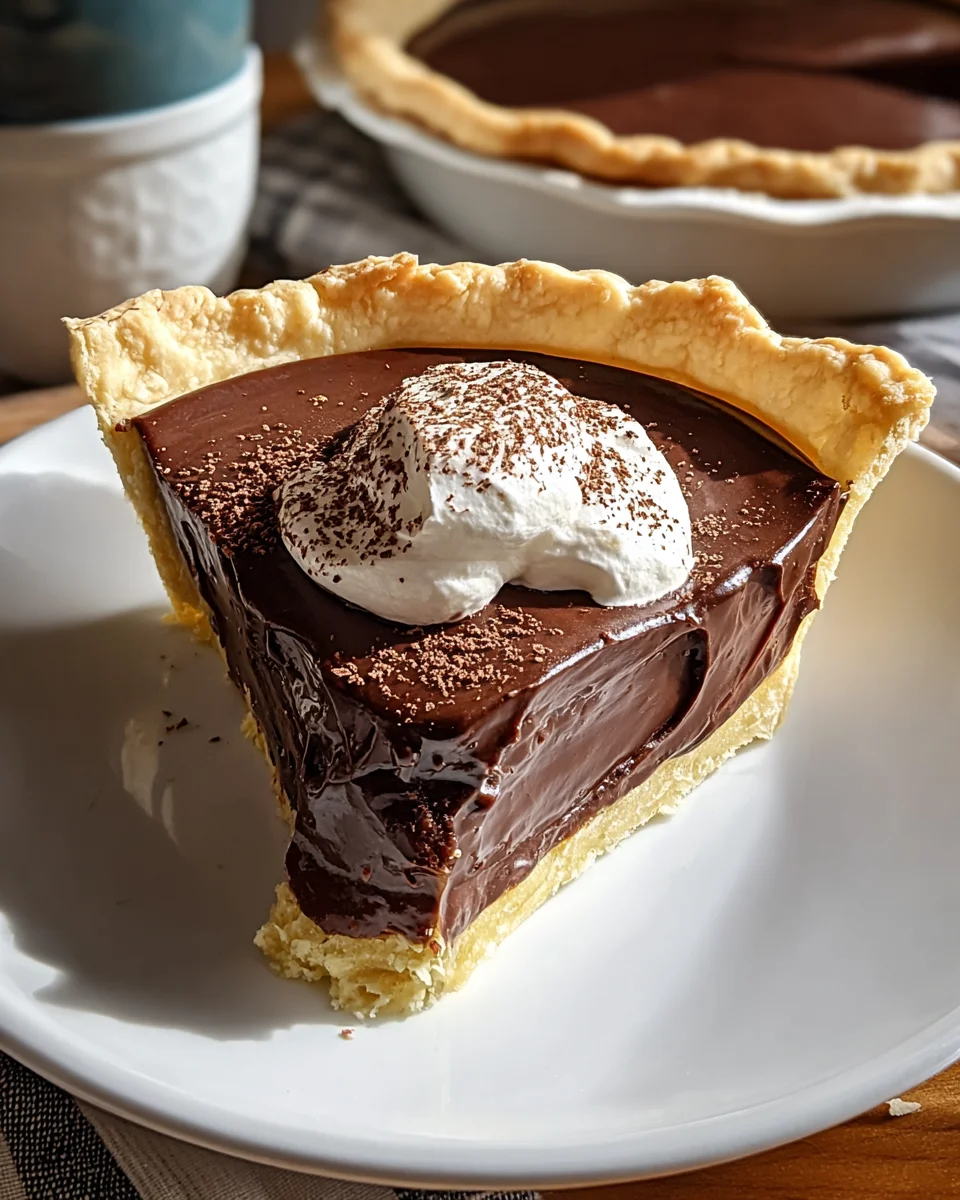
Grandma’s Irresistible Chocolate Pie
A timeless classic, Grandma’s Chocolate Pie is a culinary hug in every bite. This recipe delivers a rich, velvety smooth chocolate filling in a delicious crust, evoking warmth, tradition, and cherished memories.
Ingredients
Instructions
Important Information
Nutrition Facts (Per Serving)
It is important to consider this information as approximate and not to use it as definitive health advice.
Allergy Information
Please check ingredients for potential allergens and consult a health professional if in doubt.