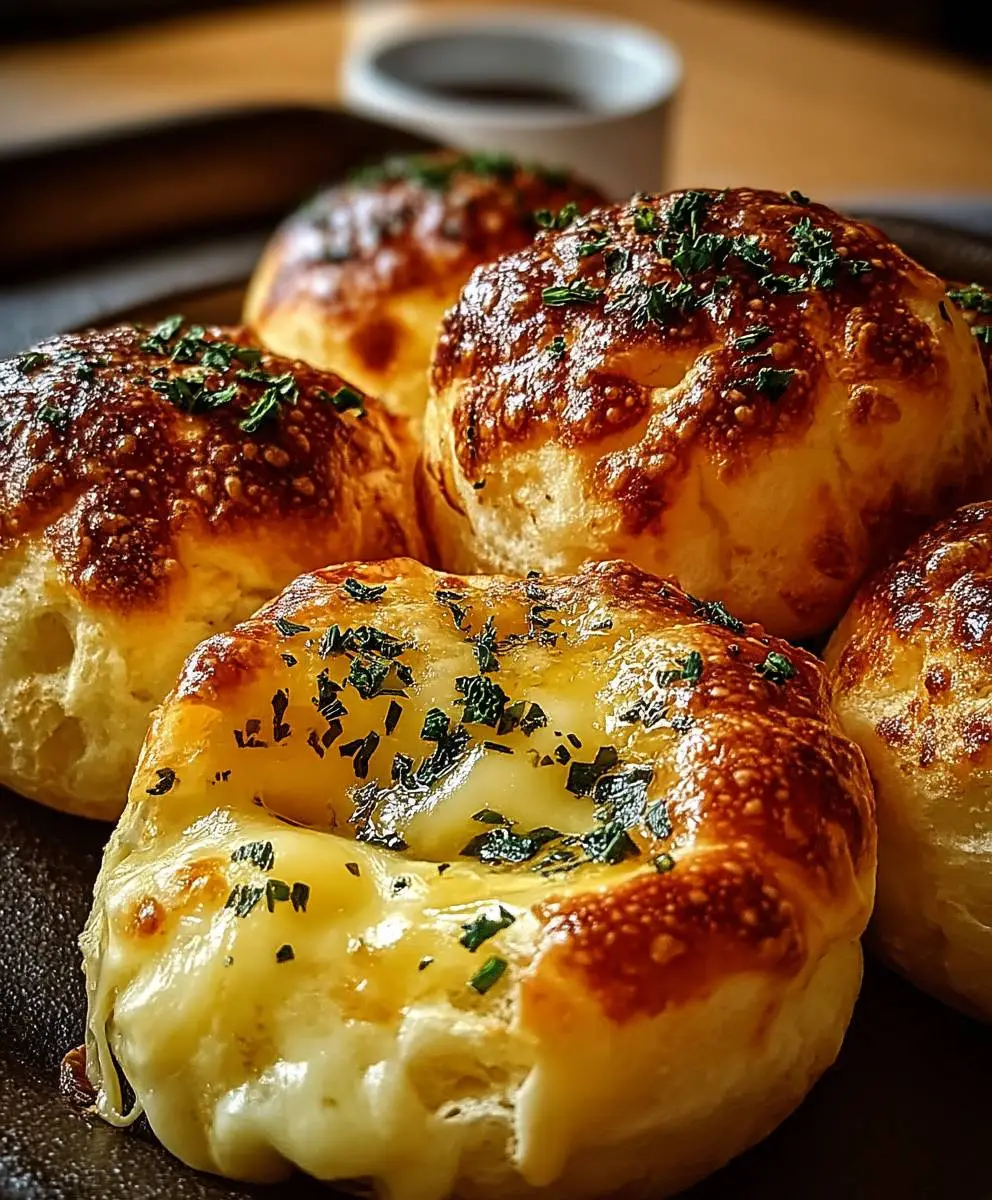
Garlic Butter Cheese Bombs: Prepare to have your taste buds explode with these irresistible, bite-sized pockets of pure cheesy, garlicky goodness! Imagine sinking your teeth into a warm, golden-brown exterior, only to be met with a molten core of melted cheese infused with the rich, savory flavor of garlic butter. These aren’t just any ordinary rolls; they’re an experience.
While the exact origins of these delightful treats are somewhat shrouded in mystery, the concept of combining bread, cheese, and garlic butter has been a culinary staple across various cultures for centuries. From Italian garlic knots to cheesy breadsticks, the combination is a timeless classic. What sets these Garlic Butter Cheese Bombs apart is their perfectly portioned size and the explosion of flavor packed into each one.
People adore these little bombs for so many reasons. The taste is undeniably addictive – the buttery garlic perfectly complements the creamy, melted cheese. The texture is equally appealing, offering a satisfying contrast between the slightly crisp exterior and the soft, gooey interior. Plus, they’re incredibly convenient! Whether you’re looking for a crowd-pleasing appetizer, a comforting snack, or a delicious addition to your dinner table, these cheese bombs are always a hit. Get ready to bake up a batch and watch them disappear in minutes!

Ingredients:
- 1 package (16 ounces) refrigerated biscuit dough (like Pillsbury Grands!)
- 8 ounces cream cheese, softened
- 1/2 cup (1 stick) unsalted butter, melted
- 4 cloves garlic, minced
- 1 cup shredded mozzarella cheese
- 1/2 cup grated Parmesan cheese
- 2 tablespoons chopped fresh parsley
- 1 teaspoon garlic powder
- 1/2 teaspoon onion powder
- 1/4 teaspoon red pepper flakes (optional, for a little kick!)
- Salt and freshly ground black pepper to taste
- Optional: Everything bagel seasoning for topping
Preparing the Garlic Butter
Okay, let’s get started! The first thing we’re going to do is make that glorious garlic butter. This is what’s going to infuse our cheese bombs with incredible flavor, so don’t skimp on the garlic!
- In a medium bowl, combine the melted butter and minced garlic. Make sure your butter isn’t too hot, just melted enough to be easily mixed.
- Add the garlic powder, onion powder, red pepper flakes (if using), salt, and pepper. Give it a good whisk until everything is evenly distributed. The aroma alone is going to make your mouth water!
- Set the garlic butter aside for now. We’ll need it later to coat our cheese bombs.
Preparing the Cheese Filling
Now, let’s move on to the cheesy goodness that will be the heart of our bombs. This is where the magic really happens!
- In a separate bowl, beat the softened cream cheese until it’s nice and smooth. This is important because you don’t want any lumps in your filling. If your cream cheese is still a little cold, you can microwave it for a few seconds, but be careful not to melt it completely.
- Add the shredded mozzarella cheese and grated Parmesan cheese to the cream cheese.
- Stir in the chopped fresh parsley. The parsley not only adds a pop of color but also a fresh, herbaceous flavor that complements the cheese perfectly.
- Season the cheese mixture with a pinch of salt and pepper to taste. Remember that Parmesan cheese is already quite salty, so go easy on the salt.
- Mix everything together until well combined. The cheese mixture should be thick and creamy.
Assembling the Cheese Bombs
Alright, we’ve got our garlic butter and our cheese filling ready to go. Now comes the fun part: assembling the cheese bombs! This is where we transform simple biscuit dough into irresistible, cheesy delights.
- Preheat your oven to 375°F (190°C). Line a baking sheet with parchment paper. This will prevent the cheese bombs from sticking and make cleanup a breeze.
- Open the can of refrigerated biscuit dough. Gently separate each biscuit.
- Using your fingers, flatten each biscuit into a circle, about 3-4 inches in diameter. You want them to be thin enough to easily wrap around the cheese filling, but not so thin that they tear.
- Place a generous spoonful (about 1-2 tablespoons) of the cheese filling in the center of each flattened biscuit.
- Carefully bring the edges of the biscuit dough up and around the cheese filling, pinching them together to seal. Make sure there are no gaps, or the cheese will ooze out during baking.
- Roll the sealed biscuit between your palms to form a smooth ball. This will help ensure even baking.
- Repeat steps 3-6 with the remaining biscuits and cheese filling.
Coating and Baking
We’re almost there! Now we’re going to coat our cheese bombs in that delicious garlic butter and bake them to golden perfection.
- Dip each cheese bomb into the melted garlic butter, making sure to coat it evenly on all sides. You can use a spoon to drizzle the butter over the bombs if you prefer.
- Place the coated cheese bombs on the prepared baking sheet, leaving a little space between each one.
- Optional: Sprinkle the tops of the cheese bombs with everything bagel seasoning for extra flavor and texture.
- Bake in the preheated oven for 15-20 minutes, or until the cheese bombs are golden brown and the biscuit dough is cooked through. Keep an eye on them, as baking times may vary depending on your oven.
Cooling and Serving
The hardest part is waiting! Once the cheese bombs are golden brown and bubbly, it’s time to take them out of the oven and let them cool slightly before serving.
- Remove the baking sheet from the oven and let the cheese bombs cool for a few minutes on the baking sheet. This will prevent them from burning your mouth.
- Transfer the cheese bombs to a serving plate.
- Serve warm and enjoy! These garlic butter cheese bombs are best enjoyed fresh out of the oven, when the cheese is melted and gooey and the biscuit dough is soft and fluffy.
Tips and Variations:
- Spice it up: Add a pinch of cayenne pepper or a dash of hot sauce to the cheese filling for a spicy kick.
- Herb it up: Experiment with different herbs in the cheese filling, such as oregano, thyme, or rosemary.
- Cheese it up: Use a variety of cheeses in the filling, such as cheddar, Monterey Jack, or provolone.
- Make it ahead: Assemble the cheese bombs ahead of time and store them in the refrigerator until ready to bake. You may need to add a few minutes to the baking time if baking from cold.
- Air Fryer Option: Preheat your air fryer to 350°F (175°C). Place the garlic butter coated cheese bombs in the air fryer basket, ensuring they are not overcrowded. Air fry for 8-10 minutes, or until golden brown and cooked through.
Serving Suggestions:
- Serve as an appetizer at your next party or gathering.
- Enjoy as a side dish with your favorite pasta or soup.
- Pack them in your lunchbox for a cheesy and satisfying snack.
- Dip them in marinara sauce, ranch dressing, or your favorite dipping sauce.
These Garlic Butter Cheese Bombs are guaranteed to be a hit with everyone who tries them. They’re easy to make, incredibly delicious, and perfect for any occasion. So go ahead, give them a try, and prepare to be amazed!
Conclusion:
And there you have it! These Garlic Butter Cheese Bombs are truly something special, and I genuinely believe you need to try them. They’re the perfect blend of savory, cheesy, and comforting, making them an instant crowd-pleaser for any occasion. From the satisfying pull of the melted cheese to the aromatic burst of garlic butter, every bite is an explosion of flavor that will leave you wanting more.
But why are these little bombs a must-try? It’s simple: they’re incredibly easy to make, require minimal ingredients, and deliver maximum flavor. Seriously, even if you’re a novice in the kitchen, you can whip these up in no time. Plus, they’re endlessly customizable!
Think of these as your blank canvas for cheesy, garlicky goodness. Want to kick up the heat? Add a pinch of red pepper flakes to the garlic butter. Craving something a little more herbaceous? Mix in some fresh chopped parsley, oregano, or thyme. Feeling adventurous? Try stuffing them with sun-dried tomatoes, cooked bacon bits, or even a little bit of pesto. The possibilities are truly endless!
Serving Suggestions and Variations:
These Garlic Butter Cheese Bombs are fantastic on their own as a snack or appetizer. Imagine serving them warm at your next party – they’ll disappear in minutes! They also make a wonderful addition to any meal. Serve them alongside a hearty bowl of pasta, a grilled steak, or a simple salad. They’re also perfect for dipping in marinara sauce, ranch dressing, or even a creamy garlic aioli.
For a fun variation, try using different types of cheese. Gruyere, provolone, or even a sharp cheddar would all work beautifully. You could also experiment with different types of bread dough. Instead of using store-bought biscuit dough, try making your own from scratch for an even more impressive result. Or, for a lighter option, use whole wheat biscuit dough.
Another great idea is to make mini cheese bombs using smaller biscuit rounds. These are perfect for kids or for serving as bite-sized appetizers. You could even arrange them on a platter with a variety of dipping sauces for a fun and interactive party snack.
Don’t be afraid to get creative and experiment with different flavors and ingredients to create your own signature version of these Garlic Butter Cheese Bombs.
I’m so confident that you’ll love this recipe, and I can’t wait to hear what you think! So, gather your ingredients, preheat your oven, and get ready to experience the magic of these cheesy, garlicky delights.
Now it’s your turn!
I encourage you to try this recipe and share your experience with me. Did you make any variations? What did you serve them with? What did your family and friends think? Leave a comment below and let me know! I’m always eager to hear your feedback and see your creations. Happy baking, and enjoy your delicious Garlic Butter Cheese Bombs! I know you will!
Garlic Butter Cheese Bombs: The Ultimate Guide to Deliciousness
Fluffy biscuit dough filled with a creamy, cheesy mixture, coated in garlic butter, and baked to golden perfection. These Garlic Butter Cheese Bombs are an irresistible appetizer or side dish!
Ingredients
Instructions
Recipe Notes
- Spice it up: Add a pinch of cayenne pepper or a dash of hot sauce to the cheese filling for a spicy kick.
- Herb it up: Experiment with different herbs in the cheese filling, such as oregano, thyme, or rosemary.
- Cheese it up: Use a variety of cheeses in the filling, such as cheddar, Monterey Jack, or provolone.
- Make it ahead: Assemble the cheese bombs ahead of time and store them in the refrigerator until ready to bake. You may need to add a few minutes to the baking time if baking from cold.
- Air Fryer Option: Preheat your air fryer to 350°F (175°C). Place the garlic butter coated cheese bombs in the air fryer basket, ensuring they are not overcrowded. Air fry for 8-10 minutes, or until golden brown and cooked through.
- Serve as an appetizer at your next party or gathering.
- Enjoy as a side dish with your favorite pasta or soup.
- Pack them in your lunchbox for a cheesy and satisfying snack.
- Dip them in marinara sauce, ranch dressing, or your favorite dipping sauce.