Christmas Sugar Cookie Shots Recipe – are you ready to elevate your holiday dessert game this year? I’m absolutely thrilled to share a concept that transforms two beloved Christmas traditions into one unforgettable treat. Forget the traditional cookie on a plate; we’re talking about an edible shot glass that merges the comforting taste of a classic sugar cookie with playful novelty. Sugar cookies, with their delightful simplicity and endless decorating possibilities, have been a cherished part of Christmas celebrations for generations. Their origins trace back to 17th-century German settlers who brought their cookie traditions to America, where they evolved into the festive, often beautifully adorned cookies we know today. These treats truly embody the spirit of the season, symbolizing joy, warmth, and togetherness. This ingenious Christmas Sugar Cookie Shots Recipe takes that beloved tradition and reimagines it as a whimsical, interactive experience that’s perfect for any holiday gathering. People adore this dish not just for its familiar, sweet flavor and tender-crisp texture, but for the sheer fun and creativity it brings to the festive table. Imagine guests enjoying their favorite holiday beverage – from milk to eggnog or even a festive liqueur – all served in a delicious, edible sugar cookie cup. It’s a brilliant conversation starter, a unique dessert, and an activity all rolled into one, promising to be the delightful highlight of your festive spread.

Ingredients:
-
For the Christmas Sugar Cookie Dough:
- 3 cups (360g) all-purpose flour, plus more for dusting
- 1 teaspoon baking powder
- 1/2 teaspoon salt
- 1 cup (226g) unsalted butter, softened to room temperature
- 1 1/2 cups (300g) granulated sugar
- 2 large eggs, at room temperature
- 2 teaspoons pure vanilla extract
- 1/2 teaspoon almond extract (optional, but highly recommended for a classic sugar cookie flavor)
-
For the Royal Icing Decoration:
- 4 cups (480g) powdered sugar, sifted
- 3 tablespoons meringue powder
- 6 tablespoons warm water, plus more as needed
- 1 teaspoon pure vanilla extract (or almond extract for a different flavor profile)
- Gel food coloring (red, green, white, etc., for Christmas themes)
- Various Christmas-themed sprinkles (optional)
-
Optional Fillings & Garnishes:
- 1 cup (approx. 170g) melting chocolate or chocolate chips (for lining the cookie shots)
- Milk or flavored milk (chocolate milk, eggnog)
- Hot cocoa (warm or chilled)
- Espresso or coffee beverages
- Liqueurs (e.g., Irish cream, coffee liqueur, peppermint schnapps for adult versions)
- Whipped cream or meringue
- Mini marshmallows
- Chocolate syrup or caramel sauce
- Gather Your Ingredients and Tools: Before you even begin, make sure your butter and eggs are at room temperature. This is crucial for achieving a smooth, well-emulsified dough that bakes evenly. Having everything ready means you won’t have to pause during critical steps. I also like to prepare my stand mixer with the paddle attachment and have all my measuring cups and spoons at hand.
- Whisk Dry Ingredients: In a medium bowl, whisk together the 3 cups of all-purpose flour, 1 teaspoon of baking powder, and 1/2 teaspoon of salt. I always give it a good whisk for about 30 seconds to ensure the leavening agent and salt are evenly distributed throughout the flour. This prevents pockets of salt or areas where the cookies won’t rise properly. Set this aside for now.
- Cream Butter and Sugar: In the bowl of a stand mixer fitted with the paddle attachment (or using a large bowl and a hand mixer), cream together the softened 1 cup of unsalted butter and 1 1/2 cups of granulated sugar on medium-high speed. You’re looking for a light, fluffy, and pale mixture. This usually takes about 3 to 5 minutes. Make sure to scrape down the sides of the bowl frequently with a spatula during this process to ensure everything is thoroughly combined. This step incorporates air into your butter, which is vital for tender, soft cookies.
- Add Eggs and Extracts: Reduce the mixer speed to low. Add the 2 large eggs one at a time, mixing well after each addition until fully incorporated. Then, add the 2 teaspoons of pure vanilla extract and the optional 1/2 teaspoon of almond extract. Mix until just combined. Be careful not to overmix at this stage; we just want everything to come together. The extracts will infuse your cookies with that wonderful, festive flavor we all love in Christmas sugar cookies.
- Gradually Add Dry Ingredients: With the mixer still on low speed, slowly add the dry ingredient mixture (flour, baking powder, salt) to the wet ingredients, about a third at a time. Mix only until the flour is just incorporated and no streaks of flour remain. As soon as you see no more dry flour, stop mixing. Overmixing the dough once the flour is added can develop the gluten too much, leading to tough cookies. We want tender, melt-in-your-mouth cookie shots!
- Chill the Dough: Gather the dough into a large disk, wrap it tightly in plastic wrap, and refrigerate it for at least 1 hour, or preferably 2-3 hours. Chilling the dough is an absolutely critical step for sugar cookies, especially when shaping them into molds. It helps the butter solidify, which prevents the cookies from spreading too much during baking and ensures they hold their shape perfectly in the cookie shot molds. You can even chill it overnight if you’re preparing ahead!
- Prepare Your Workspace and Molds: Lightly flour a clean surface and your rolling pin. Take the chilled dough out of the fridge and let it sit for about 5-10 minutes to soften slightly, making it easier to roll without cracking, but not so long that it becomes sticky. For your cookie shot molds (silicone molds work best for easy release), spray them thoroughly with a non-stick baking spray (the kind with flour is excellent), or butter and flour each cavity meticulously. Proper mold preparation is key to preventing your cookie shots from sticking and breaking when you try to remove them.
- Roll Out the Dough: Roll out the dough to an even thickness of about 1/4 inch. For best results, I often use rolling pin guides or a ruler to ensure consistent thickness, as this will result in evenly baked cookie shots. If the dough starts to stick, lightly flour your surface and rolling pin again.
- Cut and Press into Molds: Using a round cookie cutter that is slightly larger than the base of your cookie shot molds, cut out dough circles. Carefully press each circle of dough into a cavity of the prepared cookie shot mold. Use your fingers to gently push the dough up the sides and around the bottom, making sure there are no air bubbles and the dough is evenly thick on all sides. You want a consistent wall thickness for even baking and structural integrity. Trim any excess dough from the top edges with a small knife or your finger to create a clean, even rim. You can re-roll dough scraps, but try not to overwork them.
- Preheat Oven and Bake: Preheat your oven to 375°F (190°C). Place the cookie shot molds on a baking sheet. Bake for 12-15 minutes, or until the edges are lightly golden brown. Baking times can vary based on your oven and the thickness of your cookie walls, so keep a close eye on them. You might need to rotate the baking sheet halfway through baking for even browning.
- Cool and Release: Once baked, remove the molds from the oven and let the cookie shots cool in the molds on a wire rack for at least 15-20 minutes. Patience is a virtue here! The cookies are fragile when hot. Once slightly cooled, they will firm up. Gently twist or push the bottom of the silicone molds to release each cookie shot. If they resist, let them cool a bit longer. Transfer the released cookie shots to a wire rack to cool completely before decorating. This cooling process is crucial for preventing breakage.
- Sift Powdered Sugar: In a large bowl, sift your 4 cups of powdered sugar. This step is important to remove any lumps, ensuring a super smooth icing consistency without grainy bits that can clog your piping tips.
- Combine Ingredients: Add the 3 tablespoons of meringue powder to the sifted powdered sugar. Using a stand mixer with the whisk attachment (or a hand mixer), slowly add the 6 tablespoons of warm water and 1 teaspoon of vanilla extract. Start mixing on low speed until just combined, then increase to medium-high speed.
- Achieve Stiff Consistency: Continue beating for 5-7 minutes, or until the icing is very thick, glossy, and holds stiff peaks. At this stage, it will be the consistency for outlining. If it’s too thick to pipe, add a tiny bit more water (1/2 teaspoon at a time) until it reaches a toothpaste-like consistency that holds its shape well. This consistency is perfect for creating strong outlines for your cookie shot designs.
- Create Flood Consistency: To make thinner icing for flooding (filling in your outlines), take a portion of the stiff icing and gradually add very small amounts of water (1/4 teaspoon at a time), stirring well after each addition, until it reaches a “10-15 second rule” consistency. This means if you drizzle a spoonful of icing back into the bowl, the line disappears and becomes smooth again within 10-15 seconds. This consistency is ideal for creating a smooth, even base coat.
- Color the Icing: Divide your icing into separate bowls for different colors. Use gel food coloring, adding a tiny drop at a time with a toothpick, then mixing thoroughly until you achieve your desired shade. Gel colors are concentrated and won’t thin out your icing like liquid food colorings. For Christmas, think vibrant reds, forest greens, crisp whites, and maybe even a touch of gold or silver edible dust for extra sparkle. Keep unused icing covered tightly with plastic wrap directly touching the surface to prevent it from drying out.
- Prepare Piping Bags: Fit piping bags with small round tips (like Wilton 1, 2, or 3) for outlining and slightly larger round tips (like Wilton 3 or 4) for flooding, if desired. You can also simply snip a tiny corner off the piping bag for both. Fill each bag with your desired icing colors and consistencies. For intricate work, less icing in the bag makes it easier to control.
- Outline the Cookie Shots: Using the stiffer, outline-consistency icing, carefully pipe a border around the rim and any major design elements on your cookie shots. For Christmas sugar cookie shots, I often do a simple outline around the top rim. You can also pipe a few simple shapes like stars or snowflakes to create sections for different colors. Allow the outlines to set for about 10-15 minutes. This creates a dam to hold your flood icing in place.
- Flood with Icing: With the flood-consistency icing, fill in the outlined areas. Pipe a small amount of icing into the center of an outlined section, then use a clean toothpick or a scribe tool to gently spread the icing to the edges. Work quickly but carefully to cover the entire area, popping any air bubbles you see by gently nudging them with your tool. For a classic Christmas look, you might flood the entire exterior of the cookie shot with white or light green icing.
- Create Detailed Designs (Wet-on-Wet Technique): While the flood icing is still wet (this is called “wet-on-wet”), you can add contrasting colors for intricate patterns. For example, if you’ve flooded a cookie shot with white, immediately pipe thin red or green lines across it. Then, drag a toothpick through the lines in alternating directions to create a marbled effect or zig-zags. You can also pipe dots of another color onto the wet flood icing, and then drag a toothpick through them to create hearts or flower petals.
- Add Sprinkles and Let Dry: If using sprinkles, gently apply them to the wet flood icing immediately after flooding or adding wet-on-wet details. The wet icing will act as an adhesive. Once all your decorating is complete, place the decorated cookie shots on a cooling rack and let them dry completely. This is arguably the most important step for beautiful, smudge-free decorations. Depending on humidity, this can take anywhere from 6-8 hours, or even overnight. For faster drying, you can use a small fan directed at the cookies on its lowest setting. Ensure they are bone dry before handling or storing.
- Line with Chocolate (Crucial for Liquids!): Once your decorated cookie shots are completely dry, it’s time to prepare them for liquid fillings. Melt your melting chocolate or chocolate chips in a microwave-safe bowl in 30-second intervals, stirring after each, until smooth. Alternatively, use a double boiler. Pour a small amount of melted chocolate into each cookie shot and swirl it around to coat the entire interior surface. You want a thin, even layer. Pour out any excess chocolate. Invert the cookie shots on a piece of parchment paper or a wire rack to allow any remaining excess to drip off, then place them upright again. Transfer them to the refrigerator for 10-15 minutes, or until the chocolate is fully set and firm. This chocolate lining creates a barrier that prevents the cookie from getting soggy when filled with liquids. Without it, your cookie shots will quickly disintegrate!
- Choose Your Fillings: Now comes the fun part – filling your Christmas Sugar Cookie Shots! The possibilities are endless. For a family-friendly treat, consider cold milk, chocolate milk, or warm festive hot cocoa. For adult gatherings, a shot of eggnog, Irish cream, coffee liqueur, or even peppermint schnapps would be delightful. You can also fill them with mini scoops of ice cream or mousse for a dessert experience.
- Garnish and Serve Immediately: Just before serving, fill your cookie shots. Top them with a swirl of whipped cream, a sprinkle of cocoa powder, mini marshmallows, or more festive sprinkles. These cookie shots are best enjoyed right after filling. The joy of a cookie shot is the ability to drink the contents and then eat the delicious cookie cup. Present them on a beautiful platter or serving tray to really impress your guests. Encourage your friends and family to take a sip, then take a bite of the festive cookie cup! They are truly a unique and memorable way to enjoy your favorite beverages and a sweet treat during the holiday season.
Preparing the Sugar Cookie Dough
Shaping and Baking the Cookie Shots
Preparing the Royal Icing
Decorating the Christmas Sugar Cookie Shots
Assembling and Serving the Christmas Sugar Cookie Shots
Conclusion:
And there you have it, friends! After delving into the delightful details of this unique creation, I hope you’re as excited as I am about bringing these festive treats to life. This isn’t just another holiday cookie recipe; it’s an experience, a conversation starter, and a true testament to the joy of creative baking. The Christmas Sugar Cookie Shots Recipe truly stands out as a must-try because it masterfully combines the nostalgic comfort of a perfectly baked sugar cookie with the unexpected whimsy of a festive beverage, all in one adorable, edible package. It’s a brilliant way to elevate your holiday entertaining, offering guests something truly memorable and delicious that they won’t soon forget.
I genuinely believe that once you experience the sheer delight of these edible cups, filled with your favorite holiday sips, you’ll wonder how you ever celebrated without them. They’re not just visually stunning; the rich, buttery flavor of the cookie pairs incredibly well with a variety of fillings, making each bite and sip a little moment of holiday magic. Imagine the smiles when your loved ones discover they can literally eat their drinkware! It’s the perfect blend of dessert and drink, an innovation that makes holiday gatherings feel even more special and interactive. Trust me, the effort is absolutely worth the “oohs” and “aahs” you’ll receive.
Serving Suggestions and Delightful Variations:
Now, let’s talk about making these even more spectacular! While a simple pour of cold milk is utterly classic and delicious, the beauty of the Christmas Sugar Cookie Shots Recipe lies in its versatility. For a grown-up twist, consider filling them with a dash of creamy peppermint schnapps, a splash of Bailey’s Irish Cream, or even a mini serving of your favorite coffee liqueur. Imagine an espresso martini shot, but in a cookie cup – pure genius! For a non-alcoholic yet equally festive option, eggnog is a divine choice, its rich, spiced flavor complementing the sugar cookie beautifully. Hot cocoa (cooled slightly, of course) or even a festive cranberry punch could also make for delightful fillings. Don’t be afraid to experiment with different milk flavors too, like chocolate milk or strawberry milk, especially if you have younger guests who might enjoy a splash of colorful fun.
But the customization doesn’t stop there! Think about the presentation. You could line the rims of your finished cookie shots with extra sprinkles, melted white chocolate, or even crushed candy canes for an extra pop of festive flair. A tiny dollop of whipped cream on top of your chosen liquid, adorned with a single festive sprinkle or a tiny chocolate curl, adds an elegant touch. For those who love a bit of sparkle, edible glitter can turn these into truly enchanted offerings. You might also experiment with flavoring the cookie dough itself slightly differently next time—perhaps a touch of almond extract for a marzipan-like note, or a hint of orange zest to brighten the flavor profile. Dipping the entire cooled cookie shot into a thin layer of tempered chocolate before decorating could also add another layer of flavor and create a lovely visual contrast.
Consider arranging them on a beautiful holiday platter, perhaps nestled among pine sprigs or fairy lights, for a truly show-stopping display. They make fantastic individual dessert offerings, a charming alternative to traditional cookies, or even a memorable parting favor for your guests. You could prepare a “shot bar” where guests choose their cookie cup and then select from a variety of festive liqueurs and non-alcoholic drinks to fill them, adding an interactive element to your party. This truly turns them into an event rather than just a dessert, making your holiday celebration that much more engaging and fun.
Your Turn to Create and Share!
I truly hope this detailed guide has inspired you to roll up your sleeves and dive into making this wonderful holiday treat. There’s immense satisfaction in creating something so unique and delicious from scratch. Don’t hesitate to try this Christmas Sugar Cookie Shots Recipe – I promise you won’t regret it! Imagine the joy on your family and friends’ faces when they encounter these edible wonders. It’s an instant mood-lifter, a conversation starter, and a genuinely delightful experience.
Once you’ve successfully whipped up your batch of cookie shots, I would absolutely love to hear about your experience! What fillings did you try? Did you come up with any clever variations or serving suggestions? Did your guests adore them as much as mine do? Please, don’t keep your culinary triumphs to yourself! Share your photos, your tips, and your stories. There’s nothing more rewarding than seeing our community embrace new ideas and make them their own. Happy baking, and happy holidays!
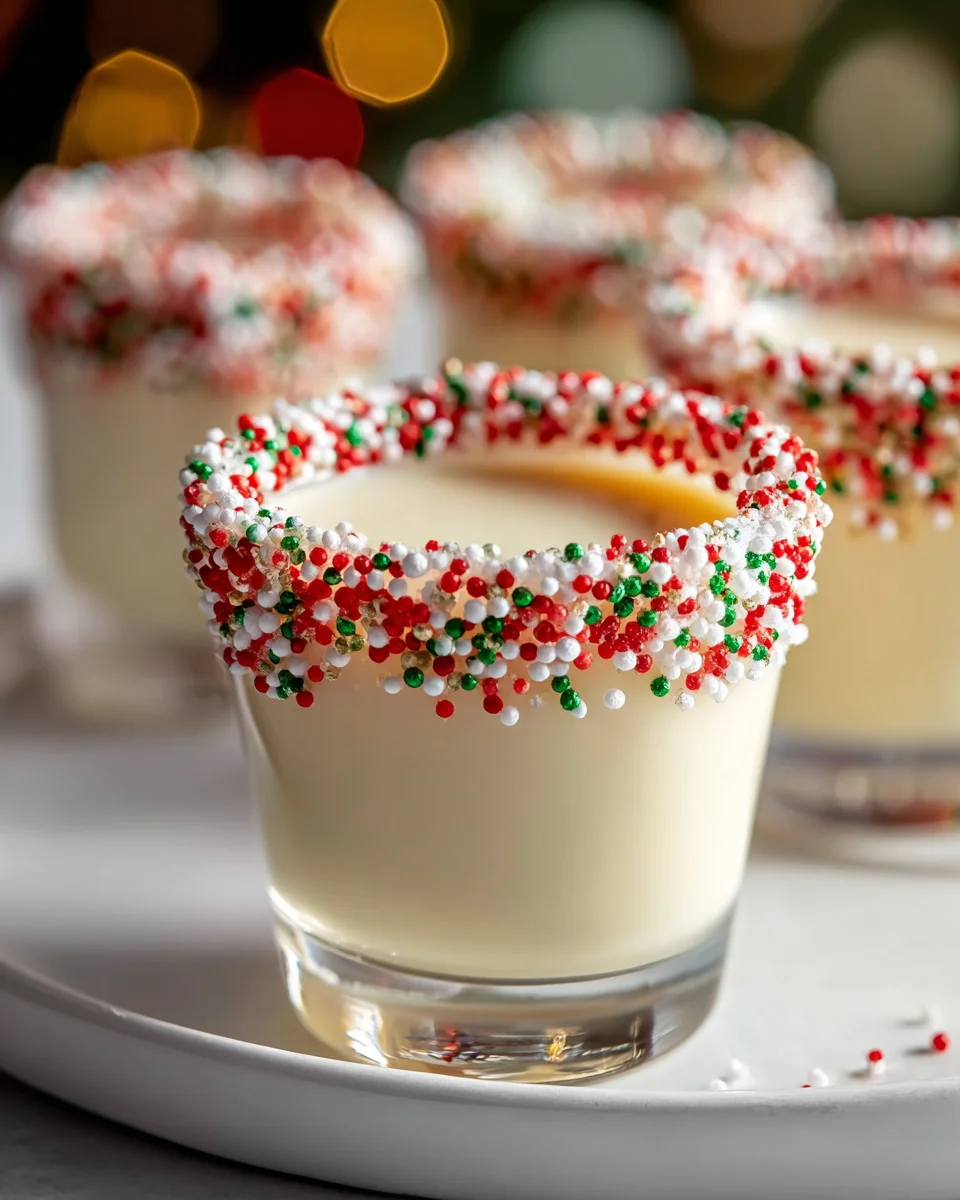
Festive Christmas Sugar Cookie Shots – A Sweet Holiday Treat
Elevate your holiday dessert game with edible Christmas sugar cookie shots! This recipe transforms classic sugar cookies into whimsical edible shot glasses, perfect for serving milk, non-alcoholic eggnog, hot cocoa, or festive non-alcoholic liqueurs. A unique and delicious treat that’s sure to be a conversation starter at any holiday gathering.
Ingredients
Instructions
Important Information
Nutrition Facts (Per Serving)
It is important to consider this information as approximate and not to use it as definitive health advice.
Allergy Information
Please check ingredients for potential allergens and consult a health professional if in doubt.