Seeded Sourdough Bread With Extra Crunch
There’s nothing quite like the aroma of freshly baked bread filling your kitchen, and when it comes to sourdough, it’s an experience elevated. But my recipe for Seeded Sourdough Bread With Extra Crunch takes that comfort to a whole new level. This isn’t just any sourdough; it’s a celebration of texture and flavor, designed specifically for those of us who dream of a crust that crackles and shatters beautifully with every slice.
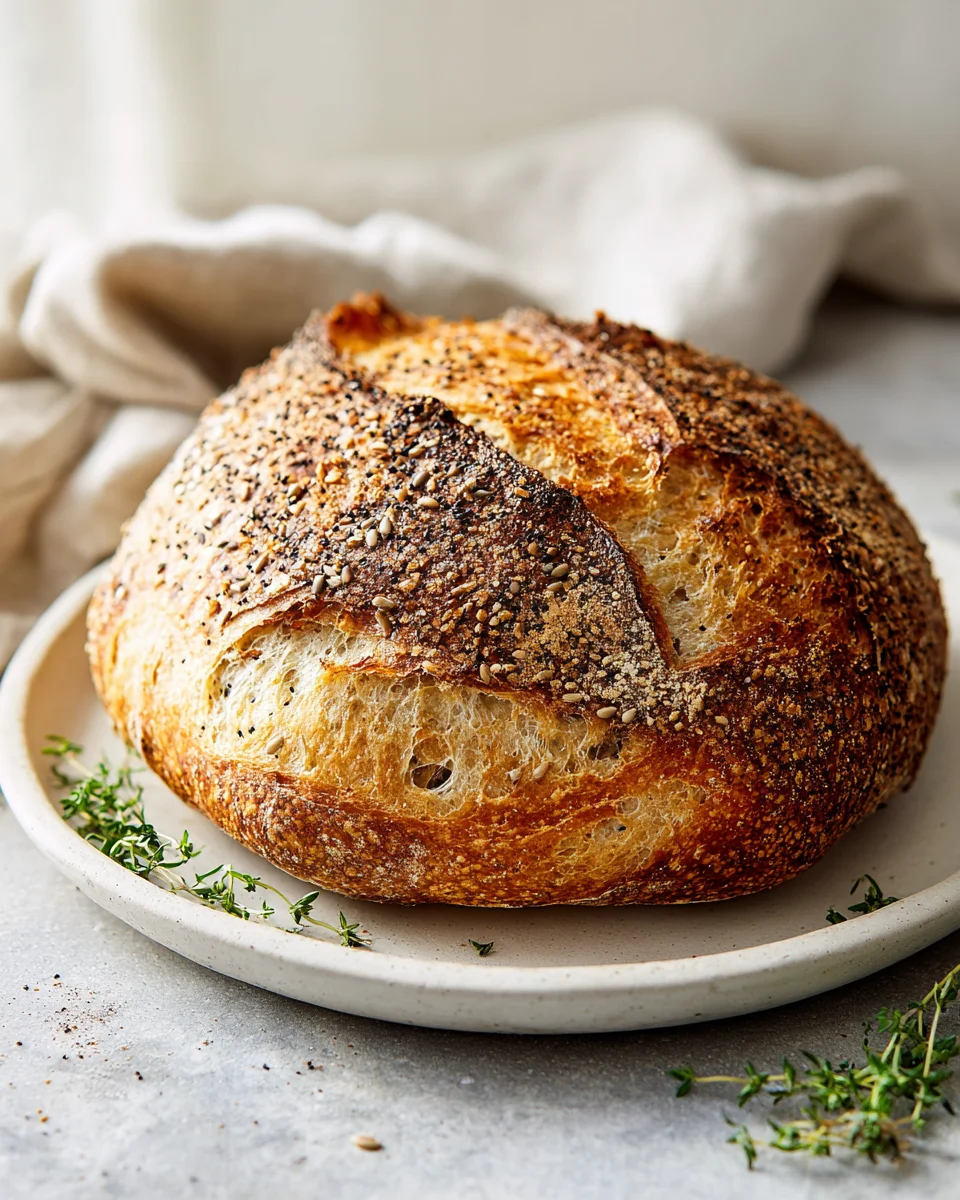
You’re going to absolutely adore the satisfying chew of the crumb, the delightful tang that only a well-nurtured sourdough starter can provide, and especially that ‘extra crunch’ we’ve perfected. Imagine a crust so golden and crisp, it practically sings, loaded with an inviting medley of seeds that add both visual appeal and a wonderful nutty depth. It’s the kind of bread that makes simple butter and jam feel like a gourmet meal, or elevates your favorite sandwich from good to unforgettable.
In a nutshell, we’re crafting a truly artisanal loaf right in our own kitchens. This recipe guides you through creating a perfectly leavened sourdough bread, generously studded with a vibrant mix of seeds like sesame, poppy, flax, and sunflower. The magic, however, lies in the specific techniques we’ll employ to achieve that unparalleled, extra-crispy crust, while maintaining an open, airy, and wonderfully chewy interior. Get ready to bake a loaf that not only looks stunning but tastes absolutely incredible.

Ingredient Notes
Making a truly exceptional loaf of Seeded Sourdough Bread With Extra Crunch starts with understanding your ingredients. Each component plays a vital role in achieving that perfect crumb and irresistible, crackly crust.
Sourdough Starter
- Active Sourdough Starter: This is the heart of your bread. I always ensure my starter is vibrant, bubbly, and active, ideally fed 4-8 hours before mixing and showing clear signs of activity – doubling in size and passing the float test (a small spoonful floats in water). A weak starter will lead to a dense loaf.
Flour
- Strong Bread Flour: I typically use a high-protein bread flour (around 12-13% protein) as it provides the necessary gluten structure to support the seeds and create that airy, open crumb. It’s the backbone of your loaf.
- Whole Wheat Flour (Optional): Sometimes I’ll add 10-20% whole wheat flour for a deeper, nuttier flavor profile, which complements the seeds beautifully. Just be aware it can absorb more water, so adjust hydration slightly if needed.
- Substitution: If you don’t have strong bread flour, an all-purpose flour with a decent protein content (around 10-11%) can work, but your crumb might be slightly less open.
Water
- Filtered Water: I always use room temperature, filtered water. Chlorine in tap water can inhibit yeast activity, so filtering is a good habit for sourdough.
Salt
- Fine Sea Salt: A good quality, non-iodized fine sea salt is my choice. It’s essential for flavor, controlling fermentation, and strengthening the gluten network. Don’t skimp on the salt!
The Seeds – For Flavor and Extra Crunch
- Mixed Seeds: This is where the “seeded” and “extra crunch” truly shine! I love a combination of sunflower seeds, pumpkin seeds, flax seeds, sesame seeds, and poppy seeds. Each adds a unique texture and flavor.
- Internal Seeds: For the inside of the dough, I usually pre-soak a portion of the harder seeds (like sunflower and pumpkin) for a few hours or overnight. This prevents them from absorbing too much moisture from the dough, keeping your crumb hydrated and preventing a dry texture, while still contributing to an interior crunch.
- External Seeds for Extra Crunch: For that “extra crunch” on the crust, I reserve a generous mix of dry, un-soaked seeds (especially sesame, poppy, and smaller flax seeds) to either roll the dough in during the final shaping, or to heavily dust the banneton before placing the dough. Toasting these external seeds lightly before applying them can amplify their flavor and crispiness even further!
- Substitutions: Feel free to experiment with other seeds like chia, millet, or even chopped nuts for variety. Just be mindful of how they absorb water.
Step-by-Step Instructions
Here’s how I create my Seeded Sourdough Bread With Extra Crunch, from feeding the starter to pulling it from the oven.
- Prepare Your Starter (Night Before/Morning Of): Make sure your sourdough starter is active and bubbly. I feed it 4-8 hours before I plan to mix the dough. A small piece should float in water when it’s ready.
- Autolyse (1 Hour): In a large mixing bowl, combine all the flour and water. Mix until no dry streaks of flour remain. Cover the bowl and let it rest for 1 hour at room temperature. This step, called autolyse, helps the flour hydrate and gluten develop, making the dough easier to work with.
- Add Starter and Salt (10-15 minutes): After the autolyse, add your active sourdough starter and salt to the dough. Using damp hands, gently squeeze and fold the starter and salt into the dough until fully incorporated. It might seem messy at first, but keep working it until it’s homogeneous.
- Incorporate Seeds (First Fold): Now for the seeds! Gently spread out the dough on a clean, lightly damp surface or keep it in the bowl. Evenly sprinkle in your pre-soaked internal seeds. Perform your first set of stretch and folds, ensuring the seeds are well distributed throughout the dough. I aim for 4-6 folds, turning the bowl each time.
- Bulk Fermentation with Stretch and Folds (3-5 Hours): Cover your bowl and let the dough rest. Over the next 3-5 hours (depending on your room temperature and starter strength), I perform 3-4 sets of stretch and folds, spaced 30-45 minutes apart. This builds strength in the dough and further distributes the seeds. The dough should become noticeably more cohesive and aerated with each set. I look for the dough to increase in volume by about 30-50% and feel airy.
- Pre-shape (20-30 Minutes): Gently turn the dough out onto a lightly floured surface. Using a dough scraper and your hands, gently form the dough into a round or oval (a boule or batard). Be careful not to degas it too much. Let it rest, uncovered, for 20-30 minutes to relax the gluten.
- Final Shape & External Seeds: This is crucial for the “extra crunch”! Lightly dampen your hands and the top of your dough. Sprinkle a generous amount of your dry external seeds onto your work surface, or directly into your proofing basket (banneton). Gently flip your dough onto the bed of seeds, ensuring a good coating. Now, carefully shape your dough into its final round or oval shape, being mindful not to lose too many seeds. You can also lightly press more seeds onto the surface if needed. Transfer the shaped dough, seam-side up, into your generously seeded banneton.
- Cold Proof (8-16 Hours): Cover the banneton with a plastic bag or shower cap and place it in the refrigerator for 8-16 hours. This cold proof slows fermentation, develops flavor, and makes the dough much easier to score.
- Preheat Oven & Dutch Oven (1 Hour): About an hour before you plan to bake, place your Dutch oven (with the lid on) into your oven and preheat to its highest setting, usually 475-500°F (245-260°C).
- Score and Bake (45-55 Minutes): Carefully remove the hot Dutch oven from the oven. Gently invert your cold dough onto a piece of parchment paper or directly into the Dutch oven. Using a sharp razor blade or lame, score the top of your dough with your desired design. Quickly place the lid back on the Dutch oven and bake for 20 minutes.
- Uncover and Finish Baking (25-35 Minutes): After 20 minutes, carefully remove the lid from the Dutch oven. Reduce the oven temperature to 450°F (230°C). Continue to bake for another 25-35 minutes, or until the crust is a deep golden brown and the external seeds are beautifully toasted and crispy. The internal temperature of the bread should be around 200-210°F (93-99°C).
- Cool Completely: Transfer the bread to a wire rack and let it cool completely for at least 2 hours before slicing. This is absolutely critical for the crumb to set and for that amazing “extra crunch” crust to fully develop.
Tips & Suggestions
- Don’t Rush the Proof: Sourdough thrives on time. If your kitchen is cool, bulk fermentation might take longer. If it’s warm, it’ll be faster. Learn to read your dough, not just the clock. The dough should feel airy and have increased in volume by about 30-50%.
- Seed Prep is Key: For the interior seeds, I really find that pre-soaking them makes a huge difference in the final texture of the crumb, preventing it from drying out. For the exterior “extra crunch” seeds, a light toast before applying them will deepen their flavor significantly.
- Mastering the “Extra Crunch”:
- High Heat Start: Baking in a preheated Dutch oven at a very high temperature initially creates the perfect burst of steam and oven spring, essential for a great crust.
- Longer Uncovered Bake: Don’t be afraid to let your bread get really dark brown during the uncovered bake. This longer exposure to dry heat is what develops that deep color and incredible, shattering crunch.
- External Seed Application: Ensuring a generous coating of seeds on the outside, especially smaller ones like sesame and poppy, creates a fantastic textural contrast and adds to the ‘extra crunch’ factor. Some bakers even mist the dough with water before rolling in seeds to help them adhere.
- Gentle Handling: Seeded dough can be a little trickier to handle due to the added weight and texture of the seeds. Be gentle during pre-shaping and final shaping to avoid degassing your beautiful air pockets.
- Patience, My Friend: I know it’s tempting, but cutting into warm sourdough will result in a gummy crumb. Resist the urge! Let it cool completely on a wire rack for a minimum of 2 hours. This allows the internal structure to set and the crust to become wonderfully crisp.
Storage
- Room Temperature: I store my Seeded Sourdough Bread With Extra Crunch cut-side down on a cutting board or wrapped loosely in a clean kitchen towel at room temperature for up to 2-3 days. This helps maintain the crust’s crispness. Avoid airtight containers if you want to preserve the crunch, as they can soften the crust.
- Freezing: For longer storage, slice the cooled loaf and freeze the slices in an airtight freezer bag. You can also freeze a whole loaf. To enjoy, thaw at room temperature, then toast individual slices or reheat a whole loaf in a 350°F (175°C) oven for 10-15 minutes to revive that glorious crunch.
- Reviving the Crunch: If your crust softens a bit, a quick 5-10 minute refresh in a 350°F (175°C) oven (or toaster for slices) will bring back a good portion of that “extra crunch”!
Final Thoughts
And there you have it – your very own masterpiece, the Seeded Sourdough Bread With Extra Crunch! I truly believe this isn’t just another sourdough recipe; it’s an invitation to experience the incredible satisfaction of baking something truly special. The combination of the hearty, tangy crumb, the nutritious burst of seeds, and that absolutely irresistible, shattering crust truly sets this loaf apart. Every slice promises a delightful crunch that will have you reaching for more.
From a simple slice toasted with your favorite spread, to pairing it alongside a comforting beef stew, or simply tearing off a piece to savor on its own, the Seeded Sourdough Bread With Extra Crunch is a versatile and utterly delicious creation. The pride you’ll feel when you pull this magnificent loaf from your oven, filling your home with its incredible aroma, is an experience I want everyone to have. Trust me, the journey is rewarding, and the destination – that perfect loaf – is simply magnificent. Enjoy every crunchy, seedy bite!

Extra Crunchy Seeded Sourdough Bread: Bake Your Best Loaf!
- Total Time: 47 minute
- Yield: 1 loaf
Description
Experience the delightful crunch and flavor of this artisanal Seeded Sourdough Bread, packed with a vibrant mix of seeds. This recipe guides you through creating a perfectly leavened loaf with an irresistible, crackly crust.
Ingredients
- Active Sourdough Starter
- Strong Bread Flour
- Whole Wheat Flour (Optional)
- Filtered Water
- Fine Sea Salt
- Mixed Seeds (sunflower seeds, pumpkin seeds, flax seeds, sesame seeds, poppy seeds)
- Internal Seeds (pre-soaked sunflower and pumpkin seeds)
- External Seeds (dry, un-soaked sesame, poppy, and flax seeds)
Instructions
- Prepare Your Starter (Night Before/Morning Of): Make sure your sourdough starter is active and bubbly. I feed it 4-8 hours before I plan to mix the dough. A small piece should float in water when it's ready.
- Autolyse (1 Hour): In a large mixing bowl, combine all the flour and water. Mix until no dry streaks of flour remain. Cover the bowl and let it rest for 1 hour at room temperature.
- Add Starter and Salt (10-15 minutes): After the autolyse, add your active sourdough starter and salt to the dough. Using damp hands, gently squeeze and fold the starter and salt into the dough until fully incorporated.
- Incorporate Seeds (First Fold): Gently spread out the dough on a clean, lightly damp surface or keep it in the bowl. Evenly sprinkle in your pre-soaked internal seeds. Perform your first set of stretch and folds, ensuring the seeds are well distributed throughout the dough.
- Bulk Fermentation with Stretch and Folds (3-5 Hours): Cover your bowl and let the dough rest. Over the next 3-5 hours, perform 3-4 sets of stretch and folds, spaced 30-45 minutes apart.
- Pre-shape (20-30 Minutes): Gently turn the dough out onto a lightly floured surface. Using a dough scraper and your hands, gently form the dough into a round or oval. Let it rest, uncovered, for 20-30 minutes.
- Final Shape & External Seeds: Lightly dampen your hands and the top of your dough. Sprinkle a generous amount of your dry external seeds onto your work surface. Gently flip your dough onto the bed of seeds, ensuring a good coating.
- Cold Proof (8-16 Hours): Cover the banneton with a plastic bag or shower cap and place it in the refrigerator for 8-16 hours.
- Preheat Oven & Dutch Oven (1 Hour): About an hour before you plan to bake, place your Dutch oven into your oven and preheat to its highest setting.
- Score and Bake (45-55 Minutes): Carefully remove the hot Dutch oven from the oven. Gently invert your cold dough onto a piece of parchment paper or directly into the Dutch oven. Score the top of your dough with your desired design and bake for 20 minutes.
- Uncover and Finish Baking (25-35 Minutes): After 20 minutes, carefully remove the lid from the Dutch oven. Reduce the oven temperature to 450°F. Continue to bake for another 25-35 minutes, or until the crust is a deep golden brown.
- Cool Completely: Transfer the bread to a wire rack and let it cool completely for at least 2 hours before slicing.
- Prep Time: 15 mins
- Cook Time: 45-55 mins
- Category: Bread
- Method: Baking
- Cuisine: Artisanal
Nutrition
- Serving Size: 1 slice
- Calories: 200
- Sugar: 1 g
- Sodium: 300 mg
- Fat: 5 g
- Saturated Fat: 1 g
- Unsaturated Fat: 3 g
- Trans Fat: 0 g
- Carbohydrates: 35 g
- Fiber: 3 g
- Protein: 7 g
- Cholesterol: 0 mg
Keywords: Don't rush the proof; learn to read your dough. Pre-soaking seeds for the interior helps prevent drying out. Toasting external seeds before applying enhances flavor.