Tiramisu Cake
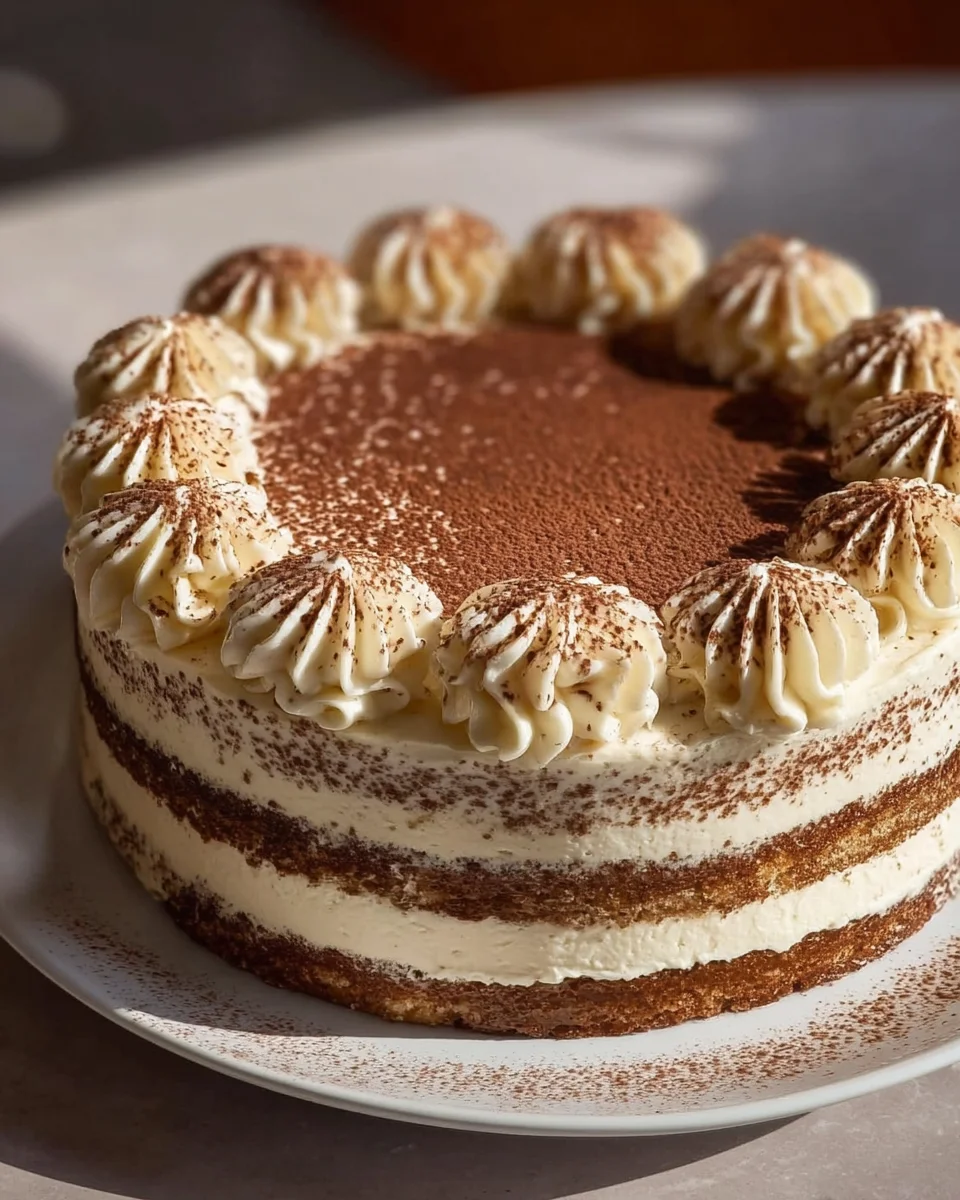
Ah, Tiramisu Cake! This delightful dessert has a special place in my heart, and I’m excited to share it with you. Imagine layers of soft, coffee-soaked sponge cake, interlaced with a rich and creamy mascarpone filling, all topped off with a dusting of cocoa powder. What sets this Tiramisu Cake apart is not just its indulgent flavors but also its ability to transport you straight to the charming cafes of Italy with every bite.
Readers will absolutely love this cake for its perfect balance of sweetness and creaminess, combined with that subtle hint of coffee that elevates it to pure bliss. Plus, it’s surprisingly easy to make! Whether you’re celebrating a special occasion or simply indulging yourself on a quiet afternoon, this Tiramisu Cake is guaranteed to impress your family and friends. So, let’s dive into this luscious recipe and create a dessert that will leave everyone asking for seconds!

Ingredient Notes
Creating a delicious Tiramisu Cake starts with gathering the right ingredients, and I love how versatile they can be. Here’s what you’ll need:
- Ladyfingers: The traditional choice for tiramisu, but if you can’t find them, you can use sponge cake or even homemade cake layers.
- Mascarpone Cheese: This creamy cheese is essential for a rich texture. If you can’t find mascarpone, a mixture of cream cheese and heavy cream can work as a substitute.
- Espresso or Strong Coffee: For authentic flavor, I always use strong brewed espresso. If you prefer a non-caffeinated option, decaf coffee works perfectly.
- Eggs: Fresh eggs provide richness. If you’re concerned about using raw eggs, opt for pasteurized eggs or a whipped cream-based filling instead.
- Sugar: Granulated sugar is standard, but for a deeper flavor, you might try using brown sugar.
- Cocoa Powder: Unsweetened cocoa powder is essential for that classic tiramisu finish. Consider dark cocoa powder for a richer taste.
Step-by-Step Instructions
Now that we have our ingredients ready, let’s dive into making this delightful Tiramisu Cake!
- Prepare the Coffee Mixture: Brew a strong cup of espresso or coffee and let it cool. You can add a splash of vanilla extract for extra flavor.
- Make the Filling: In a bowl, combine the mascarpone cheese, granulated sugar, and egg yolks. Beat until smooth and creamy. In a separate bowl, whip the egg whites until stiff peaks form, then gently fold them into the mascarpone mixture.
- Assemble the Layers: Quickly dip each ladyfinger into the cooled coffee, ensuring they are well-coated but not soggy. Lay the dipped ladyfingers in a single layer at the bottom of your cake pan.
- Add Filling: Spread half of the mascarpone mixture over the layer of ladyfingers. Smooth it out evenly.
- Repeat the Layers: Add another layer of dipped ladyfingers on top of the mascarpone filling, followed by the remaining mascarpone mixture. Smooth the top layer with a spatula.
- Chill: Cover the cake with plastic wrap and refrigerate for at least 4 hours, or overnight if you can wait! This will help the flavors meld beautifully.
- Finish with Cocoa: Before serving, dust the top with a generous layer of cocoa powder for that classic tiramisu presentation.
Tips & Suggestions
Here are some tips I’ve learned over the years to make my Tiramisu Cake even more delightful:
- Let It Chill: Patience is key! The longer you let the cake chill, the better the flavors will develop. Overnight is ideal.
- Experiment with Flavors: You can add flavorings like almond extract or a touch of cinnamon to the mascarpone mixture for a unique twist.
- Presentation Matters: For a beautiful presentation, consider using a springform pan. It allows you to remove the sides easily without disturbing the layers.
- Serving Size: This cake is rich, so you may want to cut it into smaller pieces than you would typical cakes.
- Non-Dairy Option: If you want a non-dairy version, try using coconut cream instead of mascarpone, though the flavor will differ slightly.
Storage
To keep your Tiramisu Cake fresh and delicious:
- Refrigeration: Store the cake in the refrigerator, covered with plastic wrap or in an airtight container. It should last for about 3 to 5 days.
- Freezing: If you want to make it ahead of time, Tiramisu Cake can be frozen for up to a month. Just ensure it’s well-wrapped to prevent freezer burn. When ready to serve, thaw it in the refrigerator overnight.
Enjoy your Tiramisu Cake, and don’t forget to share it with friends and family—it’s a crowd-pleaser that never fails to impress!
Final Thoughts
If you’re looking for a dessert that is both indulgent and delightfully easy to make, the Tiramisu Cake is a must-try! This luscious cake captures the classic flavors of traditional tiramisu, transforming them into a stunning layered dessert that will impress your family and friends. With its rich coffee flavor, creamy mascarpone layers, and a hint of cocoa, each bite is a heavenly experience. Plus, by using non-alcohol alternatives, everyone can enjoy this treat, making it perfect for any occasion. I can’t recommend the Tiramisu Cake enough—it’s a delightful way to bring a taste of Italy into your home. So gather your ingredients and treat yourself to this deliciously satisfying cake; you won’t regret it!