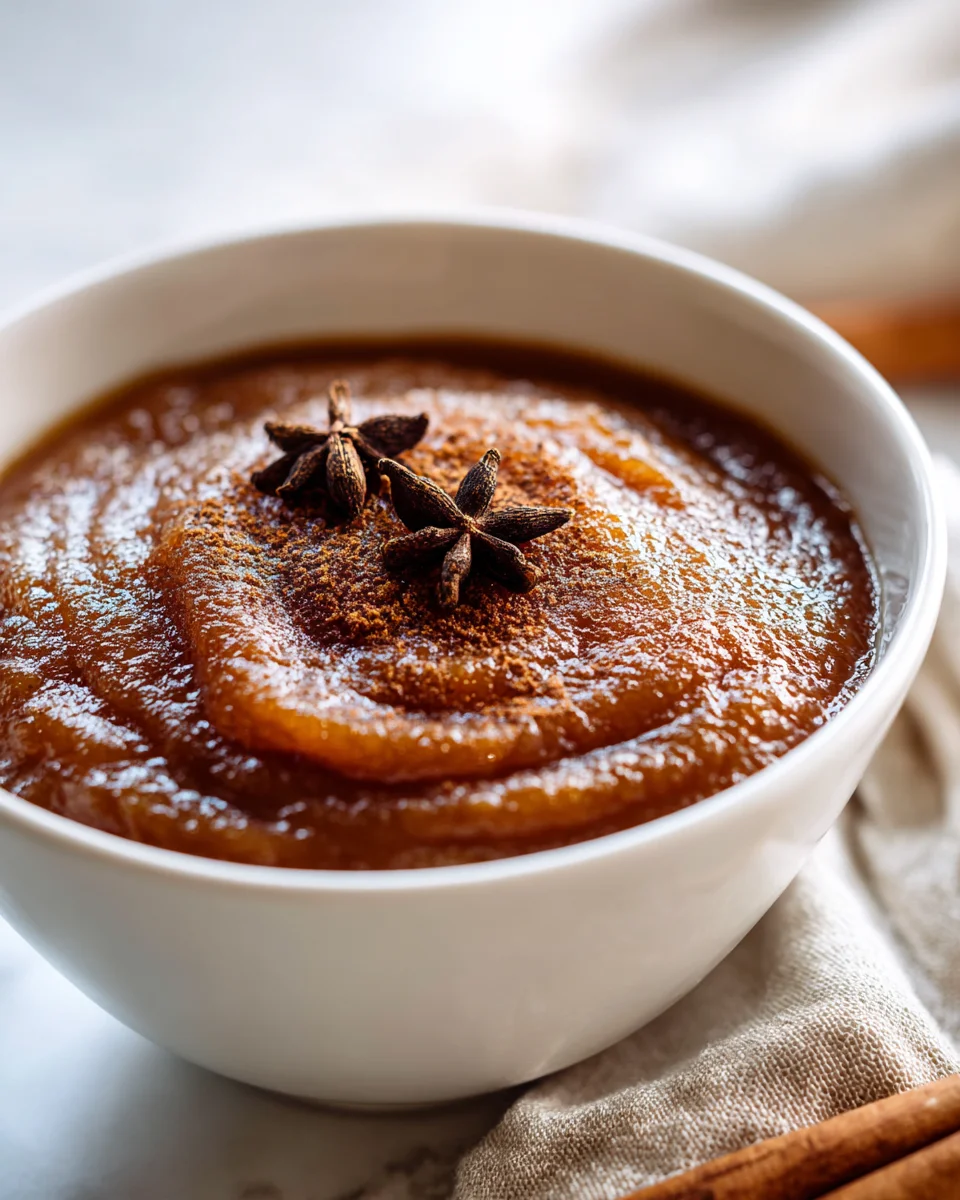
Apple Butter With Cinnamon And Cloves
There’s something incredibly magical about the scent of apples, cinnamon, and cloves wafting through your kitchen on a crisp day. And that, my friends, is just the beginning of what makes my Apple Butter With Cinnamon And Cloves so incredibly special. This isn’t just another apple spread; it’s a labor of love that transforms simple fruit into a luxurious, deeply flavored preserve that practically screams “comfort” from the jar.
I absolutely know you’re going to fall head over heels for this recipe. Why? Because it captures the very essence of autumn and coziness in every single spoonful. Imagine spreading this thick, glossy, intensely apple-flavored goodness on a warm piece of toast, stirring it into your morning oatmeal, or even pairing it with a savory beef dish for an unexpected twist. The beauty of homemade apple butter lies in its rich, concentrated apple flavor, which is only enhanced by the perfect balance of warm cinnamon and aromatic cloves. It’s sweet, but not overly so, with a delightful tang that keeps you coming back for more.
So, what exactly is Apple Butter With Cinnamon And Cloves? In a nutshell, it’s a slow-cooked, intensely flavored fruit preserve made by simmering apples down with sugar and a generous helping of those signature spices – cinnamon and cloves – until they break down completely, become wonderfully smooth, and reduce to a thick, spreadable consistency. The name “butter” refers to its silky, rich texture, not to any dairy product. It’s a truly rewarding experience to make, and even more so to enjoy. Get ready to fill your home with an irresistible aroma and your pantry with jars of pure bliss!

Ingredient Notes
Making delicious apple butter truly starts with the right ingredients. For my Apple Butter With Cinnamon And Cloves, I always prioritize fresh, flavorful apples and quality spices. This isn’t just a basic apple sauce; it’s a deeply caramelized, spice-infused spread, and each component plays a vital role.
Apples
The star of the show! I find that a blend of sweet and tart apples yields the most complex and balanced flavor profile for apple butter. My favorites include a mix of Honeycrisp, Fuji, Gala for sweetness, and Granny Smith for that essential tart counterpoint. Using a variety ensures your apple butter isn’t too cloyingly sweet or overly sharp. You’ll need about 5-6 pounds for a good batch. There’s no need to peel them if you plan on using an immersion blender later, as the skins will break down beautifully and add a touch of pectin for thickening. However, if you prefer an absolutely pristine, pale apple butter, peeling is the way to go.
Sweetener
For that signature deep, caramel-like flavor, I almost exclusively use a combination of light brown sugar and a touch of molasses. The brown sugar adds warmth, while the molasses deepens the color and introduces a wonderful complexity that granulated sugar alone can’t achieve. You can adjust the amount to your preference, but I usually start with about 1 cup of brown sugar and 1-2 tablespoons of molasses for the quantity of apples mentioned. If you prefer, granulated sugar works well too, perhaps with a smaller amount of molasses. Maple syrup is also a fantastic alternative for a different kind of rich sweetness.
Spices: Cinnamon and Cloves
These two spices are non-negotiable for my apple butter recipe. I use ground cinnamon – typically 1 to 2 tablespoons, depending on how robust I want the spice flavor to be. For cloves, I prefer to use whole cloves tied in a cheesecloth sachet (about 1 teaspoon of whole cloves). This allows their potent aroma to infuse the butter without leaving behind any gritty texture or overpowering bitterness that ground cloves can sometimes impart when cooked for a long time. If you only have ground cloves, start with just ¼ teaspoon and taste test. The warmth of cinnamon perfectly complements the intense, sweet-spicy notes of the cloves, creating that classic, comforting apple butter aroma.
Liquid
To help the apples break down and prevent sticking at the start, I use a splash of liquid. My top choice is always unsweetened apple cider, about 1 cup. It reinforces the apple flavor without diluting it. Water is a perfectly acceptable substitute if cider isn’t available. Avoid anything too acidic at this stage, as it can hinder the apples from softening properly.
Optional Add-ins
While cinnamon and cloves are my core, sometimes I like to add ½ teaspoon of ground nutmeg or ¼ teaspoon of ground allspice for an extra layer of warmth. These are entirely optional but can deepen the overall spice profile beautifully.
Step-by-Step Instructions
Crafting apple butter is a labor of love, but the process is incredibly rewarding, filling your kitchen with an intoxicating aroma. Here’s how I make my Apple Butter With Cinnamon And Cloves:
- Prepare the Apples: First, I wash my apples thoroughly. If I’m aiming for a very smooth texture without peeling, I just core and chop them into roughly 1-inch pieces. The skins will cook down and blend easily. If you prefer to peel, go ahead and peel, core, and chop. The smaller the pieces, the faster they will cook.
- Combine Ingredients in a Pot: Transfer the chopped apples to a large, heavy-bottomed pot or Dutch oven. Add the apple cider (or water), brown sugar, and molasses. If using whole cloves, tie them in a small cheesecloth sachet and add it to the pot. Stir everything gently to combine, ensuring the apples are lightly coated.
- Initial Cook Down: Place the pot over medium-low heat. Bring the mixture to a gentle simmer, then reduce the heat to low, cover, and let it cook for about 30-40 minutes, stirring occasionally. This initial cooking phase allows the apples to soften considerably, releasing their juices and making them easy to mash. You’ll know they’re ready when they are very tender and easily pierced with a fork.
- Blend Until Smooth: Remove the clove sachet if you used one. Now it’s time to achieve that silky-smooth texture. I typically use an immersion blender directly in the pot, blending until no chunks remain. Be careful of splatters! If you don’t have an immersion blender, carefully transfer the cooked apples in batches to a food processor or regular blender and process until smooth. Return the purée to the pot.
- Thicken the Apple Butter: This is the most crucial, and perhaps the longest, step. Place the pot back on the stove over low to medium-low heat. Add the ground cinnamon (and any optional spices like nutmeg or allspice). Bring the apple purée to a gentle simmer. Now, you need to cook it down, stirring frequently – especially as it thickens – to prevent it from sticking to the bottom and burning. This can take anywhere from 1.5 to 3 hours, depending on how much moisture is in your apples and how thick you want your apple butter. The goal is a rich, dark, spreadable consistency. It will thicken considerably as it cools.
- Test for Doneness: To check if it’s done, I spoon a small amount onto a chilled plate. Let it cool for a minute or two. If there’s no watery ring around the edge of the apple butter, it’s ready. It should hold its shape and spread nicely. Taste and adjust sweetness if desired, adding a little more brown sugar if you like it sweeter.
- Jar It Up: Carefully ladle the hot apple butter into clean, sterilized jars, leaving about ½ inch headspace. Wipe the rims clean, apply lids, and screw on the bands until finger-tight.
Tips & Suggestions
Making apple butter is a truly satisfying experience, and over the years, I’ve picked up a few tricks to ensure a perfect batch every time. Here are my favorite tips for your Apple Butter With Cinnamon And Cloves:
- Choose Your Apples Wisely: As I mentioned in the ingredients, a mix of sweet and tart apples is ideal for depth of flavor. Don’t be afraid to experiment with different combinations! Using softer apples (like McIntosh) can speed up the initial cooking time, but may result in a thinner butter unless cooked down longer. Firmer apples (like Granny Smith) need more time but provide good body.
- Embrace the Slow Cooker: While I often start my apple butter on the stovetop, a slow cooker is fantastic for the long, slow reduction phase. After blending, transfer the apple purée to a slow cooker. Cook on low for 6-8 hours (or on high for 3-4 hours), leaving the lid slightly ajar to allow moisture to escape. Stir every hour or so. This method requires less active stirring and reduces the risk of burning.
- Prevent Sticking: When thickening on the stovetop, stirring frequently is crucial, especially towards the end. A heavy-bottomed pot helps distribute heat evenly and reduces scorching. If you notice it sticking, immediately reduce the heat to the lowest setting and stir vigorously. A heat diffuser can also be a lifesaver.
- Achieve Ultimate Smoothness: For the silkiest apple butter, after blending, you can press the purée through a fine-mesh sieve. This removes any tiny bits of skin or apple pulp that an immersion blender might miss. It’s an extra step, but if you’re a texture perfectionist, it’s worth it!
- Adjust Spices to Your Taste: My recommended amounts of cinnamon and cloves are a guideline. Feel free to adjust them to your liking. If you love a stronger clove punch, add a tiny bit more; if you prefer it milder, dial it back. Taste the apple butter as it thickens and add more spices incrementally if desired. Remember, the flavors will intensify as it cooks down.
- Don’t Rush the Reduction: The long, slow cooking not only thickens the apple butter but also deepens its flavor and color, transforming it from a simple apple sauce into a rich, caramelized spread. Patience is key here; rushing this stage will result in a less flavorful and less satisfying product.
Storage
Once you’ve poured your heart (and apples!) into making this beautiful Apple Butter With Cinnamon And Cloves, you’ll want to ensure it lasts so you can enjoy it for weeks or even months. Proper storage is essential:
Refrigeration
For immediate consumption, once your apple butter has cooled, transfer it to clean, airtight containers or jars. It will keep beautifully in the refrigerator for up to 3 weeks. Always make sure to use a clean spoon each time you dip into the jar to prevent contamination and extend its freshness.
Freezing
Apple butter freezes exceptionally well. If you’ve made a large batch and don’t plan to eat it all within a few weeks, freezing is a fantastic option. Spoon the cooled apple butter into freezer-safe containers, leaving about ½ inch of headspace to allow for expansion. You can also freeze it in smaller portions, like in ice cube trays, then transfer the frozen cubes to a freezer bag for individual servings. Label and date your containers. Frozen apple butter will maintain its quality for up to 6 months. To use, simply thaw overnight in the refrigerator.
Canning (Water Bath Method)
For long-term, shelf-stable storage, water bath canning is the way to go. This process creates a vacuum seal, allowing your apple butter to be stored in a pantry for up to a year (or even longer, though quality might start to decline after a year). Here’s a brief overview:
- Prepare Jars: Sterilize your canning jars and lids according to the manufacturer’s instructions. Keep them hot until ready to fill.
- Fill Jars: Carefully ladle the hot apple butter into the hot, sterilized jars, leaving ½ inch of headspace (the space between the top of the food and the rim of the jar). Remove any air bubbles with a non-metallic utensil, like a plastic knife or rubber spatula, by gently running it around the inside of the jar.
- Clean Rims and Apply Lids: Wipe the rims of the jars clean with a damp cloth to ensure a good seal. Center the hot lids on the jars and screw on the bands until they are finger-tight.
- Process in Water Bath: Place the filled jars into a boiling water canner, ensuring they are fully submerged by at least 1 inch of water. Bring the water to a rolling boil and process pint jars for 15 minutes (adjusting for altitude if necessary).
- Cool and Store: After processing, turn off the heat and let the jars sit in the hot water for 5 minutes before carefully removing them to a clean towel on your counter. Allow them to cool undisturbed for 12-24 hours. You’ll hear the satisfying “pop” as the seals form. Check seals by pressing on the center of the lid; it should not flex. Store properly sealed jars in a cool, dark place. Unsealed jars should be refrigerated and consumed within 3 weeks.
Enjoy your homemade apple butter!
Final Thoughts
So there you have it! My absolute favorite way to capture the essence of autumn in a jar: Apple Butter With Cinnamon And Cloves. There’s truly nothing quite like the aroma that fills your kitchen as the apples slowly cook down with those warm, inviting spices. It’s more than just a spread; it’s a labor of love that rewards you with incredible depth of flavor that store-bought versions simply can’t match.
I promise you, making your own Apple Butter With Cinnamon And Cloves is an experience worth savoring. From slathering it generously on your morning toast, swirling it into yogurt, or even pairing it with savory dishes like roasted beef, its rich, spiced sweetness is incredibly versatile. It’s a taste of pure comfort, a reminder of simpler times, and a beautiful way to bring warmth and a little homemade magic into your home. Don’t hesitate – give this recipe a try; you won’t regret filling your pantry with this golden goodness!

Delicious Apple Butter: Cinnamon & Clove Infused Recipe
- Total Time: 3 hours 15 minutes
- Yield: Approximately 6 cups 1x
Description
This homemade apple butter captures the essence of autumn with its rich, spiced flavor. Perfect for spreading on toast or pairing with savory dishes, it’s a comforting treat you won’t want to miss.
Ingredients
- 5–6 pounds of apples (mix of Honeycrisp, Fuji, Gala, and Granny Smith)
- 1 cup of light brown sugar
- 1–2 tablespoons of molasses
- 1 to 2 tablespoons of ground cinnamon
- 1 teaspoon of whole cloves (tied in a cheesecloth sachet)
- 1 cup of unsweetened apple cider (or water)
- 1/2 teaspoon of ground nutmeg (optional)
- 1/4 teaspoon of ground allspice (optional)
Instructions
- Prepare the Apples: First, wash the apples thoroughly. Core and chop them into roughly 1-inch pieces, leaving the skins on for a smoother texture later, or peel if preferred.
- Combine Ingredients in a Pot: Transfer the chopped apples to a large, heavy-bottomed pot or Dutch oven. Add the apple cider (or water), brown sugar, and molasses. If using whole cloves, tie them in a small cheesecloth sachet and add it to the pot. Stir everything gently to combine.
- Initial Cook Down: Place the pot over medium-low heat. Bring the mixture to a gentle simmer, then reduce the heat to low, cover, and let it cook for about 30-40 minutes, stirring occasionally.
- Blend Until Smooth: Remove the clove sachet. Use an immersion blender to blend the mixture until smooth. If using a regular blender, transfer the cooked apples in batches and process until smooth, then return the purée to the pot.
- Thicken the Apple Butter: Place the pot back on the stove over low to medium-low heat. Add the ground cinnamon and any optional spices. Cook down, stirring frequently, for 1.5 to 3 hours until thickened.
- Test for Doneness: Spoon a small amount onto a chilled plate. If there's no watery ring around the edge, it's ready. Adjust sweetness if desired.
- Jar It Up: Ladle the hot apple butter into clean, sterilized jars, leaving about 1/2 inch headspace. Wipe the rims clean, apply lids, and screw on the bands until finger-tight.
- Prep Time: 15 mins
- Cook Time: 3 hours
- Category: Preserve
- Method: Stovetop
- Cuisine: American
Nutrition
- Serving Size: 1 tablespoon
- Calories: 50
- Sugar: 12 g
- Sodium: 1 mg
- Fat: 0 g
- Saturated Fat: 0 g
- Unsaturated Fat: 0 g
- Trans Fat: 0 g
- Carbohydrates: 13 g
- Fiber: 0 g
- Protein: 0 g
- Cholesterol: 0 mg
Keywords: Choose a mix of sweet and tart apples for the best flavor. You can use a slow cooker for the long reduction phase if preferred. Adjust spices to your taste.