Air Fryer Honey Butter Garlic Chicken Tenders – just the name itself conjures images of a truly irresistible meal. Are you ready to transform ordinary chicken into an extraordinary culinary delight that’s both quick to prepare and bursting with flavor? I know I am! This dish is not merely a weeknight savior; it’s a testament to how simple ingredients, combined with the magic of the air fryer, can yield restaurant-quality results right in your own kitchen. We all love those moments when a meal comes together effortlessly, offering a perfect balance of sweet, savory, and wonderfully crispy textures, and this recipe delivers precisely that.
While chicken tenders have long been a beloved classic for families and a go-to for quick meals, the innovative use of the air fryer elevates them to new heights. Gone are the days of greasy deep-frying; instead, we embrace a healthier, yet equally satisfying, crispiness that perfectly coats each succulent piece of chicken. The fusion of golden honey, rich butter, and aromatic garlic creates an unparalleled glaze that caramelizes beautifully, ensuring every bite of these Air Fryer Honey Butter Garlic Chicken Tenders is an explosion of mouthwatering taste.
It’s the ultimate crowd-pleaser, promising a comforting, delightful experience that will have everyone asking for seconds.
Get ready to impress yourself and your loved ones with this incredibly flavorful and convenient dish!

Ingredients:
- For the Air Fryer Honey Butter Garlic Chicken Tenders:
- 1.5 lbs (approximately 680g) boneless, skinless chicken tenders
- 1 cup all-purpose flour
- 2 large eggs
- 2 cups Panko breadcrumbs (Japanese style)
- 1 teaspoon salt (divided)
- 0.5 teaspoon black pepper (divided)
- 1 teaspoon garlic powder
- 1 teaspoon onion powder
- 0.5 teaspoon smoked paprika (or sweet paprika)
- 0.25 teaspoon cayenne pepper (optional, for a subtle kick)
- Olive oil cooking spray or other high-heat cooking oil spray
- For the Irresistible Honey Butter Garlic Sauce:
- 0.5 cup (1 stick or 113g) unsalted butter
- 6-8 cloves garlic, minced very finely
- 0.5 cup honey
- 2 tablespoons low-sodium soy sauce
- 1 tablespoon apple cider vinegar (optional, for a touch of tang)
- 0.5 teaspoon red pepper flakes (optional, for a bit of heat)
- Optional Garnish:
- 2 tablespoons fresh parsley, chopped
- 1 tablespoon toasted sesame seeds
Preparing the Chicken Tenders for Breading
- Prepare Your Chicken: First things first, let’s get our chicken tenders ready for their delicious transformation. Take your 1.5 lbs of boneless, skinless chicken tenders and gently pat them thoroughly dry with paper towels. This step is absolutely crucial because removing excess moisture from the chicken surface helps the breading adhere better and ensures a crispier result in the air fryer. If the chicken is wet, the breading can become soggy or peel off during cooking, which is not what we want for our perfect Air Fryer Honey Butter Garlic Chicken Tenders.
- Inspect and Trim: Carefully inspect each chicken tender. If you notice any visible excess fat or tough, white sinew (often called the “tendon”), use a sharp paring knife to carefully trim it away. While not strictly necessary, removing these parts ensures a more uniform texture and a more pleasant eating experience.
- Initial Seasoning: Now, let’s give our chicken a foundational layer of flavor. In a small bowl, combine 0.5 teaspoon of salt and 0.25 teaspoon of black pepper. Sprinkle this mixture evenly over both sides of the patted-dry chicken tenders. Use your hands to gently rub the seasoning into the meat. This initial seasoning penetrates the chicken itself, ensuring that every bite of your Air Fryer Honey Butter Garlic Chicken Tenders is flavorful, not just the breading.
Setting Up the Breading Station
Creating an efficient breading station is key to a smooth and less messy process. We’ll be using three shallow dishes or pie plates, which are ideal for dipping and coating.
- Prepare Your Flour Dish: In your first shallow dish, pour in the 1 cup of all-purpose flour. To this, add your remaining 0.5 teaspoon of salt, 0.25 teaspoon of black pepper, 1 teaspoon of garlic powder, 1 teaspoon of onion powder, 0.5 teaspoon of smoked paprika, and the optional 0.25 teaspoon of cayenne pepper. Use a whisk or a fork to thoroughly combine all these dry ingredients until they are evenly distributed. This seasoned flour will be our first coating layer, providing a flavorful base and helping the egg wash stick to the chicken.
- Prepare Your Egg Wash Dish: In your second shallow dish, crack the 2 large eggs. Add a splash (about 1 tablespoon) of water or milk to the eggs. Whisk them vigorously with a fork until the yolks and whites are fully combined and the mixture is smooth and slightly frothy. This egg wash acts as a binding agent, creating a sticky surface for the breadcrumbs to adhere to. The splash of water or milk helps to thin the egg wash slightly, ensuring a lighter, more even coating.
- Prepare Your Panko Dish: In your third shallow dish, place the 2 cups of Panko breadcrumbs. Panko is truly the secret weapon for incredibly crispy air-fried foods. Unlike regular breadcrumbs, Panko is coarser and flakier, absorbing less oil and yielding a far superior crunch. There’s no need to season the Panko directly, as the flour mixture and the chicken itself are already well-seasoned.
- Arrange Your Station: Arrange the three dishes in a logical sequence on your countertop: flour, then egg, then Panko. To your left, place your seasoned chicken tenders, and to your right, prepare a clean wire rack set over a baking sheet. This setup will streamline the breading process and minimize mess.
Breading the Chicken Tenders
The “wet hand, dry hand” technique is your best friend here to avoid clumpy, breading-covered fingers!
- Flour First: Using your “dry hand” (the hand you’ll use for the flour and Panko), pick up one seasoned chicken tender. Dredge it completely in the seasoned flour mixture, ensuring it’s fully coated on all sides. Gently shake off any excess flour. A thin, even layer is what we’re aiming for. Too much flour can make the breading gummy.
- Egg Wash Next: With your “dry hand,” transfer the floured tender to the egg wash dish. Now, switch to your “wet hand” (the hand you’ll use for the egg wash). Submerge the chicken tender completely in the egg wash, making sure every part is covered. Lift the tender, allowing any excess egg to drip back into the dish. Again, a thin, even coat is preferred.
- Panko for Perfection: With your “wet hand,” gently transfer the egg-coated tender into the Panko breadcrumbs. Immediately switch back to your “dry hand.” Generously cover the chicken tender with Panko, gently pressing the breadcrumbs onto the chicken with your fingers to ensure maximum adhesion. You want a thick, even layer of Panko all over; this is what will give your Air Fryer Honey Butter Garlic Chicken Tenders their signature crispness.
- Rest on the Rack: Once fully coated, carefully transfer the breaded chicken tender to the wire rack set over the baking sheet. Placing them on a rack allows air to circulate around all sides, preventing the bottom from becoming soggy.
- Repeat the Process: Continue this breading process with the remaining chicken tenders, working one by one until all are beautifully coated. It’s a bit of a repetitive task, but the effort is absolutely worth it for the incredible texture we’re going to achieve.
- Optional Chilling Step: For an even more secure breading, if you have time, place the entire baking sheet with the breaded chicken tenders into the refrigerator for at least 15-30 minutes. Chilling helps the breading adhere firmly to the chicken, reducing the chances of it flaking off during air frying. This step significantly enhances the final quality of your Air Fryer Honey Butter Garlic Chicken Tenders.
Air Frying the Chicken Tenders
The air fryer is going to work its magic, giving us incredibly crispy tenders with far less oil than traditional frying.
- Preheat Your Air Fryer: Always preheat your air fryer for best results. Set your air fryer to 375°F (190°C) and let it preheat for at least 5 minutes. Preheating ensures that the moment the chicken tenders hit the basket, they start cooking evenly and developing that crispy crust immediately, preventing them from drying out or becoming greasy.
- Prepare the Basket: Once preheated, lightly spray the inside of your air fryer basket with olive oil cooking spray. This prevents sticking and helps promote an even crisp.
- Arrange Tenders: Carefully place the breaded chicken tenders in a single layer in the air fryer basket. Do not overcrowd the basket. Overcrowding is the enemy of crispiness in an air fryer, as it traps steam and prevents proper air circulation. You want to leave a little space between each tender. You will likely need to cook these in two or more batches, depending on the size of your air fryer.
- Spray the Tenders: Once arranged, generously spray the tops of the chicken tenders with olive oil cooking spray. This is essential for achieving that beautiful golden-brown color and super crispy texture that we associate with perfectly fried chicken, but without all the oil.
- Initial Air Frying: Close the air fryer basket and cook the chicken tenders for 8 minutes.
- Flip and Continue: After 8 minutes, carefully open the air fryer. Using tongs, gently flip each chicken tender over. Spray the newly exposed tops of the tenders with more cooking spray. This ensures both sides get equally golden and crispy.
- Final Air Frying: Close the air fryer and continue to cook for another 5-7 minutes, or until the chicken is golden brown, crispy, and cooked through. The exact timing can vary slightly depending on the thickness of your tenders and your specific air fryer model.
- Check for Doneness: The most accurate way to check for doneness is with an instant-read meat thermometer. Insert the thermometer into the thickest part of a chicken tender; it should read an internal temperature of 165°F (74°C). The breading should be beautifully golden and feel firm and crunchy to the touch.
- Batch Management: As each batch of your Air Fryer Honey Butter Garlic Chicken Tenders finishes cooking, transfer them to a clean plate or a wire rack and keep them warm while you cook the remaining batches. You can place them in a low oven (around 200°F/95°C) to stay warm and crispy.
Making the Honey Butter Garlic Sauce
This sauce is the star of the show, bringing together a symphony of sweet, savory, and garlicky flavors that will coat your crispy tenders in pure deliciousness.
- Melt the Butter: In a small saucepan, melt 0.5 cup (1 stick) of unsalted butter over medium-low heat. Using medium-low heat is important to prevent the butter from browning too quickly, which could give the sauce a nutty, almost burnt flavor instead of the smooth, rich butteriness we desire for our Air Fryer Honey Butter Garlic Chicken Tenders.
- Sauté the Garlic: Once the butter is fully melted and shimmering, add the 6-8 cloves of finely minced garlic to the saucepan. Sauté the garlic for about 30-60 seconds, stirring continuously. The goal here is to let the garlic become fragrant and soften slightly, releasing its aromatic oils into the butter. Be very careful not to let the garlic brown or burn, as burnt garlic can taste bitter and ruin the delicate balance of the sauce.
- Whisk in the Honey: Reduce the heat to low. Pour in the 0.5 cup of honey, and whisk it thoroughly into the butter and garlic mixture. The honey will melt into the warm butter, creating a luscious, golden base for our sauce. Keep whisking until the mixture is smooth and fully combined.
- Add the Savory Elements: Next, whisk in the 2 tablespoons of low-sodium soy sauce. The soy sauce adds a fantastic umami depth and a touch of saltiness that perfectly complements the sweetness of the honey. If you’re using it, now is also the time to whisk in the 1 tablespoon of apple cider vinegar, which will provide a bright, tangy counterpoint, cutting through the richness of the butter and honey. Finally, if you enjoy a little warmth, stir in the 0.5 teaspoon of red pepper flakes.
- Gentle Simmer: Increase the heat slightly to medium-low and bring the sauce to a gentle simmer. Let it simmer for 1-2 minutes, stirring occasionally. This short simmer allows the flavors to meld together beautifully and helps the sauce thicken ever so slightly, giving it a perfect consistency for coating the chicken tenders. You’ll notice the sauce becoming a bit more cohesive and glossy.
- Taste and Adjust: Remove the saucepan from the heat. Carefully taste the sauce (it will be hot!). This is your opportunity to adjust the seasoning. Do you want it a little saltier? Add a pinch more salt. A bit sweeter? Stir in a touch more honey. Prefer more tang? Another splash of apple cider vinegar. This customization ensures the sauce perfectly suits your palate and enhances your Air Fryer Honey Butter Garlic Chicken Tenders to their fullest potential.
Tossing and Serving Your Air Fryer Honey Butter Garlic Chicken Tenders
This is where all your hard work comes together in a magnificent explosion of flavor and texture!
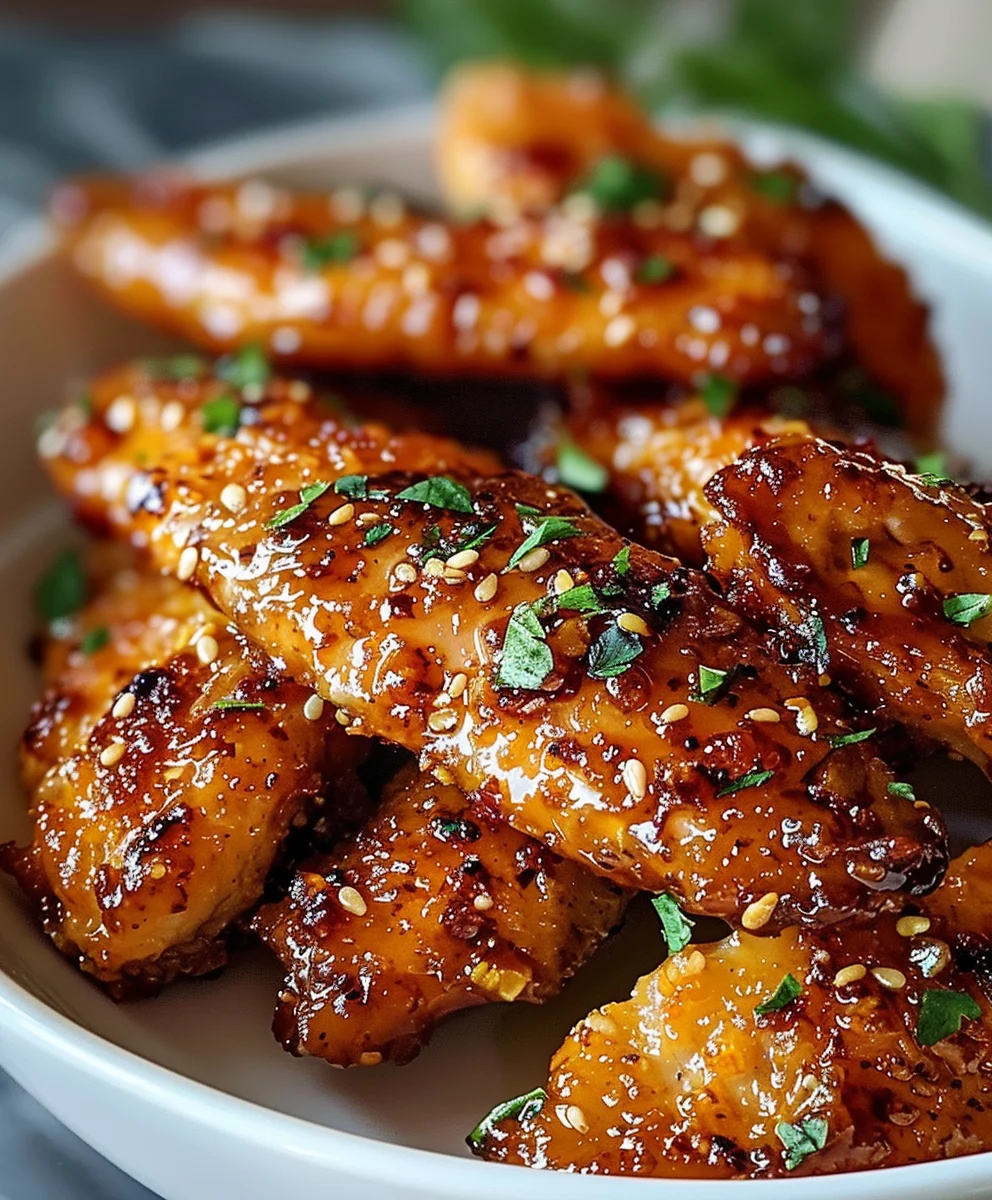
- Combine and Coat: Once all your crispy Air Fryer Honey Butter Garlic Chicken Tenders are cooked and ready, transfer them into a large, sturdy mixing bowl. Pour the warm, aromatic honey butter garlic sauce evenly over the tenders. You’ll want every single one of those golden, crispy pieces to be generously coated.
- Gently Toss: Using a pair of tongs or two large spoons, gently toss the chicken tenders in the sauce. Be careful not to toss too vigorously, as you want to preserve the crispiness of the breading while ensuring every tender is beautifully glazed. Continue tossing until each piece is fully covered in the glistening, fragrant sauce. You’ll see the sauce clinging perfectly to the nooks and crannies of the Panko breading, promising an incredible bite.
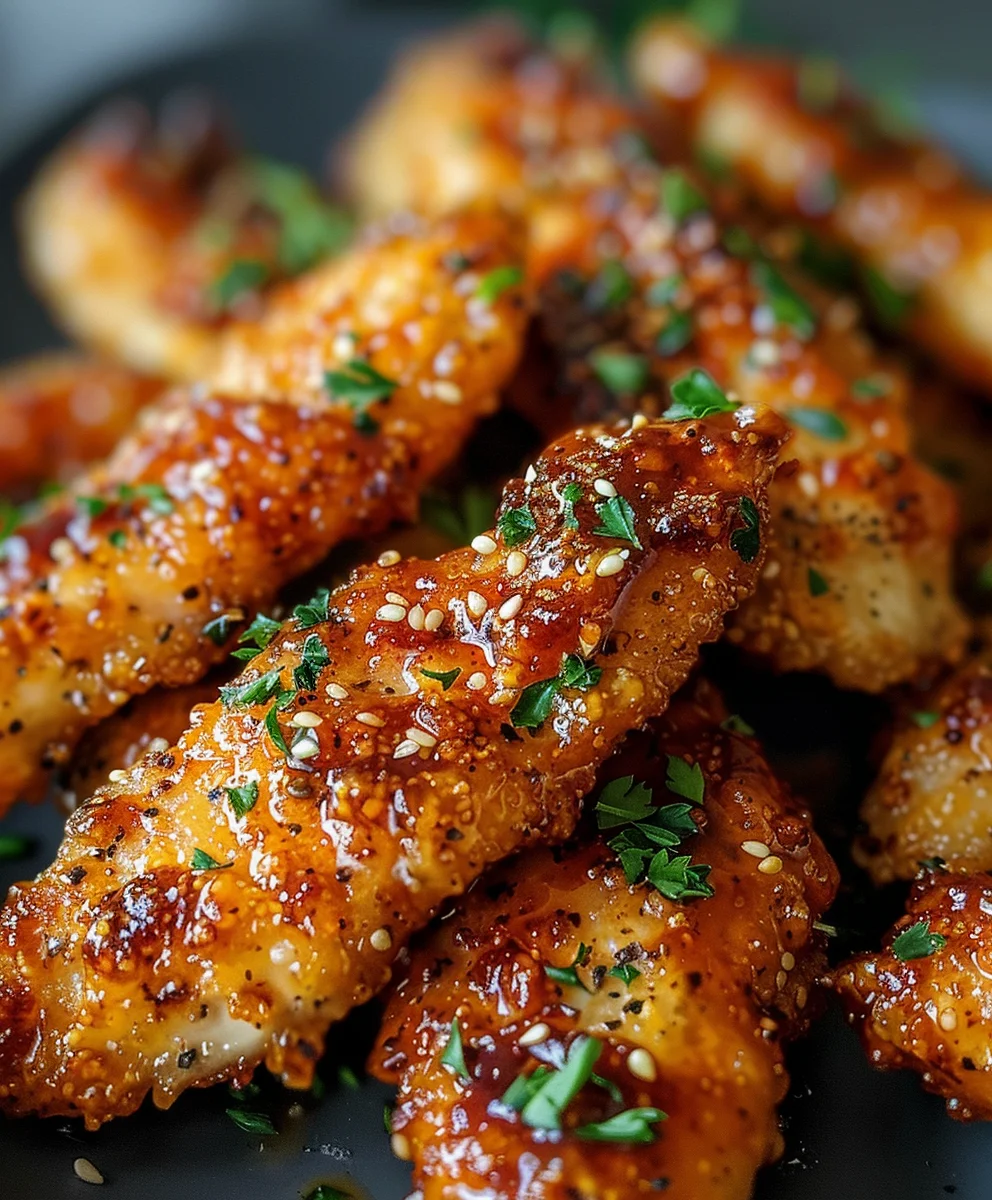
- Garnish and Serve Immediately: Transfer your glorious Air Fryer Honey Butter Garlic Chicken Tenders to a serving platter. If desired, sprinkle generously with the fresh chopped parsley for a pop of color and herbaceous freshness, and the toasted sesame seeds for an extra layer of texture and a nutty aroma. These garnishes not only make the dish visually appealing but also add subtle flavor contrasts.
- Enjoy the Masterpiece: Serve these incredible Air Fryer Honey Butter Garlic Chicken Tenders immediately. They are at their absolute best when fresh out of the air fryer and tossed in the warm sauce, ensuring the perfect balance of crispiness and sauciness. These tenders pair wonderfully with a side of steamed white rice to soak up any extra sauce, a simple green salad for freshness, or even some roasted vegetables. The combination of the unbelievably crispy exterior, the juicy chicken inside, and that irresistible sweet, savory, and garlicky glaze is simply divine. Get ready for rave reviews and empty plates!
Conclusion:
Well, my friends, we’ve reached the end of our culinary journey for today, and I truly hope you’re feeling as excited as I am about the incredible dish we’ve explored. If there’s one recipe you absolutely, unequivocally need to add to your repertoire this week, it’s this one. I wholeheartedly believe that the Air Fryer Honey Butter Garlic Chicken Tenders are more than just a meal; they’re a revelation in convenience, flavor, and sheer crowd-pleasing power. This isn’t just another chicken tender recipe; it’s a golden, crispy, incredibly juicy masterpiece that delivers an unforgettable symphony of sweet, savory, and aromatic flavors with every single bite. The magic lies in how effortlessly the air fryer transforms humble chicken tenders into something extraordinary – a tender, moist interior encased in a gloriously crispy, golden-brown crust, all without the fuss and grease of traditional deep-frying.
What truly makes this a must-try recipe is its unparalleled blend of speed and gourmet taste. In less time than it takes to order takeout, you can have a dish on the table that tastes like it came from a five-star restaurant. The simplicity of the ingredients—chicken, butter, honey, garlic, and a few basic seasonings—belies the complex and utterly addictive flavor profile they create when combined. It’s perfect for those hectic weeknights when you’re short on time but refuse to compromise on taste. And let’s not forget the health aspect; by using an air fryer, we’re significantly cutting down on oil, making this a lighter option without sacrificing any of the satisfying crunch or richness. Trust me when I say, once you taste these golden nuggets of deliciousness, you’ll wonder how you ever lived without them.
Unleash Your Creativity: Serving Suggestions & Variations
The beauty of these honey butter garlic chicken tenders extends far beyond their initial preparation; they are incredibly versatile, ready to elevate almost any meal or occasion. For a satisfying and wholesome dinner, I absolutely love serving them alongside a generous portion of fluffy jasmine rice or creamy mashed potatoes, allowing the extra glaze to meld into every spoonful. A simple green salad with a light vinaigrette or some perfectly roasted asparagus or broccoli would also make for a wonderfully balanced meal, adding a fresh counterpoint to the rich chicken.
But why stop there? Think outside the dinner plate! These tenders are absolutely fantastic as a star ingredient in other dishes. Imagine them sliced and nestled into warm tortillas for the most flavorful chicken tacos you’ve ever had, or chopped and tossed into a vibrant salad for a protein-packed lunch that’s anything but boring. They also make an incredible filling for a hearty sandwich or wrap, perhaps with some crisp lettuce, juicy tomatoes, and a drizzle of ranch dressing. And for those casual gatherings or game nights, these tenders are an absolute showstopper appetizer. Just serve them with a side of your favorite dipping sauce – perhaps an extra bowl of the honey butter garlic glaze, a spicy sriracha mayo, or a classic ranch – and watch them disappear in minutes.
Now, if you’re feeling a bit adventurous and want to put your own spin on this already fantastic recipe, I encourage you to experiment with some variations. For a touch of heat that really wakes up the palate, consider adding a pinch of red pepper flakes or a dash of your favorite hot sauce to the glaze. A sprinkle of fresh herbs like chopped parsley or chives at the end can add a beautiful burst of freshness and color. You could also try experimenting with different types of honey for subtle flavor nuances – perhaps a robust buckwheat honey or a floral orange blossom variety. For those who enjoy a little zest, a squeeze of fresh lemon juice over the finished tenders can really brighten the flavors. Don’t be afraid to adjust the balance of honey and butter to suit your preference; if you like it sweeter, add more honey, if you prefer it richer, a little extra butter will do the trick. The possibilities are truly endless, and this recipe provides a brilliant foundation for your culinary creativity.
Your Turn to Shine!
Now that you have all the insider tips and tricks, it’s time to roll up your sleeves and experience the magic of the Air Fryer Honey Butter Garlic Chicken Tenders for yourself. I genuinely believe that this recipe will become a cherished staple in your home, bringing smiles and satisfied sighs to everyone at your table. Don’t just read about it; go ahead and make it! I promise you won’t regret it.
And once you’ve whipped up your own batch of these irresistible tenders, I would absolutely love to hear about your experience. Did you try a fun variation? What did you serve them with? How did your family react? Please share your thoughts, your successes, and even your creative twists in the comments below. Your feedback and personal stories are what make this culinary community so vibrant and inspiring. Let’s celebrate delicious food together, one perfectly crispy, sweet, and savory chicken tender at a time! Happy cooking, everyone!
Crispy Air Fryer Honey Butter Garlic Chicken Tenders
Transform ordinary chicken into extraordinary Air Fryer Honey Butter Garlic Chicken Tenders. Quick to prepare and bursting with sweet, savory, and crispy flavor, this dish leverages the air fryer for healthier, restaurant-quality results. Each succulent tender is coated in a golden honey, rich butter, and aromatic garlic glaze for an irresistible meal.
Ingredients
-
1.5 lbs boneless, skinless chicken tenders
-
1 cup all-purpose flour
-
2 large eggs
-
2 cups Panko breadcrumbs
-
1 tsp salt
-
0.5 tsp black pepper
-
1 tsp garlic powder
-
1 tsp onion powder
-
0.5 tsp smoked paprika
-
0.25 tsp cayenne pepper (optional)
-
Olive oil cooking spray
-
0.5 cup unsalted butter
-
6-8 cloves garlic, minced
-
0.5 cup honey
-
2 tbsp low-sodium soy sauce
-
1 tbsp apple cider vinegar (optional)
-
0.5 tsp red pepper flakes (optional)
-
2 tbsp fresh parsley, chopped (optional garnish)
-
1 tbsp toasted sesame seeds (optional garnish)
Instructions
-
Step 1
Pat chicken tenders dry. Trim any excess fat or sinew. Season chicken with 0.5 tsp salt and 0.25 tsp black pepper; rub into meat. -
Step 2
{‘@type’: ‘HowToSection’, ‘name’: ‘Set Up Breading Station’, ‘itemListElement’: [{‘@type’: ‘HowToStep’, ‘name’: ‘Prepare Flour Dish’, ‘text’: ‘In Dish 1: Combine 1 cup flour, 0.5 tsp salt, 0.25 tsp black pepper, 1 tsp garlic powder, 1 tsp onion powder, 0.5 tsp smoked paprika, 0.25 tsp cayenne pepper (optional). Whisk.’}, {‘@type’: ‘HowToStep’, ‘name’: ‘Prepare Egg Wash Dish’, ‘text’: ‘In Dish 2: Whisk 2 large eggs with 1 tbsp water or milk until smooth.’}, {‘@type’: ‘HowToStep’, ‘name’: ‘Prepare Panko Dish’, ‘text’: ‘In Dish 3: Place 2 cups Panko breadcrumbs.’}, {‘@type’: ‘HowToStep’, ‘name’: ‘Arrange Station’, ‘text’: ‘Arrange dishes: chicken, flour, egg, Panko. Prepare a wire rack over a baking sheet.’}]} -
Step 3
{‘@type’: ‘HowToSection’, ‘name’: ‘Bread the Chicken Tenders’, ‘itemListElement’: [{‘@type’: ‘HowToStep’, ‘name’: ‘Dredge and Coat’, ‘text’: “Using the ‘dry hand, wet hand’ technique: Dredge each tender in flour, shaking off excess. Transfer to egg wash using ‘wet hand’, coating completely. Transfer to Panko with ‘wet hand’, then use ‘dry hand’ to press Panko onto chicken for full coverage.”}, {‘@type’: ‘HowToStep’, ‘name’: ‘Rest on Rack’, ‘text’: ‘Place breaded tenders on the wire rack. Repeat for all chicken.’}, {‘@type’: ‘HowToStep’, ‘name’: ‘Optional Chilling’, ‘text’: ‘(Optional) Chill breaded tenders in the refrigerator for 15-30 minutes to help breading adhere.’}]} -
Step 4
{‘@type’: ‘HowToSection’, ‘name’: ‘Air Frying the Chicken Tenders’, ‘itemListElement’: [{‘@type’: ‘HowToStep’, ‘name’: ‘Preheat Air Fryer’, ‘text’: ‘Preheat air fryer to 375°F (190°C) for 5 minutes. Lightly spray basket with olive oil cooking spray.’}, {‘@type’: ‘HowToStep’, ‘name’: ‘Arrange and Spray Tenders’, ‘text’: ‘Place breaded tenders in a single layer in the basket (do not overcrowd). Generously spray tops with olive oil cooking spray.’}, {‘@type’: ‘HowToStep’, ‘name’: ‘Air Fry’, ‘text’: ‘Air fry for 8 minutes, then flip tenders, spray again, and cook for another 5-7 minutes, until golden brown, crispy, and internal temperature reaches 165°F (74°C).’}, {‘@type’: ‘HowToStep’, ‘name’: ‘Batch Management’, ‘text’: ‘Transfer cooked tenders to a plate or wire rack; keep warm while cooking remaining batches.’}]} -
Step 5
{‘@type’: ‘HowToSection’, ‘name’: ‘Make the Honey Butter Garlic Sauce’, ‘itemListElement’: [{‘@type’: ‘HowToStep’, ‘name’: ‘Melt Butter and Sauté Garlic’, ‘text’: ‘Melt 0.5 cup unsalted butter in a small saucepan over medium-low heat. Add minced garlic and sauté for 30-60 seconds until fragrant.’}, {‘@type’: ‘HowToStep’, ‘name’: ‘Whisk in Ingredients’, ‘text’: ‘Reduce heat to low. Whisk in 0.5 cup honey, 2 tbsp low-sodium soy sauce, 1 tbsp apple cider vinegar (optional), and 0.5 tsp red pepper flakes (optional).’}, {‘@type’: ‘HowToStep’, ‘name’: ‘Simmer and Adjust’, ‘text’: ‘Gently simmer for 1-2 minutes, stirring occasionally, until slightly thickened and glossy. Taste and adjust seasoning.’}]} -
Step 6
{‘@type’: ‘HowToSection’, ‘name’: ‘Toss and Serve’, ‘itemListElement’: [{‘@type’: ‘HowToStep’, ‘name’: ‘Coat Tenders’, ‘text’: ‘Transfer cooked tenders to a large mixing bowl. Pour warm honey butter garlic sauce over them.’}, {‘@type’: ‘HowToStep’, ‘name’: ‘Toss Gently’, ‘text’: ‘Gently toss with tongs or spoons until tenders are evenly coated and glazed.’}, {‘@type’: ‘HowToStep’, ‘name’: ‘Garnish and Serve’, ‘text’: ‘Garnish with fresh chopped parsley and toasted sesame seeds (if using). Serve immediately.’}]}
Important Information
Nutrition Facts (Per Serving)
It is important to consider this information as approximate and not to use it as definitive health advice.
Allergy Information
Please check ingredients for potential allergens and consult a health professional if in doubt.