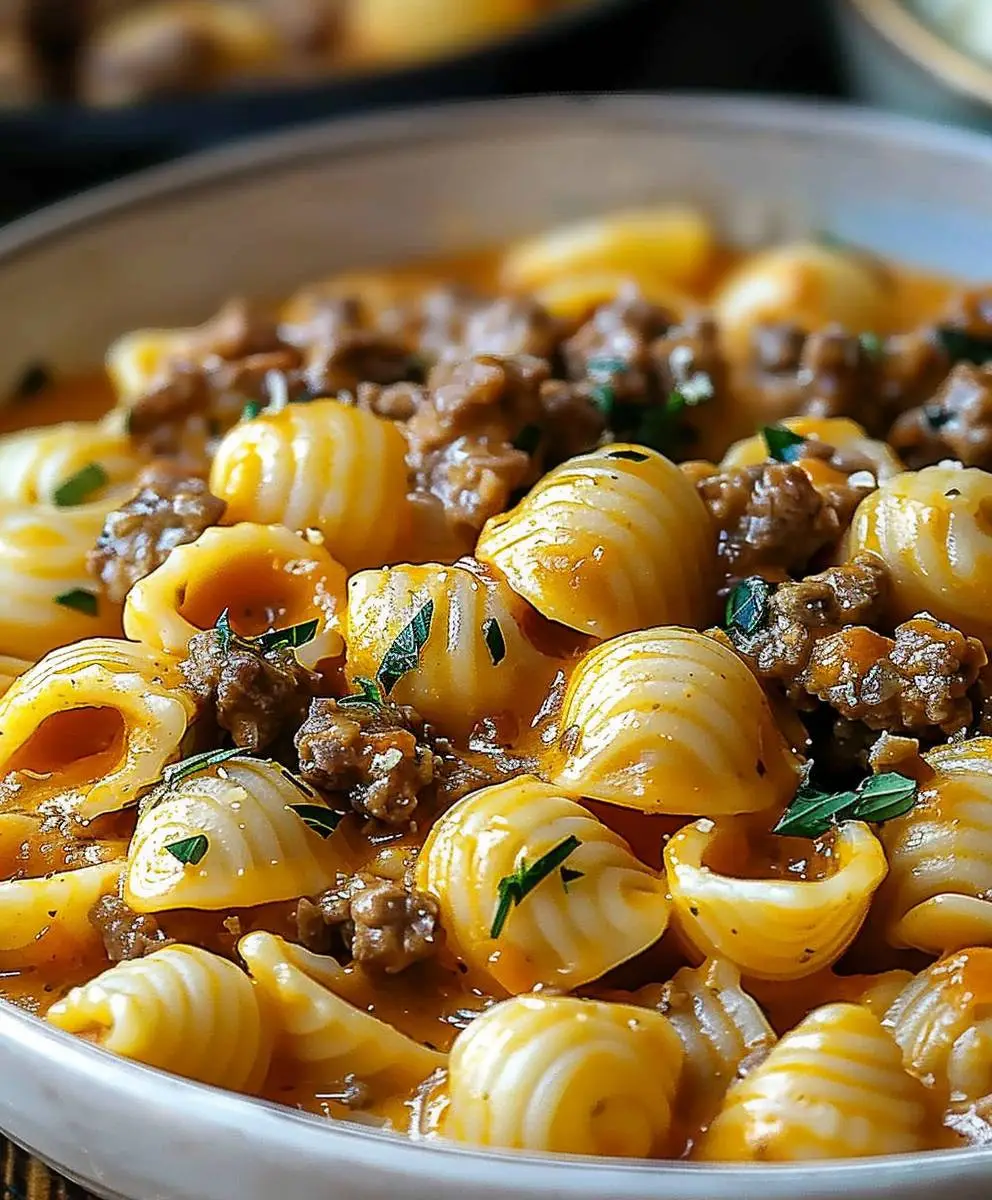
Creamy Beef Shells Pasta: A Comfort Food Classic
Creamy Beef Shells Pasta – just the name conjures up images of a warm, comforting meal perfect for a chilly evening or a cozy family gathering. I’ve always loved this dish, and I’m excited to share my family’s treasured recipe with you. It’s more than just pasta and beef; it’s a journey through flavor and texture that will leave you completely satisfied.
While the exact origins are difficult to pinpoint, Creamy Beef Shells Pasta is a dish that embodies the spirit of classic American comfort food. It’s a testament to the simple elegance of combining readily available ingredients into something truly special. Think of it as a modern evolution of classic macaroni and cheese, elevated with the richness of beef and a creamy, luscious sauce. This isn’t your grandmother’s macaroni and cheese; this is Creamy Beef Shells Pasta, a dish that stands on its own.
What makes this Creamy Beef Shells Pasta so beloved? It’s the perfect balance of flavors and textures. The tender beef, slow-cooked to perfection, mingles beautifully with the creamy, cheesy sauce that coats each perfectly-shaped shell. The pasta itself offers a delightful chewiness, providing a satisfying contrast to the smooth sauce. It’s a dish that’s both incredibly satisfying and surprisingly easy to make, making it a weeknight favorite for busy families and experienced cooks alike. The convenience factor is a huge plus; you can easily prepare the majority of the ingredients ahead of time, making for a quick and delicious meal even on the busiest of days. So, let’s dive in and create this culinary masterpiece together!

Ingredients:
- 1 pound ground beef
- 1 medium onion, chopped
- 2 cloves garlic, minced
- 1 (28 ounce) can crushed tomatoes
- 1 (15 ounce) can tomato sauce
- 1 (15 ounce) can diced tomatoes, undrained
- 1 teaspoon dried oregano
- 1 teaspoon dried basil
- 1/2 teaspoon salt
- 1/4 teaspoon black pepper
- 1/2 cup beef broth
- 1 (16 ounce) package jumbo pasta shells
- 2 cups ricotta cheese
- 1/2 cup grated Parmesan cheese
- 1 egg, lightly beaten
- 1/4 cup chopped fresh parsley
- 1/2 teaspoon salt
- 1/4 teaspoon black pepper
- 2 cups shredded mozzarella cheese
Preparing the Meat Sauce
- I always start by browning the ground beef. In a large skillet over medium-high heat, crumble the ground beef and cook, breaking it up with a spoon, until browned. Drain off any excess grease.
- Next, add the chopped onion to the skillet and cook until softened, about 5 minutes. I like to stir frequently to prevent burning.
- Now, add the minced garlic and cook for another minute, until fragrant. Be careful not to burn the garlic, as it can become bitter.
- Time to add the canned tomatoes! Stir in the crushed tomatoes, tomato sauce, and diced tomatoes (undrained). This gives the sauce a nice, chunky texture.
- Season generously with oregano, basil, salt, and pepper. I usually taste the sauce at this point and adjust the seasonings as needed. Sometimes I add a pinch more salt or a dash more oregano, depending on my mood.
- Bring the sauce to a simmer, then reduce heat to low, cover, and let it simmer gently for at least 30 minutes, or even longer for a richer flavor. The longer it simmers, the better it tastes!
- After 30 minutes, stir in the beef broth. This adds a depth of flavor and helps to thin the sauce slightly if needed. I often check the consistency at this point and add a little more broth if it’s too thick for my liking.
Preparing the Ricotta Filling
- In a medium bowl, combine the ricotta cheese, Parmesan cheese, egg, parsley, salt, and pepper. I like to mix this thoroughly until everything is well combined and evenly distributed.
- This step is crucial for a creamy filling. Make sure the ricotta is well-mixed and there are no lumps. A smooth filling ensures a delightful texture in the final dish.
Cooking the Pasta Shells and Assembling the Dish
- While the sauce simmers, cook the pasta shells according to package directions. I usually cook them al dente, meaning slightly firm to the bite. Overcooked pasta will become mushy in the baking process.
- Once the pasta is cooked, drain it well and rinse it under cold water to stop the cooking process. This prevents the pasta from sticking together.
- Preheat your oven to 375°F (190°C). This ensures the cheese melts perfectly and the dish is heated through.
- Lightly grease a 9×13 inch baking dish. I prefer to use cooking spray for easy cleanup.
- Spread a thin layer of the meat sauce in the bottom of the baking dish. This creates a flavorful base for the shells.
- Fill each cooked pasta shell with a generous spoonful of the ricotta cheese mixture. I try to fill them evenly to ensure consistent flavor and texture throughout the dish.
- Arrange the filled pasta shells in the prepared baking dish. I usually arrange them in a single layer, but you can do two layers if your dish is deep enough.
- Pour the remaining meat sauce over the shells, making sure they are mostly covered. This ensures that every bite is flavorful and moist.
- Sprinkle the mozzarella cheese evenly over the top. I like to use a generous amount of cheese for a nice, cheesy topping.
- Bake for 25-30 minutes, or until the cheese is melted, bubbly, and golden brown. Keep an eye on it to prevent burning. The baking time may vary depending on your oven.
- Let the casserole stand for a few minutes before serving. This allows the filling to set slightly and makes it easier to serve.
Serving Suggestions
Serve this Creamy Beef Shells Pasta hot. A side salad or some crusty bread would complement this dish perfectly. Enjoy!
Conclusion:
So there you have it – my Creamy Beef Shells Pasta recipe! I truly believe this dish is a must-try for several reasons. First, it’s incredibly flavorful. The rich, creamy sauce perfectly complements the tender beef and perfectly cooked pasta shells. The blend of savory and slightly sweet notes creates a symphony of taste that will leave you wanting more. Second, it’s surprisingly easy to make. Despite the decadent result, the recipe itself is straightforward and doesn’t require any complicated techniques or hard-to-find ingredients. Even a beginner cook can confidently tackle this recipe and impress their family and friends.
Third, and perhaps most importantly, this Creamy Beef Shells Pasta is incredibly versatile. It’s the perfect weeknight dinner, but it’s also elegant enough for a special occasion. You can easily adapt it to your own preferences and dietary needs. For example, you could add different vegetables like mushrooms, spinach, or bell peppers to boost the nutritional value and add a pop of color. Feel free to experiment with different cheeses – a sharp cheddar or a creamy Gruyere would be delicious additions. If you prefer a spicier kick, a pinch of red pepper flakes would do the trick.
Speaking of variations, I love serving this Creamy Beef Shells Pasta with a side of crusty garlic bread for dipping into that luscious sauce. A simple green salad with a light vinaigrette also makes a refreshing counterpoint to the richness of the dish. For a truly indulgent meal, consider adding a sprinkle of freshly grated Parmesan cheese just before serving. The possibilities are endless!
For those who prefer a lighter meal, you can easily reduce the amount of cream used in the sauce, or even substitute it with half-and-half or milk for a less heavy version. You could also add some cooked chicken or turkey instead of beef, making it a great option for a leaner protein source. The beauty of this recipe lies in its adaptability; feel free to customize it to your liking!
Serving Suggestions:
- Crusty garlic bread
- Simple green salad with vinaigrette
- Side of steamed broccoli or asparagus
- Freshly grated Parmesan cheese
Variations:
- Add different vegetables: mushrooms, spinach, bell peppers
- Use different cheeses: cheddar, Gruyere
- Add a pinch of red pepper flakes for spice
- Substitute beef with chicken or turkey
- Reduce the amount of cream for a lighter version
I genuinely hope you give my Creamy Beef Shells Pasta recipe a try. It’s a dish that I’ve perfected over time, and I’m confident it will become a staple in your own kitchen. It’s the kind of comforting, satisfying meal that everyone will love. Once you’ve made it, I’d love to hear about your experience! Share your photos and feedback on social media using #CreamyBeefShellsPasta – I can’t wait to see your delicious creations!
Don’t forget to share this recipe with your friends and family – let’s spread the creamy goodness!
Creamy Beef Shells Pasta: A Comfort Food Recipe
Cheesy baked pasta shells filled with creamy ricotta and topped with rich meat sauce and mozzarella.
Ingredients
Instructions
Recipe Notes
- For a richer meat sauce, use a combination of ground beef and Italian sausage.
- Feel free to add other vegetables to the meat sauce, such as bell peppers or mushrooms.
- If the sauce is too thick, add more beef broth. If it’s too thin, simmer uncovered for a longer time.
- You can use different types of pasta shells, but jumbo shells work best for this recipe.
- Leftovers can be stored in the refrigerator for up to 3 days.