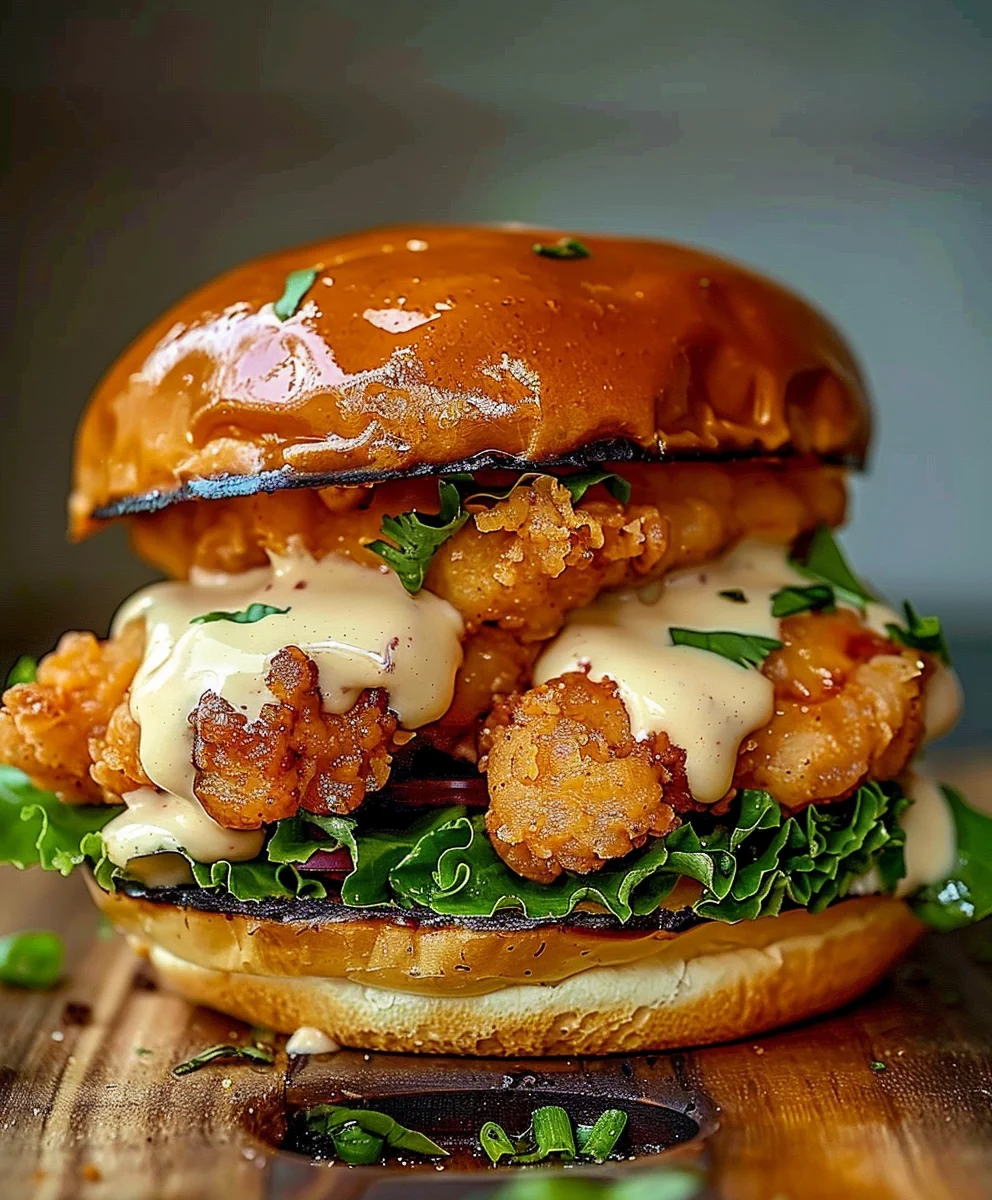
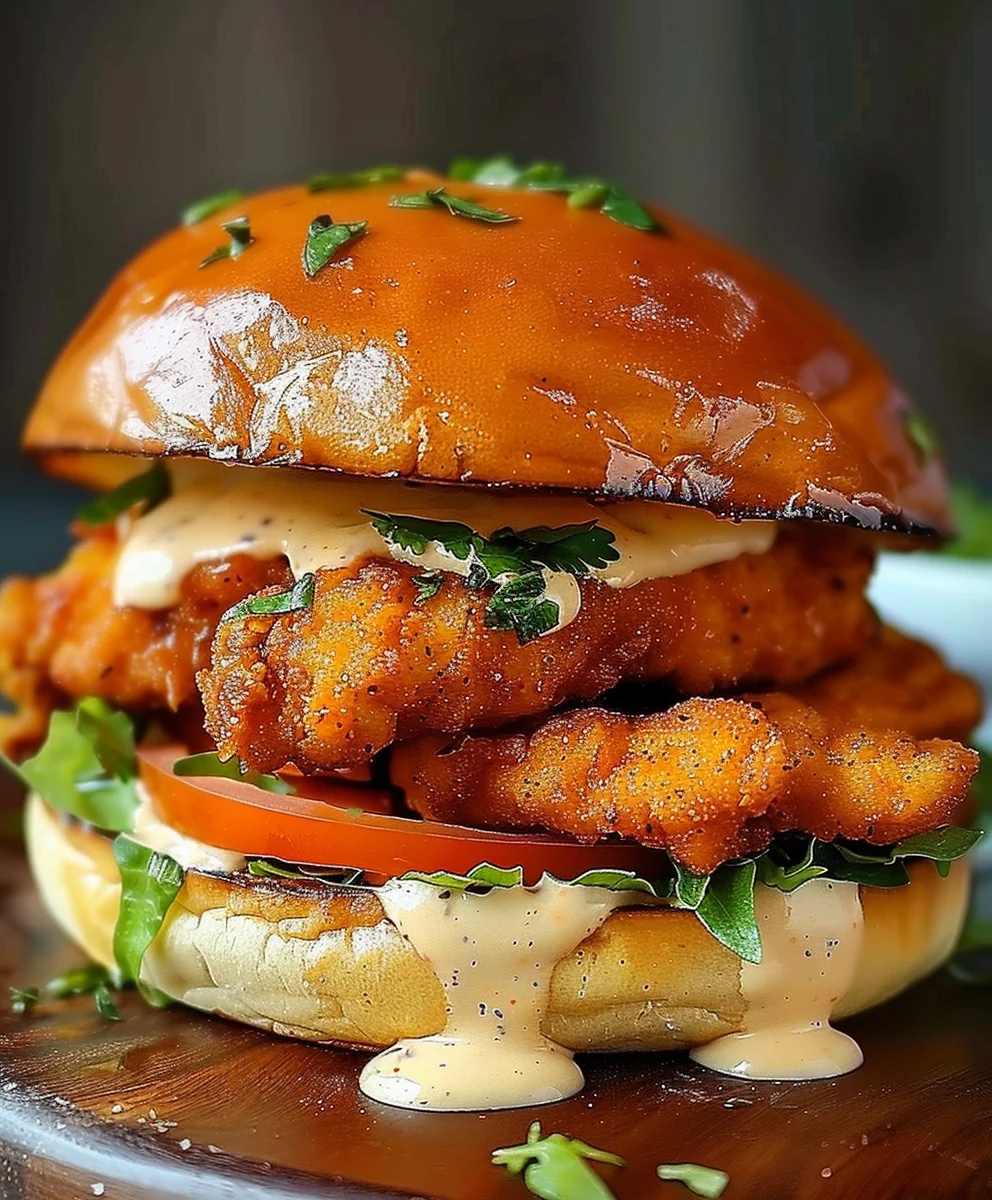
Spicy Chicken Sandwich With Creamy Homemade Sauce is not just another item on the menu; it’s a culinary journey that promises to ignite your senses and elevate your expectations for what a homemade sandwich can be. Prepare to bid farewell to ordinary weeknight dinners and embrace a creation that perfectly marries heat, crunch, and an unbelievably smooth, cooling counterpoint. The chicken sandwich itself has a storied past, evolving from a simple diner staple to a cultural icon, particularly as its spicy iterations captured the hearts (and taste buds) of millions. Our rendition pays homage to this beloved classic while adding a distinctive, personalized touch that makes all the difference.
What truly sets this dish apart, and why I know you’ll fall in love with it, is the sensational interplay of a perfectly seasoned, crispy fried chicken breast with our unique, tangy, and rich sauce—crafted right in your kitchen. Every bite of this Spicy Chicken Sandwich With Creamy Homemade Sauce delivers that satisfying crunch, followed by tender, juicy chicken, all exquisitely complemented by a luxurious dressing that you simply won’t find anywhere else. It’s an explosion of flavor and texture that makes it an unforgettable meal, surprisingly achievable for any home cook.

Ingredients:
- For the Chicken:
- 4 boneless, skinless chicken thighs (about 6-8 oz each), pounded to an even 1/2-inch thickness for quicker, more uniform cooking.
- 2 cups buttermilk, an absolute must for tenderizing and adding a slight tang.
- 1/4 cup hot sauce (your favorite brand, I usually go for a cayenne pepper-based one), for initial heat and flavor in the marinade.
- 1 tablespoon smoked paprika, for depth and a lovely reddish hue.
- 1 teaspoon garlic powder.
- 1 teaspoon onion powder.
- 1/2 teaspoon cayenne pepper (adjust to your spice preference, I like it fiery!).
- 1/2 teaspoon black pepper, freshly ground is always best.
- 1 teaspoon salt.
- For the Creamy Homemade Sauce:
- 1 cup good quality mayonnaise, the backbone of our creamy delight.
- 2 tablespoons pickle juice (from a jar of dill pickles), for that essential tang and brine.
- 1 tablespoon hot sauce (again, your choice, I often use a different one here for complexity, maybe a habanero-based sauce for extra kick).
- 1 tablespoon honey or maple syrup, to balance the heat and acidity.
- 1 teaspoon smoked paprika.
- 1/2 teaspoon garlic powder.
- 1/4 teaspoon cayenne pepper (optional, for an extra spicy sauce).
- 1/4 cup finely chopped dill pickles, for texture and bursts of briny flavor.
- Salt and freshly ground black pepper to taste.
- For the Breading:
- 2 cups all-purpose flour, for a sturdy and crispy coating.
- 1/4 cup cornstarch, my secret for extra crispiness that lasts.
- 1 tablespoon baking powder, also contributes to that satisfying crunch.
- 1 tablespoon smoked paprika.
- 1 teaspoon garlic powder.
- 1 teaspoon onion powder.
- 1 teaspoon cayenne pepper (don’t shy away, this is where the spicy in the sandwich comes from!).
- 1 teaspoon salt.
- 1/2 teaspoon black pepper.
- 2 large eggs, beaten with 2 tablespoons of water or milk, creating our wet dredge.
- For Frying:
- 6-8 cups vegetable oil, peanut oil, or canola oil, enough to submerge the chicken pieces (about 2-3 inches deep in a large, heavy-bottomed pot or Dutch oven).
- For Assembly and Toppings:
- 4 brioche buns, potato rolls, or your favorite sturdy sandwich buns, lightly toasted.
- Sliced dill pickles, for layering on top of the chicken – non-negotiable in my book!
- Lettuce leaves (crisp varieties like romaine or iceberg work wonderfully), for freshness and crunch.
- Tomato slices (optional).
- Red onion slices (optional, thinly sliced).
Preparing the Chicken Marinade: The Foundation of Flavor and Tenderness
- First things first, let’s get that chicken soaking up all the amazing flavors. You’ll want to start with your chicken thighs and ensure they’re pounded to an even 1/2-inch thickness. This isn’t just for quicker cooking; it also helps them cook more uniformly and makes for a better bite in the sandwich. I usually place them between two pieces of plastic wrap and use a meat mallet or the bottom of a heavy pan.
- In a large bowl or a zip-top bag (my personal preference for even coating and easy cleanup), combine the 2 cups of buttermilk, 1/4 cup of your chosen hot sauce, 1 tablespoon of smoked paprika, 1 teaspoon of garlic powder, 1 teaspoon of onion powder, 1/2 teaspoon of cayenne pepper, 1/2 teaspoon of black pepper, and 1 teaspoon of salt. This is your flavor powerhouse marinade.
- Whisk everything together thoroughly until all the spices are well distributed in the buttermilk mixture. The hot sauce here does more than just add heat; its vinegary tang actually helps to tenderize the chicken even further, working in tandem with the lactic acid in the buttermilk.
- Add your prepared chicken thighs to the marinade, making sure each piece is completely submerged and coated. If you’re using a bowl, cover it tightly with plastic wrap.
- Refrigerate the chicken for a minimum of 4 hours, but ideally overnight (8-12 hours). The longer the soak, the more tender and flavorful your chicken will be, so don’t rush this step! This extended marination time is key to achieving that incredibly juicy and tender interior that contrasts beautifully with the crispy exterior. I’ve even marinated chicken for up to 24 hours with fantastic results.
Making the Creamy Homemade Sauce: The Essential Zest
While your chicken is marinating, let’s turn our attention to the star sauce. This creamy homemade concoction is what truly ties the entire “Spicy Chicken Sandwich With Creamy Homemade Sauce” experience together. It’s incredibly easy to make and infinitely better than anything store-bought.
- In a medium-sized bowl, combine 1 cup of good quality mayonnaise. The quality of your mayo really does make a difference here, so choose one you love.
- Add 2 tablespoons of pickle juice. Don’t skip this! It adds a crucial briny tang that brightens the sauce and complements the pickles on the sandwich perfectly.
- Next, stir in 1 tablespoon of your preferred hot sauce. I often use a different hot sauce for the sauce than for the marinade to add layers of flavor. Perhaps a spicier, fruitier one here for a more complex heat profile.
- Add 1 tablespoon of honey or maple syrup. This sweetness is vital for balancing the heat and acidity, creating a wonderfully complex flavor profile that isn’t just spicy, but also rich and satisfying.
- Incorporate 1 teaspoon of smoked paprika, 1/2 teaspoon of garlic powder, and if you dare, 1/4 teaspoon of extra cayenne pepper for an even spicier kick.
- Finally, stir in 1/4 cup of finely chopped dill pickles. These add fantastic texture and little bursts of briny flavor with every bite. I like to chop them quite small so they distribute evenly in the sauce.
- Whisk all the ingredients together until the sauce is completely smooth and well combined. Taste it and adjust with a pinch of salt and freshly ground black pepper as needed. You might find you want a little more hot sauce, or a bit more pickle juice – trust your palate!
- Cover the bowl and refrigerate the creamy homemade sauce until you’re ready to assemble your sandwiches. Allowing it to chill for at least 30 minutes lets the flavors meld beautifully, making it even more delicious. This sauce can be made a day in advance, making your sandwich day even easier.
Preparing the Breading Station: Achieving Ultimate Crispiness
This is where we build that incredible, crunchy crust. Proper setup is key here for an efficient and effective breading process. Trust me, a little organization goes a long way!
- In a large, shallow dish or pie plate, whisk together the 2 cups of all-purpose flour, 1/4 cup of cornstarch, 1 tablespoon of baking powder, 1 tablespoon of smoked paprika, 1 teaspoon of garlic powder, 1 teaspoon of onion powder, 1 teaspoon of cayenne pepper (this is your spicy breading!), 1 teaspoon of salt, and 1/2 teaspoon of black pepper. Mix thoroughly until there are no clumps and all the spices are evenly distributed. The cornstarch and baking powder are crucial for an extra crispy, almost flaky coating.
- In a separate, shallow dish, whisk together the 2 large eggs with 2 tablespoons of water or milk. This creates our wet dredge. The little bit of water/milk helps thin the egg wash slightly, ensuring it doesn’t get too thick and gloopy, allowing for a lighter, crispier coating.
- Set up your breading station in an assembly line fashion: chicken (removed from marinade, excess drained), then the egg wash, then the seasoned flour mixture. This makes the process much cleaner and more efficient.
Breading the Chicken: The Double Dip for Maximum Crunch
Now for the fun part – getting that chicken ready for its crispy destiny. This double-dredge method is my go-to for truly spectacular fried chicken.
- Remove one chicken thigh from the buttermilk marinade, letting any excess drip off. You want some marinade clinging to it, but not too much that it’s dripping wet.
- First, dredge the chicken piece thoroughly in the seasoned flour mixture. Make sure it’s completely coated, gently pressing the flour onto the chicken to adhere. Shake off any excess flour.
- Next, dip the floured chicken into the egg wash, ensuring both sides are fully coated. Let any excess egg wash drip off for a few seconds.
- Finally, return the chicken to the seasoned flour mixture for a second dredge. This is the key to an extra thick, craggy, and super crispy crust! Press the flour firmly onto the chicken again, really making sure those nooks and crannies are filled. The more textured the coating, the more surface area there is to get crispy. Shake off any excess flour once more.
- Place the breaded chicken on a wire rack set over a baking sheet. Repeat this process with the remaining chicken thighs.
- Once all the chicken is breaded, let it rest on the wire rack for at least 15-20 minutes at room temperature. This resting period is critical! It allows the breading to hydrate slightly and adhere firmly to the chicken, preventing it from falling off during frying. This step alone can elevate your fried chicken game significantly.
Frying the Crispy Chicken: Golden Perfection
This is where the magic happens! Frying can seem intimidating, but with a few careful steps, you’ll achieve perfect results. Safety first: always be cautious when working with hot oil.
- Pour 6-8 cups of vegetable oil (or peanut oil for a higher smoke point and great flavor, or canola oil) into a large, heavy-bottomed pot or Dutch oven. You’ll need enough oil to submerge the chicken pieces, usually about 2-3 inches deep.
- Heat the oil over medium-high heat until it reaches a temperature of 350-365°F (175-185°C). Using a deep-fry thermometer is highly recommended for accurate temperature control. If the oil isn’t hot enough, the chicken will be greasy; if it’s too hot, the outside will burn before the inside cooks.
- Carefully lower 1 or 2 pieces of breaded chicken into the hot oil. Avoid overcrowding the pot, as this will drop the oil temperature too quickly and result in soggy chicken. Fry in batches if necessary.
- Fry the chicken for about 6-8 minutes per side, or until it’s a deep golden brown and cooked through. The exact time will depend on the thickness of your chicken and the consistency of your oil temperature. I like to gently turn them halfway through to ensure even browning.
- The internal temperature of the chicken should reach 165°F (74°C) when checked with an instant-read thermometer at the thickest part. Don’t guess here; undercooked chicken is no good!
- Once cooked, carefully remove the chicken from the oil using tongs and place it on a clean wire rack set over a baking sheet lined with paper towels. The wire rack allows air to circulate, keeping the chicken crispy as it drains excess oil. Season immediately with a sprinkle of additional salt if desired.
- Repeat the frying process with the remaining chicken, making sure to let the oil come back up to temperature between batches.
Toasting Buns and Preparing Toppings: The Finishing Touches
While your chicken rests, let’s get the rest of our sandwich components ready. This quick step ensures every element is perfect.
- Slice your brioche buns or potato rolls in half.
- Lightly toast the buns. You can do this in a dry skillet over medium heat for 1-2 minutes until golden, in a toaster, or under a broiler. Toasting adds a lovely texture and prevents the bun from getting soggy from the sauce and chicken. It also adds a subtle layer of flavor.
- Arrange your fresh toppings: crisp lettuce leaves, plenty of sliced dill pickles, and any optional tomato or red onion slices. Having everything prepped makes assembly a breeze.
Assembling Your Spicy Chicken Sandwich: The Grand Finale!
The moment we’ve all been waiting for! Putting it all together to create the ultimate “Spicy Chicken Sandwich With Creamy Homemade Sauce.”
- Take a toasted bun half and generously spread a good dollop of your creamy homemade sauce on both the top and bottom halves. Don’t be shy; this sauce is incredible! I like to ensure every edge is covered for maximum flavor in every bite.
- On the bottom bun, layer a few crisp lettuce leaves. This provides a fresh base and a pleasant textural contrast.
- Place one perfectly fried, crispy chicken thigh directly on top of the lettuce. The heat from the chicken will slightly warm the lettuce and sauce, which is a wonderful sensation.
- Pile on several slices of dill pickles. I usually go for 4-5 slices per sandwich, but adjust to your pickle obsession level! Their tartness cuts through the richness of the chicken and sauce beautifully.
- If using, add your tomato and/or red onion slices now.
- Place the top bun, with its generous swipe of creamy homemade sauce, firmly over the assembled sandwich.
- Gently press down to compact your masterpiece slightly.
- Serve immediately and prepare for an explosion of flavor and texture! This sandwich is best enjoyed fresh off the fryer, while the chicken is still piping hot and ultra-crispy. Every bite should offer that incredible crunch, juicy chicken, spicy kick, and creamy tang. Get ready to make this a new favorite in your recipe repertoire.
Conclusion:
Well, friends, we’ve journeyed through the creation of what I truly believe is not just a meal, but an experience. This isn’t just another sandwich recipe; it’s a testament to how simple ingredients, when treated with a little love and attention, can transform into something extraordinary. The crispy, perfectly seasoned chicken, the fiery kick that warms you from the inside out, and that unparalleled creamy homemade sauce – it all comes together in a symphony of flavors and textures that will leave your taste buds singing. I’ve made countless sandwiches in my time, but this one consistently rises above the rest, delivering that coveted crunch, that juicy tenderness, and that perfect balance of heat and cool relief. It’s the kind of dish you crave, the kind you excitedly tell your friends about, and the kind that disappears from the plate far too quickly. Trust me when I say, once you taste the magic of this combination, you’ll understand why it’s poised to become a staple in your culinary repertoire. It’s more than just a quick bite; it’s a moment of pure, unadulterated culinary joy.
Now, while this masterpiece certainly shines as a standalone star, elevating your meal with the right accompaniments is part of the fun. For a classic diner vibe, I highly recommend pairing your sandwich with a generous helping of golden, crispy crinkle-cut fries – perhaps seasoned with a touch of smoked paprika – and a tangy, cool coleslaw to provide a refreshing contrast to the spice. Don’t forget the dill pickle spears; their briny crunch is simply indispensable. If you’re feeling a bit more adventurous, try sweet potato fries for a touch of sweetness, or even some homemade onion rings for an extra layer of satisfying crunch. A simple, crisp green salad with a light vinaigrette can also be a wonderful palate cleanser, making each bite of the sandwich feel fresh again. For a truly elevated experience, consider a side of roasted corn on the cob, lightly seasoned with chili powder and lime. As for drinks, a frosty glass of lemonade, a cold craft beer – especially a crisp lager or IPA – or even a sparkling iced tea with a slice of lemon can provide the perfect cooling counterpoint to the delicious heat.
But the beauty of cooking at home lies in personalization, and this recipe is incredibly adaptable. If you’re a true heat seeker, don’t hesitate to dial up the spice in your chicken marinade and dredge by adding extra cayenne pepper or even a touch of finely minced habanero for a serious kick. For those who prefer a milder experience, simply reduce the chili flakes and hot sauce, or swap them out for a milder paprika. You could experiment with different cuts of chicken too – boneless, skinless chicken thighs would offer a richer, juicier bite, while grilling the chicken instead of frying provides a lighter, yet still flavorful alternative. When it comes to the bun, while I adore a toasted brioche for its buttery richness, a sturdy potato bun or even a rustic ciabatta roll can work wonders, each offering a slightly different texture and flavor profile. Feel free to pile on your favorite toppings: a slice of melty pepper jack cheese for an extra spicy kick, crisp iceberg lettuce for crunch, ripe tomato slices for freshness, or my personal favorite, thinly sliced pickled red onions, which add a beautiful, tangy zing that cuts through the richness. And that creamy homemade sauce? It’s your canvas! A hint of smoked paprika for depth, a dash of honey for sweetness, or even a squeeze of fresh lime for brightness can subtly alter its profile to your liking. Don’t be afraid to make this recipe truly your own, experimenting until you find your perfect version.
So, there you have it, my friends. My enthusiastic plea for you to try this incredible recipe. Don’t just admire the photos; gather your ingredients, fire up your kitchen, and prepare to embark on a culinary adventure that promises immense satisfaction. The effort is minimal, but the reward is truly magnificent. There’s something incredibly gratifying about sinking your teeth into a perfectly crafted sandwich, knowing every delicious component was made by your own hands. This isn’t just about feeding yourself; it’s about the joy of creating, the pleasure of eating, and the pride of serving something genuinely spectacular. I can’t emphasize enough how the combination of crispy, juicy chicken with that unique, flavorful sauce culminates in the ultimate Spicy Chicken Sandwich With Creamy Homemade Sauce. It’s a game-changer, I promise.
I genuinely can’t wait for you to experience this for yourself. When you do try it, please come back and share your thoughts! Did you add extra spice? Did you try a different bun? What were your favorite sides? Your insights and variations not only inspire me but also help other readers discover new ways to enjoy this fantastic dish. Tag me in your photos, drop a comment below, or just tell your friends – word of mouth is the best compliment a recipe can get.
Happy cooking, and get ready for your new favorite sandwich obsession!
Crave-Worthy Spicy Chicken Sandwich & Creamy Homemade Sauce
A crave-worthy spicy chicken sandwich featuring perfectly seasoned, crispy fried chicken and a unique, tangy, and rich homemade sauce. This recipe promises an explosion of flavor and texture, transforming ordinary meals into an unforgettable culinary experience.
Ingredients
-
4 boneless, skinless chicken breasts or thighs (about 6-8 oz each), pounded to 1/2-inch thickness. Breasts offer a leaner bite and firm texture, while thighs provide juicier flavor; both can be butterflied or pounded thin for optimal crispiness and even cooking.
-
2 cups buttermilk
-
1/4 cup hot sauce (cayenne pepper-based)
-
1 tablespoon smoked paprika
-
1 teaspoon garlic powder
-
1 teaspoon onion powder
-
1/2 teaspoon cayenne pepper
-
1/2 teaspoon black pepper
-
1 teaspoon salt
-
1 cup mayonnaise
-
2 tablespoons pickle juice (from dill pickles)
-
1 tablespoon hot sauce (e.g., habanero-based)
-
1 tablespoon honey or maple syrup
-
1 teaspoon smoked paprika
-
1/2 teaspoon garlic powder
-
1/4 teaspoon cayenne pepper (optional, for sauce)
-
1/4 cup finely chopped dill pickles
-
Salt and freshly ground black pepper to taste (for sauce)
-
2 cups all-purpose flour
-
1/4 cup cornstarch
-
1 tablespoon baking powder
-
1 tablespoon smoked paprika (for breading)
-
1 teaspoon garlic powder (for breading)
-
1 teaspoon onion powder (for breading)
-
1 teaspoon cayenne pepper (for breading)
-
1 teaspoon salt (for breading)
-
1/2 teaspoon black pepper (for breading)
-
2 large eggs, beaten with 2 tablespoons water or milk
-
6-8 cups vegetable oil, peanut oil, or canola oil (for frying)
-
4 brioche buns, potato rolls, or sturdy sandwich buns, lightly toasted
-
Sliced dill pickles (for topping)
-
Lettuce leaves (crisp varieties like romaine or iceberg)
-
Tomato slices (optional)
-
Red onion slices (optional, thinly sliced)
Instructions
-
Step 1
Pound chicken to 1/2-inch thickness. In a large bowl or zip-top bag, combine buttermilk, 1/4 cup hot sauce, 1 tbsp smoked paprika, 1 tsp garlic powder, 1 tsp onion powder, 1/2 tsp cayenne pepper, 1/2 tsp black pepper, and 1 tsp salt. Whisk well. Add chicken, ensuring it’s submerged. Refrigerate for 4-12 hours (ideally overnight). -
Step 2
In a medium bowl, combine 1 cup mayonnaise, 2 tbsp pickle juice, 1 tbsp hot sauce, 1 tbsp honey or maple syrup, 1 tsp smoked paprika, 1/2 tsp garlic powder, 1/4 tsp optional cayenne pepper, and 1/4 cup finely chopped dill pickles. Whisk until smooth. Season with salt and pepper to taste. Refrigerate for at least 30 minutes to meld flavors. -
Step 3
In a shallow dish, whisk together 2 cups all-purpose flour, 1/4 cup cornstarch, 1 tbsp baking powder, 1 tbsp smoked paprika, 1 tsp garlic powder, 1 tsp onion powder, 1 tsp cayenne pepper, 1 tsp salt, and 1/2 tsp black pepper. In another shallow dish, whisk 2 large eggs with 2 tbsp water or milk. Set up an assembly line: chicken (from marinade), egg wash, seasoned flour. -
Step 4
Remove chicken from marinade, letting excess drip. First, dredge chicken in seasoned flour, pressing to coat. Shake off excess. Dip in egg wash. Return to seasoned flour for a second dredge, pressing firmly. Shake off excess. Place breaded chicken on a wire rack over a baking sheet. Let rest for 15-20 minutes at room temperature. -
Step 5
Heat 6-8 cups oil in a large pot to 350-365°F (175-185°C). Carefully lower 1-2 chicken pieces into hot oil. Fry for 6-8 minutes per side, until deep golden brown and internal temperature reaches 165°F (74°C). Remove to a clean wire rack over paper towels to drain. Season with salt. Repeat for remaining chicken, ensuring oil returns to temperature between batches. -
Step 6
Lightly toast sandwich buns. Arrange lettuce, sliced dill pickles, and optional tomato/red onion slices. -
Step 7
Generously spread creamy homemade sauce on both bun halves. Layer lettuce on the bottom bun. Place fried chicken on lettuce. Pile on sliced dill pickles. Add optional tomato/red onion. Top with the other bun half. Gently press. Serve immediately.
Important Information
Nutrition Facts (Per Serving)
It is important to consider this information as approximate and not to use it as definitive health advice.
Allergy Information
Please check ingredients for potential allergens and consult a health professional if in doubt.