Crack Chicken Tenders – a name that perfectly encapsulates their utterly addictive quality. Are you searching for a dish that consistently delivers on flavor, comfort, and sheer culinary delight? Then you’ve arrived at the right place. These aren’t just any ordinary chicken tenders; they are a creamy, savory, and incredibly satisfying explosion of taste that has captivated countless palates across the globe. There’s a reason this particular flavor profile has gone viral!
Originating from the incredibly popular “crack chicken” concept – a delightful blend of ranch seasoning, rich cream cheese, and sharp cheddar cheese – these tenders take that beloved essence and transform it into a handheld, crispy, and wonderfully tender masterpiece. It’s a modern classic born from a love for irresistible comfort food, designed to be both simple to prepare and unforgettable to eat.
Why are these Crack Chicken Tenders so universally loved?
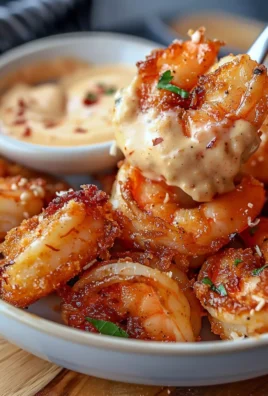
I personally adore how versatile and supremely crowd-pleasing they are. Whether it’s a quick weeknight dinner, a guaranteed hit for a casual gathering, or the star of a game day snack spread, these Crack Chicken Tenders always disappear in record time. Their irresistible combination of juicy, tender chicken, coated in a rich, tangy, and cheesy blend, often finished with a golden-brown crisp, makes them a dish everyone clamors for. Get ready to discover why this recipe is destined to become a beloved staple in your kitchen, delivering pure joy with every bite.

Ingredients:
Gathering your ingredients is the first exciting step on our journey to creating these truly phenomenal Crack Chicken Tenders. Each component plays a vital role in building the layers of flavor and texture that make this dish so addictive. Don’t skimp on quality; it truly makes a difference!
- For the Chicken:
- 2 pounds boneless, skinless chicken tenderloins (or chicken breasts, cut into 1-inch thick strips)
- 1 cup buttermilk (for brining, if not using a separate brine)
- 1 tablespoon salt (for brining)
- 1 tablespoon sugar (for brining)
- 4 cups water (for brining)
- Paper towels (for patting dry)
- For the “Crack” Coating Mixture:
- 2 cups all-purpose flour
- 1 cup panko breadcrumbs (for extra crispiness, don’t skip these!)
- 1/2 cup grated Parmesan cheese (freshly grated is best for flavor)
- 1 (1-ounce) packet ranch seasoning mix (the dry mix, not dressing)
- 1 teaspoon garlic powder
- 1 teaspoon onion powder
- 1 teaspoon smoked paprika
- 1/2 teaspoon cayenne pepper (optional, for a subtle kick)
- 1/2 teaspoon black pepper, freshly ground
- 1/4 teaspoon salt (adjust to taste, as ranch mix is salty)
- For the Wet Dredge:
- 2 large eggs
- 1/2 cup milk or remaining buttermilk
- 1 tablespoon hot sauce (optional, adds flavor without much heat)
- For Frying:
- 4-6 cups vegetable oil, canola oil, or peanut oil (enough for deep frying, approximately 2-3 inches in your pot)
- Optional Dipping Sauce Ingredients:
- 1/2 cup mayonnaise
- 2 tablespoons sour cream or Greek yogurt
- 1 tablespoon fresh chives, minced
- 1 teaspoon fresh dill, minced
- 1/2 teaspoon garlic powder
- 1/4 teaspoon onion powder
- Salt and pepper to taste
Preparing the Chicken: The Foundation of Flavor
The secret to truly tender and juicy chicken tenders begins even before the coating. I always take a few extra minutes here because it makes all the difference in the world for our Crack Chicken Tenders.
- Trim the Chicken: Unpack your chicken tenderloins. Even if they look perfect, take a moment to inspect each one. Often, there’s a thin, white tendon running down the length of the tenderloin. While not harmful, it can be a bit chewy. You can remove it by holding the tenderloin in one hand, grasping the tendon with a paper towel (for grip) in the other, and pulling it out while pressing down on the chicken with a fork or your thumb. If you’re using chicken breasts, slice them against the grain into uniform 1-inch wide strips. Aim for consistency in size so they cook evenly.
- The Brining Secret (Highly Recommended!): This step is where we infuse moisture and initial flavor into our chicken, ensuring our Crack Chicken Tenders are incredibly juicy. In a large bowl or a resealable plastic bag, combine the 4 cups of water, 1 tablespoon of salt, and 1 tablespoon of sugar. Stir until both the salt and sugar are fully dissolved. Submerge the trimmed chicken tenderloins completely in this brine. Cover the bowl or seal the bag and refrigerate for at least 30 minutes, but ideally for 2-4 hours. Do not brine for longer than 6 hours, as the chicken can start to become too firm. If you’re short on time, a quick soak in buttermilk for 30 minutes can also help tenderize, but the salt-sugar brine is superior for moisture retention.
- Prepare for Coating: Once brining is complete, remove the chicken from the brine. This part is crucial: thoroughly pat each piece of chicken dry with paper towels. Excess moisture on the chicken will prevent the coating from adhering properly, leading to a less crispy, unevenly coated tender. You want them as dry as possible to achieve that perfect, craggy “crack” texture. Place the patted-dry chicken on a clean plate or baking sheet and set aside.
Crafting the Irresistible “Crack” Coating: The Flavor Bomb
This is where the magic truly happens for our Crack Chicken Tenders! The unique blend of ingredients in our coating is what gives these tenders their signature flavor and texture. Pay close attention to mixing everything thoroughly.
- Combine Dry Ingredients: In a large, shallow dish or pie plate (something wide enough to comfortably dredge a tenderloin), combine the 2 cups of all-purpose flour, 1 cup of panko breadcrumbs, 1/2 cup of grated Parmesan cheese, the entire 1-ounce packet of ranch seasoning mix, 1 teaspoon of garlic powder, 1 teaspoon of onion powder, 1 teaspoon of smoked paprika, 1/2 teaspoon of cayenne pepper (if using), 1/2 teaspoon of black pepper, and 1/4 teaspoon of salt.
- Whisk Thoroughly: Using a whisk or a fork, mix all these dry ingredients together until they are completely uniform. It’s important that the ranch seasoning and spices are evenly distributed so every bite of your Crack Chicken Tenders gets that incredible flavor. Break up any clumps of ranch seasoning. Set this aside as your “dry dredge.”
- Prepare the Wet Dredge: In another shallow dish, crack the 2 large eggs. Add the 1/2 cup of milk (or leftover buttermilk) and 1 tablespoon of hot sauce (if using). Whisk vigorously until the eggs are well beaten and all ingredients are thoroughly combined. This mixture will help the dry coating adhere to the chicken and provide additional moisture. Set this aside as your “wet dredge.”
The Breading Process: Achieving the Perfect “Crack” Texture
The way you bread your chicken is paramount to achieving that signature crispy, craggy texture that makes these Crack Chicken Tenders so irresistible. This is where patience and proper technique come into play.
- Set Up Your Dredging Station: Arrange your workstation in an assembly line fashion, moving from left to right (or right to left, if you’re left-handed). First, place your plate of patted-dry chicken. Next, position the dish with the flour/panko/spice mixture (dry dredge). Then, the dish with the egg/milk mixture (wet dredge). Finally, place an empty baking sheet or large plate at the end, lined with parchment paper or a wire rack, where you’ll place the breaded tenders. This setup minimizes mess and makes the process efficient.
- The Double Dredge Technique: This is my personal secret for super crispy tenders.
- First Dry Coat: Take one chicken tenderloin and fully coat it in the dry dredge mixture. Press firmly to ensure the flour mixture adheres well. Shake off any excess.
- Wet Coat: Dip the flour-coated tender into the wet dredge, ensuring it’s completely covered. Let any excess egg mixture drip off.
- Second Dry Coat (The “Crack” Layer!): Now, return the wet tender to the dry dredge mixture. This time, really press the coating onto the chicken. Use your fingers to pack the breading onto all surfaces. You want a thick, even coat with some delightful cragginess – these are the bits that will get extra crispy and form the “crack” exterior. The panko and Parmesan will create wonderful texture.
- Repeat and Rest: Place the fully breaded chicken tender on your prepared baking sheet or wire rack. Repeat this process with all remaining chicken tenderloins. Do not overcrowd the baking sheet.
- Chill for Adhesion (Optional but Recommended): Once all your Crack Chicken Tenders are breaded, place the baking sheet in the refrigerator for at least 15-30 minutes. This chilling time helps the breading adhere even more firmly to the chicken, preventing it from falling off during frying. It also helps the coating set, contributing to a crispier finish. This is a small step that yields big results!
Cooking Your “Crack Chicken Tenders”: Frying to Golden Perfection
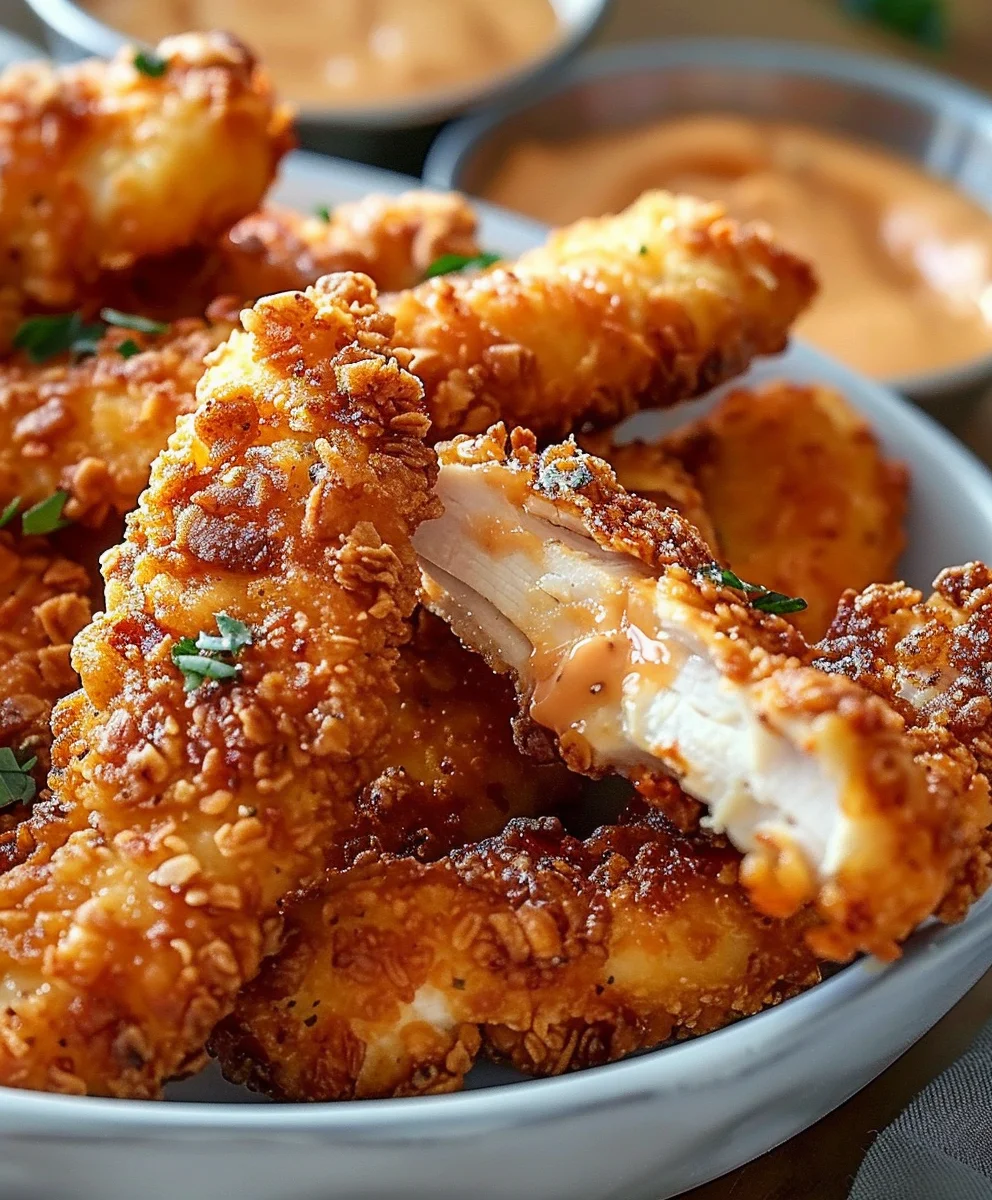
Now for the exciting part – cooking our perfectly breaded Crack Chicken Tenders until they’re golden, crispy, and cooked through. We’ll focus on deep frying for that classic restaurant-quality crunch, with notes for alternative cooking methods.
- Preheat the Frying Oil: In a large, heavy-bottomed pot or Dutch oven (I prefer cast iron for even heat), pour in 4-6 cups of vegetable, canola, or peanut oil. You need enough oil to submerge the tenders by at least 2-3 inches. Place the pot over medium-high heat. Attach a deep-fry thermometer to the side of the pot. We are aiming for a consistent oil temperature of 350°F (175°C). This temperature is crucial: too low, and the tenders will absorb too much oil and be greasy; too high, and the outside will burn before the inside cooks.
- Prepare Your Landing Zone: While the oil heats, set up a wire rack over a baking sheet lined with several layers of paper towels. This will be where your cooked tenders will drain, allowing excess oil to drip off and keeping them crispy.
- Fry in Batches: Once the oil reaches 350°F (175°C), carefully add 3-4 breaded chicken tenders to the hot oil. Do not overcrowd the pot! Overcrowding will drastically lower the oil temperature, leading to soggy tenders. Give each tender enough space to fry properly.
- Monitor and Flip: Fry the tenders for approximately 4-6 minutes, flipping them once halfway through to ensure even browning. Keep a close eye on your oil temperature, adjusting the heat as needed to maintain 350°F. The tenders should turn a beautiful deep golden brown.
- Check for Doneness: The best way to ensure your Crack Chicken Tenders are cooked through is to use an instant-read meat thermometer. The internal temperature should reach 165°F (74°C). If you don’t have a thermometer, cut into the thickest part of one tender; the meat should be opaque white with no pink.
- Drain and Rest: Once cooked, carefully remove the tenders from the oil using tongs and transfer them to the prepared wire rack to drain. Sprinkle lightly with a pinch of sea salt immediately after removing from the oil; this enhances flavor and helps draw out a bit more oil. Let them rest for a few minutes while you continue frying the remaining batches. This brief rest helps the juices redistribute, keeping the tenders incredibly tender.
- Preheat Air Fryer: Preheat your air fryer to 375°F (190°C).
- Prepare Tenders: Lightly spray the breaded tenders with cooking spray on all sides. This helps with crispiness.
- Cook in Batches: Place the tenders in a single layer in the air fryer basket, ensuring they don’t overlap. You’ll likely need to work in batches.
- Air Fry: Cook for 10-15 minutes, flipping them halfway through, until they are golden brown and cooked through to an internal temperature of 165°F (74°C). The cooking time can vary based on your air fryer model and the thickness of your tenders.
- Preheat Oven: Preheat your oven to 400°F (200°C). Line a baking sheet with parchment paper or a wire rack set over a foil-lined sheet.
- Prepare Tenders: Lightly spray the breaded tenders with cooking spray on all sides.
- Bake: Arrange the tenders in a single layer on the prepared baking sheet. Bake for 20-25 minutes, flipping halfway through, until golden brown and cooked through to an internal temperature of 165°F (74°C).
Air Frying Alternative for “Crack Chicken Tenders”:
If you prefer a lighter option, air frying is a fantastic alternative, though the texture won’t be quite as rich as deep-fried.
Baking Alternative for “Crack Chicken Tenders”:
Baking is another great option for those avoiding oil, though it will yield a less crispy result than deep frying or air frying.
Serving Suggestions and Tips for Perfect “Crack Chicken Tenders”:
Once your glorious Crack Chicken Tenders are cooked to perfection, it’s time to enjoy the fruits of your labor! Here are some ideas to make the experience even better, along with some important tips.
- The Perfect Dipping Sauce: While these tenders are phenomenal on their own, a good dipping sauce elevates the experience.
- Homemade Ranch Dip: For an extra layer of “crack” flavor, whip up a quick homemade ranch-style dip. In a small bowl, combine 1/2 cup mayonnaise, 2 tablespoons sour cream or Greek yogurt, 1 tablespoon fresh chives (minced), 1 teaspoon fresh dill (minced), 1/2 teaspoon garlic powder, 1/4 teaspoon onion powder, and salt and pepper to taste. Mix well and let it sit in the fridge for at least 15 minutes for the flavors to meld.
- Other Favorites: Classic options like honey mustard, BBQ sauce, hot sauce, or even a simple ketchup are also great choices.
- Accompaniments: What pairs well with crispy, flavorful chicken tenders?
- Crispy Fries or Onion Rings: The ultimate classic pairing.
- Creamy Coleslaw: A cool, tangy slaw provides a refreshing contrast to the rich tenders.
- Macaroni and Cheese: Comfort food at its finest.
- Simple Green Salad: To add a bit of freshness and balance to the meal.
- Corn on the Cob: Sweet and summery.
- Serve Immediately: For the absolute best texture and flavor, serve your Crack Chicken Tenders piping hot, right off the wire rack. That crispy coating is at its peak when fresh.
- Storage and Reheating:
- Storing: If you happen to have any leftovers (which is rare!), store them in an airtight container in the refrigerator for up to 3 days.
- Reheating: To bring back some of that amazing crispiness, I highly recommend reheating them in an air fryer at 350°F (175°C) for 5-7 minutes, or in an oven at 375°F (190°C) for 10-15 minutes, until heated through and crispy again. Microwaving will make them soggy, so avoid it if you can.
- Don’t Rush the Brining: I cannot stress enough how much brining impacts the final juiciness and flavor of these Crack Chicken Tenders. It’s a game-changer!
- Maintain Oil Temperature: When deep frying, consistency in oil temperature is your best friend. A thermometer is invaluable here. Fluctuations lead to either greasy or burnt tenders.
- Double Dredging is Key: That second pass through the dry mixture, with firm pressing, is what creates the incredibly textured “crack” coating. Don’t skip it!
- Season Liberally: The ranch seasoning is a core component, but don’t be afraid to adjust the other spices like garlic powder, onion powder, and smoked paprika to your personal preference. A little extra cayenne can also give it a lovely, subtle warmth.
Enjoy every single bite of these truly outstanding, highly addictive Crack Chicken Tenders. They’re perfect for game day, family dinners, or simply when you’re craving something incredibly delicious and satisfying!
Conclusion:
Well, my friends, we’ve reached the end of our culinary journey, but truly, it’s just the beginning of a delicious adventure for your taste buds. I genuinely believe that if there’s one recipe you absolutely must add to your regular rotation, it’s this one. It’s more than just a meal; it’s an experience. Imagine sinking your teeth into tender, juicy chicken, perfectly coated with that irresistible, savory, and slightly tangy blend that makes these Crack Chicken Tenders truly unforgettable. This dish is a testament to how simple ingredients, when combined with a little love and the right technique, can create something profoundly satisfying and utterly addictive. It’s the kind of comfort food that wraps you in a warm hug, making any day feel a little brighter. I’ve seen firsthand the smiles and satisfied nods this recipe brings to the table, and I’m confident it will do the same for you and your loved ones.
Why This Recipe is a Game-Changer
So, why is this particular preparation of chicken such a must-try? It’s the perfect storm of textures and flavors. You get the inherent succulence of perfectly cooked chicken, whether you choose to bake it for a lighter touch or pan-fry it for that extra crispy exterior. Then there’s the iconic flavor profile: the smoky crunch of bacon bits, the creamy tang of ranch seasoning, and the comforting melt of cheddar cheese. It’s a symphony of tastes that hits all the right notes – savory, umami, a hint of saltiness, and that underlying richness that keeps you coming back for more. It’s quick enough for a busy weeknight, yet special enough for a casual gathering or even a game day spread. This recipe isn’t just about feeding hunger; it’s about creating joyful food moments. It’s also incredibly forgiving, allowing for slight variations based on what you have in your pantry or what your family prefers. I find immense satisfaction in knowing that a meal can bring so much happiness, and this one consistently delivers.
Serving Suggestions and Creative Variations
Now, let’s talk about how to elevate your Crack Chicken Tenders experience even further. While they are absolutely divine on their own, served hot and fresh, there are countless ways to enjoy them. For a classic family dinner, I love pairing them with a simple side of crispy oven-baked fries, a vibrant coleslaw, or a comforting scoop of macaroni and cheese. If you’re aiming for a lighter meal, these tenders are fantastic alongside a fresh garden salad with a light vinaigrette, or some steamed green beans tossed with a touch of butter and garlic. Don’t forget the dipping sauces! While the flavor is robust enough to stand alone, a side of extra ranch dressing, some tangy honey mustard, or even a spicy sriracha mayo can add another layer of enjoyment. But why stop there? Get creative!
Expand Your Culinary Horizons:
- Sandwiches and Wraps: Shred the cooked tenders and pile them high on toasted buns with lettuce and tomato for an epic sandwich, or roll them into warm tortillas with your favorite veggies for a satisfying wrap.
- Salad Topper Extraordinaire: Slice them into bite-sized pieces and sprinkle them over a bed of crisp greens for a hearty, flavorful salad that’s anything but boring.
- Loaded Fries or Nachos: Crumble some tenders over a plate of hot fries or crunchy tortilla chips, add more cheese, and pop it under the broiler for an indulgent snack.
- Pizza Topping: Yes, you heard that right! Cut them into smaller pieces and use them as a unique and flavorful pizza topping.
- Pasta Mix-in: Dice them and toss them into a creamy pasta dish for an added burst of flavor and protein.
As for variations within the recipe itself, feel free to experiment. Want a little heat? Add a pinch of cayenne pepper or a dash of your favorite hot sauce to the coating mixture. Prefer a different cheese? Pepper jack will give it a nice kick, or a smoked gouda can add a lovely depth of flavor. You can also experiment with different cooking methods – an air fryer will yield incredibly crispy results with less oil, while baking offers a hands-off approach. Don’t be afraid to make it your own!
Your Turn: Try and Share!
So, what are you waiting for? I encourage you, with all my heart, to set aside some time very soon and make these incredible Crack Chicken Tenders. Whether it’s for your next family dinner, a gathering with friends, or simply because you deserve a truly delicious meal, I promise you won’t be disappointed. Experience that irresistible flavor, the satisfying texture, and the sheer joy of creating something truly special in your own kitchen. I’m incredibly excited for you to try this recipe because I know the magic it holds. Once you’ve made them, please come back and share your experience with me and our community! Did you try a unique serving suggestion? Did you add a personal twist? I absolutely love hearing about your culinary adventures, seeing your photos, and learning how these recipes become a part of your family’s traditions. Your feedback not only brightens my day but also helps inspire others to get cooking. Happy cooking, everyone – I can’t wait to hear all about your amazing Crack Chicken Tenders!

Creamy Ranch Crack Chicken Tenders
Inspired by the viral ‘crack chicken’ concept, these tenders are a creamy, savory, and incredibly satisfying explosion of ranch, cream cheese, and cheddar flavors. Simple to prepare and unforgettable to eat, they are a guaranteed hit for any meal or gathering.
Ingredients
-
1.5 lbs boneless, skinless chicken tenders
-
6 oz cream cheese, softened
-
1 packet (1 oz) dry ranch seasoning mix
-
1 tsp garlic powder
-
½ tsp onion powder
-
1 cup shredded cheddar cheese, divided
-
½ cup cooked beef bacon bits
-
1 tbsp olive oil or cooking spray
-
2 tbsp chopped green onions (optional)
Instructions
-
Step 1
Preheat oven to 375°F (190°C). In a bowl, combine softened cream cheese, ranch seasoning, garlic powder, and onion powder. Lightly grease a baking dish with olive oil or cooking spray. -
Step 2
Arrange chicken tenders in the prepared baking dish. Evenly spread the cream cheese mixture over the chicken. Bake for 20-25 minutes, or until chicken is cooked through (internal temperature 165°F / 74°C). -
Step 3
Remove dish from oven. Sprinkle ½ cup of shredded cheddar cheese and all the beef bacon bits over the chicken. Return to oven for 5-10 minutes, until cheese is melted and bubbly. -
Step 4
Garnish with remaining cheddar cheese and chopped green onions, if desired. Serve immediately.
Important Information
Nutrition Facts (Per Serving)
It is important to consider this information as approximate and not to use it as definitive health advice.
Allergy Information
Please check ingredients for potential allergens and consult a health professional if in doubt.