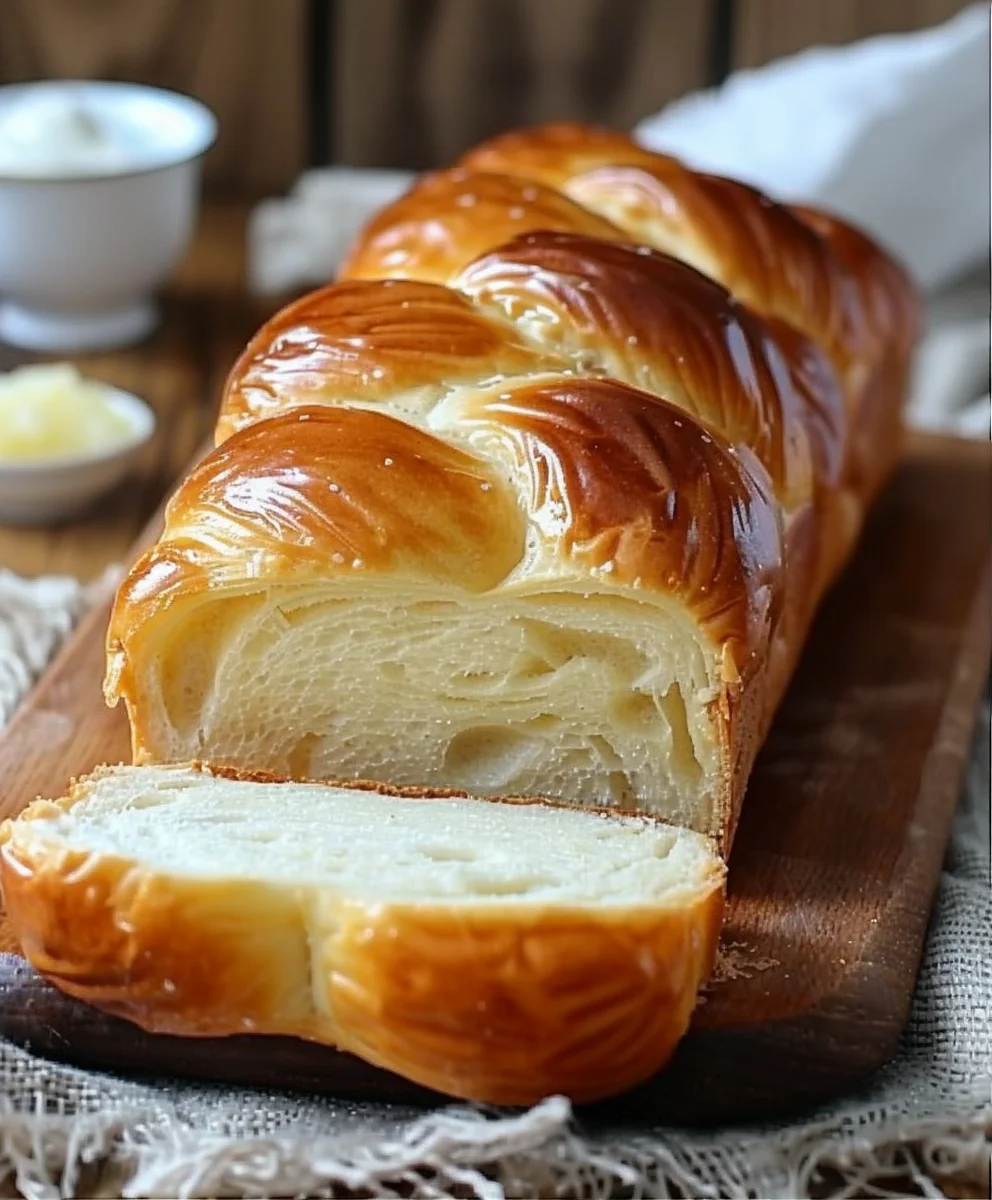
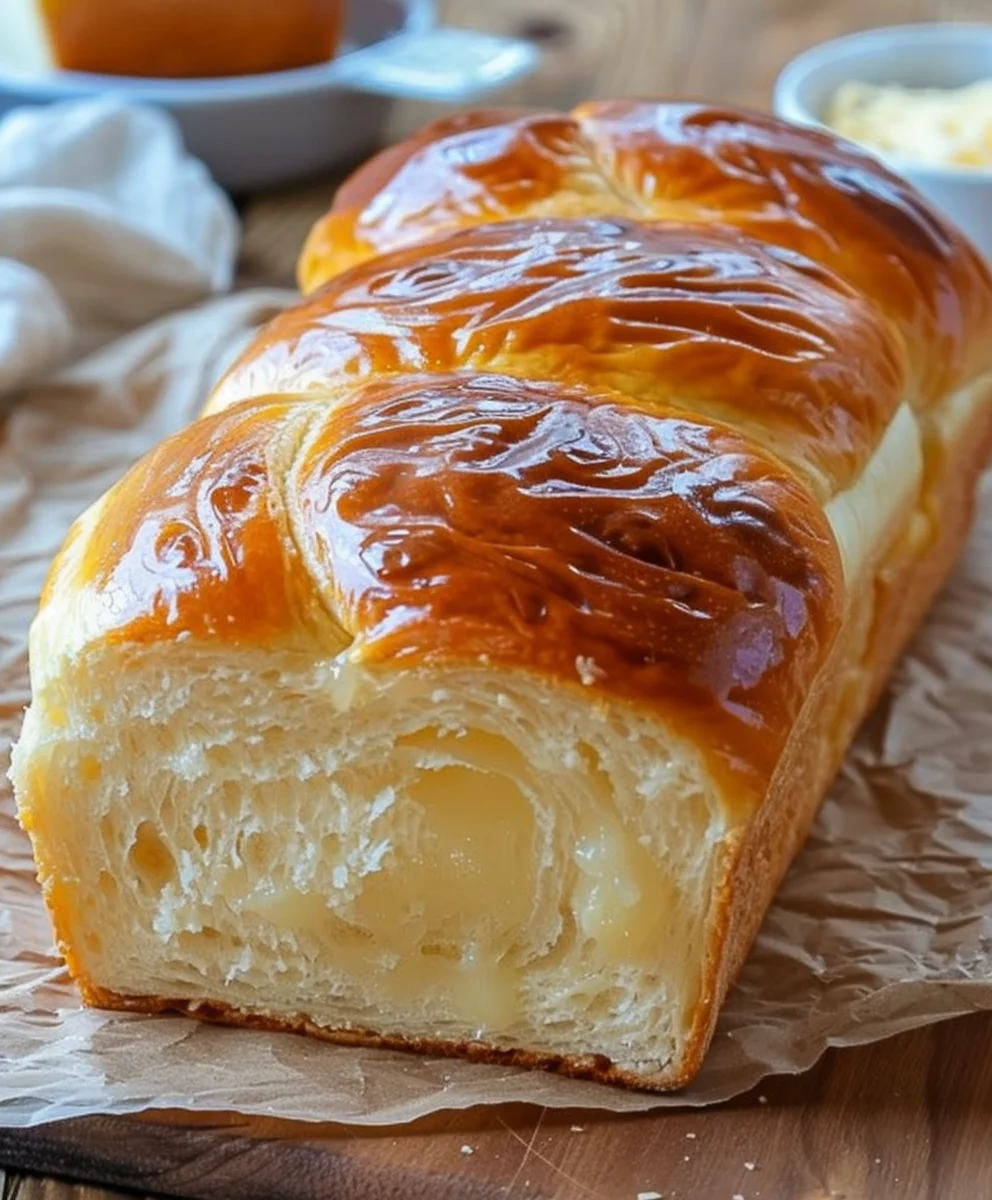
Condensed Milk Bread Recipe Easy To Make is more than just a dish; it’s a delightful journey into the world of soft, sweet, and utterly irresistible homemade bread. Have you ever dreamt of baking a bread so tender it practically melts in your mouth, with a subtle sweetness that brightens your day, all without the usual fuss? I assure you, this recipe delivers precisely that, promising a baking experience that is as rewarding as it is simple. The use of condensed milk, an ingredient that gained widespread popularity for its convenience and rich flavor, transforms ordinary bread into something truly extraordinary. This beloved staple, embraced across many cultures, not only lends a unique depth of sweetness but also contributes significantly to the bread’s incredibly soft crumb and irresistible golden-brown crust. People adore this bread for its remarkable texture, the perfect balance of sweetness, and, of course, the incredible ease with which it comes together. Whether you are a seasoned baker or just starting your culinary adventures, mastering this Condensed Milk Bread Recipe Easy To Make will quickly become one of your proudest kitchen achievements. I am excited for you to discover the magic of this wonderfully simple yet profoundly satisfying bread.

Ingredients:
- All-Purpose Flour: 4 cups (approximately 480 grams), plus extra for dusting. I find that all-purpose flour gives this bread a lovely tender crumb, but bread flour can also be used for a slightly chewier texture.
- Granulated Sugar: 1/4 cup (approximately 50 grams). Just enough to give the bread a hint of sweetness and help activate the yeast.
- Salt: 1 teaspoon. Don’t skip the salt; it truly balances the sweetness and enhances the flavor of the bread.
- Active Dry Yeast: 2 1/4 teaspoons (one standard packet). Make sure your yeast is fresh! An old packet can ruin your bread.
- Warm Milk: 1 cup (approximately 240 ml). It’s crucial that the milk is warm, not hot. Aim for a temperature between 105-115°F (40-46°C). If it’s too hot, it will kill the yeast; too cold, and the yeast won’t activate properly.
- Sweetened Condensed Milk: 1/2 cup (approximately 120 ml). This is the star ingredient! It provides that signature sweetness, incredible moisture, and a beautiful golden crust to our bread.
- Unsalted Butter: 1/4 cup (4 tablespoons or 56 grams), melted and slightly cooled. Using unsalted butter allows us to control the salt content in the recipe, and melting it helps incorporate it smoothly into the dough.
- Egg (optional, for egg wash): 1 large egg, whisked with 1 tablespoon of milk or water. This will give your finished loaf a gorgeous shiny, golden-brown crust.
Preparing the Dough
- Activate the Yeast: In a medium-sized bowl, pour the warm milk. Sprinkle the active dry yeast over the milk and add about 1 teaspoon of the granulated sugar from the measured amount. Give it a gentle stir and let it sit for 5-10 minutes. You’ll know your yeast is active and ready when it becomes frothy and bubbly on the surface. If it doesn’t foam, your yeast might be old or the milk wasn’t at the right temperature, and it’s best to start this step over. This step is absolutely critical for a light and airy bread!
- Combine Wet Ingredients: Once your yeast is beautifully bloomed, add the sweetened condensed milk and the slightly cooled melted unsalted butter to the yeast mixture. Whisk everything together until it’s well combined and homogenous. The condensed milk will add a wonderful richness and sweetness here.
- Mix Dry Ingredients: In a very large mixing bowl, combine the all-purpose flour, the remaining granulated sugar, and the salt. Use a whisk to thoroughly mix these dry ingredients, ensuring that the salt and sugar are evenly distributed throughout the flour. This prevents pockets of overly salty or sweet dough in your finished bread.
- Form the Dough: Create a well in the center of your dry ingredients. Pour the wet yeast mixture into this well. Using a sturdy wooden spoon or a spatula, start mixing from the center outwards, gradually incorporating the flour into the wet ingredients. Continue mixing until a shaggy, cohesive dough forms. At this point, it might still look a bit sticky and rough, which is perfectly normal.
- Kneading the Dough (by hand): Turn the shaggy dough out onto a lightly floured clean work surface. Begin to knead the dough. This is where the magic truly happens! Push the dough away from you with the heels of your hands, then fold it back towards you, rotate, and repeat. Continue kneading for about 8-10 minutes. At first, the dough will be sticky, but as you knead, the gluten will develop, and it will become smoother, more elastic, and less sticky. You’ll know it’s ready when it passes the “windowpane test”: you should be able to stretch a small piece of dough thin enough to see light through it without tearing. Don’t be afraid to add a tiny bit more flour, a teaspoon at a time, if the dough is excessively sticky, but resist the urge to add too much, as it can make the bread dense.
- Kneading the Dough (with a stand mixer): If you’re using a stand mixer with a dough hook, combine all the dry ingredients in the mixer bowl, then add the wet yeast mixture. Mix on low speed until a dough forms, then increase the speed to medium-low and knead for about 6-8 minutes. The dough should gather around the hook and pull away from the sides of the bowl, becoming smooth and elastic.
- First Rise (Bulk Fermentation): Lightly grease a large clean bowl with a little oil or non-stick cooking spray. Place your kneaded dough into the bowl, turning it once to coat the top with oil. This prevents it from drying out. Cover the bowl tightly with plastic wrap or a clean kitchen towel. Place the bowl in a warm, draft-free place for about 1 to 1.5 hours, or until the dough has doubled in size. A good way to tell if it’s ready is to gently poke it with a floured finger; if the indentation remains, it’s sufficiently proofed.
Shaping the Loaf
- Punch Down the Dough: Once the dough has doubled in size, gently punch it down to release the trapped gases. This step is important for an even texture and to redistribute the yeast for the next rise. Turn the dough out onto a lightly floured work surface.
- Prepare Your Loaf Pan: Grease a standard 9×5-inch (23×13 cm) loaf pan with butter or cooking spray. You can also line it with parchment paper for easier removal, leaving an overhang on the long sides to use as handles.
- Shape the Loaf:
Option 1: Classic Loaf Shape
Gently flatten the dough into a rectangle, roughly the width of your loaf pan (about 9 inches) and about 12-14 inches long. Take one of the longer sides and tightly roll the dough up into a cylinder. Pinch the seam closed firmly along the bottom. Then, gently tuck the ends under to create a neat, uniform loaf shape. This tight rolling helps create a nice internal structure and prevents large air pockets in your finished bread.
Option 2: Pullman Loaf/Multiple Rolls (for a softer crumb)
Instead of one large rectangle, you could divide the dough into 3 or 4 equal pieces. Roll each piece into a small ball, then flatten each ball into a rectangle. Roll up each small rectangle tightly into a log, pinching the seams. Arrange these logs side-by-side in your prepared loaf pan. This method often results in an incredibly soft, pull-apart texture, which is lovely for this Condensed Milk Bread Recipe Easy To Make.
- Second Rise (Proofing): Place the shaped dough into the prepared loaf pan. Cover the pan loosely with plastic wrap or a clean kitchen towel and return it to your warm, draft-free spot for another 30-45 minutes. The dough should rise again, increasing by about 50-75% in volume and looking puffy and light. It won’t quite double this time, but it should look significantly risen over the pan.
Baking the Bread
- Preheat Oven: About 15-20 minutes before the end of the second rise, preheat your oven to 375°F (190°C). Make sure your oven rack is in the center position.
- Apply Egg Wash (Optional): If you want a beautiful golden, shiny crust, whisk one large egg with a tablespoon of milk or water. Gently brush this mixture over the top of the risen dough in the loaf pan. Be very careful not to deflate the dough! This egg wash is a fantastic touch for presentation. If you prefer, you can skip this and brush with a little extra condensed milk or plain milk for a slightly softer crust.
- Bake the Bread: Carefully place the loaf pan into the preheated oven. Bake for 30-35 minutes. The exact baking time can vary depending on your oven, so it’s always good to keep an eye on it.
- Check for Doneness: The bread is done when the top is beautifully golden brown and sounds hollow when tapped on the bottom. For ultimate certainty, use an instant-read thermometer to check the internal temperature; it should register between 190-200°F (88-93°C). If the top is browning too quickly, you can loosely tent it with aluminum foil for the last 10-15 minutes of baking.
- Cool the Bread: Once baked, immediately remove the loaf pan from the oven. Let the bread cool in the pan for about 5-10 minutes. This allows the bread to set slightly and makes it easier to remove without sticking. Then, carefully invert the pan and turn the bread out onto a wire cooling rack. Allow the bread to cool completely before slicing. This cooling period is vital! Slicing hot bread can result in a gummy texture because the internal moisture hasn’t had a chance to redistribute and set properly.
- Enjoy Your Creation: Once completely cooled, slice your incredible Condensed Milk Bread Recipe Easy To Make and savor its tender crumb and subtly sweet flavor. It’s truly delightful on its own, toasted, or slathered with a little butter or jam. You’ll find that making this bread from scratch is incredibly rewarding, and the aroma filling your kitchen is simply unmatched.
Conclusion:
So, there you have it! We’ve journeyed through the simple yet profoundly rewarding steps of creating something truly magical in your own kitchen. I genuinely believe that this particular Condensed Milk Bread Recipe Easy To Make stands head and shoulders above many others because of its unparalleled tenderness and the subtle, lingering sweetness that comes from our star ingredient. It’s not just bread; it’s an experience. Imagine a bread so soft, it almost melts in your mouth, with a beautiful golden crust and an interior that is impossibly fluffy and moist. This isn’t your average loaf; it’s a comforting hug in edible form, perfect for any time of day, transforming ordinary moments into something truly special.
What makes this recipe a true game-changer, in my opinion, is its incredible approachability. Even if you’re new to baking or consider yourself a novice in the kitchen, I promise you, this recipe is designed for success. The methods are straightforward, the ingredients are simple, and the reward is absolutely magnificent. It demystifies the art of bread-making, proving that you don’t need years of experience to produce something utterly delicious and impressive. The condensed milk not only imparts its signature flavor but also contributes significantly to the bread’s incredible moisture and helps achieve that dreamy, fine crumb that experienced bakers often strive for. This isn’t just a recipe; it’s an invitation to discover the pure joy and deep satisfaction of baking a truly exceptional loaf of bread from scratch, with minimal fuss and maximum flavor. The aroma alone, as it bakes, is enough to lift spirits and evoke a sense of warmth and home.
Delightful Ways to Enjoy Your Condensed Milk Bread
Now that you’ve mastered the bake, let’s talk about how to savor every single slice. While this bread is absolutely divine on its own, perhaps with a simple cup of coffee or tea, its versatility truly shines when paired with a few thoughtful additions. For a simple breakfast, I love to toast a slice and spread it with a thin layer of butter – the warmth truly brings out its inherent sweetness and creates an irresistible aroma. It’s also phenomenal as a dessert; try serving it warm with a scoop of vanilla bean ice cream and a drizzle of caramel sauce for an indulgent treat that feels utterly luxurious.
- Breakfast Bliss: A thick slice, lightly toasted, with your favorite fruit jam or marmalade. The sweetness of the bread complements tart preserves beautifully, creating a perfect balance of flavors.
- Coffee Companion: Enjoy a fresh, un-toasted slice with your morning brew or afternoon tea. The soft texture and mild sweetness make it the ideal, comforting accompaniment to your hot beverage.
- Dessert Dream: Warm slices served with fresh berries and a dollop of freshly whipped cream, or a generous scoop of your favorite ice cream. A dusting of powdered sugar adds an elegant finish.
- French Toast Extraordinaire: For an elevated brunch, use day-old slices of this bread to make the most incredible French toast. The condensed milk in the bread adds an extra layer of flavor and ensures a rich, custardy interior once soaked and cooked. You’ll thank me later for this absolutely game-changing tip!
- Bread Pudding Perfection: If you happen to have any leftover (a rare occurrence, I assure you!), it makes the most wonderfully rich and flavorful bread pudding. The natural sweetness means you’ll need less added sugar in your custard base, letting the bread’s inherent deliciousness truly shine.
Unleash Your Creativity: Exciting Variations
One of the things I adore about this recipe is how easily it adapts to your personal preferences and pantry staples. While the base recipe is perfect as is, yielding a sublime loaf every time, don’t hesitate to experiment and make it uniquely your own!
- Chocolate Chip Heaven: Fold in a cup of your favorite chocolate chips (milk, dark, or white) during the final kneading stage for a delightful surprise in every bite. The melting chocolate pockets are simply divine.
- Nutty Goodness: Add a generous half-cup of chopped walnuts, pecans, or almonds for a satisfying textural contrast and a hint of nutty flavor. Toasting the nuts beforehand will really enhance their aroma and depth.
- Fruity Infusion: For a touch of fruitiness, consider incorporating a handful of plump dried cranberries, golden raisins, or finely chopped dried apricots. A little lemon or orange zest can also brighten up the flavor profile beautifully, adding a zesty counterpoint to the sweetness.
- Glaze It Up: For an extra touch of sweetness and a beautiful, shiny finish, whisk together powdered sugar with a little milk or lemon juice to create a simple glaze to drizzle generously over the cooled loaf. It adds an extra layer of indulgence.
- Cardamom Spice: A small amount of ground cardamom, perhaps a teaspoon added with the dry ingredients, can give the bread a wonderfully fragrant, almost exotic touch that pairs beautifully with the condensed milk’s sweetness. It’s a subtle but impactful addition.
Your Culinary Adventure Awaits!
I truly hope this journey into the world of homemade condensed milk bread has inspired you to preheat your oven and get baking. There’s something profoundly satisfying about the aroma of freshly baked bread filling your home, and even more so when you know you’ve created something so utterly delicious with your own hands. This isn’t just a recipe to follow; it’s an invitation to experience the pure joy of baking, to create cherished memories, and to share warmth and comfort with those you love. The act of baking itself is therapeutic, and the reward is a tangible expression of love.
I promise you, the effort (which is minimal, thanks to the inherent simplicity and clear instructions of this Condensed Milk Bread Recipe Easy To Make) is immensely rewarding. The smiles around your table when this tender, sweet loaf is served will be all the proof you need of its irresistible charm. So, please, give this recipe a try! I am genuinely excited for you to discover the magic and bring this delightful bread into your home.
Once you’ve baked your masterpiece, I would absolutely love to hear about your experience. Did you add any exciting variations? What delightful accompaniment did you serve it with? How did your family and friends react to this tender, sweet treat? Please, share your baking triumphs with me! Snap a photo, tell us all about your delicious loaf, and let’s celebrate the joy of baking together. Your feedback and stories truly inspire me and help this wonderful baking community grow. Happy baking, my friends; I can’t wait to see what you create!
Condensed Milk Bread Recipe Easy To Make
A simple, sweet, and irresistible recipe for homemade bread, featuring sweetened condensed milk for an incredibly soft crumb and golden-brown crust, all without the usual fuss.
Ingredients
-
3 cups all-purpose flour (or bread flour)
-
2 ¼ teaspoons instant yeast (1 packet)
-
½ teaspoon salt
-
½ cup warm milk (110°F/43°C)
-
⅓ cup sweetened condensed milk
-
2 tablespoons sugar
-
1 large egg
-
2 tablespoons butter, softened
-
1 egg yolk
-
1 tablespoon milk
Instructions
-
Step 1
In a bowl, combine ½ cup warm milk, 2 ¼ tsp instant yeast, and 1 tsp of the sugar. Let sit for 5-10 minutes until frothy. -
Step 2
Add ⅓ cup sweetened condensed milk, 2 tbsp softened butter, and 1 large egg to the yeast mixture. In a large bowl, whisk together 3 cups all-purpose flour, the remaining sugar (1 tablespoon + 2 teaspoons), and ½ tsp salt. Pour wet ingredients into dry, mixing until a shaggy dough forms. -
Step 3
Knead dough on a lightly floured surface for 8-10 minutes (or 6-8 minutes with a stand mixer) until smooth and elastic. Place dough in a lightly oiled bowl, cover, and let rise in a warm place for 1 to 1.5 hours until doubled. -
Step 4
Gently punch down the dough. Grease a 9×5-inch loaf pan. Flatten dough into a rectangle, then roll it tightly into a cylinder, pinching the seam. (For a softer crumb, divide dough into 3-4 pieces, roll into logs, and place side-by-side in pan). -
Step 5
Place shaped dough in the loaf pan, cover, and let rise for another 30-45 minutes until puffy. Preheat oven to 375°F (190°C). -
Step 6
Whisk 1 egg yolk with 1 tbsp milk for an egg wash; gently brush over the risen dough. Bake for 30-35 minutes until golden brown and the internal temperature reaches 190-200°F (88-93°C). -
Step 7
Let bread cool in the pan for 5-10 minutes, then transfer to a wire rack to cool completely before slicing and serving.
Important Information
Nutrition Facts (Per Serving)
It is important to consider this information as approximate and not to use it as definitive health advice.
Allergy Information
Please check ingredients for potential allergens and consult a health professional if in doubt.