Classic Genoise Cake: the very name evokes images of elegant tea parties and sophisticated desserts. Have you ever dreamed of creating a cake so light, airy, and versatile that it could be the foundation for countless culinary masterpieces? Well, look no further! This recipe unlocks the secrets to baking the perfect Genoise, a skill that will elevate your baking game to new heights.
The Genoise, with its origins in Genoa, Italy, has a rich history dating back centuries. It was originally created as a simpler alternative to more elaborate cakes, focusing on achieving a delicate crumb and subtle flavor. This makes it an ideal base for soaking in syrups, layering with creams, and showcasing fresh fruits. Its neutral taste allows it to complement a wide range of flavors, making it a staple in both home kitchens and professional bakeries.
What makes the Classic Genoise Cake so beloved? It’s the ethereal texture, a result of incorporating air directly into the eggs and sugar. This creates a sponge that is incredibly light and absorbent, unlike denser cakes that rely on chemical leaveners. People adore its versatility; it can be transformed into anything from a simple sponge cake with berries and cream to a show-stopping layered gateau. Plus, mastering the Genoise opens the door to creating other classic desserts like tiramisu and trifles. So, are you ready to embark on this baking adventure with me? Let’s create a truly unforgettable cake!

Ingredients:
- For the Cake:
- 1 cup (125g) cake flour, sifted
- 1 cup (200g) granulated sugar
- 6 large eggs, at room temperature
- 1/4 cup (60ml) unsalted butter, melted and cooled slightly
- 1 teaspoon vanilla extract
- Pinch of salt
- For the Simple Syrup (Optional):
- 1/2 cup (120ml) water
- 1/4 cup (50g) granulated sugar
- 1 tablespoon liquor (optional, such as rum, brandy, or Grand Marnier)
- For the Filling (Example: Whipped Cream & Berries):
- 2 cups (480ml) heavy cream, cold
- 1/4 cup (30g) powdered sugar, sifted
- 1 teaspoon vanilla extract
- 2 cups fresh berries (strawberries, raspberries, blueberries, etc.), washed and sliced if necessary
Preparing the Genoise Cake Batter
- Prepare the Baking Pan: Preheat your oven to 350°F (175°C). Grease and flour a 9-inch round cake pan. Alternatively, you can line the bottom with parchment paper for easier removal. This step is crucial to prevent the cake from sticking. I usually grease with shortening and then dust with flour, tapping out any excess.
- Combine Eggs and Sugar: In a large, heatproof bowl (like a stainless steel bowl), combine the eggs and granulated sugar. Make sure your eggs are at room temperature; this helps them whip up to a greater volume. If they’re cold, you can place them in a bowl of warm water for a few minutes.
- Heat the Egg Mixture: Place the bowl over a saucepan of simmering water, making sure the bottom of the bowl doesn’t touch the water (this creates a double boiler). Whisk constantly until the mixture is warm to the touch and the sugar is completely dissolved. This usually takes about 5-7 minutes. You should be able to rub a bit of the mixture between your fingers and not feel any sugar granules. This step is vital for achieving the proper volume in the cake.
- Whip the Egg Mixture: Remove the bowl from the heat and transfer it to a stand mixer fitted with the whisk attachment (or use a hand mixer). Whip the mixture on high speed for about 8-10 minutes, or until it becomes very pale, thick, and tripled in volume. The mixture should form a ribbon when you lift the whisk. This is the key to the Genoise’s light and airy texture. Don’t rush this step!
- Sift the Flour: While the egg mixture is whipping, sift the cake flour. Sifting is essential to remove any lumps and aerate the flour, which contributes to the cake’s delicate crumb.
- Gently Fold in the Flour: Once the egg mixture is whipped, gently fold in the sifted cake flour in three additions. Use a large rubber spatula and be careful not to deflate the batter. Cut down through the center of the batter, scrape along the bottom of the bowl, and fold the batter over the flour. Rotate the bowl slightly after each fold. Overmixing will develop the gluten in the flour and result in a tough cake.
- Incorporate the Butter and Vanilla: In a small bowl, combine the melted and cooled butter with the vanilla extract. Gently drizzle this mixture over the batter and fold it in using the same technique as with the flour. Make sure the butter is cooled slightly, otherwise it might deflate the batter.
Baking the Genoise Cake
- Pour Batter into Pan: Pour the batter into the prepared cake pan and spread it evenly.
- Bake the Cake: Bake in the preheated oven for 30-35 minutes, or until a wooden skewer inserted into the center comes out clean. The cake should be golden brown and spring back lightly when touched.
- Cool the Cake: Let the cake cool in the pan for 10 minutes before inverting it onto a wire rack to cool completely. Cooling it upside down can help prevent it from sinking.
Preparing the Simple Syrup (Optional)
- Combine Water and Sugar: In a small saucepan, combine the water and granulated sugar.
- Heat and Dissolve: Heat over medium heat, stirring until the sugar is completely dissolved.
- Simmer: Bring the mixture to a simmer and let it simmer for 1-2 minutes.
- Cool and Add Liquor (Optional): Remove from heat and let it cool completely. Stir in the liquor, if using.
Assembling the Cake
- Level the Cake (Optional): Once the cake is completely cool, use a long serrated knife to level the top of the cake, if necessary. This will ensure that the layers are even.
- Slice the Cake: Carefully slice the cake horizontally into two or three even layers. A long serrated knife works best for this.
- Prepare the Whipped Cream: In a large bowl, combine the cold heavy cream, powdered sugar, and vanilla extract. Beat with a mixer until stiff peaks form. Be careful not to overwhip, or the cream will turn into butter.
- Soak the Cake Layers (Optional): If using, brush each cake layer with the simple syrup. This will add moisture and flavor to the cake.
- Assemble the Cake: Place one cake layer on a serving plate. Spread a generous layer of whipped cream over the cake layer. Arrange the fresh berries over the whipped cream.
- Repeat Layers: Top with the second cake layer and repeat the whipped cream and berry filling. If you have a third layer, repeat again.
- Frost the Cake: Frost the top and sides of the cake with the remaining whipped cream. You can create a smooth finish or a more rustic look.
- Garnish (Optional): Garnish the cake with additional fresh berries, a dusting of powdered sugar, or chocolate shavings.
- Chill the Cake: Chill the cake in the refrigerator for at least 30 minutes before serving. This will allow the flavors to meld together and the whipped cream to set. I often chill it for a couple of hours, or even overnight, for the best results.
Tips for Success
- Room Temperature Ingredients: Using room temperature eggs is crucial for achieving maximum volume in the batter.
- Don’t Overmix: Overmixing the batter will develop the gluten in the flour, resulting in a tough cake. Be gentle when folding in the flour and butter.
- Proper Baking Temperature: Ensure your oven is properly preheated and the temperature is accurate. An oven thermometer can be helpful.
- Cool Completely: Allow the cake to cool completely before slicing and assembling. This will prevent the whipped cream from melting.
- Fresh Ingredients: Use the freshest ingredients possible for the best flavor.
- Variations: Feel free to experiment with different fillings and frostings. Chocolate ganache, pastry cream, or buttercream are all delicious options. You can also add different extracts or flavorings to the cake batter, such as almond extract or lemon zest.
Troubleshooting
- Cake is Dense: This could be due to overmixing the batter, not whipping the egg mixture enough, or using cold eggs.
- Cake is Dry: This could be due to overbaking or not using enough liquid in the batter. The simple syrup helps to prevent dryness.
- Cake Sinks in the Middle: This could be due to opening the oven door too early, underbaking, or not cooling the cake properly.
- Whipped Cream is Runny: This could be due to using warm heavy cream, not chilling the bowl and beaters, or overwhipping the cream.
Enjoy your delicious homemade Genoise cake! I hope you found this recipe helpful and easy to follow. Happy baking!
Conclusion:
This Classic Genoise Cake recipe isn’t just another cake recipe; it’s a gateway to a world of baking possibilities and a guaranteed crowd-pleaser. From its delicate crumb to its subtly sweet flavor, every bite is a testament to the magic that happens when simple ingredients are combined with a little bit of patience and care. I truly believe that once you’ve mastered this foundational recipe, you’ll find yourself reaching for it time and time again, whether you’re celebrating a special occasion or simply craving a comforting treat.
Why is it a must-try? Because it’s incredibly versatile! The light and airy texture of the Genoise makes it the perfect canvas for a wide range of flavors and fillings. Unlike denser cakes, it soaks up syrups and liqueurs beautifully, allowing you to create truly decadent and unforgettable desserts. Plus, the relatively simple ingredient list means you probably already have most of what you need in your pantry. No fancy equipment or hard-to-find ingredients required!
But the real beauty of this Classic Genoise Cake lies in its adaptability. Looking for serving suggestions? The possibilities are endless! For a classic presentation, try layering it with fresh berries and whipped cream. A simple dusting of powdered sugar also works wonders. Or, for a more sophisticated dessert, consider filling it with pastry cream and topping it with a glossy chocolate ganache. You could even use it as the base for a stunning trifle, layering it with fruit, custard, and jelly.
And don’t be afraid to experiment with variations! Want to add a hint of citrus? Zest a lemon or orange into the batter. Craving chocolate? Replace a portion of the flour with cocoa powder. Feeling adventurous? Infuse your simple syrup with coffee or your favorite liqueur. The only limit is your imagination!
Here are a few ideas to get you started:
Serving Suggestions & Variations:
* Berry Bliss: Layer with fresh raspberries, blueberries, and strawberries, and top with a light whipped cream.
* Chocolate Decadence: Fill with chocolate pastry cream and cover with a rich chocolate ganache.
* Lemon Dream: Infuse the simple syrup with lemon zest and juice, and fill with a lemon curd.
* Coffee Kick: Soak the cake layers with coffee-flavored syrup and fill with a coffee buttercream.
* Tiramisu Transformation: Use the Genoise as the base for a homemade tiramisu.
I know that baking can sometimes seem intimidating, but trust me, this recipe is more forgiving than you might think. Just follow the instructions carefully, and don’t be afraid to ask questions if you get stuck. And most importantly, have fun! Baking should be a joyful experience, a chance to create something delicious and share it with the people you love.
So, what are you waiting for? Preheat your oven, gather your ingredients, and get ready to bake the most amazing Classic Genoise Cake you’ve ever tasted. I’m confident that you’ll be thrilled with the results.
And once you’ve tried it, I’d absolutely love to hear about your experience! Share your photos, your variations, and your tips in the comments below. Let’s build a community of Genoise cake enthusiasts and inspire each other to create even more delicious variations. Happy baking! I can’t wait to see what you create!
Classic Genoise Cake: A Step-by-Step Guide to Baking Perfection
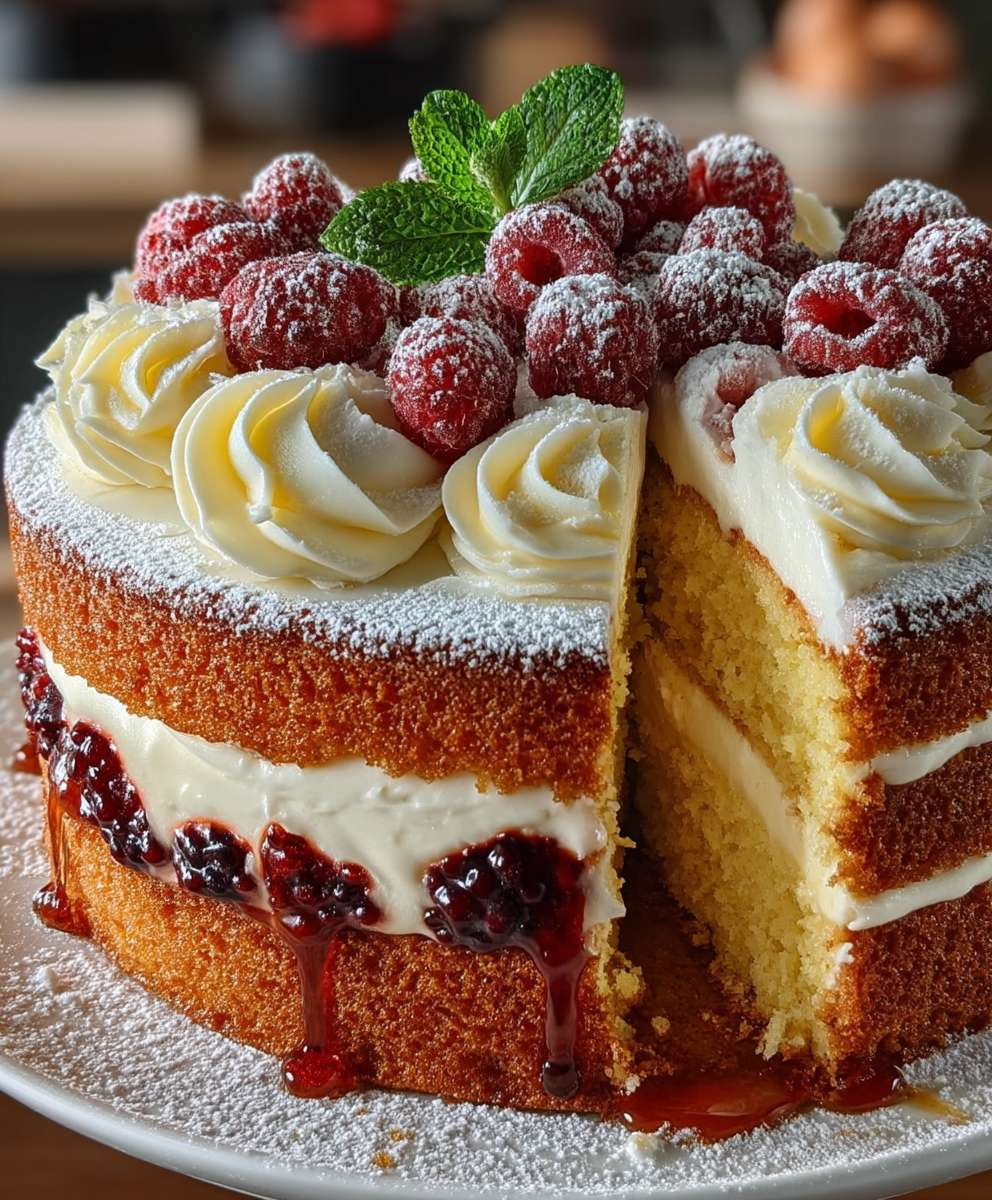
Light and airy Genoise cake, perfect for layering with whipped cream and fresh berries. A classic dessert that's surprisingly easy to make at home!
Ingredients
Instructions
Recipe Notes
- Room Temperature Ingredients: Using room temperature eggs is crucial for achieving maximum volume in the batter.
- Don’t Overmix: Overmixing the batter will develop the gluten in the flour, resulting in a tough cake. Be gentle when folding in the flour and butter.
- Proper Baking Temperature: Ensure your oven is properly preheated and the temperature is accurate. An oven thermometer can be helpful.
- Cool Completely: Allow the cake to cool completely before slicing and assembling. This will prevent the whipped cream from melting.
- Fresh Ingredients: Use the freshest ingredients possible for the best flavor.
- Variations: Feel free to experiment with different fillings and frostings. Chocolate ganache, pastry cream, or buttercream are all delicious options. You can also add different extracts or flavorings to the cake batter, such as almond extract or lemon zest.