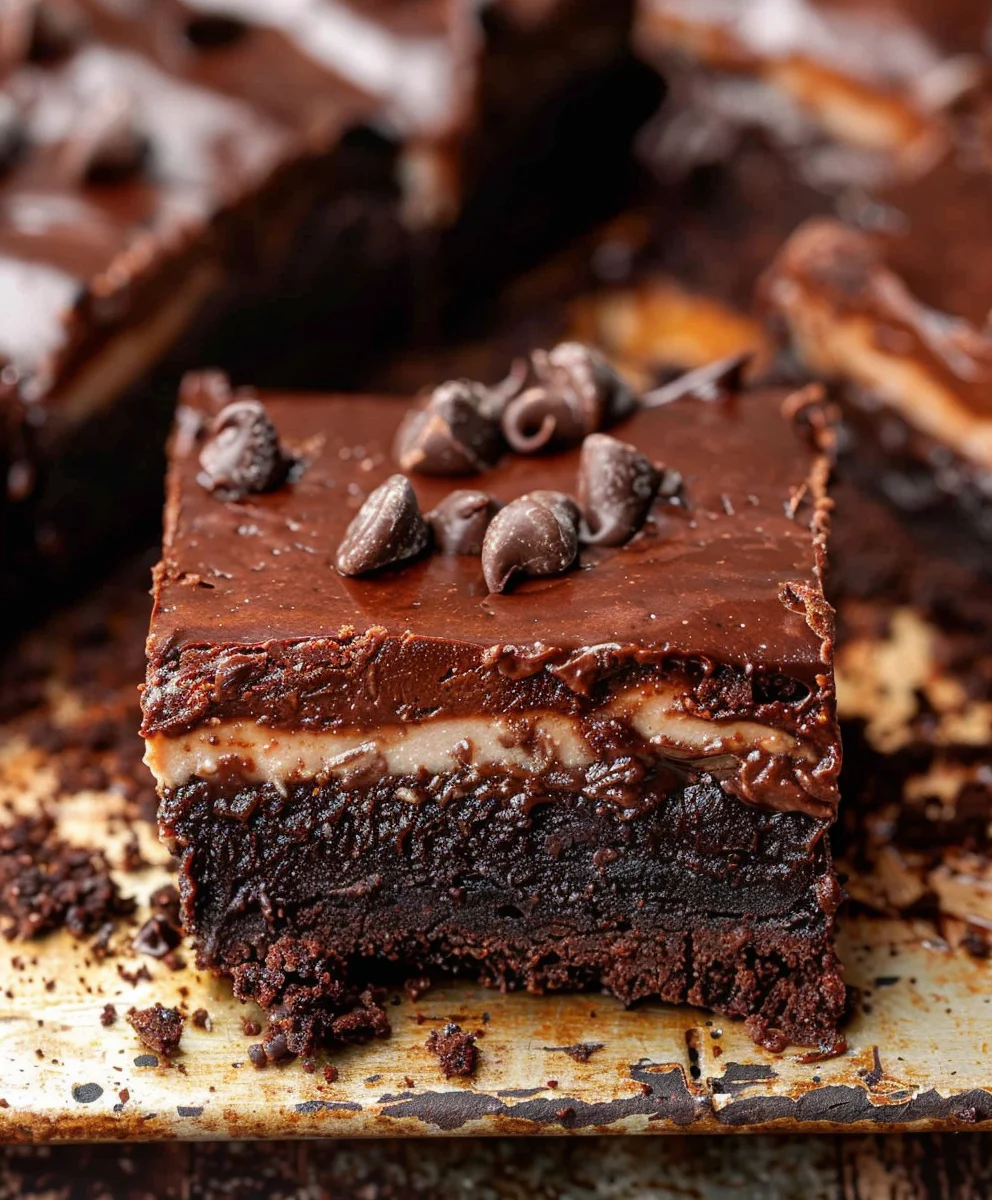
Chocolate Cheesecake Brownie Bars are truly a dessert marvel, a harmonious symphony of two beloved classics that, when combined, create something extraordinary. Imagine the rich, fudgy embrace of a classic brownie meeting the creamy, tangy sophistication of cheesecake, all in one glorious bite. I’ve always believed that the best recipes are those that offer a delightful surprise with every forkful, and these bars certainly deliver. They effortlessly combine comfort and elegance in a way few other desserts can.
Tracing their lineage through the grand tradition of American desserts, the fudgy brownie made its delectable debut around the turn of the 20th century, while the creamy New York-style cheesecake gained widespread fame shortly thereafter. This brilliant fusion represents the pinnacle of comfort food innovation, a testament to culinary creativity that brings together two distinct yet complementary worlds. It’s not merely a dessert; it’s an experience that speaks to generations of sweet tooths and celebrates the joy of indulgent baking.
Why Everyone Loves These Heavenly Bars
People adore these bars because they perfectly capture the decadent richness of chocolate brownies while simultaneously offering the luscious, tangy counterpoint of cheesecake. The contrasting textures – a dense, chewy chocolate base beneath a silky-smooth cream cheese layer, often swirled with more chocolate – make every bite utterly irresistible. They are incredibly convenient for gatherings, easy to transport, and always a crowd-pleaser, making them a staple for any celebration or simply a cherished indulgence. I am confident that once you try these Chocolate Cheesecake Brownie Bars, you will understand why they have become such a beloved treat in countless homes. Prepare to be enchanted!

Ingredients:
- For the Rich Brownie Layer:
- 1 cup (2 sticks or 226g) unsalted butter, softened or melted and slightly cooled
- 1 ¾ cups (350g) granulated sugar
- 4 large eggs, at room temperature
- 1 teaspoon pure vanilla extract
- 1 cup (100g) unsweetened cocoa powder, Dutch-processed for a darker, richer flavor is preferred
- 1 cup (125g) all-purpose flour, spooned and leveled
- ½ teaspoon baking powder
- ¼ teaspoon salt
- 1 cup (170g) chocolate chips (semi-sweet or dark chocolate, depending on your preference)
- For the Creamy Cheesecake Swirl:
- 2 (8-ounce or 226g each) packages full-fat cream cheese, softened at room temperature
- ½ cup (100g) granulated sugar
- 1 large egg, at room temperature
- 1 teaspoon pure vanilla extract
- Optional Garnish (for extra flair and flavor):
- A dusting of cocoa powder or powdered sugar
- Chocolate shavings or mini chocolate chips
Preparing for the Ultimate Chocolate Cheesecake Brownie Bars Experience
- Preheat Your Oven and Prepare Your Pan: First things first, let’s get that oven ready! Preheat your oven to a comfortable 350°F (175°C). While the oven is warming up, grab a 9×13-inch baking pan. To ensure your Chocolate Cheesecake Brownie Bars come out beautifully and without sticking, line the pan with parchment paper, leaving an overhang on the sides. This overhang acts as “handles” later, making it incredibly easy to lift the entire batch of bars out of the pan. Lightly spray the parchment paper with non-stick cooking spray for an extra layer of security. Trust me, this simple step makes all the difference when it comes to serving these glorious bars.
Crafting the Decadent Brownie Layer
- Melt the Butter and Sugar: In a large, microwave-safe bowl or a medium saucepan over low heat, combine the softened butter and granulated sugar. If using the microwave, heat in 30-second intervals, stirring well after each, until the butter is fully melted and the sugar begins to dissolve into it. If using a saucepan, stir constantly until the mixture is smooth and glossy. Remove it from the heat and allow it to cool for a few minutes. This cooling step is important; we don’t want to scramble our eggs!
- Incorporate Wet Ingredients: Once the butter-sugar mixture has cooled slightly (it should still be warm to the touch, but not hot), whisk in the eggs, one at a time, until fully incorporated and the mixture is smooth. This gradual addition ensures everything comes together beautifully. Next, stir in the vanilla extract. You’ll notice the mixture start to take on a beautiful, rich sheen. Continue whisking until the mixture is lightened in color and slightly thickened, about 1-2 minutes of vigorous whisking. This aeration helps create that desirable fudgy brownie texture we all love in Chocolate Cheesecake Brownie Bars.
- Introduce the Dry Ingredients: In a separate medium bowl, whisk together the unsweetened cocoa powder, all-purpose flour, baking powder, and salt. Make sure there are no lumps of cocoa powder. Gradually add these dry ingredients to the wet mixture, stirring gently with a spatula or wooden spoon until just combined. Be careful not to overmix here! Overmixing can lead to a tougher brownie. A few streaks of flour are perfectly fine at this stage, as they will disappear during the next step.
- Fold in the Chocolate Chips: Finally, fold in the chocolate chips. These little bursts of chocolate will melt into pockets of pure bliss within your Chocolate Cheesecake Brownie Bars. Once the chocolate chips are evenly distributed, pour the brownie batter into your prepared 9×13-inch baking pan. Using an offset spatula or the back of a spoon, spread the batter evenly across the bottom of the pan. Set this aside while we prepare the luscious cheesecake swirl.
Whipping Up the Dreamy Cheesecake Swirl
- Cream the Cream Cheese: In a medium-sized mixing bowl, using an electric mixer (either hand-held or stand mixer with a paddle attachment), beat the softened cream cheese on medium speed until it is completely smooth and creamy, with no lumps visible. This usually takes about 2-3 minutes. Ensuring your cream cheese is truly at room temperature is key here; it will mix much more smoothly and prevent lumps in your finished Chocolate Cheesecake Brownie Bars.
- Add Sugar and Vanilla: Scrape down the sides of the bowl with a spatula, then add the granulated sugar to the cream cheese. Continue beating on medium speed until the sugar is fully incorporated and the mixture is light and fluffy, usually another 1-2 minutes. Now, stir in the vanilla extract until just combined. The aroma alone will have you excited for these Chocolate Cheesecake Brownie Bars!
- Incorporate the Egg: Add the single large egg to the cream cheese mixture. Beat on low speed until just combined. Again, do not overmix at this stage! Overmixing the cheesecake batter can introduce too much air, which can cause cracks in the cheesecake layer during baking. We’re aiming for a silky smooth, not airy, texture for our Chocolate Cheesecake Brownie Bars.
Assembling and Baking Your Chocolate Cheesecake Brownie Bars
- Dollop and Swirl: Now for the artistic part! Spoon generous dollops of the creamy cheesecake mixture evenly over the top of the brownie batter in the pan. Don’t worry about perfect placement; we’re going for a rustic swirl. Once all the cheesecake mixture is on top, take a butter knife or a skewer and gently swirl the cheesecake into the brownie batter. Make sweeping motions to create beautiful, marbleized patterns. Try not to over-swirl, as you still want distinct layers and swirls of both brownie and cheesecake. Aim for about 8-10 swirls across the pan. This creates the signature look of our Chocolate Cheesecake Brownie Bars.
- Bake to Perfection: Carefully place the baking pan into your preheated 350°F (175°C) oven. Bake for approximately 35-45 minutes. The baking time can vary slightly depending on your oven, so keep an eye on them. You’ll know your Chocolate Cheesecake Brownie Bars are done when the edges of the brownie layer are set and the cheesecake layer looks mostly set with only a slight jiggle in the very center. A toothpick inserted into the brownie portion (avoiding the cheesecake swirl if possible) should come out with moist crumbs, but not wet batter. Be careful not to overbake, as this can dry out the brownies and make the cheesecake tough.
The Crucial Cooling and Chilling Phase
- Cool Completely at Room Temperature: Once baked, remove the pan from the oven and place it on a wire cooling rack. Allow the Chocolate Cheesecake Brownie Bars to cool in the pan at room temperature for at least 1-2 hours. This gradual cooling is essential; it helps the bars set properly and prevents the cheesecake from cracking due to a sudden temperature change. Patience is a virtue, especially when making delicious baked goods like these!
- Chill for Optimal Setting: After the bars have cooled to room temperature, loosely cover the pan with plastic wrap (try not to let the plastic touch the cheesecake layer directly) and transfer it to the refrigerator. Chill for a minimum of 4 hours, but ideally overnight. This chilling step is absolutely critical for the Chocolate Cheesecake Brownie Bars to firm up properly, making them easy to cut into neat, beautiful squares. If you try to cut them too soon, they might be too soft and messy. The wait is worth it, I promise!
Cutting, Serving, and Storing Your Masterpiece
- Prepare for Cutting: Once thoroughly chilled, use the parchment paper overhang to carefully lift the entire slab of Chocolate Cheesecake Brownie Bars out of the baking pan and onto a cutting board.
- Achieve Perfect Slices: For clean cuts, use a large, sharp knife. For best results, run your knife under hot water, wipe it clean, and then make each cut. Repeat this process for every slice. This trick helps prevent the cheesecake from sticking to the knife and creates beautifully defined edges. You can cut them into 24 squares (6 rows by 4 rows) or 16 larger squares, depending on your desired serving size. The elegant swirls of the Chocolate Cheesecake Brownie Bars will truly shine in each piece.
- Optional Garnish and Serve: If you’re feeling fancy, dust the top of your Chocolate Cheesecake Brownie Bars with a little cocoa powder or powdered sugar just before serving. A few chocolate shavings or mini chocolate chips can also add a delightful finishing touch. These bars are rich and satisfying on their own, but also pair wonderfully with a scoop of vanilla ice cream or a fresh cup of coffee.
- Storage: Store any leftover Chocolate Cheesecake Brownie Bars in an airtight container in the refrigerator for up to 4-5 days. While they are best enjoyed within the first few days, they do hold up well and remain incredibly delicious. You can also freeze individual bars for longer storage (up to 1 month); just thaw them in the refrigerator before serving. Each bite will remind you of the care and effort you put into making these truly spectacular treats.
Conclusion:
Well, my friends, we’ve reached the sweet finale, and I truly hope you’re as excited as I am about the prospect of bringing these incredible Chocolate Cheesecake Brownie Bars to life in your own kitchen. I honestly can’t stress enough why this recipe isn’t just another dessert; it’s an experience, a celebration of all things delicious. Imagine a world where the fudgiest, most intensely chocolatey brownie you’ve ever tasted meets a silky-smooth, tangy cheesecake swirl, all baked into one convenient, shareable bar. It’s a symphony of textures and flavors that will undoubtedly steal the show at any gathering, or simply provide the perfect indulgent treat for a quiet evening at home.
What makes these bars an absolute must-try? It’s the magical combination. The deep, dark cocoa notes of the brownie are perfectly balanced by the bright, creamy tang of the cheesecake, creating a harmonious contrast that will have everyone reaching for a second, or even a third, piece. Plus, let’s be honest, the marbled top is just gorgeous – it looks impressive, but it’s surprisingly simple to achieve. This isn’t just baking; it’s crafting joy, one delicious square at a time. I’ve found that they travel incredibly well, making them ideal for potlucks, bake sales, or as a thoughtful gift for a friend who needs a little pick-me-up. The sheer delight they bring to people’s faces is truly rewarding, and that, for me, is the true essence of homemade desserts.
Now, let’s talk about making these even more spectacular, or just tweaking them to suit your mood. While absolutely divine on their own, a warm bar served with a scoop of premium vanilla bean ice cream or a dollop of freshly whipped cream takes them to an even higher level of indulgence. For a touch of sophistication, consider a light dusting of cocoa powder or a few fresh raspberries artfully placed on top. The tartness of the berries really cuts through the richness, creating a beautifully balanced bite. Want to experiment? Try adding a sprinkle of sea salt to the top before baking for a salted chocolate caramel effect, or incorporate a handful of chopped pecans or walnuts into your brownie batter for an extra textural crunch. You could even swirl in a tablespoon of raspberry jam with your cheesecake batter for a fruity twist! The possibilities are truly endless, and each variation promises a new layer of deliciousness.
Your Culinary Adventure Awaits!
So, my fellow home bakers, I wholeheartedly encourage you to roll up your sleeves and give these incredible Chocolate Cheesecake Brownie Bars a try. Don’t be shy; embrace the fun of baking! I promise you, the effort is minimal compared to the incredible reward of sinking your teeth into one of these magnificent creations. There’s a special kind of satisfaction that comes from sharing something you’ve made with love, and these bars are practically guaranteed to elicit smiles and compliments. Once you experience the magic, I have a feeling they’ll become a much-loved staple in your recipe collection, a dessert you’ll turn to again and again.
I would absolutely adore hearing about your experiences in the kitchen. Did you make any fun substitutions? What did your friends and family think? Please don’t hesitate to share your stories, photos, and any creative variations you come up with. Your culinary adventures inspire me, and I love seeing how these recipes become part of your own unique traditions. So go forth, bake with joy, and prepare to fall head over heels for these truly irresistible bars. Happy baking!

Chocolate Cheesecake Brownie Bars
Chocolate Cheesecake Brownie Bars are truly a dessert marvel, a harmonious symphony of two beloved classics that, when combined, create something extraordinary. Imagine the rich, fudgy embrace of a classic brownie meeting the creamy, tangy sophistication of cheesecake, all in one glorious bite. I’ve always believed that the best recipes are those that offer a delightful surprise with every forkful, and these bars certainly deliver. They effortlessly combine comfort and elegance in a way few other desserts can.
Ingredients
-
2 cups Oreo crumbs
-
4 tablespoons Unsalted butter, melted
-
24 ounces Cream cheese, room temperature
-
1 cup White granulated sugar
-
1/2 cup Unsweetened cocoa powder, Dutch-processed
-
8 ounces Chocolate bar, melted
-
1/2 cup Heavy cream, room temperature
-
1 teaspoon Pure vanilla extract
-
4 Large eggs, room temperature
-
1 cup Semi-sweet chocolate chips
-
1/2 cup Heavy cream
Instructions
-
Step 1
Preheat oven to 325°F (160°C). Line a 9×13-inch baking pan with parchment paper, leaving an overhang. Combine 2 cups Oreo crumbs and 4 tbsp melted butter; press firmly into the bottom of the prepared pan. Bake for 8-10 minutes. Let cool. -
Step 2
In a large bowl, beat 24 oz softened cream cheese until smooth. Gradually add 1 cup granulated sugar, then 1/2 cup Dutch-processed cocoa powder, beating until combined. Beat in 8 oz melted chocolate bar, 1/2 cup heavy cream (room temperature), and 1 tsp vanilla extract. Add 4 large eggs one at a time, beating on low speed until just combined. Fold in 1 cup semi-sweet chocolate chips. -
Step 3
Pour cheesecake filling evenly over the cooled crust. Bake for 50-60 minutes, or until the edges are set and the center slightly jiggles. -
Step 4
Cool completely at room temperature. For an optional ganache topping, melt the remaining 1/2 cup heavy cream with some chocolate chips and drizzle over the warm cheesecake. Transfer to the refrigerator and chill for at least 4 hours, preferably overnight, until firm. -
Step 5
Lift the chilled bars from the pan using the parchment paper. For clean cuts, use a sharp knife wiped clean after each slice. Cut into 16 or 24 squares. Garnish with cocoa powder or chocolate shavings if desired. -
Step 6
Store leftover bars in an airtight container in the refrigerator for up to 4-5 days, or freeze individual bars for up to 1 month.
Important Information
Nutrition Facts (Per Serving)
It is important to consider this information as approximate and not to use it as definitive health advice.
Allergy Information
Please check ingredients for potential allergens and consult a health professional if in doubt.