Pumpkin Magic Bars Recipe is here to transform your autumn baking, offering a dessert experience so effortlessly delightful, it truly feels like pure culinary wizardry. Imagine a treat where rich flavors and diverse textures meld seamlessly, all with minimal fuss in the kitchen. The classic “Magic Bar,” often celebrated as a Seven Layer Bar, has charmed generations with its straightforward assembly and incredibly satisfying outcome, traditionally featuring a graham cracker crust, chocolate chips, butterscotch chips, coconut, walnuts, and the magical binder of sweetened condensed milk. My rendition introduces a beloved seasonal twist, infusing the cozy essence of pumpkin spice into this timeless favorite, creating the ultimate indulgence for crisp autumn evenings and festive gatherings.
Why do these bars captivate so many hearts?
It’s the perfect symphony of sensations in every bite: the satisfying crunch of the golden-brown crust, the gooey, pumpkin-infused sweetness from the condensed milk, the rich pockets of chocolate, and the delightful chewiness of coconut and nuts. This Pumpkin Magic Bars Recipe not only promises an explosion of comforting flavors but also unparalleled convenience, coming together in a single pan with remarkably little effort. It’s a true celebration of autumn, delivering warmth, comfort, and undeniable joy in every single square. Prepare to enchant your taste buds and impress your guests with this simple yet spectacular dessert!

Ingredients:
-
For the Graham Cracker Crust:
- 1 ½ cups (approximately 10-12 full sheets) graham cracker crumbs, finely crushed
- ½ cup (1 stick or 113g) unsalted butter, melted
- ¼ cup granulated sugar
-
For the Creamy Pumpkin Layer:
- 1 (15-ounce) can pumpkin puree (not pumpkin pie filling)
- 1 (14-ounce) can sweetened condensed milk
- 2 large eggs
- 2 teaspoons pure vanilla extract
- 1 teaspoon ground cinnamon
- ½ teaspoon ground ginger
- ¼ teaspoon ground nutmeg
- ⅛ teaspoon ground cloves (or a pinch of allspice)
- ¼ teaspoon salt
-
For the Irresistible Toppings:
- 1 cup semi-sweet chocolate chips (or dark chocolate chips for a richer flavor)
- 1 cup shredded sweetened coconut flakes
- 1 cup chopped pecans or walnuts (or a mix of both), lightly toasted for enhanced flavor
Preparing the Irresistible Graham Cracker Crust for Your Pumpkin Magic Bars
- Preheat and Prepare: My first step, and a crucial one for any baking endeavor, is to preheat my oven to 350°F (175°C). While the oven is warming up, I take out a 9×13-inch baking pan. To ensure a clean release for our delicious Pumpkin Magic Bars, I line the pan with parchment paper, leaving an overhang on the two longer sides. This creates “handles” that will make lifting the cooled bars out of the pan an absolute breeze. If you don’t have parchment paper, a thorough greasing with butter or non-stick spray will also work, but the parchment paper truly is a game-changer for presentation.
- Crush Those Crackers: Next, we tackle the graham cracker crumbs. If you’re starting with whole graham crackers, you’ll want to get them as finely crushed as possible. I usually place them in a large zip-top bag and use a rolling pin to crush them into a fine, sandy texture. You can also use a food processor for a quicker and more uniform result. Just be careful not to over-process them into a paste. The goal here is a consistent crumb that will pack together nicely to form the base of our Pumpkin Magic Bars. Aim for about 1 ½ cups of these delightful crumbs.
- Melt the Butter: In a microwave-safe bowl or a small saucepan over low heat, I melt ½ cup of unsalted butter. It’s important to melt it gently; we don’t want it sizzling or browned. Once it’s liquid, remove it from the heat.
- Combine and Sweeten: In a medium-sized mixing bowl, I combine the finely crushed graham cracker crumbs, the melted butter, and ¼ cup of granulated sugar. I use a fork or a spatula to mix everything together until the crumbs are thoroughly moistened and resemble wet sand. Every single crumb should be coated with that buttery goodness, as this is what will hold our crust together and provide that satisfying crunch in our Pumpkin Magic Bars.
- Press the Crust: Now for the fun part! I transfer the entire graham cracker mixture into the prepared 9×13-inch baking pan. Using the bottom of a flat-bottomed glass, a measuring cup, or even my fingertips, I press the mixture firmly and evenly across the bottom of the pan. The key here is to create a compact, uniform layer. A firm crust is essential to prevent your Pumpkin Magic Bars from crumbling when sliced. Pay extra attention to the corners and edges to ensure an even thickness throughout.
- Optional Pre-Bake for Perfection: While some recipes skip this, I find that a quick pre-bake can truly elevate the crust for our Pumpkin Magic Bars. I pop the pressed crust into the preheated oven for about 8-10 minutes, or until it’s lightly golden around the edges and smells wonderfully fragrant. This step helps to set the crust, making it sturdier and less prone to becoming soggy once the pumpkin layer is added. Once baked, I remove it from the oven and set it aside to cool slightly while I prepare the pumpkin filling.
Crafting the Creamy Pumpkin Layer for Your Magic Bars
- Gather the Wet Ingredients: In a large mixing bowl, I start by combining the star of our show: the 15-ounce can of pumpkin puree. It’s absolutely vital to use pure pumpkin puree here, not pumpkin pie filling, as the latter already contains spices and sugar, which would throw off the delicate balance of our Pumpkin Magic Bars. To this, I add the entire 14-ounce can of sweetened condensed milk, two large eggs, and two teaspoons of pure vanilla extract. The condensed milk provides that unmistakable sweetness and a velvety texture that is characteristic of the “magic” in these bars. The eggs act as a binder, giving structure, while vanilla enhances all the other flavors.
- Introduce the Warming Spices: This is where the magic of fall truly comes alive for our Pumpkin Magic Bars. I carefully measure out 1 teaspoon of ground cinnamon, ½ teaspoon of ground ginger, ¼ teaspoon of ground nutmeg, and a tiny ⅛ teaspoon of ground cloves. If you don’t have cloves, a pinch of allspice can work as a substitute, but the cloves offer a unique depth. To balance the sweetness and brighten the overall flavor, I also add ¼ teaspoon of salt. These spices are the heart and soul of any great pumpkin dessert, and they will infuse our bars with that cozy, comforting aroma and taste we all crave.
- Whisk Until Velvety Smooth: Using a whisk, I thoroughly combine all the ingredients in the bowl. I whisk vigorously for at least 2-3 minutes, ensuring that the pumpkin puree, condensed milk, eggs, vanilla, and all the spices are perfectly incorporated. The mixture should be completely smooth, with no streaks of egg yolk or lumps of pumpkin. This thorough whisking not only combines the ingredients but also lightly aerates the mixture, contributing to a wonderfully light and creamy texture for the finished Pumpkin Magic Bars. You want a consistent, vibrant orange batter that promises pure deliciousness.
- Set Aside: Once my pumpkin mixture is beautifully smooth and fragrant, I set it aside momentarily. It’s now ready to be poured over our prepared crust and toppings, bringing us one step closer to indulging in these magnificent Pumpkin Magic Bars.
Assembling and Baking Your Decadent Pumpkin Magic Bars
- Layer the Toppings for Maximum Flavor: With our pre-baked or cooled crust (if you opted to pre-bake) patiently waiting in the pan, it’s time to layer on the irresistible toppings. This is where the “magic” in “Pumpkin Magic Bars” truly begins to manifest, as the condensed milk base helps all these goodies meld together beautifully. I start by evenly sprinkling 1 cup of semi-sweet chocolate chips over the entire surface of the graham cracker crust. Then, I follow with 1 cup of shredded sweetened coconut flakes. Finally, I scatter 1 cup of chopped pecans or walnuts over the coconut. The order doesn’t have to be rigid, but I find this layering helps to distribute everything nicely. Each topping adds its own distinct texture and flavor: the chocolate for richness, the coconut for a chewiness and tropical hint, and the nuts for a satisfying crunch and earthy note. These layers are what make our Pumpkin Magic Bars so dynamic and exciting with every bite.
- Gently Pour the Pumpkin Mixture: Once all the toppings are beautifully arranged, I carefully and slowly pour the creamy pumpkin mixture (that we prepared earlier) evenly over the top of all the scattered goodies. Take your time with this step to ensure that the pumpkin mixture spreads out to cover the entire pan, seeping down into the crevices around the chocolate, coconut, and nuts. This even distribution is key to ensuring that every single slice of your Pumpkin Magic Bars has a perfect balance of all the components. You’ll see the orange pumpkin batter create a vibrant top layer, hinting at the warm, spiced goodness within.
- Bake to Golden Perfection: Now, for the moment of truth! I carefully transfer the pan into the preheated 350°F (175°C) oven. The baking time for these Pumpkin Magic Bars will typically be between 40 to 50 minutes. I always recommend keeping an eye on them starting around the 40-minute mark. You’ll know they’re done when the edges are lightly golden brown and the center is set. A good test is to gently jiggle the pan; if the center still looks very wobbly, it needs more time. If it’s mostly set with just a slight tremble, it’s perfect. Another reliable indicator is inserting a clean toothpick into the center; it should come out mostly clean with maybe a few moist crumbs attached, but not wet batter. Be mindful not to overbake, as this can lead to a dry texture. The goal is a wonderfully moist and creamy pumpkin layer.
- Cooling is Crucial: Once your Pumpkin Magic Bars emerge from the oven, smelling absolutely divine and looking perfectly baked, it’s incredibly important to resist the urge to cut into them immediately. The bars need time to cool and set properly. I place the hot pan on a wire rack and allow the bars to cool completely at room temperature. This can take anywhere from 2 to 3 hours. During this cooling period, the internal structure of the bars continues to firm up, ensuring that when you finally slice them, they hold their shape beautifully. Patience truly is a virtue here, leading to perfectly structured and delicious Pumpkin Magic Bars.
Cooling and Slicing for Perfect Pumpkin Magic Bars
- The Importance of a Full Chill: After the initial room temperature cooling, which helps the bars to firm up, I find that chilling the Pumpkin Magic Bars in the refrigerator for at least another 2-3 hours (or even overnight for the best results) is absolutely essential. This deep chill makes them much easier to slice cleanly and allows all the flavors to meld together even more beautifully. Plus, the creamy pumpkin layer and the chewy toppings become perfectly set, ensuring each bar maintains its integrity. I usually cover the pan loosely with plastic wrap before refrigerating. This step might test your patience, but trust me, it’s worth every minute for a pristine Pumpkin Magic Bars experience.
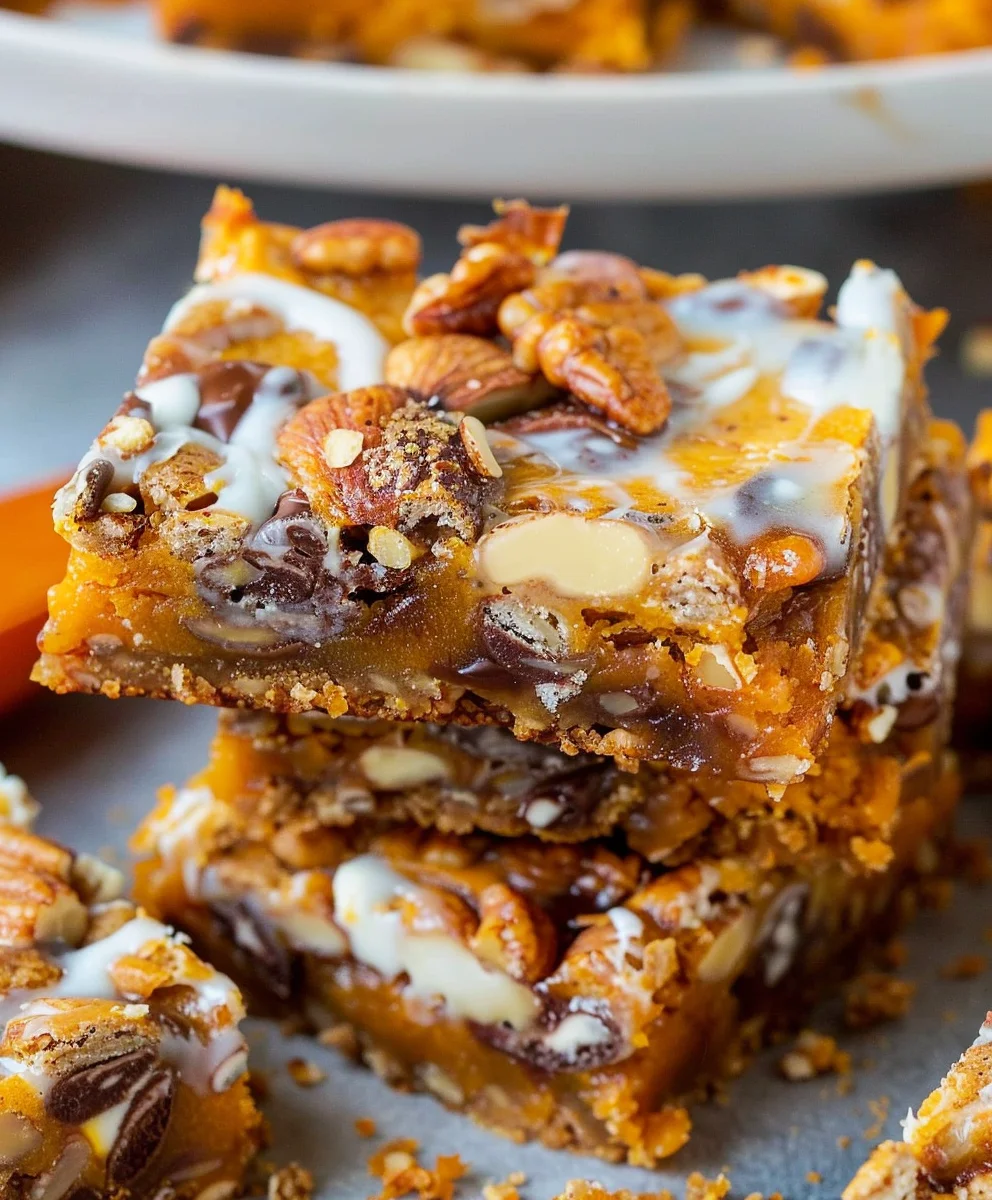
- Lifting and Slicing with Precision: Once thoroughly chilled, I use the parchment paper overhangs that we thoughtfully created earlier as “handles.” I carefully lift the entire slab of Pumpkin Magic Bars out of the pan and transfer it to a large cutting board. This method is incredibly helpful for getting clean, straight cuts. For slicing, I use a sharp, non-serrated knife. For the cleanest cuts, especially through the chocolate and nuts, I often run my knife under hot water and wipe it dry between each cut. This slight warmth on the blade helps it glide through the layers without dragging. I typically cut the large slab into 24 even bars (4 rows by 6 rows), or into whatever size suits my mood or the occasion. For smaller, bite-sized treats, I might cut them into 32 pieces. Each cut reveals those beautiful, distinct layers: the golden graham cracker crust, the medley of chocolate, coconut, and pecans, and the vibrant, creamy pumpkin layer.
- Storing Your Scrumptious Bars: To keep these delightful Pumpkin Magic Bars fresh and delicious, I store them in an airtight container in the refrigerator. They will maintain their wonderful texture and flavor for up to 5-7 days. While they are amazing straight from the fridge, some people enjoy letting them sit out for 10-15 minutes before serving to slightly soften the pumpkin layer and allow the flavors to become more pronounced. These bars also freeze exceptionally well! If you plan to freeze them, I recommend wrapping individual bars or small stacks tightly in plastic wrap, then placing them in a freezer-safe bag or container. They can be frozen for up to 2-3 months. Just thaw them in the refrigerator overnight when you’re ready to enjoy that magical taste of autumn once more.
- Serving Suggestions: These Pumpkin Magic Bars are perfect on their own, a complete dessert in every bite. However, if you’re feeling extra indulgent, a dollop of whipped cream, a dusting of extra cinnamon, or a light drizzle of caramel sauce can take them to the next level. They are truly a crowd-pleaser and embody all the comforting flavors of the fall season, making them a fantastic treat for gatherings, holidays, or just a cozy evening at home. Enjoy every single bite of your homemade “Pumpkin Magic Bars Recipe”!
Conclusion:
As we reach the sweet conclusion of our culinary journey, I truly hope you’re feeling as inspired as I am about this particular confection. It’s more than just a dessert; it’s an experience waiting to happen in your very own kitchen. I’ve shared this
Pumpkin Magic Bars Recipe with immense joy because I genuinely believe it stands head and shoulders above many other seasonal treats. Why is it a must-try? Well, for starters, its simplicity belies its extraordinary flavor. You’re not dealing with fussy techniques or obscure ingredients here. Instead, you’re combining readily available components into a harmonious symphony of autumnal delight. The convenience factor alone makes it a winner for busy bakers, but the real magic lies in that perfect balance of textures and tastes: the crisp, buttery crust providing a delightful foundation, the rich, spiced pumpkin layer offering warmth and comfort, and the medley of chocolate chips, coconut, and nuts delivering an irresistible chewiness and burst of flavor in every single bite. It’s a bar that truly lives up to its “magic” moniker, transforming simple ingredients into something truly spectacular with minimal effort.
I find these bars to be incredibly versatile when it comes to serving. They are, of course, absolutely phenomenal on their own, perhaps with a simple dusting of powdered sugar to enhance their visual appeal. But if you’re looking to elevate the experience, consider serving them slightly warm, allowing the chocolate to become wonderfully gooey and the pumpkin notes to truly sing. A scoop of premium vanilla bean ice cream melting gently on top creates an indulgent contrast of temperatures and textures that is simply divine. For an extra touch of seasonal flair, a dollop of freshly whipped cream, perhaps infused with a hint of maple syrup or a dash of cinnamon, would be a magnificent accompaniment. They also pair beautifully with a hot cup of coffee, a steaming mug of chai tea, or a glass of cold milk, making them ideal for breakfast, an afternoon pick-me-up, or a satisfying evening dessert. Imagine sharing these at a family gathering or a cozy get-together with friends – they’re guaranteed to be a conversation starter and a crowd-pleaser.
Endless Possibilities for Customization
Beyond the classic presentation, feel free to get creative with variations. That’s the beauty of a recipe like this! If you’re not a fan of walnuts, substitute them with toasted pecans, almonds, or even a mix of seeds for a different crunch. White chocolate chips can be swapped in for semi-sweet, or you could even go for a mix of dark and milk chocolate for a more complex flavor profile. A sprinkle of sea salt over the top before baking can also really enhance the sweetness and depth of the flavors. For those with dietary considerations, consider experimenting with a gluten-free graham cracker crust or using dairy-free chocolate chips and a vegan butter substitute in the crust to adapt the recipe. You could even play with different spice blends, adding a touch of ground ginger or cloves to the pumpkin layer for a more robust spice kick. The possibilities are truly as endless as your imagination, allowing you to tailor this treat to your exact preferences and surprise your taste buds with new combinations.
Your Turn to Create Sweet Memories
Now, I’ve done my part in tempting you with the delicious details and endless possibilities. The next step, dear reader, is yours! I wholeheartedly encourage you to roll up your sleeves, preheat your oven, and embark on the delightful adventure of baking these Pumpkin Magic Bars. Don’t be shy; this recipe is incredibly forgiving and yields fantastic results every time. There’s an unparalleled joy in creating something so utterly delicious from scratch, especially when it fills your home with the intoxicating aroma of fall spices. Once you’ve pulled that golden-brown goodness from the oven and experienced your first heavenly bite, I would absolutely love to hear about it. Please don’t hesitate to share your baking journey with me, whether it’s through comments on the article, social media posts, or simply telling your friends and family about your success. What variations did you try? How did your family react? Every story is a source of inspiration, and I’m genuinely excited to see the magic you create in your own kitchen. Happy baking, and may your autumn be filled with warmth, flavor, and plenty of these extraordinary bars!
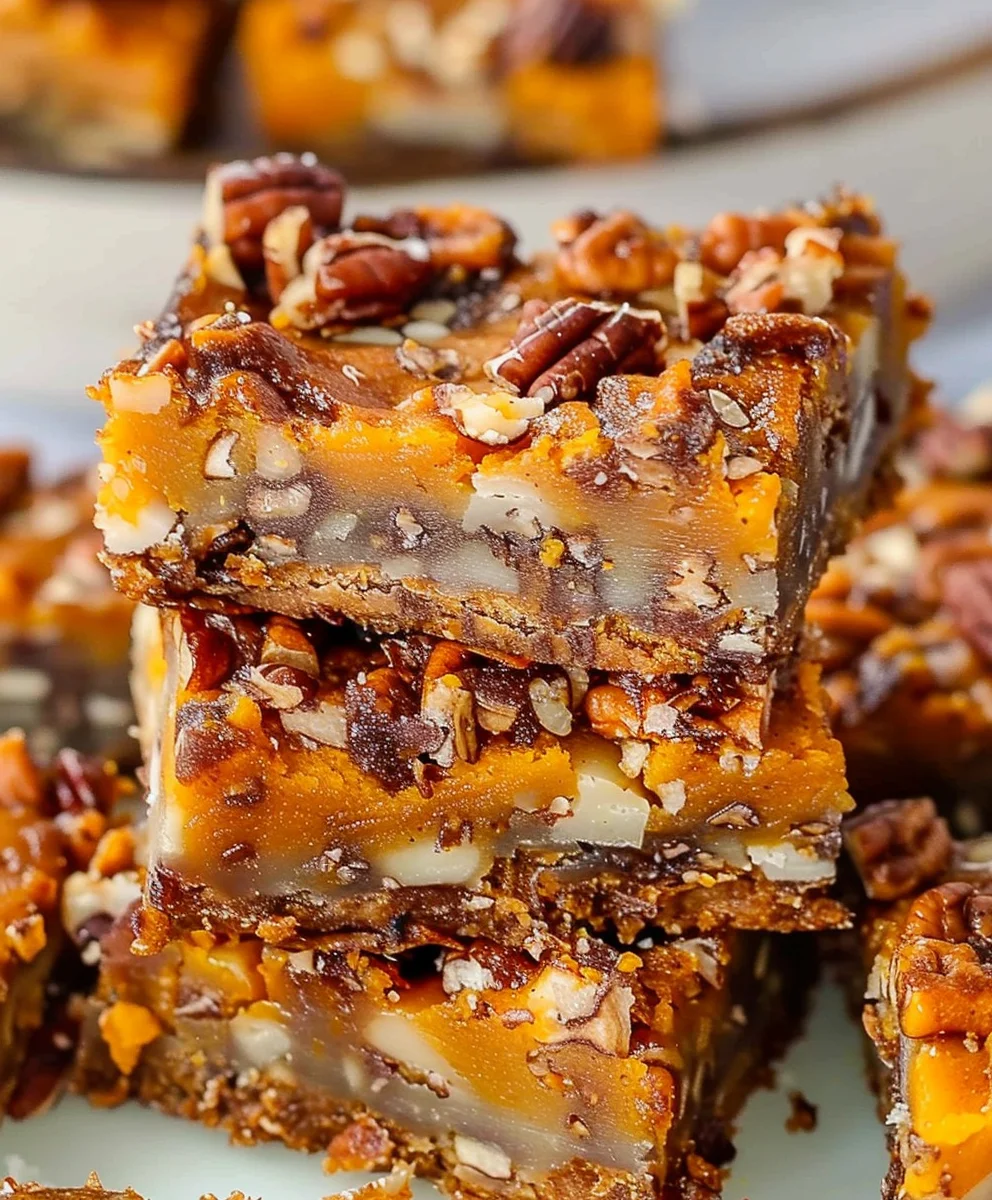
Chewy Pumpkin Magic Bars Recipe – Your New Fall Favorite!
These Pumpkin Magic Bars offer a delightful autumn dessert, blending rich flavors and diverse textures with minimal fuss. Featuring a spiced crust, creamy pumpkin filling, butterscotch chips, toffee bits, and pecans, these bars are a cozy indulgence for fall gatherings.
Ingredients
-
½ cup unsalted butter
-
⅓ cup light brown sugar, packed
-
1 cup all-purpose flour
-
½ teaspoon pumpkin pie spice
-
Pinch fine sea salt
-
1 cup canned pumpkin pie filling
-
11 ounces butterscotch chips
-
1 cup toffee bits
-
2 cups chopped pecans
-
14 ounces sweetened condensed milk
Instructions
-
Step 1
Preheat oven to 350°F (175°C). Line a 9×13-inch baking pan with parchment paper, leaving an overhang. In a bowl, combine ½ cup melted unsalted butter, ⅓ cup packed light brown sugar, 1 cup all-purpose flour, ½ teaspoon pumpkin pie spice, and a pinch of fine sea salt. Mix until crumbly. Press mixture firmly and evenly into the prepared pan. Bake for 10-12 minutes, until lightly golden. Remove and cool slightly. -
Step 2
In a large mixing bowl, whisk together 1 cup canned pumpkin pie filling and 14 ounces sweetened condensed milk until completely smooth. -
Step 3
Evenly sprinkle 11 ounces butterscotch chips, 1 cup toffee bits, and 2 cups chopped pecans over the baked crust. Carefully pour the pumpkin-condensed milk mixture over the toppings, ensuring even coverage. -
Step 4
Transfer the pan to the preheated oven and bake for 40-50 minutes, or until the edges are lightly golden brown and the center is set with only a slight tremble when gently jiggled. Do not overbake. -
Step 5
Remove from oven and place on a wire rack to cool completely at room temperature (2-3 hours). For best slicing, chill the bars in the refrigerator for at least another 2-3 hours, or preferably overnight, covered loosely with plastic wrap. -
Step 6
Using the parchment paper overhangs, lift the slab of bars onto a cutting board. With a sharp, non-serrated knife (wiping the blade between cuts if needed), cut into 24 to 32 even bars. -
Step 7
Store leftover Pumpkin Magic Bars in an airtight container in the refrigerator for up to 5-7 days. Bars can also be wrapped tightly and frozen for 2-3 months; thaw overnight in the refrigerator.
Important Information
Nutrition Facts (Per Serving)
It is important to consider this information as approximate and not to use it as definitive health advice.
Allergy Information
Please check ingredients for potential allergens and consult a health professional if in doubt.