Meringue Mushrooms By Chef Philippe – prepare to be enchanted by a confection that transcends mere dessert into a work of edible art. I am absolutely thrilled to share with you a recipe that has captivated hearts and charmed palates for generations. Imagine delicate, ethereal shapes, perfectly crafted to resemble tiny forest treasures, each bite offering an unparalleled symphony of crunch and melt-in-your-mouth sweetness. This iconic treat, while seemingly simple, carries the legacy of classic patisserie, transforming basic ingredients into something truly magical.
I’ve always found the artistry involved in creating beautiful meringues to be deeply satisfying, and these particular meringue mushrooms are a testament to that timeless elegance. Their origins are rooted in the sophisticated world of European confectionery, where meringue itself has been a beloved component for centuries, celebrated for its versatility and delicate texture. People adore this dish not only for its delightful crispness and airy interior but also for its whimsical appearance, making it a perfect centerpiece for celebrations, a charming addition to any dessert platter, or a unique garnish for other sweet creations. Learning to create these exquisite Meringue Mushrooms By Chef Philippe will undoubtedly elevate your baking repertoire, allowing you to craft a dessert that is as visually stunning as it is irresistibly delicious.

Ingredients:
-
For the Meringue:
- 4 large egg whites (approximately 120-130g), at room temperature
- 1/2 teaspoon cream of tartar (or 1 teaspoon fresh lemon juice)
- 1/2 cup (100g) granulated sugar, superfine if possible
- 1/2 cup (60g) confectioners’ sugar (powdered sugar), sifted
- 1 teaspoon pure vanilla extract (optional, for a subtle aroma)
-
For Assembly and Decoration:
- 2 ounces (approximately 55g) good quality dark chocolate (60-70% cacao), finely chopped
- 2-3 tablespoons unsweetened cocoa powder, for dusting
Preparing the Meringue Base
- Prepare Your Workspace and Equipment: Before you even think about cracking an egg, ensure all your equipment is impeccably clean and dry. Any trace of grease or yolk can prevent your egg whites from whipping properly, and for these delicate Meringue Mushrooms By Chef Philippe, perfection is key. Gather two large baking sheets and line them with parchment paper. Have your piping bags ready with a medium round tip (like an Ateco 805) for the stems and a slightly larger round tip (like an Ateco 807 or 808) for the caps, or simply use a snipped corner of a sturdy Ziploc bag for both.
- Separate the Egg Whites: Carefully separate your egg whites from the yolks. It’s crucial that absolutely no yolk, even the tiniest speck, gets into your egg whites. I find it easiest to separate them one by one into a small bowl first, then add each clean white to your main mixing bowl. This way, if you accidentally get yolk in one, you don’t ruin the whole batch. Room temperature egg whites whip up with more volume and stability, so let them sit out for 30 minutes if they’ve been in the fridge.
- Begin Whipping the Egg Whites: Place the clean egg whites into the bowl of a stand mixer fitted with the whisk attachment (or use a large bowl and a hand mixer). Begin whipping on medium-low speed until the whites become foamy and opaque, resembling a cloud of tiny bubbles. This usually takes about 1-2 minutes.
- Add the Stabilizer: Once foamy, sprinkle in the cream of tartar (or add the lemon juice). This acidic ingredient acts as a stabilizer, helping the egg whites hold their structure and reach maximum volume. Increase the speed to medium.
- Gradually Add Granulated Sugar: Now comes the critical step of adding the granulated sugar. With the mixer still running on medium speed, begin adding the granulated sugar, a tablespoon at a time, very slowly and steadily. This process should take about 3-5 minutes. The slow addition allows the sugar to fully dissolve into the egg whites, creating a smooth, glossy, and stable meringue. If you add it too quickly, your meringue can become grainy or “weep” later. Continue whipping until the meringue is thick, glossy, and forms stiff peaks. When you lift the whisk, the peak should stand up straight without drooping, and the meringue should feel smooth when rubbed between your fingers – no grittiness from undissolved sugar. This is the hallmark of Chef Philippe’s excellent meringue.
- Fold in Confectioners’ Sugar and Vanilla: Gently remove the bowl from the mixer. Sift the confectioners’ sugar over the meringue. Add the vanilla extract, if using. Using a rubber spatula, carefully fold the confectioners’ sugar into the meringue with a light hand. Use an under-and-over motion, rotating the bowl as you go, until just combined. The goal is to incorporate it without deflating the beautiful volume you’ve built. The confectioners’ sugar adds a bit more stability and a slightly finer texture to the baked meringue.
- Prepare Piping Bags: Divide your finished meringue into your prepared piping bags. If using two different tips, put about two-thirds of the meringue into the bag with the larger tip for the caps, and the remaining one-third into the bag with the smaller tip for the stems. If using just one tip, simply fill one bag.
Piping and Shaping Your Meringue Mushrooms
- Preheat Oven to a Low Temperature: Preheat your oven to a very low temperature, around 200°F (95°C). Meringues don’t bake; they dry out. A low and slow temperature is essential for achieving that delicate, crisp, and pure white texture without browning.
- Piping the Meringue Caps: Using the piping bag with the larger tip (or a snipped corner for a wider opening), pipe dome-shaped caps onto one of your parchment-lined baking sheets. Hold the bag perpendicular to the sheet, apply steady pressure, and pipe a dollop. Stop squeezing, then gently lift the bag straight up. Aim for caps of varying sizes, from about 1 inch (2.5 cm) to 2 inches (5 cm) in diameter, leaving about an inch of space between each one. You can use the back of a small spoon, dipped in a little cornstarch, to gently smooth out any unruly peaks on your caps. Chef Philippe often advises making some caps slightly flatter on top for a more rustic look.
- Piping the Meringue Stems: Now, switch to the piping bag with the smaller tip for the stems. On the second parchment-lined baking sheet, pipe cylindrical shapes. Hold the bag perpendicular, apply steady pressure, and pipe a small column, then release pressure and pull straight up. Aim for stems that are roughly half the height of your caps, with a flat base for stability. Again, vary the sizes to match your caps later. It’s always a good idea to pipe a few extra caps and stems than you think you’ll need, just in case some break during the baking or assembly process.
The Gentle Bake: Achieving Crisp Perfection
- Bake the Meringues: Carefully place your baking sheets into the preheated 200°F (95°C) oven. Bake for a long time – typically 1.5 to 2 hours, sometimes even up to 2.5 hours, depending on the size of your meringues and your oven’s calibration. The goal here isn’t to brown them but to thoroughly dry them out. They should feel light and crisp, and lift easily from the parchment paper without sticking.
- Check for Doneness: After the initial baking time, gently lift one meringue from the parchment paper. If it comes off cleanly and feels light and hollow, and the bottom is dry, it’s likely done. If it’s still sticky or soft, continue baking for another 30 minutes and check again. Meringues that are not fully dried will become chewy or sticky when exposed to air.
- Cooling in the Oven: This step is paramount for the stability and crispness of your Meringue Mushrooms By Chef Philippe. Once the meringues are fully baked and dried, turn off the oven. Leave the oven door ajar (you can prop it open with a wooden spoon) and allow the meringues to cool completely inside the oven for at least 2-3 hours, or even overnight. This gradual cooling prevents thermal shock, which can cause them to crack or weep. It also allows any residual moisture to evaporate, ensuring they are perfectly crisp throughout.
Assembling and Decorating Your Woodland Wonders
- Melt the Dark Chocolate: Once your meringue caps and stems are completely cool and crisp, it’s time for assembly. Place the finely chopped dark chocolate in a heatproof bowl. You can melt it gently over a double boiler (a bowl set over a saucepan of simmering water, ensuring the bowl does not touch the water) or in the microwave in 20-second intervals, stirring well after each interval, until smooth and fully melted. Don’t overheat the chocolate, as it can seize.
- Assemble the Meringue Mushrooms: Take one meringue cap and gently turn it upside down. Dip the top (the flat side that would typically be facing down on the baking sheet) of a meringue stem into the melted chocolate, just enough to coat the very top. Immediately press the chocolate-dipped stem firmly but gently onto the center of the inverted meringue cap. Hold it in place for a few seconds to allow the chocolate to start setting. Repeat this process with all your caps and stems, pairing them up by size for the most natural-looking mushrooms.
- Allow Chocolate to Set: Carefully transfer your assembled meringue mushrooms to a cooling rack or a plate lined with parchment paper. Let the chocolate “glue” set completely. This might take 30 minutes at room temperature, or you can pop them into the refrigerator for 10-15 minutes to speed up the process. Be mindful of humidity if refrigerating, as it can affect meringue.
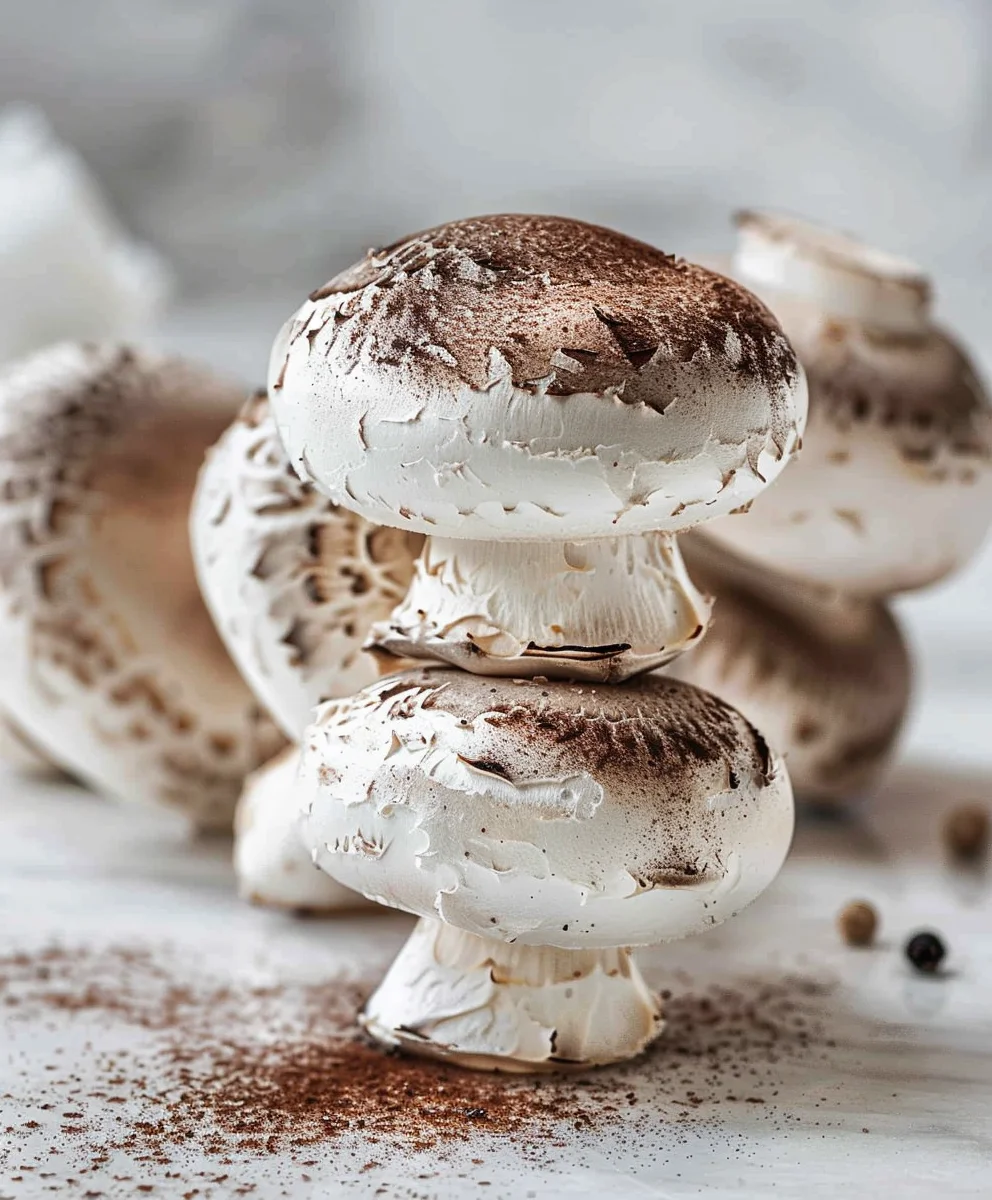
- Dust with Cocoa Powder: Once the chocolate is fully set and the mushrooms are stable, it’s time for the magical finishing touch. Place the unsweetened cocoa powder in a fine-mesh sieve or a tea strainer. Gently dust the tops and undersides of your Meringue Mushrooms By Chef Philippe with the cocoa powder. This not only gives them a beautiful, earthy, and realistic woodland appearance but also adds a lovely subtle bitterness that contrasts beautifully with the sweet meringue. You can be generous with the dusting for a richer, more rustic look.
- Final Touches (Optional): For an even more authentic look, you can use a very fine paintbrush and a tiny amount of melted dark chocolate to paint “gills” on the underside of the caps, radiating from the stem. Or, for a different variety of mushroom, dab tiny speckles of chocolate on the cocoa-dusted tops. These small details truly bring your Meringue Mushrooms By Chef Philippe to life.
- Serving and Storage: Your beautiful meringue mushrooms are now ready to be displayed and enjoyed! They make an exquisite centerpiece or a delightful addition to any dessert platter. Store any leftover mushrooms in an airtight container at room temperature for up to a week. Protect them from humidity, which is meringue’s greatest adversary. They are a delicate delight, a testament to the patience and precision that Chef Philippe champions in the kitchen.
Conclusion:
And there you have it, my friends! We’ve journeyed through the enchanting process of creating a dessert that isn’t just a treat for the taste buds, but a genuine spectacle for the eyes. If you’ve been following along, you’ll already understand why this particular recipe is an absolute must-try for anyone who loves baking, entertaining, or simply indulging in something truly special. What makes these meringue marvels so compelling isn’t just their delicate sweetness or their ethereal, melt-in-your-mouth texture; it’s the sheer artistry involved, an artistry that, I promise you, is far more achievable than it looks. They possess a captivating charm that effortlessly elevates any dessert spread, transforming a simple platter into a whimsical forest scene or a sophisticated tableau.
Think about the joy of presenting these! Their crisp shell, giving way to an airy, chewy interior, is a delightful surprise with every bite. They manage to be both elegant and playful, making them perfectly suited for a wide array of occasions. From a charming addition to a festive holiday dessert table – imagining them nestled amongst a Yule log cake or scattered across a gingerbread house display – to a sophisticated garnish for a gourmet plated dessert, their versatility knows no bounds. They are an instant conversation starter, a little edible sculpture that speaks volumes about your culinary prowess and attention to detail. I’ve found them to be an incredible way to bring a touch of magic to any gathering, big or small. The simple ingredients belie the dramatic and impressive outcome, making them a secret weapon in any baker’s repertoire.
Now, let’s talk about how to truly make these your own. While wonderful on their own, these delightful creations are also incredibly adaptable. For a truly immersive experience, I love arranging them on a platter dusted with cocoa powder, creating the illusion of a forest floor – perhaps even adding a few candied nuts or chocolate curls for extra texture. They make an exquisite accompaniment to fresh berries and a dollop of whipped cream, the light crunch of the meringue contrasting beautifully with the soft fruit. Consider serving them alongside a rich chocolate mousse or a creamy panna cotta; their delicate sweetness provides a perfect counterpoint to richer, denser desserts. For a unique twist, you could even incorporate them into a deconstructed trifle, layering crushed meringue with fruit and custard for a texturally exciting dessert.
But why stop there? Let your creativity blossom! For variations, you can infuse the meringue with different flavors. A tiny drop of pure almond extract, a hint of peppermint, or a dash of espresso powder can entirely change their character. Imagine delicate lemon zest swirled into the meringue for a bright, zesty finish, or a touch of pink food coloring for a fantastical, fairy-tale garden theme. You could dip the stems in melted dark chocolate for an extra layer of decadence, or sprinkle them with edible glitter before baking for a truly enchanting sparkle. For a more robust flavor profile, try dusting the caps lightly with cinnamon sugar immediately after they come out of the oven. And don’t feel restricted to just one size; varying the size of your mushrooms can create an even more dynamic and visually appealing display. Small ones are perfect for topping cupcakes or decorating larger cakes, while a few larger ones can anchor a dessert platter beautifully.
Ultimately, what truly sets these apart is the delightful artistry of the Meringue Mushrooms By Chef Philippe. This isn’t just a recipe; it’s an invitation to explore your creativity and surprise your loved ones with something truly memorable. I am genuinely excited for you to bring this recipe to life in your own kitchen. There’s immense satisfaction in taking simple ingredients and transforming them into something so visually stunning and incredibly delicious. Don’t be shy; embrace the process, have fun with the piping, and enjoy the magical transformation. Once you’ve had the pleasure of tasting these homemade wonders, I know you’ll agree that they are an absolute triumph.
So, please, go forth and bake! I am incredibly eager to see your culinary masterpieces. Once you’ve made these enchanting treats, I would absolutely love for you to share your experience with me and with our community. Did you try a fun variation? What did your family and friends think? Snap a photo, share your stories, and let’s celebrate the joy of baking together. Your insights and creations inspire me, and I can’t wait to hear all about your adventures with this truly special recipe. Happy baking!
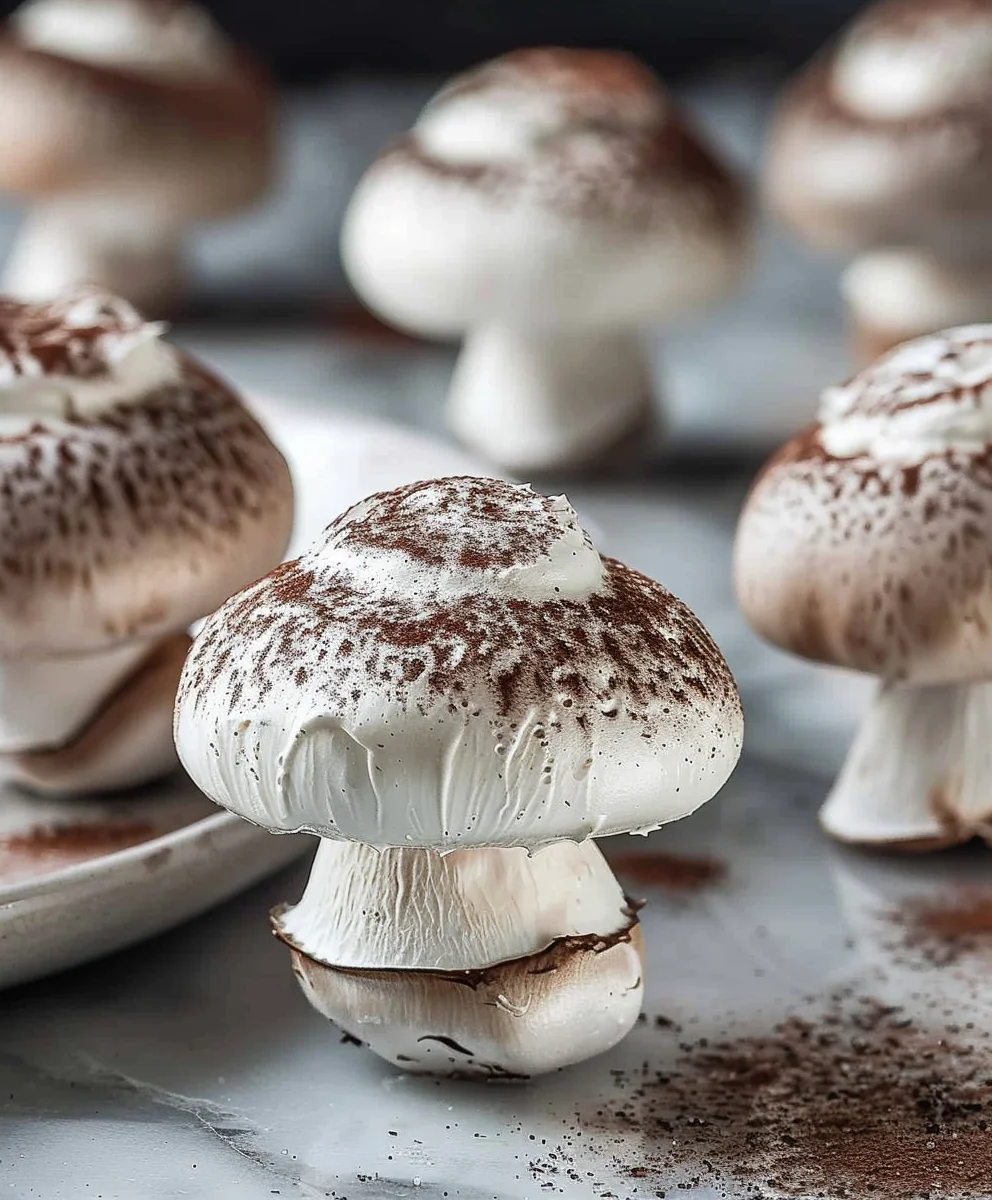
Chef Philippe’s Meringue Mushrooms
Craft delicate, whimsical meringue mushrooms with a crisp exterior and sweet interior. This iconic treat, assembled with a touch of dark chocolate and dusted with cocoa, makes a charming centerpiece or dessert platter addition, showcasing classic patisserie elegance.
Ingredients
-
4 large egg whites, at room temperature
-
2 cups (250 g) powdered sugar, sifted
-
1 tablespoon unsweetened cocoa powder, for dusting
-
2 oz (60 g) dark chocolate, finely chopped
Instructions
-
Step 1
Ensure all equipment is impeccably clean and dry. Line two large baking sheets with parchment paper. Have piping bags with a medium and a slightly larger round tip ready. Carefully separate 4 large egg whites into a clean mixing bowl, ensuring no yolk is present. Let them reach room temperature. -
Step 2
Place egg whites into the bowl of a stand mixer fitted with the whisk attachment. Begin whipping on medium-low speed until whites become foamy. Increase speed to medium. Gradually add the 2 cups (250g) sifted powdered sugar, one tablespoon at a time, very slowly and steadily over 3-5 minutes. Continue whipping on medium-high speed until the meringue is thick, glossy, and forms stiff peaks that stand straight up without drooping. -
Step 3
Divide the finished meringue into your prepared piping bags; allocate about two-thirds for caps (larger tip) and the remaining one-third for stems (smaller tip). Preheat your oven to a very low temperature, around 200°F (95°C). -
Step 4
Using the larger tip, pipe dome-shaped caps onto one parchment-lined baking sheet, aiming for 1 to 2 inches in diameter. On the second sheet, use the smaller tip to pipe cylindrical stems, roughly half the height of your caps, with a flat base. -
Step 5
Carefully place baking sheets into the preheated 200°F (95°C) oven. Bake for 1.5 to 2.5 hours, depending on size and oven, until the meringues feel light, crisp, and lift easily from the parchment without sticking. -
Step 6
Once fully baked and dried, turn off the oven. Leave the oven door ajar (prop with a wooden spoon) and allow the meringues to cool completely inside the oven for at least 2-3 hours, or even overnight. This gradual cooling ensures maximum crispness and prevents cracking. -
Step 7
Once meringue caps and stems are completely cool and crisp, gently melt 2 oz (60g) dark chocolate using a double boiler or microwave. Dip the flat top of a meringue stem into the melted chocolate, then immediately press it firmly but gently onto the center of an inverted meringue cap. Hold in place for a few seconds to allow the chocolate to begin setting. Repeat for all mushrooms. -
Step 8
Carefully transfer assembled mushrooms to a cooling rack and let the chocolate set completely (about 30 minutes at room temperature or 10-15 minutes in the refrigerator). Place 1 tablespoon unsweetened cocoa powder in a fine-mesh sieve and gently dust the tops and undersides of your meringue mushrooms for a beautiful, earthy, and rustic woodland appearance. -
Step 9
Your beautiful meringue mushrooms are ready to be displayed and enjoyed! Store any leftover mushrooms in an airtight container at room temperature for up to a week, protecting them from humidity.
Important Information
Nutrition Facts (Per Serving)
It is important to consider this information as approximate and not to use it as definitive health advice.
Allergy Information
Please check ingredients for potential allergens and consult a health professional if in doubt.