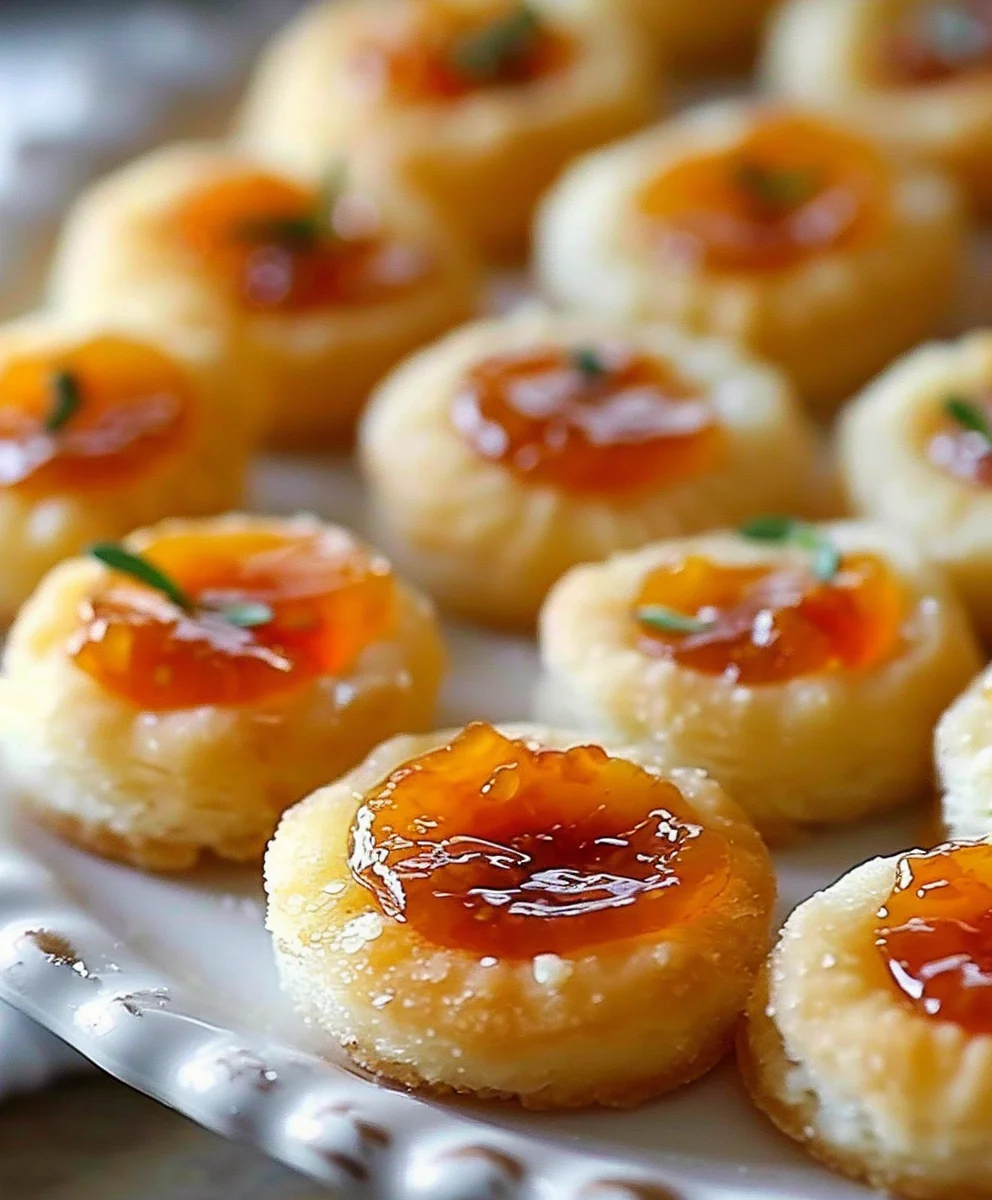
Cheesy Thumbprint Appetizers With Hot Pepper Jelly are about to become your new favorite go-to recipe for entertaining, holidays, or simply elevating a quiet evening at home. Imagine a perfect, bite-sized package that delivers an explosion of contrasting yet harmonious flavors and textures, leaving your guests utterly captivated from the very first nibble. I absolutely adore these little gems because they strike that magnificent balance between creamy, savory cheese and the vibrant, sweet-with-a-kick hot pepper jelly – a combination that truly sings on the palate.
While the classic thumbprint cookie is a beloved sweet treat, often associated with holiday baking and a touch of nostalgic charm, this savory rendition transforms the familiar into something remarkably sophisticated. We’re taking that charming “thumbprint” concept and infusing it with a modern, piquant twist, proving that the best innovations often build on cherished traditions. It’s a delightful evolution, showcasing how simple, quality ingredients can create something truly extraordinary and memorable.
Why Everyone Loves These Cheesy Thumbprint Appetizers
What truly makes these Cheesy Thumbprint Appetizers With Hot Pepper Jelly so incredibly popular is their irresistible appeal on multiple fronts. The tender, melt-in-your-mouth cheese base provides a comforting, rich foundation, perfectly complemented by the bright, tangy, and subtly spicy kick of the hot pepper jelly. They’re incredibly easy to prepare, making them an ideal choice for busy hosts who want to impress without the stress. Visually appealing, utterly delicious, and conveniently bite-sized, they are guaranteed to disappear from the platter almost as quickly as you can set them down.

Ingredients:
- For the Irresistibly Cheesy Shortbread Base:
- 1 cup (2 sticks or 226g) unsalted butter, softened to true room temperature
- 8 ounces (approximately 2 cups packed) sharp cheddar cheese, finely grated (I recommend grating it yourself for the best texture!)
- 4 ounces (approximately 1 cup packed) Parmesan cheese, finely grated (freshly grated is always superior for flavor and texture)
- 2 ½ cups (300g) all-purpose flour
- 1 teaspoon sea salt
- ½ teaspoon garlic powder
- ¼ teaspoon cayenne pepper (this is entirely optional, but it adds a lovely, subtle warmth to the dough itself)
- For the Vibrant Hot Pepper Jelly Filling:
- ¾ cup hot pepper jelly, or your absolute favorite sweet and spicy variety. Don’t be shy about choosing one with a kick!
- For Garnish (Optional, but highly recommended for visual appeal and fresh flavor):
- 2 tablespoons fresh chives, very finely chopped
- A tiny sprinkle of red pepper flakes for an extra fiery touch (only for the bold!)
Preparing the Irresistibly Cheesy Dough
- Bring Butter to Perfect Room Temperature: Before you even think about starting to mix, it is absolutely essential that your 1 cup (2 sticks) of unsalted butter is genuinely softened to room temperature. This is not just a suggestion; it’s a critical step for achieving that wonderfully light, airy, and creamy texture we’re aiming for when we “cream” it with the cheese. If your butter is too cold, it won’t incorporate properly, leading to a lumpy mixture, and if it’s melted or too soft, your dough will be greasy and much harder to handle. I typically take my butter out of the refrigerator about 1 to 2 hours before I plan to start baking. You want it to be soft enough that you can easily make an indentation with your finger, but it should still hold its shape and not look shiny or oily. This perfect consistency sets the foundation for your delightful Cheesy Thumbprint Appetizers With Hot Pepper Jelly.
- Grate Your Cheeses with Care: Next, let’s turn our attention to the star of our cheesy base – the cheese! For these incredibly delicious Cheesy Thumbprint Appetizers With Hot Pepper Jelly, fresh grating truly makes all the difference in both flavor and texture. Take your 8 ounces of sharp cheddar cheese and 4 ounces of Parmesan cheese and grate them finely. I strongly advise against using pre-shredded cheeses, as they often contain anti-caking agents like cellulose, which can slightly alter the texture of your dough, making it less tender and sometimes a little mealy. The sharp cheddar brings a robust, tangy, and deeply savory flavor, while the Parmesan adds a salty, nutty, and umami depth that truly elevates the base beyond a simple cracker.
- Cream the Butter and Cheeses to Perfection: In a large mixing bowl, or the bowl of your stand mixer fitted with the paddle attachment, combine the perfectly softened butter with both the finely grated sharp cheddar and Parmesan cheeses. Beat these together on medium speed for a good 3 to 4 minutes. Your primary goal during this step is to achieve a light and fluffy consistency. The mixture should become noticeably paler in color and increase slightly in volume as air is incorporated into it. Make sure to scrape down the sides of the bowl frequently with a rubber spatula to ensure that everything is thoroughly combined and no pockets of unmixed butter or cheese remain. This thorough creaming step is absolutely vital for developing the tender, delicate texture of our cheesy shortbread base.
- Whisk Dry Ingredients for Even Distribution: In a separate, medium-sized bowl, accurately measure out your 2 ½ cups of all-purpose flour. To this, add the 1 teaspoon of sea salt, ½ teaspoon of garlic powder, and if you’re feeling a bit adventurous and desire a tiny, subtle hint of heat directly in the dough itself, include the ¼ teaspoon of cayenne pepper. Whisk these dry ingredients together thoroughly for about 30 seconds, or until they are completely combined. This seemingly simple step is crucial because it ensures that the salt, garlic powder, and cayenne (if you’re using it) are evenly distributed throughout the flour. This prevents any unpleasant pockets of intense flavor or saltiness in your final baked thumbprints and contributes to a consistent, balanced taste in every bite of your Cheesy Thumbprint Appetizers With Hot Pepper Jelly.
- Gently Combine Wet and Dry Ingredients: Now, with your mixer on low speed, begin to gradually add the whisked dry ingredients to the rich butter and cheese mixture. Do this in two or three additions, mixing just until the flour is barely incorporated. This is a critical moment where you must be careful not to overmix! Overmixing is the enemy of tender baked goods; it develops the gluten in the flour excessively, which can lead to a tough, dense, and less-than-desirable shortbread base. We are absolutely aiming for a delicate, melt-in-your-mouth texture for these delightful Cheesy Thumbprint Appetizers With Hot Pepper Jelly. Stop mixing as soon as no visible streaks of dry flour remain. The dough will initially look a bit crumbly, but it will quickly come together into a soft, pliable ball as you continue to gently mix.
- Form and Thoroughly Chill the Dough: Once the dough has come together, gather it from the bowl and gently form it into a flattened disk or a rough log shape. Wrap it tightly in plastic wrap, ensuring it’s completely sealed. Now comes what some might consider the hardest part: chilling! Place the dough in the refrigerator for at least 1 hour, but I personally find that 2 hours yields even better results. Chilling is absolutely essential for several significant reasons: it firms up the butter, which makes the dough much, much easier to handle and prevents it from becoming too sticky; it significantly prevents the cookies from spreading excessively and losing their shape during baking; and perhaps most importantly, it allows all of those wonderful cheesy and savory flavors to meld and deepen, resulting in a more complex and flavorful cheesy base. You can even prepare this dough a day or two in advance and keep it chilled until you’re perfectly ready to bake, making these Cheesy Thumbprint Appetizers With Hot Pepper Jelly an excellent make-ahead option for entertaining.
Forming and Baking the Golden Cheesy Shells
- Preheat Your Oven and Prepare Baking Sheets: Approximately 15-20 minutes before you’re ready to start forming and baking, preheat your oven to 375°F (190°C). While the oven is heating, take two large baking sheets and line them with parchment paper or silicone baking mats. This crucial step not only prevents the thumbprints from sticking to the pan but also ensures more even baking and makes cleanup an absolute breeze. Having two sheets ready means you can work continuously, or bake in efficient batches if your oven isn’t quite large enough to accommodate both sheets at once.
- Portion the Chilled Dough Precisely: Remove the thoroughly chilled dough from the refrigerator. If it feels extremely firm and difficult to work with, allow it to sit at room temperature for just 5-10 minutes to make it slightly more pliable, but be careful not to let it get too warm and sticky. Pinch off small, uniform portions of dough, aiming for about 1 tablespoon each. A small cookie scoop (like a #50 or #60 scoop) can be incredibly helpful here for achieving consistent sizing, or you can simply use a standard measuring spoon. Aim for as uniform a size as possible, as this will ensure they all bake evenly and look professional on your serving platter. You should be able to get approximately 36-40 perfectly sized thumbprint shells from this recipe, an ideal quantity for serving a crowd with your amazing Cheesy Thumbprint Appetizers With Hot Pepper Jelly.
- Roll Each Portion into Smooth Balls: Take each individual portion of dough and roll it gently between the palms of your hands to form a smooth, uniform ball. This step helps to create a consistent texture and appearance for each thumbprint. Place these neatly rolled dough balls about 1 ½ to 2 inches apart on your prepared baking sheets. It’s important to give them a little bit of space, as they will spread ever so slightly during the baking process, and you don’t want them to meld together.
- Create the Signature “Thumbprint” Indentation: Now for the defining characteristic of these appetizers – the “thumbprint” itself! You have a few excellent options here. Traditionally, you would use your actual thumb, pressing gently but firmly into the center of each dough ball to create a distinct, deep well. If you prefer a more uniform indentation, or if your thumbs are on the smaller side, the back of a rounded ½ teaspoon measuring spoon, or even the end of a wooden spoon handle, works beautifully. The key here is to press down far enough to create a distinct and adequately deep cavity, but be careful not to press so deep that you go all the way through the bottom of the dough ball. The edges of the indentation might crack slightly, which is perfectly normal and expected for a shortbread-style dough; simply gently press any significant cracks back together with your fingers to neaten them up. This well will become the cozy, flavorful home for our vibrant hot pepper jelly.
- Pre-Bake the Cheesy Shells: Carefully place the baking sheets into your preheated oven. Bake for an initial 10-12 minutes, or until the very edges of the cheesy shells are just beginning to turn a very light, subtle golden brown, and the centers appear set and firm to the touch. The savory, cheesy aroma filling your kitchen right now will be absolutely delightful and a strong hint of the deliciousness to come! We are pre-baking them specifically to give the cheesy base a crucial head start and to help it firm up sufficiently before we introduce the jelly. This method prevents the jelly from soaking into the dough too much and helps maintain the integrity of the base, keeping it nice and crisp – which is absolutely crucial for the best possible texture and overall experience of your Cheesy Thumbprint Appetizers With Hot Pepper Jelly.
- Remove and Re-Indent (If Necessary): Carefully remove the baking sheets from the oven. At this stage, it’s quite common for the indentations to have puffed up slightly during the initial bake. If they have, gently re-press the centers with your thumb, the back of a small spoon, or your chosen tool to deepen the wells again. Do this while the shells are still warm and pliable; they will be less prone to cracking. This crucial step ensures there’s ample space for a generous amount of that delicious hot pepper jelly.
Filling, Finishing, and Serving Your Appetizers
- Generously Fill with Hot Pepper Jelly: Once your cheesy shells are perfectly pre-baked and their indentations are clear and ready, it’s time to introduce the star of the show: the hot pepper jelly! Using a small spoon, carefully dollop about ½ to 1 teaspoon of hot pepper jelly into each thumbprint. The exact amount will depend on the size and depth of your indentation, so use your judgment. You want to fill it generously to ensure a burst of flavor in every bite, but be careful not to overfill, as it might bubble over during the final bake. The vibrant, jewel-toned color of the jelly against the golden cheese base is already making these look incredibly appealing and irresistible. The delightful balance of sweetness and subtle (or not-so-subtle, depending on your jelly!) heat from the hot pepper jelly will perfectly complement and cut through the rich, savory deliciousness of the cheesy shortbread base. This combination is what makes these Cheesy Thumbprint Appetizers With Hot Pepper Jelly truly shine.
- Return to Oven for Final Bake and Setting: Carefully place the baking sheets, now adorned with their lovely jelly fillings, back into your preheated oven. Bake for an additional 5-8 minutes, or until the jelly is visibly bubbly and appears slightly set, and the edges of the cheesy shells have deepened to a beautiful golden brown and feel firm to the touch. It’s important to keep a very close eye on them during this final stage, as oven temperatures can vary, and you certainly don’t want the delicate jelly to scorch or burn. The goal here is to warm the jelly thoroughly through and allow it to slightly meld with the cheesy base, creating a cohesive and incredibly flavorful bite. This last bake is the final magical touch that truly transforms them into magnificent and unforgettable Cheesy Thumbprint Appetizers With Hot Pepper Jelly.
- Cool Before Serving for Optimal Texture and Safety: Once your appetizers are baked to perfection, carefully remove the baking sheets from the oven. It’s important to let the appetizers cool on the baking sheets for about 5-10 minutes. The jelly will be extremely hot and quite sticky right out of the oven, so allowing it this initial cooling time on the sheet helps it to set up slightly and reduces the risk of burns. After this initial cooling, carefully transfer the warm Cheesy Thumbprint Appetizers With Hot Pepper Jelly to a wire cooling rack to cool completely. This crucial cooling step is important for both safety (to avoid burning your mouth on molten jelly) and for the texture; the cheesy base will crisp up a bit more as it cools, achieving that desirable tender-crisp shortbread consistency.
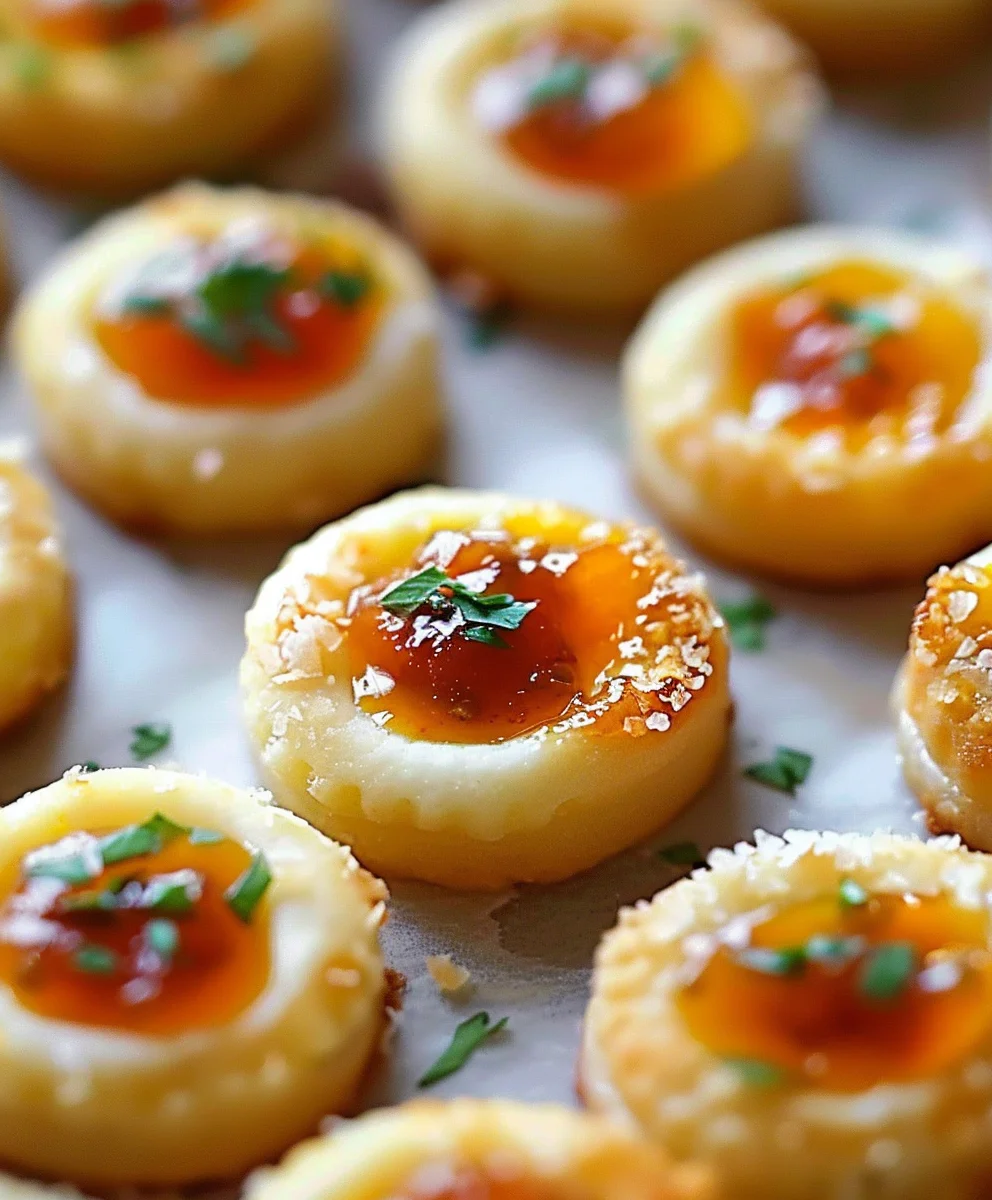
- Garnish and Present Your Culinary Creations: If you’re using garnishes, now is the perfect time to add them! Once the appetizers have cooled completely, you can sprinkle the tops with finely chopped fresh chives. These add a wonderful touch of fresh oniony flavor, a subtle herbaceous note, and a vibrant pop of green color that beautifully contrasts with the red jelly and golden base. For those who absolutely adore an extra fiery kick, a tiny pinch of red pepper flakes can also be artfully added directly onto the jelly. Arrange your stunning Cheesy Thumbprint Appetizers With Hot Pepper Jelly beautifully on your favorite serving platter and proudly present them to your eagerly awaiting guests. They are sure to be a showstopper!
Tips for Perfection and Delightful Variations
Ensuring Your Cheesy Thumbprint Appetizers Are Always a Culinary Hit
- The Importance of Room Temperature Butter: I truly cannot stress enough the absolute importance of using truly room temperature butter. It is, in my opinion, the ultimate secret to achieving a perfectly smooth, light, and wonderfully tender dough every single time. If you happen to forget to take it out in advance, don’t despair! You can cut it into smaller, 1-inch pieces and let it sit for about 15-20 minutes, or as a last resort, gently microwave it in very short 5-second bursts until it softens, but be incredibly careful not to melt it even slightly, as this will compromise the texture of your dough.
- Invest in Quality Cheese: Always, always opt for good quality, sharp cheddar cheese and, if possible, freshly grated Parmesan. The quality and robust flavor profile of your chosen cheese directly and significantly impacts the overall taste and deliciousness of these appetizers. As mentioned before, pre-shredded cheeses, while convenient, often contain starches and anti-caking agents that can make your dough a little stiffer, less tender, and less flavorful, which is definitely not what we want for these delicate cheesy bites.
- Do Not Rush the Chill Time: The chilling step for the dough is not merely a suggestion; it is a critical and non-negotiable component for achieving success with this recipe. It plays a vital role in preventing the thumbprints from spreading too much and losing their shape in the oven, it allows all those wonderful flavors to meld and deepen beautifully, and it makes the dough infinitely easier to handle and shape. If your kitchen happens to be particularly warm, or if your dough feels too soft after the recommended time, you might even need to chill it for a bit longer. Patience here will be rewarded!
- Experiment with Different Jellies: While the hot pepper jelly is a phenomenal choice and creates the classic Cheesy Thumbprint Appetizers With Hot Pepper Jelly, feel absolutely free to explore and experiment with other delicious options! A vibrant fig jam, a sweet apricot preserves with a subtle hint of chili, a tangy cranberry jalapeño jelly, or even a spicy tomato jam could all be wonderful and exciting alternatives. These variations allow you to customize the flavor profile of your appetizers to suit different tastes or occasions. Just ensure that your chosen jelly isn’t too thin or watery, as this might cause it to soak into the dough too much and make the base soggy.
- Explore Savory-Only Variations: For those who might prefer a purely savory take on this delightful appetizer, you could easily adapt the recipe! Instead of jelly, consider filling the pre-baked thumbprints with a small dollop of homemade or store-bought pesto, a savory sun-dried tomato tapenade, a rich caramelized onion jam, or even a creamy olive tapenade. If you go this route, adjust the final bake time accordingly, as these types of fillings might need less time to warm through and set compared to jelly.
-
Master the Make-Ahead Magic: This recipe is incredibly well-suited for making ahead, which is a huge advantage when you’re entertaining or busy!
- Dough Preparation: The prepared cheesy dough can be tightly wrapped in plastic wrap and kept in the refrigerator for up to 3 days. For longer storage, it can be securely wrapped and frozen for up to 3 months. If freezing, remember to thaw it thoroughly in the refrigerator overnight before you plan to proceed with step 8.
- Baked Shells (Unfilled): You can bake the cheesy shells through step 12, let them cool completely on a wire rack, and then store them in an airtight container at room temperature for up to 2 days. Alternatively, they can be frozen for up to 1 month. When you’re ready to serve, thaw them if frozen, then fill them with your chosen jelly, and proceed directly with step 14 for the final bake.
- Finished Appetizers: Fully baked Cheesy Thumbprint Appetizers With Hot Pepper Jelly can be stored in an airtight container at room temperature for up to 2-3 days, though I find they are truly at their absolute best when enjoyed fresh on the day they are baked. If you wish to serve them warm later, they can be gently reheated in a low oven (around 300°F or 150°C) for about 5-7 minutes to warm the jelly and re-crisp the cheesy base.
Thoughtful Serving Suggestions for Your Guests
These exquisite Cheesy Thumbprint Appetizers With Hot Pepper Jelly are incredibly versatile and make a fantastic, always-welcome addition to almost any gathering or occasion. Their perfect bite-sized nature and balanced flavors make them universally appealing. Here are a few ideas for how to best present and enjoy them:
- Sophisticated Cocktail Parties: They are absolutely ideal for cocktail parties! Offering a perfect and addictive balance of savory, sweet, and spicy in a convenient, elegant, and bite-sized format. I love pairing them with a crisp, dry white wine like Sauvignon Blanc, a refreshing dry rosé, or a classic gin and tonic to complement their vibrant flavors.
- Festive Holiday Gatherings: The beautiful, festive colors (especially with red pepper jelly!) and the comforting, yet exciting, flavors make them an undeniable hit during the holiday season. They look stunning arranged on a holiday platter alongside other festive treats and can easily become a new family tradition.
- Elevated Game Day Spreads: Looking to elevate your game-day snacks beyond the usual chips and dips? These thumbprints will be a phenomenal crowd-pleaser, providing a gourmet, yet approachable, touch to your spread that will have everyone reaching for more.
- Charming Brunch Presentations: Yes, even for brunch! A beautifully arranged tray of these Cheesy Thumbprint Appetizers With Hot Pepper Jelly would provide a delightful savory-sweet contrast to typical brunch fare. They pair wonderfully with mimosas, a spicy Bloody Mary, or even a cup of rich, dark coffee.
Every single bite of these Cheesy Thumbprint Appetizers With Hot Pepper Jelly offers a delightful and unforgettable explosion of flavor and texture – the tender, cheesy shortbread melting delicately in your mouth, perfectly followed by the sweet, tangy, and wonderfully spicy kick of the hot pepper jelly. They are truly an unforgettable appetizer that will have your guests not only raving about them but also eagerly asking you for the cherished recipe!
Conclusion:
And there you have it, my friends! We’ve reached the delicious culmination of our culinary journey. I genuinely hope you’re feeling as excited as I am about trying this incredible recipe. What makes these particular treats an absolute must-try isn’t just their undeniable charm and effortless elegance; it’s the magical symphony of flavors and textures they bring to the table. Imagine a perfectly tender, savory pastry, embracing a molten core of creamy, rich cheese, all crowned with a vibrant dollop of sweet and spicy hot pepper jelly. It’s a combination that truly sings, hitting every note from comforting warmth to an exhilarating kick. These aren’t just appetizers; they are tiny bursts of pure joy, designed to impress without demanding hours of your precious time. They are the epitome of an impressive yet easy-to-make dish, proving that you don’t need a gourmet kitchen to create something truly memorable. The first time I served these, I knew I had a winner, and I am confident they’ll become a staple in your entertaining repertoire too. When I talk about the absolute best in crowd-pleasing finger foods, these Cheesy Thumbprint Appetizers With Hot Pepper Jelly are always at the top of my list.
The Irresistible Allure of These Bites
Let’s dive a little deeper into why these little bites are so captivating. The pastry itself offers a delightful contrast – crisp on the outside, yet tender and flaky within, providing the perfect foundation for the fillings. The cheese, whether you stick to the classic cheddar or venture into other delightful varieties, melts into a gooey, savory dream. And then there’s the hot pepper jelly, the star of the show, delivering that crucial balance of sweetness, tang, and a gentle warmth that awakens your palate without overwhelming it. It’s this beautiful interplay of savory, sweet, and spicy, combined with varying textures, that makes each bite an experience in itself. They look intricate and elegant, but our secret is how incredibly simple they are to assemble. This makes them not just a fantastic dish to serve, but a genuinely rewarding one to prepare.
Perfect for Any Occasion
One of the many reasons I adore this recipe is its incredible versatility. These appetizers are genuinely suitable for almost any gathering you can imagine. Are you hosting a sophisticated holiday cocktail party? These will be the talk of the evening, adding a touch of festive color and gourmet flair. Planning a casual game day get-together? They’re robust enough to stand up to a lively crowd and disappear quickly. Think about a cozy brunch with friends – a slightly larger version could even be a delightful savory pastry to accompany coffee. Or perhaps you’re simply looking for an impressive yet easy starter for a weeknight dinner party. No matter the event, these little gems rise to the occasion, making you look like a culinary genius with minimal effort. They pair beautifully with a crisp white wine, a light beer, or even a sparkling non-alcoholic cider, truly complementing any beverage you choose to serve.
Unleash Your Inner Chef: Creative Variations
While the classic combination is undeniably perfect, don’t hesitate to get creative and make this recipe your own! Here are a few serving suggestions and variations to inspire you. For a different cheesy experience, consider using creamy goat cheese, which offers a delightful tang, or a smoked gouda for an added layer of complexity. Blue cheese crumbles could introduce a bold, piquant flavor, while a sharp provolone would melt beautifully and add a distinct Italian touch. If you’re looking to switch up the jelly, fig jam provides a luxurious, earthy sweetness that pairs wonderfully with savory cheese, especially goat cheese. Apricot preserves can offer a brighter, fruitier note, or for a truly festive twist, a cranberry-orange relish could be absolutely divine during the winter holidays. You could also experiment with the dough itself – a pinch of dried rosemary or thyme mixed in would add an aromatic herbaceousness, or a touch of smoked paprika could deepen the savory profile. For an extra textural element, consider sprinkling a few toasted pecans or walnuts around the jelly before baking, or a fine dusting of fresh chives or chopped parsley after they come out of the oven for a pop of color and freshness. The possibilities are truly endless, allowing you to tailor these appetizers to your exact taste or the preferences of your guests.
Your Invitation to Create and Share!
So, what are you waiting for? I wholeheartedly encourage you to roll up your sleeves, gather your ingredients, and give this recipe a try. You’ll be amazed at how simple it is to create something so incredibly delicious and visually appealing. Cooking should be an adventure, a source of joy and creativity, and I truly believe these appetizers embody that spirit. Don’t be shy about experimenting with the suggestions I’ve shared, or even coming up with your own unique twists. Once you’ve baked your batch of these delightful treats, I would absolutely love to hear about your experience! Did you stick to the classic recipe, or did you venture into exciting new variations? How did your friends and family react? Please feel free to share your thoughts, tips, and even your mouth-watering photos in the comments section below. Your feedback and creativity inspire not only me but also our entire community of enthusiastic home cooks. Let’s celebrate the joy of good food together! Happy baking, and I can’t wait to see what you create!
Cheesy Thumbprint Appetizers with Zesty Hot Pepper Jelly!
These Cheesy Thumbprint Appetizers with Hot Pepper Jelly are a perfect bite-sized package of contrasting yet harmonious flavors and textures. A tender, melt-in-your-mouth cheese base is perfectly complemented by the bright, tangy, and subtly spicy kick of hot pepper jelly, making them ideal for entertaining or a sophisticated snack.
Ingredients
-
1 cup shredded sharp cheddar cheese
-
4 oz cream cheese, softened
-
½ cup unsalted butter, softened
-
1 cup all-purpose flour
-
⅓ cup hot pepper jelly (store-bought or homemade)
Instructions
-
Step 1
Ensure butter and cream cheese are softened to room temperature. In a large bowl, cream together the softened unsalted butter, softened cream cheese, and shredded sharp cheddar cheese until the mixture is light and fluffy. Scrape down the sides of the bowl as needed to ensure even mixing. -
Step 2
In a separate, medium-sized bowl, whisk together the all-purpose flour. -
Step 3
Gradually add the whisked flour to the cheese mixture on low speed, mixing just until no dry streaks of flour remain. Avoid overmixing. Gently gather the dough into a flattened disk or log, wrap it tightly in plastic wrap, and refrigerate for at least 1-2 hours (or up to 2 days) until thoroughly chilled and firm. -
Step 4
Approximately 15-20 minutes before baking, preheat your oven to 375°F (190°C). Line two large baking sheets with parchment paper. Remove the chilled dough and pinch off small, uniform portions (about 1 tablespoon each). Roll each portion into a smooth ball and place them 1½ to 2 inches apart on the prepared baking sheets. -
Step 5
Press gently but firmly into the center of each dough ball with your thumb or the back of a small rounded spoon to create a distinct, deep well. Gently press any significant cracks back together. Bake for an initial 10-12 minutes, or until the edges are just beginning to turn a very light golden brown and the centers appear set. Remove from oven and gently re-press the indentations if they have puffed up during baking, while the shells are still warm. -
Step 6
Carefully dollop about ½ to 1 teaspoon of hot pepper jelly into each thumbprint, filling generously but avoiding overfilling. Return the baking sheets to the preheated oven and bake for an additional 5-8 minutes, or until the jelly is visibly bubbly and appears slightly set, and the cheesy shells have deepened to a beautiful golden brown. -
Step 7
Remove the baked appetizers from the oven and let them cool on the baking sheets for 5-10 minutes. Then, carefully transfer them to a wire cooling rack to cool completely. For garnish, sprinkle with finely chopped fresh chives or a tiny pinch of red pepper flakes, if desired, before arranging on a platter and serving to your guests.
Important Information
Nutrition Facts (Per Serving)
It is important to consider this information as approximate and not to use it as definitive health advice.
Allergy Information
Please check ingredients for potential allergens and consult a health professional if in doubt.