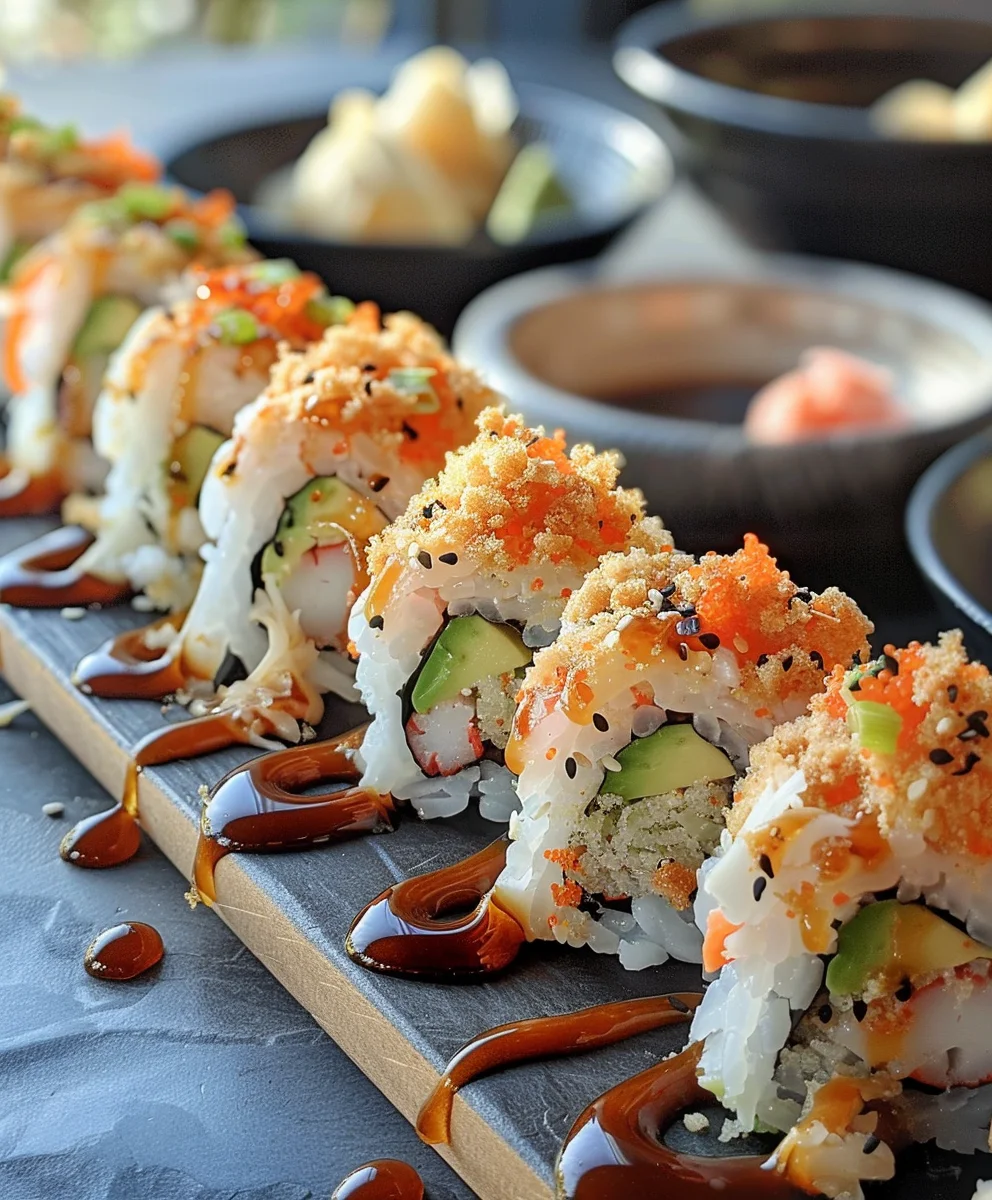
Homemade California Crunch Roll Sushi – does the thought alone make your taste buds tingle? If you’ve ever found yourself longing for that perfect combination of creamy avocado, sweet and savory imitation crab, tangy sushi rice, and, most importantly, that irresistible crispy crunch, then you’re in for a treat! This particular sushi roll isn’t just a meal; it’s a beloved culinary experience that has captivated palates worldwide. While the traditional California Roll itself is a fascinating North American innovation, often credited with popularizing sushi outside of Japan and making sushi accessible to a broader audience, the “crunch” variation takes it to another level of textural delight, blending comfort with a playful zest.
People absolutely adore this dish not only for its beautifully balanced flavors – the rich creaminess, the subtle sweetness, the hint of tang – but also for its unparalleled texture. The delicate, melt-in-your-mouth components are perfectly contrasted by the satisfying crispiness, usually from fried tempura flakes, creating a symphony of sensations with every single bite. It’s the ultimate comfort food for many, accessible, incredibly enjoyable, and surprisingly simple to master. Today, I’m thrilled to share how rewarding and delightfully easy it is to create your very own authentic and delicious Homemade California Crunch Roll Sushi. Forget expensive takeout; prepare to impress yourself and your loved ones with this culinary masterpiece made right in your own kitchen.

Ingredients:
- For the Sushi Rice:
- 2 cups sushi-grade short-grain or Calrose rice
- 2 cups cold water (for cooking)
- ½ cup rice vinegar (unseasoned)
- 2 tablespoons granulated sugar
- 1 teaspoon fine sea salt
- For the Crunch Topping:
- 1 cup panko breadcrumbs
- ½ cup all-purpose flour
- ½ cup cold water (plus more if needed for batter consistency)
- ½ teaspoon fine sea salt
- Vegetable oil or canola oil, for deep frying
- For the Fillings:
- 6-8 imitation crab sticks (surimi), thawed if frozen
- 1 large ripe avocado, peeled, pitted, and sliced thinly
- ½ English cucumber, seeded and cut into thin matchsticks
- 4-5 sheets nori (seaweed wraps)
- For the Spicy Mayonnaise (Optional but highly recommended!):
- ½ cup good quality mayonnaise
- 1-2 tablespoons Sriracha hot sauce (adjust to your spice preference)
- For Serving and Garnish:
- Toasted sesame seeds (white or black, or a mix)
- Soy sauce
- Wasabi
- Pickled ginger
Preparing the Sushi Rice: The Foundation of Your Homemade California Crunch Roll Sushi
- Rinsing the Rice: To begin our journey to creating the perfect Homemade California Crunch Roll Sushi, we first need to master the sushi rice. This is arguably the most critical component, as its texture and flavor form the foundation of our entire roll. I always recommend using a good quality short-grain or Calrose rice specifically labelled for sushi. The key here is to remove excess starch without breaking the grains. Start by placing your measured rice into a large bowl. Fill the bowl with cold water, swirling the rice gently with your hand. You’ll notice the water quickly turns milky and opaque. Carefully drain this water, making sure not to lose any grains. Repeat this rinsing process about 5-7 times, or until the water runs mostly clear. This step is non-negotiable for achieving that distinct, slightly sticky but separate grain texture that is characteristic of authentic sushi rice. Once rinsed, drain the rice thoroughly using a fine-mesh sieve and let it sit for about 15-20 minutes. This allows the remaining surface water to evaporate slightly, preparing the grains for optimal absorption during cooking.
- Cooking the Rice: Next, transfer the drained rice to your rice cooker pot or a heavy-bottomed saucepan with a tight-fitting lid. Add the specified amount of cold water (typically a 1:1 ratio for rice cooker, or slightly more for stovetop – consult your rice package, but I find 1 cup rice to 1 cup water works well for sushi rice in a cooker, and 1 cup rice to 1.25 cups water for stovetop). If using a rice cooker, simply set it to the ‘sushi rice’ or ‘white rice’ setting and let it do its magic. If using a stovetop, bring the water to a rolling boil over high heat. As soon as it boils, reduce the heat to the lowest possible setting, cover the pot tightly, and let it simmer undisturbed for 15-18 minutes. Resist the urge to peek! Lifting the lid releases crucial steam and heat, which can result in unevenly cooked rice. After 15-18 minutes, remove the pot from the heat and let it rest, still covered, for an additional 10 minutes. This resting period allows the steam to redistribute and the rice to fully absorb any remaining moisture, giving it that perfect fluffy yet slightly firm texture. Once rested, immediately transfer the cooked rice to a large, non-metallic bowl or a traditional wooden hangiri. Use a wooden or silicone spatula to gently separate the grains. Do not mash or stir vigorously, as this can break the delicate grains.
- Seasoning the Rice (Sushi-su): While the rice is cooking or resting, prepare your sushi vinegar mixture (sushi-su). In a small saucepan, combine the rice vinegar, granulated sugar, and salt. Heat gently over low heat, stirring constantly, until the sugar and salt are completely dissolved. Do not boil the mixture; we just want it warm enough to dissolve the solids. Remove from heat and set aside to cool slightly.
- Folding in the Sushi-su: Once the cooked rice has been transferred to your bowl and gently fluffed, pour the slightly cooled sushi-su evenly over the rice. Using your wooden or silicone spatula, employ a gentle slicing and folding motion. Imagine you’re “cutting” the rice with the edge of the spatula and then gently folding it over. The goal is to evenly distribute the seasoning without mashing the rice or making it clumpy. This process also helps to cool the rice and gives it that beautiful, glossy finish. Continue folding for about 5-7 minutes, or until the rice has absorbed the vinegar mixture and has a slightly firm, yet still sticky, texture.
- Cooling the Rice: Spread the seasoned rice into a thin, even layer in your bowl. You can use a fan (a handheld fan or even a small desk fan on a low setting) to help cool the rice to room temperature more quickly. As it cools, the rice will become stickier and easier to handle for rolling. It’s crucial that the rice is at room temperature before you start making your rolls. Hot rice will cause the nori to soften and tear, and cold rice will be too stiff to work with. Once cooled, cover the bowl with a damp cloth or plastic wrap to prevent the rice from drying out while you prepare the other components of your Homemade California Crunch Roll Sushi.
Crafting the Irresistible Crunch Topping
- Preparing the Batter: In a medium bowl, whisk together the all-purpose flour and ½ teaspoon of salt. Gradually add ½ cup of cold water, whisking continuously until you have a smooth batter with the consistency of thin pancake batter. It should be just thick enough to coat the back of a spoon lightly. If it’s too thick, add a tiny bit more water, a teaspoon at a time. The cold water is important here as it helps create a crispier final product.
- Coating the Panko: Pour the panko breadcrumbs into a separate shallow dish or plate. Dip small handfuls of the panko into the batter, ensuring they are lightly coated. You don’t want them completely drenched and soggy; just enough batter to bind them together slightly and create texture. You can also drizzle the batter directly over the panko and mix with your hands, ensuring an uneven but thorough coating. The goal is to create irregular, crunchy clusters, not uniform breaded pieces.
- Frying the Crunch: Heat about 2-3 inches of vegetable or canola oil in a deep, heavy-bottomed pot or a deep fryer to 350-375°F (175-190°C). If you don’t have a thermometer, you can test the oil by dropping a tiny bit of batter in – it should sizzle immediately and float to the surface. Once the oil is hot, carefully drop small batches of the coated panko into the hot oil. Do not overcrowd the pot, as this will lower the oil temperature and result in greasy, rather than crispy, crunch. Fry for 1-2 minutes, or until the panko is beautifully golden brown and incredibly crispy.
- Draining and Seasoning: Using a slotted spoon or spider, transfer the fried panko clusters to a plate lined with paper towels to drain excess oil. While they are still warm, you can sprinkle a tiny pinch more of salt if desired, though the salt in the batter should be sufficient. Allow them to cool completely. As they cool, they will become even crispier. Once cooled, gently break apart any large clumps into smaller, bite-sized “crunch” pieces suitable for topping your sushi rolls. Store any unused crunch in an airtight container at room temperature for up to a few days. This crunch is what will elevate your Homemade California Crunch Roll Sushi to the next level!
Preparing the Fresh Fillings and Spicy Mayo
- Slicing the Imitation Crab: If using imitation crab sticks, gently pat them dry with paper towels. You can leave them whole or, for a more even distribution and easier biting experience, slice them lengthwise into halves or even quarters. Some people like to shred them slightly and mix them with a touch of mayonnaise. I personally prefer them sliced, retaining some of their texture.
- Preparing the Avocado: For perfect avocado slices, choose a ripe but firm avocado. Slice it in half lengthwise, twist to separate, and remove the pit. Using a spoon, carefully scoop out the flesh. Place the avocado flesh on a cutting board and slice it thinly, about ⅛ to ¼ inch thick. Work quickly with avocado, as it tends to brown once exposed to air. A tiny squeeze of lemon or lime juice can help prevent discoloration if you’re prepping far in advance.
- Cutting the Cucumber: Wash your English cucumber thoroughly. Since English cucumbers have thin skins and minimal seeds, you generally don’t need to peel or deseed them entirely, but I find removing the very watery seed core helps prevent the roll from getting soggy. Slice the cucumber into thin matchsticks, approximately ¼ inch thick and about 3-4 inches long, to fit neatly within your sushi roll.
- Making the Spicy Mayonnaise (Optional): In a small bowl, combine the mayonnaise and Sriracha hot sauce. Whisk well until thoroughly combined and smooth. Taste and adjust the Sriracha to your preferred level of spiciness. You can also add a tiny dash of sesame oil for an extra layer of flavor. This spicy mayo adds a wonderful kick and creamy texture that pairs beautifully with the other ingredients in your Homemade California Crunch Roll Sushi.
Assembling Your Perfect Homemade California Crunch Roll Sushi
- Set Up Your Rolling Station: You’ll need a bamboo sushi rolling mat (makisu). Cover your bamboo mat tightly with plastic wrap. This prevents the rice from sticking to the mat and makes cleanup a breeze. Have a small bowl of water mixed with a splash of rice vinegar (tezu) nearby – this will be used to dampen your hands, preventing the rice from sticking to them. Gather all your prepared ingredients: the cooled sushi rice, nori sheets, imitation crab, avocado slices, cucumber matchsticks, spicy mayo (if using), toasted sesame seeds, and of course, your glorious crunch topping.
- Laying Down the Nori and Rice: Place one sheet of nori, shiny side down, onto your plastic-wrapped bamboo mat. Dip your hands into the tezu, shaking off any excess water. Take about ¾ to 1 cup of sushi rice and gently spread it evenly over the entire surface of the nori. Apply light, even pressure to ensure the rice forms a thin, uniform layer. It’s okay if a tiny bit of nori shows through, but generally, you want full coverage. Ensure the edges are covered as well.
- Flipping and Adding Fillings: Now for the fun part! Gently sprinkle a generous amount of toasted sesame seeds over the rice. Carefully flip the nori sheet over so the rice-covered side is now facing down on the bamboo mat, and the plain nori side is facing up. This is how we achieve the “rice-out” style typical of California rolls. Arrange your fillings neatly in a line across the center of the nori sheet, closer to the edge nearest you. I usually start with a few imitation crab sticks, then a layer of avocado slices, and finally some cucumber matchsticks. If you’re using spicy mayo, you can drizzle a line of it over the fillings at this point. Don’t overfill the roll, as this will make it difficult to roll tightly.
- The Rolling Technique: Hold the edge of the bamboo mat closest to you, bringing it up and over the fillings, tucking it in to meet the other side of the fillings. Apply gentle but firm pressure to start forming the roll. As you roll forward, lift the edge of the mat slightly, ensuring the plastic wrap doesn’t get rolled into the sushi. Keep rolling, maintaining firm pressure with your hands over the mat to compress the roll into a tight, cylindrical shape. Use the mat to help shape and square off the roll as you go. Once rolled, give it a final gentle squeeze with the mat to ensure it’s uniform and tight. A tightly rolled sushi holds together beautifully and cuts cleanly.
- Slicing the Roll: Transfer the rolled sushi onto a clean cutting board. It’s imperative to use a very sharp knife for slicing sushi. To prevent sticking, dampen your knife blade with a bit of water (or tezu) between each cut. Slice the roll in half, then line up the halves and slice each half into 3 or 4 equal pieces, aiming for 6-8 pieces per roll. Clean your knife as needed. The precision of your knife work truly enhances the presentation of your Homemade California Crunch Roll Sushi.
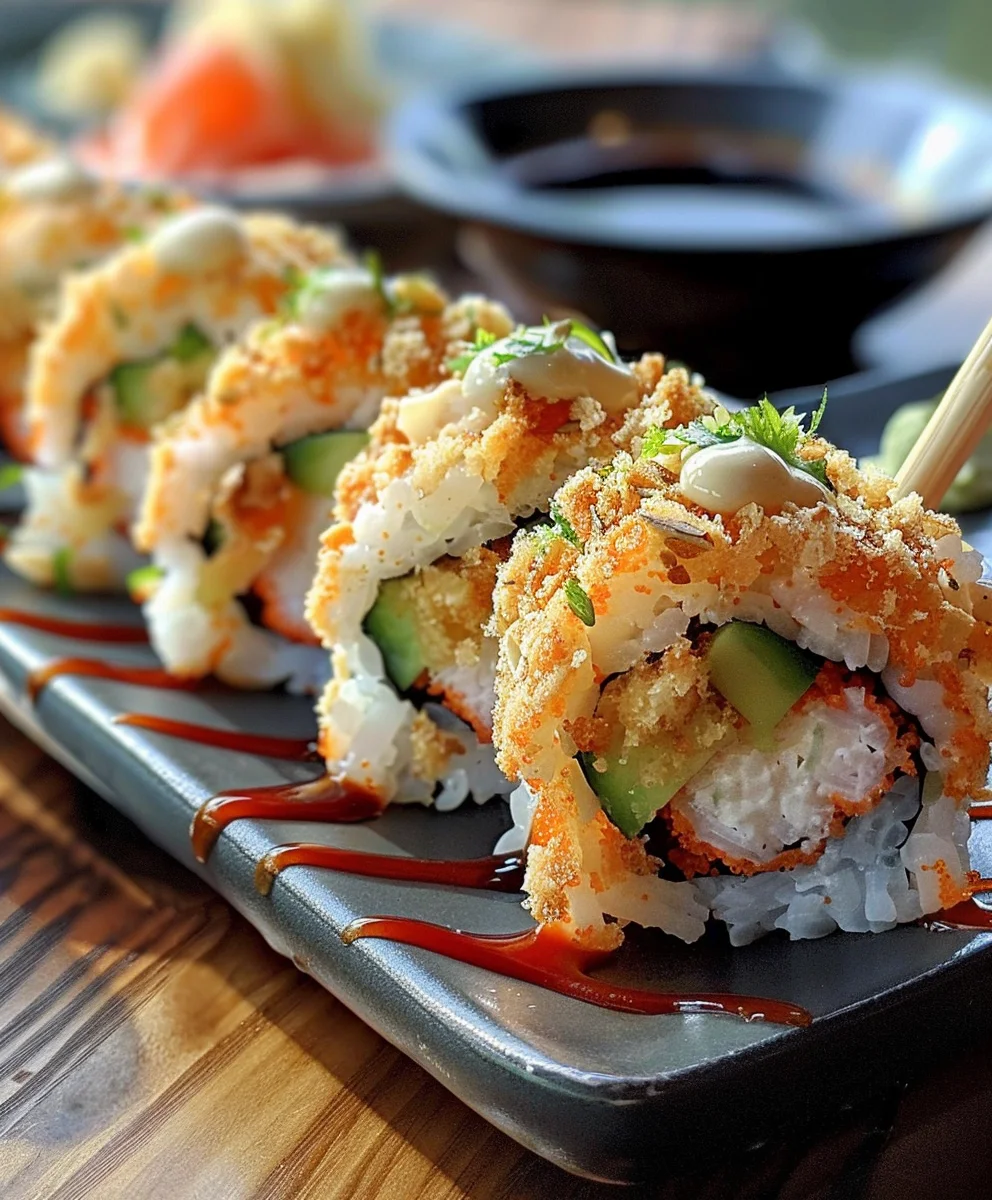
- Adding the Crunch and Final Touches: Now for the star of the show – the crunch! Take your beautifully sliced sushi pieces. You can either gently press the crunch onto the outside of the roll, or for a more elegant presentation, carefully arrange the crunch on top of each individual piece. I often pile a small amount of crunch on top of each slice, creating a delightful visual and textural contrast.
- Serving: Arrange your magnificent Homemade California Crunch Roll Sushi on a platter. Garnish with a sprinkle of additional toasted sesame seeds. Serve immediately with soy sauce, wasabi, and pickled ginger on the side. Enjoy the fruits of your labor and impress your friends and family with this incredible homemade creation!
Conclusion:
After all our culinary adventures together, I truly believe you’ll find that this recipe isn’t just another dish to add to your repertoire; it’s an absolute game-changer. We’ve explored the straightforward steps to creating a sushi experience that rivals your favorite takeout, without any of the intimidation. The sheer delight of expertly rolling your own sushi, knowing exactly what fresh ingredients have gone into every bite, is incredibly rewarding. I’m genuinely thrilled for you to discover the magic of assembling that perfect combination of creamy avocado, crisp cucumber, tender imitation crab, and, of course, that utterly addictive crispy crunch that elevates this roll from great to unforgettable. This is your invitation to bring restaurant-quality flavors and textures into your home, transforming an ordinary meal into an exciting, hands-on cooking project that delivers immense satisfaction.
What makes this particular recipe a must-try isn’t just its fantastic flavor profile or its surprisingly achievable process; it’s the incredible versatility and the sheer joy of creating something so visually stunning and deliciously complex with your own hands. You’ve just learned how to create a masterpiece, the Homemade California Crunch Roll Sushi, right in your own kitchen. Imagine the smiles when you present a platter of these beautiful rolls to friends and family, each one a testament to your newfound sushi-making prowess. The delicate balance of sweet, savory, and umami, combined with that signature textural contrast, makes every bite an exciting discovery. It’s fresh, it’s vibrant, and it’s surprisingly light yet filling, making it perfect for almost any occasion.
When it comes to serving, these homemade crunch rolls are incredibly flexible. They make a fantastic appetizer for a dinner party, a delightful main course for a casual lunch, or even an exciting addition to a picnic spread. I personally love serving them alongside a simple ginger salad with a light sesame dressing or a warm bowl of miso soup for a complete meal. Don’t forget the classic accompaniments: a small dish of good quality soy sauce for dipping, a dollop of fiery wasabi for those who enjoy a kick, and a few slices of pickled ginger to cleanse the palate between bites. For an extra touch, a sprinkle of black or white sesame seeds on top before serving adds both visual appeal and a subtle nutty flavor.
And here’s where the real fun begins: don’t be afraid to get creative with your variations! While our recipe for the Homemade California Crunch Roll Sushi is perfect as is, it’s also a fantastic springboard for your own culinary imagination. Feeling adventurous? Try swapping out the imitation crab for cooked shrimp, baked salmon, or even thin slices of seared tuna for a different protein punch. For veggie lovers, consider adding finely julienned carrots, bell peppers, or even a touch of cream cheese for a richer texture. You could experiment with different types of crispy toppings too – perhaps some toasted panko breadcrumbs for an even bigger crunch, or a drizzle of sriracha mayo for a spicy kick. The possibilities are truly endless, and each variation you try will make the recipe uniquely yours.
So, please, don’t let another day pass without experiencing the immense pleasure of making these rolls yourself. Gather your ingredients, roll up your sleeves, and dive into the satisfying art of sushi making. I promise you, the effort is minimal, and the rewards are absolutely delicious. Once you’ve created your batch of these incredible crunch rolls, I would absolutely love to hear about your experience! Did you stick to the original recipe, or did you put your own spin on it? What were your favorite parts of the process? Snap a photo of your magnificent sushi creations, share them with your friends and family, and be sure to let us know how much you enjoyed making and devouring them. Your success stories and creative variations inspire me and other home cooks, so please don’t hesitate to share your culinary journey with us. Happy rolling, and happy eating!
Homemade California Crunch Roll Sushi
Craving restaurant-quality California Crunch Roll Sushi? This recipe guides you through making the perfect blend of creamy avocado, savory imitation crab, tangy sushi rice, and irresistible crispy crunch at home. Delight your taste buds with this beloved culinary experience.
Ingredients
-
1 cup short-grain white rice
-
1¼ cups water
-
2 tbsp rice vinegar
-
1 tbsp sugar
-
½ tsp salt
-
4 roasted nori sheets (sushi-grade)
-
1 cup imitation crab
-
1 ripe avocado, sliced
-
1 small cucumber, cut into thin strips
-
2 tbsps spicy mayo
-
1 tbsp eel sauce
-
½ cup toasted panko breadcrumbs or French fried onions
-
Cream cheese strips
-
Thinly sliced jalapeño
-
Teriyaki glaze
Instructions
-
Step 1
Rinse 1 cup short-grain white rice under cold water until the water runs clear. Cook rice with 1¼ cups water (e.g., in a rice cooker). Once cooked, let it rest covered for 10 minutes, then transfer to a non-metallic bowl and fluff gently. -
Step 2
In a small saucepan, combine 2 tbsp rice vinegar, 1 tbsp sugar, and ½ tsp salt. Heat gently, stirring until the sugar and salt are completely dissolved. Let the mixture cool slightly. Pour over the cooked rice and gently fold it in using a slicing motion until the rice is evenly distributed, glossy, and slightly sticky. Cool rice to room temperature and cover with a damp cloth to prevent drying. -
Step 3
Slice 1 ripe avocado and 1 small cucumber into thin strips. Slice 1 cup imitation crab into halves or quarters. Prepare cream cheese into thin strips and thinly slice a jalapeño. Combine mayonnaise and sriracha to make 2 tbsps of spicy mayo. Have 1 tbsp eel sauce and teriyaki glaze ready for drizzling. -
Step 4
Cover a bamboo sushi mat tightly with plastic wrap. Dampen your hands with a little water. Place one of the 4 nori sheets (shiny side down) on the mat. Evenly spread about ¾ cup of the prepared sushi rice over the entire nori surface, applying light, even pressure. -
Step 5
Carefully flip the nori sheet so the rice-covered side is now facing down on the bamboo mat. Arrange a line of imitation crab, avocado slices, cucumber strips, cream cheese strips, and thinly sliced jalapeño across the center of the nori, closer to the edge nearest you. Drizzle with spicy mayo. -
Step 6
Using the bamboo mat, lift the edge closest to you and roll tightly, tucking in the fillings as you go. Apply firm, even pressure with your hands over the mat to form a compact cylindrical roll. Transfer the roll to a clean cutting board. Using a very sharp knife (dampened with water between cuts to prevent sticking), slice the roll in half, then slice each half into 3 or 4 equal pieces, aiming for 6-8 pieces per roll. -
Step 7
Gently press or sprinkle ½ cup toasted panko breadcrumbs (or French fried onions) onto the outside or top of each sushi piece. Drizzle with 1 tbsp eel sauce and teriyaki glaze. Arrange your finished Homemade California Crunch Roll Sushi on a platter and serve immediately.
Important Information
Nutrition Facts (Per Serving)
It is important to consider this information as approximate and not to use it as definitive health advice.
Allergy Information
Please check ingredients for potential allergens and consult a health professional if in doubt.