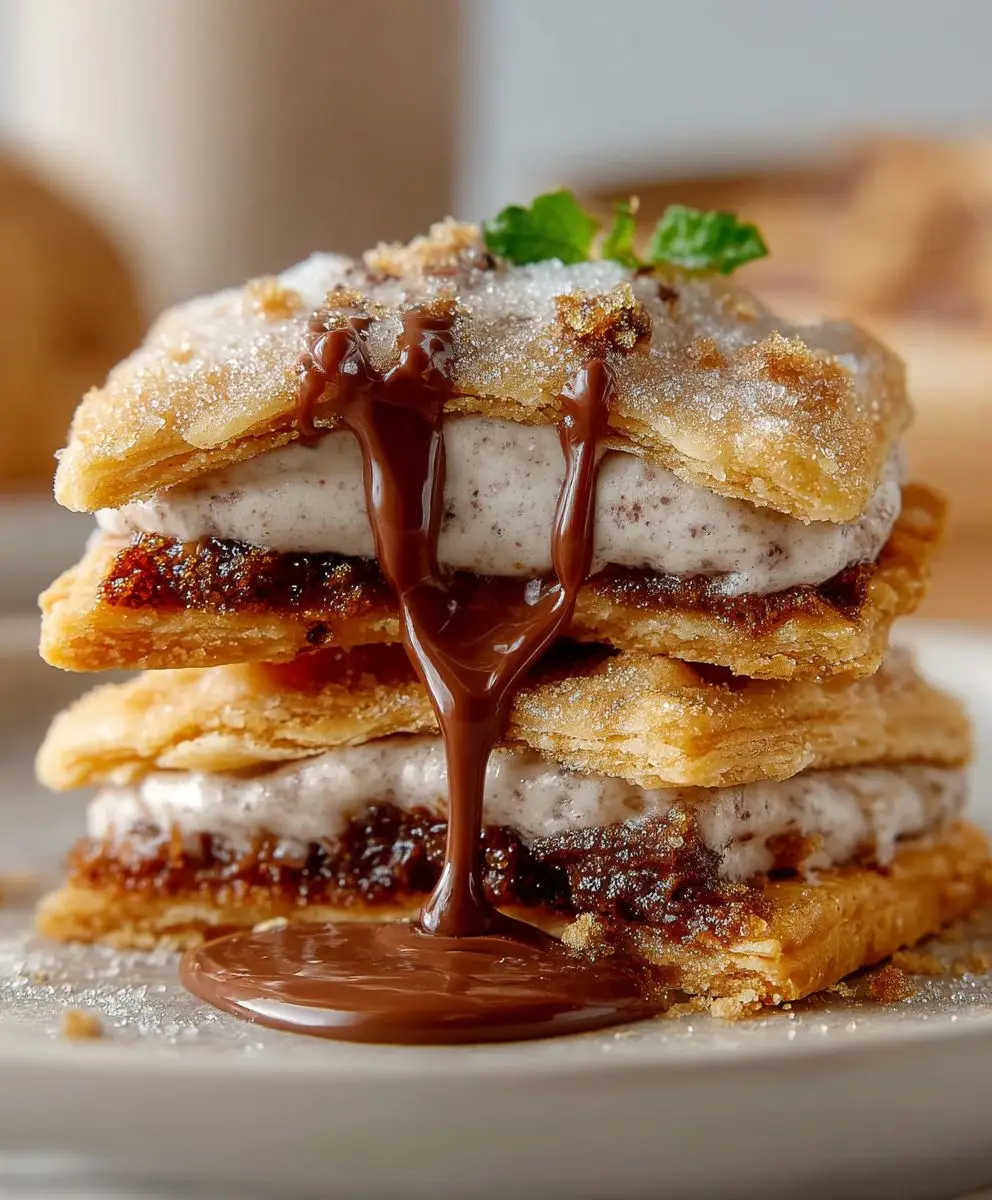
Brown Sugar Pop Tart Cookies: Prepare to be transported back to your childhood with a sophisticated twist! Remember the joy of unwrapping a warm, gooey Pop Tart? Now, imagine that same comforting flavor in a perfectly soft and chewy cookie. These aren’t your average cookies; they’re a nostalgic hug in every bite.
While the classic Pop Tart emerged as a convenient breakfast treat in the 1960s, offering a quick and easy way to enjoy a sweet pastry, our cookie version elevates that experience. We’ve taken the essence of that iconic flavor – the rich, caramel-like notes of brown sugar – and transformed it into a delectable cookie that’s perfect for any occasion.
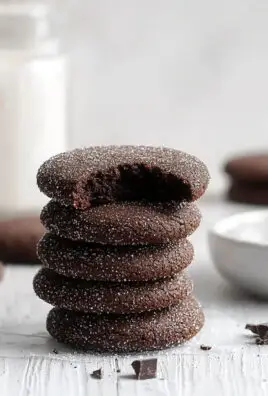
What makes these Brown Sugar Pop Tart Cookies so irresistible? It’s the delightful combination of textures and tastes. The soft, melt-in-your-mouth cookie base, infused with the deep molasses flavor of brown sugar, is simply divine. They are incredibly easy to make, requiring minimal ingredients and effort, making them a perfect treat for busy weeknights or weekend baking sessions. People adore these cookies because they offer a familiar comfort with a touch of homemade goodness. Get ready to experience a cookie that’s both nostalgic and utterly delicious!

Ingredients:
- For the Cookie Dough:
- 2 ½ cups all-purpose flour
- 1 teaspoon baking powder
- ½ teaspoon baking soda
- ½ teaspoon salt
- 1 cup (2 sticks) unsalted butter, softened
- ¾ cup granulated sugar
- ¾ cup packed light brown sugar
- 2 large eggs
- 1 teaspoon vanilla extract
- For the Brown Sugar Filling:
- ½ cup (1 stick) unsalted butter, softened
- 1 cup packed light brown sugar
- 2 tablespoons all-purpose flour
- 1 tablespoon milk
- 1 teaspoon vanilla extract
- ¼ teaspoon ground cinnamon
- Pinch of salt
- For the Glaze:
- 2 cups powdered sugar
- 4-6 tablespoons milk
- ½ teaspoon vanilla extract
- Optional Sprinkles:
- Your favorite sprinkles for decorating
Preparing the Cookie Dough:
- Combine Dry Ingredients: In a medium bowl, whisk together the flour, baking powder, baking soda, and salt. This ensures that the leavening agents are evenly distributed throughout the dough, leading to a more consistent bake.
- Cream Butter and Sugars: In a large bowl (or the bowl of a stand mixer), cream together the softened butter, granulated sugar, and brown sugar until light and fluffy. This process incorporates air into the butter and sugar mixture, which contributes to the cookies’ tender texture. I usually cream them for about 3-5 minutes until the mixture is noticeably lighter in color and texture.
- Add Eggs and Vanilla: Beat in the eggs one at a time, mixing well after each addition. Then, stir in the vanilla extract. Make sure the eggs are fully incorporated before adding the vanilla to prevent overmixing.
- Gradually Add Dry Ingredients: Gradually add the dry ingredients to the wet ingredients, mixing on low speed until just combined. Be careful not to overmix the dough, as this can develop the gluten in the flour and result in tough cookies. I usually stop mixing when I still see a few streaks of flour and then finish incorporating them by hand with a spatula.
- Divide and Chill the Dough: Divide the dough in half, flatten each half into a disc, wrap tightly in plastic wrap, and refrigerate for at least 2 hours, or preferably overnight. Chilling the dough allows the gluten to relax, which prevents the cookies from spreading too much during baking. It also makes the dough easier to handle.
Making the Brown Sugar Filling:
- Combine Filling Ingredients: In a medium bowl, combine the softened butter, brown sugar, flour, milk, vanilla extract, cinnamon, and salt.
- Mix Until Smooth: Mix with an electric mixer or a sturdy spoon until the filling is smooth and well combined. The consistency should be spreadable but not too runny. If it seems too thick, add a tiny bit more milk, a teaspoon at a time. If it seems too thin, add a little more flour, also a teaspoon at a time.
Assembling the Pop Tart Cookies:
- Preheat Oven and Prepare Baking Sheets: Preheat your oven to 350°F (175°C). Line baking sheets with parchment paper or silicone baking mats. This will prevent the cookies from sticking and make cleanup easier.
- Roll Out the Dough: On a lightly floured surface, roll out one disc of dough to about ⅛ inch thickness. Use a 3-inch cookie cutter (round or square) to cut out cookies. Place the cut-out cookies on the prepared baking sheets.
- Add Filling: Spread a thin layer of the brown sugar filling onto half of the cookies, leaving a small border around the edge. Don’t overfill them, or the filling will ooze out during baking.
- Top with Second Cookie: Roll out the second disc of dough and cut out cookies as before. Carefully place these cookies on top of the filled cookies, gently pressing the edges together to seal. You can use a fork to crimp the edges for a more authentic Pop-Tart look and to ensure a good seal.
- Bake the Cookies: Bake for 10-12 minutes, or until the edges are lightly golden brown. Keep a close eye on them, as they can burn easily.
- Cool Completely: Let the cookies cool on the baking sheets for a few minutes before transferring them to a wire rack to cool completely. It’s important to let them cool completely before glazing, or the glaze will melt.
Making the Glaze:
- Combine Glaze Ingredients: In a medium bowl, whisk together the powdered sugar, milk, and vanilla extract until smooth. Add more milk, one tablespoon at a time, until you reach your desired consistency. The glaze should be thick enough to coat the cookies but thin enough to spread easily.
- Glaze the Cookies: Once the cookies are completely cool, spread the glaze evenly over the top of each cookie.
- Add Sprinkles (Optional): Immediately sprinkle with your favorite sprinkles before the glaze sets.
- Let Glaze Set: Allow the glaze to set completely before serving or storing the cookies. This usually takes about 30 minutes to an hour.
Tips for Success:
- Don’t Overmix the Dough: Overmixing develops the gluten in the flour, resulting in tough cookies. Mix until just combined.
- Chill the Dough: Chilling the dough is crucial for preventing the cookies from spreading too much during baking.
- Use Softened Butter: Softened butter creams more easily with the sugar, resulting in a lighter and fluffier cookie. Make sure your butter is truly softened, not melted.
- Don’t Overbake: Overbaked cookies will be dry and crumbly. Bake until the edges are lightly golden brown.
- Seal the Edges Well: Make sure to seal the edges of the cookies well to prevent the filling from leaking out during baking. Use a fork to crimp the edges for extra security.
- Adjust Glaze Consistency: Adjust the amount of milk in the glaze to achieve your desired consistency.
- Storage: Store the cookies in an airtight container at room temperature for up to 3 days.
Variations:
- Different Fillings: Experiment with different fillings, such as jam, Nutella, or peanut butter.
- Different Glazes: Try different glazes, such as chocolate glaze or lemon glaze.
- Add Extracts: Add different extracts to the dough or filling, such as almond extract or peppermint extract.
- Use Different Cookie Cutters: Use different cookie cutters to create different shapes.
- Make Mini Cookies: Use smaller cookie cutters to make mini Pop Tart cookies. These are perfect for parties or snacks.
Troubleshooting:
- Cookies Spreading Too Much: This is usually caused by using too much butter, not chilling the dough enough, or overmixing the dough. Make sure to use the correct amount of butter, chill the dough for at least 2 hours, and avoid overmixing.
- Filling Leaking Out: This is usually caused by overfilling the cookies or not sealing the edges well enough. Use a thin layer of filling and make sure to crimp the edges with a fork.
- Cookies Too Dry: This is usually caused by overbaking the cookies. Bake until the edges are lightly golden brown.
- Glaze Too Thick: Add more milk, one tablespoon at a time, until you reach your desired consistency.
- Glaze Too Thin: Add more powdered sugar, one tablespoon at a time, until you reach your desired consistency.
Enjoying Your Brown Sugar Pop Tart Cookies:
These Brown Sugar Pop Tart Cookies are a delightful treat that’s perfect for any occasion. Whether you’re enjoying them with a glass of milk, serving them at a party, or giving them as a gift, they’re sure to be a hit. The combination of the buttery cookie dough, the sweet and cinnamon-spiced brown sugar filling, and the smooth glaze is simply irresistible. I hope you enjoy making and eating these cookies as much as I do! They are a fun and delicious way to bring a little bit of childhood nostalgia into your kitchen.
Conclusion:
So, there you have it! These Brown Sugar Pop Tart Cookies are more than just a cookie; they’re a nostalgic trip down memory lane, reimagined with a homemade touch. They’re the perfect blend of comforting flavors and satisfying textures, all wrapped up in a delightful, easy-to-make package. I truly believe this recipe is a must-try for anyone who loves a good cookie, a sweet treat, or simply wants to experience a little bit of childhood magic again.
Why are these cookies so special? Well, first and foremost, the brown sugar filling is absolutely divine. It’s rich, gooey, and bursting with that warm, caramel-like flavor that only brown sugar can provide. Paired with the slightly crisp, buttery cookie base, it’s a match made in dessert heaven. Plus, the simple glaze adds just the right amount of sweetness and a beautiful finishing touch. But beyond the taste, these cookies are incredibly versatile and fun to customize.
Serving Suggestions and Variations:
Think of these cookies as a blank canvas for your culinary creativity! Want to elevate them even further? Try adding a sprinkle of sea salt on top of the glaze for a sweet and salty contrast. Or, for a richer flavor, use browned butter in the cookie dough. It adds a nutty depth that complements the brown sugar filling perfectly.
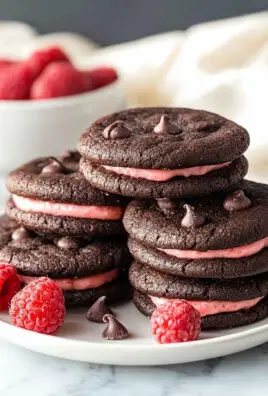
For a festive twist, you could add a dash of cinnamon or nutmeg to the filling during the holidays. Imagine warm, spiced Brown Sugar Pop Tart Cookies on a chilly winter evening – pure bliss! And if you’re feeling adventurous, why not experiment with different fillings altogether? A raspberry jam filling would be delicious, or even a Nutella swirl for the chocolate lovers out there.
These cookies are also fantastic served warm with a scoop of vanilla ice cream. The contrast between the warm cookie and the cold ice cream is simply irresistible. They’re also perfect for packing in lunchboxes, bringing to potlucks, or simply enjoying with a cup of coffee or tea. Honestly, there’s no wrong way to enjoy these little gems.
A Must-Try Recipe:
I’ve poured my heart into perfecting this recipe, and I’m confident that you’ll love it as much as I do. It’s simple enough for even beginner bakers to tackle, yet impressive enough to wow your friends and family. The ingredients are readily available, and the instructions are clear and easy to follow. Plus, the end result is a batch of cookies that are guaranteed to disappear quickly!
So, what are you waiting for? Gather your ingredients, preheat your oven, and get ready to embark on a baking adventure. I promise you won’t regret it. These Brown Sugar Pop Tart Cookies are a guaranteed crowd-pleaser, and they’re sure to become a new favorite in your household.
Share Your Experience!
I’m so excited for you to try this recipe! Once you’ve baked your own batch of Brown Sugar Pop Tart Cookies, I’d love to hear about your experience. Did you make any variations? Did you add any special touches? What did your friends and family think? Share your photos and stories in the comments below! I can’t wait to see your creations and hear all about your baking adventures. Happy baking!
Brown Sugar Pop Tart Cookies: The Ultimate Recipe Guide
These homemade Brown Sugar Pop Tart Cookies feature a buttery, tender cookie dough filled with a rich brown sugar filling and topped with a sweet vanilla glaze and optional sprinkles. Perfect for a nostalgic treat!
Ingredients
**Overall Strengths:**
* **Comprehensive:** The recipe is very detailed, which is great for bakers of all skill levels.
* **Well-Organized:** The recipe is logically divided into sections (dough, filling, glaze, assembly, etc.).
* **Helpful Tips:** The “Tips for Success” section is a valuable addition.
* **Creative Variations:** The “Variations” section encourages experimentation.
**Suggestions for Improvement:**
**1. Ingredient Clarity and Precision:**
* **Butter Temperature:** While “softened” is mentioned, it’s helpful to specify *how* soft. “Softened to room temperature, but still cool to the touch” is more precise. This prevents overly soft butter that can lead to greasy cookies.
* **Flour Measurement:** For the most consistent results, specify “spooned and leveled” when measuring flour. This helps avoid using too much flour, which can make the cookies dry.
* **Milk Measurement (Glaze):** The glaze instructions say to add more milk, one tablespoon at a time, until you reach your desired consistency. It would be helpful to give a range of how many tablespoons of milk to add.
**2. Instruction Clarity and Flow:**
* **Chilling Time:** Emphasize the importance of chilling the dough. Consider adding a sentence like, “Chilling the dough is crucial for preventing the cookies from spreading too much during baking and for easier handling.”
* **Filling Consistency:** In the filling instructions, instead of “Adjust milk or flour to achieve a spreadable consistency,” be more specific. “If the filling is too thick, add milk 1/2 teaspoon at a time. If it’s too thin, add flour 1/4 teaspoon at a time.”
* **Sealing the Edges:** Provide more detail on how to seal the edges. “Press firmly around the edges with the tines of a fork to create a tight seal. This will prevent the filling from leaking out during baking.”
* **Cooling Time:** Specify how long to cool the cookies on the baking sheet before transferring them to a wire rack. “Let the cookies cool on the baking sheets for 5 minutes before transferring them to a wire rack to cool completely.”
**3. Equipment List:**
* **Rolling Surface:** Add “lightly floured surface” to the equipment list.
* **Measuring Cups and Spoons:** Add “measuring cups and spoons” to the equipment list.
**4. Recipe Formatting:**
* **Bold Subheadings:** Consider using bold subheadings within each section (e.g., “Mixing the Dry Ingredients,” “Preparing the Filling”) to further break down the steps.
**Revised Recipe Snippets (Illustrative Examples):**
**Ingredients (Revised):**
**For the Cookie Dough:**
* 2 ½ cups all-purpose flour, spooned and leveled
* 1 teaspoon baking powder
* ½ teaspoon baking soda
* ½ teaspoon salt
* 1 cup (2 sticks) unsalted butter, softened to room temperature but still cool to the touch
* ¾ cup granulated sugar
* ¾ cup packed light brown sugar
* 2 large eggs
* 1 teaspoon vanilla extract
**Making the Brown Sugar Filling (Revised):**
1. **Combine Filling Ingredients:** In a medium bowl, combine the softened butter, brown sugar, flour, milk, vanilla extract, cinnamon, and salt.
2. **Mix Until Smooth:** Mix with an electric mixer or a sturdy spoon until the filling is smooth and well combined. If the filling is too thick, add milk 1/2 teaspoon at a time. If it’s too thin, add flour 1/4 teaspoon at a time.
**Assembling the Pop Tart Cookies (Revised):**
1. **Preheat Oven and Prepare Baking Sheets:** Preheat your oven to 350°F (175°C). Line baking sheets with parchment paper or silicone baking mats.
2. **Roll Out the Dough:** On a lightly floured surface, roll out one disc of dough to about ⅛ inch thickness. Use a 3-inch cookie cutter (round or square) to cut out cookies. Place the cut-out cookies on the prepared baking sheets.
3. **Add Filling:** Spread a thin layer of the brown sugar filling onto half of the cookies, leaving a small border around the edge.
4. **Top with Second Cookie:** Roll out the second disc of dough and cut out cookies as before. Carefully place these cookies on top of the filled cookies, gently pressing the edges together to seal. Press firmly around the edges with the tines of a fork to create a tight seal. This will prevent the filling from leaking out during baking.
5. **Bake the Cookies:** Bake for 10-12 minutes, or until the edges are lightly golden brown.
6. **Cool Completely:** Let the cookies cool on the baking sheets for 5 minutes before transferring them to a wire rack to cool completely.
**Making the Glaze (Revised):**
1. **Combine Glaze Ingredients:** In a medium bowl, whisk together the powdered sugar, milk, and vanilla extract until smooth. Add more milk, one tablespoon at a time, until you reach your desired consistency (usually 4-6 tablespoons total).
**Tips for Success (Revised):**
* Don’t overmix the dough.
* Chill the dough. Chilling the dough is crucial for preventing the cookies from spreading too much during baking and for easier handling.
* Use softened butter. Soften the butter to room temperature but still cool to the touch.
* Don’t overbake.
* Seal the edges well. Press firmly around the edges with the tines of a fork to create a tight seal.
* Adjust glaze consistency.
By implementing these suggestions, you can make your Brown Sugar Pop Tart Cookies recipe even more user-friendly and ensure consistent, delicious results for everyone who tries it!
Instructions
- Combine Dry Ingredients: In a medium bowl, whisk together the flour, baking powder, baking soda, and salt.
- Cream Butter and Sugars: In a large bowl (or the bowl of a stand mixer), cream together the softened butter, granulated sugar, and brown sugar until light and fluffy (about 3-5 minutes).
- Add Eggs and Vanilla: Beat in the eggs one at a time, mixing well after each addition. Then, stir in the vanilla extract.
- Gradually Add Dry Ingredients: Gradually add the dry ingredients to the wet ingredients, mixing on low speed until just combined. Be careful not to overmix the dough.
- Divide and Chill the Dough: Divide the dough in half, flatten each half into a disc, wrap tightly in plastic wrap, and refrigerate for at least 2 hours, or preferably overnight.
- Combine Filling Ingredients: In a medium bowl, combine the softened butter, brown sugar, flour, milk, vanilla extract, cinnamon, and salt.
- Mix Until Smooth: Mix with an electric mixer or a sturdy spoon until the filling is smooth and well combined. Adjust milk or flour to achieve a spreadable consistency.
- Preheat Oven and Prepare Baking Sheets: Preheat your oven to 350°F (175°C). Line baking sheets with parchment paper or silicone baking mats.
- Roll Out the Dough: On a lightly floured surface, roll out one disc of dough to about ⅛ inch thickness. Use a 3-inch cookie cutter (round or square) to cut out cookies. Place the cut-out cookies on the prepared baking sheets.
- Add Filling: Spread a thin layer of the brown sugar filling onto half of the cookies, leaving a small border around the edge.
- Top with Second Cookie: Roll out the second disc of dough and cut out cookies as before. Carefully place these cookies on top of the filled cookies, gently pressing the edges together to seal. Use a fork to crimp the edges for a more authentic Pop-Tart look and to ensure a good seal.
- Bake the Cookies: Bake for 10-12 minutes, or until the edges are lightly golden brown.
- Cool Completely: Let the cookies cool on the baking sheets for a few minutes before transferring them to a wire rack to cool completely.
- Combine Glaze Ingredients: In a medium bowl, whisk together the powdered sugar, milk, and vanilla extract until smooth. Add more milk, one tablespoon at a time, until you reach your desired consistency.
- Glaze the Cookies: Once the cookies are completely cool, spread the glaze evenly over the top of each cookie.
- Add Sprinkles (Optional): Immediately sprinkle with your favorite sprinkles before the glaze sets.
- Let Glaze Set: Allow the glaze to set completely before serving or storing the cookies (about 30 minutes to an hour).
Notes
**I. Overall Impressions**
* **Well-Written:** The recipe is generally well-written and easy to understand. The instructions are clear and concise.
* **Comprehensive:** It covers all the necessary steps, from making the dough to glazing the cookies.
* **Helpful Tips:** The “Tips for Success” section is a great addition.
* **Good Variations:** The “Variations” section provides inspiration for customizing the recipe.
**II. Suggestions for Improvement**
* **Chilling Time Clarity:** Emphasize the importance of chilling time. Consider adding a note that the dough *must* be chilled for at least 2 hours, or the cookies will spread too much.
* **Filling Consistency:** The filling consistency is crucial. Add a more specific description of the desired consistency (e.g., “thick but spreadable, like peanut butter”).
* **Sealing Edges:** Provide more detailed instructions on sealing the edges. Suggest using a light egg wash along the edges before pressing the top cookie on. This will help create a stronger seal.
* **Glaze Application:** Specify whether to dip the cookies in the glaze or spread it on. Spreading is implied, but explicitly stating it will avoid confusion.
* **Storage:** Clarify if the cookies can be frozen.
**III. Revised Recipe Sections (Examples)**
Here are some examples of how to revise specific sections to improve clarity and user experience:
**A. Preparing the Cookie Dough (Revised)**
1. **Combine Dry Ingredients:** In a medium bowl, whisk together the flour, baking powder, baking soda, and salt. This ensures even distribution of the leavening agents.
2. **Cream Butter and Sugars:** In a large bowl (or the bowl of a stand mixer), cream together the softened butter, granulated sugar, and brown sugar until light and fluffy (about 3-5 minutes). The mixture should be noticeably lighter in color and texture.
3. **Add Eggs and Vanilla:** Beat in the eggs one at a time, mixing well after each addition. Then, stir in the vanilla extract.
4. **Gradually Add Dry Ingredients:** Gradually add the dry ingredients to the wet ingredients, mixing on low speed until *just* combined. Be careful not to overmix the dough, as this will result in tough cookies.
5. **Divide and Chill the Dough:** Divide the dough in half, flatten each half into a disc (this helps it chill faster), wrap tightly in plastic wrap, and refrigerate for *at least* 2 hours, or preferably overnight. **Important:** This chilling time is crucial for preventing the cookies from spreading too much during baking. Do not skip this step!
**B. Making the Brown Sugar Filling (Revised)**
1. **Combine Filling Ingredients:** In a medium bowl, combine the softened butter, brown sugar, flour, milk, vanilla extract, cinnamon, and salt.
2. **Mix Until Smooth:** Mix with an electric mixer or a sturdy spoon until the filling is smooth and well combined. The filling should be thick but spreadable, similar to the consistency of peanut butter. If the filling is too thick, add a tiny bit more milk (1/2 teaspoon at a time). If it’s too thin, add a tiny bit more flour (1/2 teaspoon at a time).
**C. Assembling the Pop Tart Cookies (Revised)**
1. **Preheat Oven and Prepare Baking Sheets:** Preheat your oven to 350°F (175°C). Line baking sheets with parchment paper or silicone baking mats.
2. **Roll Out the Dough:** On a lightly floured surface, roll out one disc of dough to about ⅛ inch thickness. Use a 3-inch cookie cutter (round or square) to cut out cookies. Place the cut-out cookies on the prepared baking sheets.
3. **Add Filling:** Spread a thin, even layer of the brown sugar filling onto *half* of the cookies, leaving a small border (about 1/4 inch) around the edge.
4. **Top with Second Cookie:** Roll out the second disc of dough and cut out cookies as before. Lightly brush the edges of the filled cookies with a beaten egg (egg wash). Carefully place these cookies on top of the filled cookies, gently pressing the edges together to seal. Use a fork to crimp the edges for a more authentic Pop-Tart look and to ensure a good seal. Press firmly to prevent the filling from leaking out during baking.
5. **Bake the Cookies:** Bake for 10-12 minutes, or until the edges are lightly golden brown.
6. **Cool Completely:** Let the cookies cool on the baking sheets for a few minutes before transferring them to a wire rack to cool completely. The cookies must be completely cool before glazing.
**D. Making the Glaze (Revised)**
1. **Combine Glaze Ingredients:** In a medium bowl, whisk together the powdered sugar, milk, and vanilla extract until smooth. Add more milk, one tablespoon at a time, until you reach your desired consistency. The glaze should be thick enough to coat the cookies evenly but thin enough to spread easily.
2. **Glaze the Cookies:** Once the cookies are completely cool, spread the glaze evenly over the top of each cookie using a spoon or spatula.
3. **Add Sprinkles (Optional):** Immediately sprinkle with your favorite sprinkles before the glaze sets.
4. **Let Glaze Set:** Allow the glaze to set completely before serving or storing the cookies (about 30 minutes to an hour).
**E. Storage (Revised)**
Store the cookies in an airtight container at room temperature for up to 3 days. For longer storage, the unglazed cookies can be frozen for up to 2 months. Thaw completely before glazing.
**IV. Additional Tips to Consider**
* **Visuals:** Adding photos of each step would greatly enhance the recipe’s appeal and clarity.
* **Metric Conversions:** Consider adding metric conversions for the ingredients.
* **Troubleshooting:** Include a small troubleshooting section addressing common problems (e.g., “Why is my dough too sticky?” or “Why is my filling leaking out?”).
By implementing these suggestions, you can make your Brown Sugar Pop Tart Cookies recipe even more user-friendly and increase the likelihood of success for bakers of all skill levels.