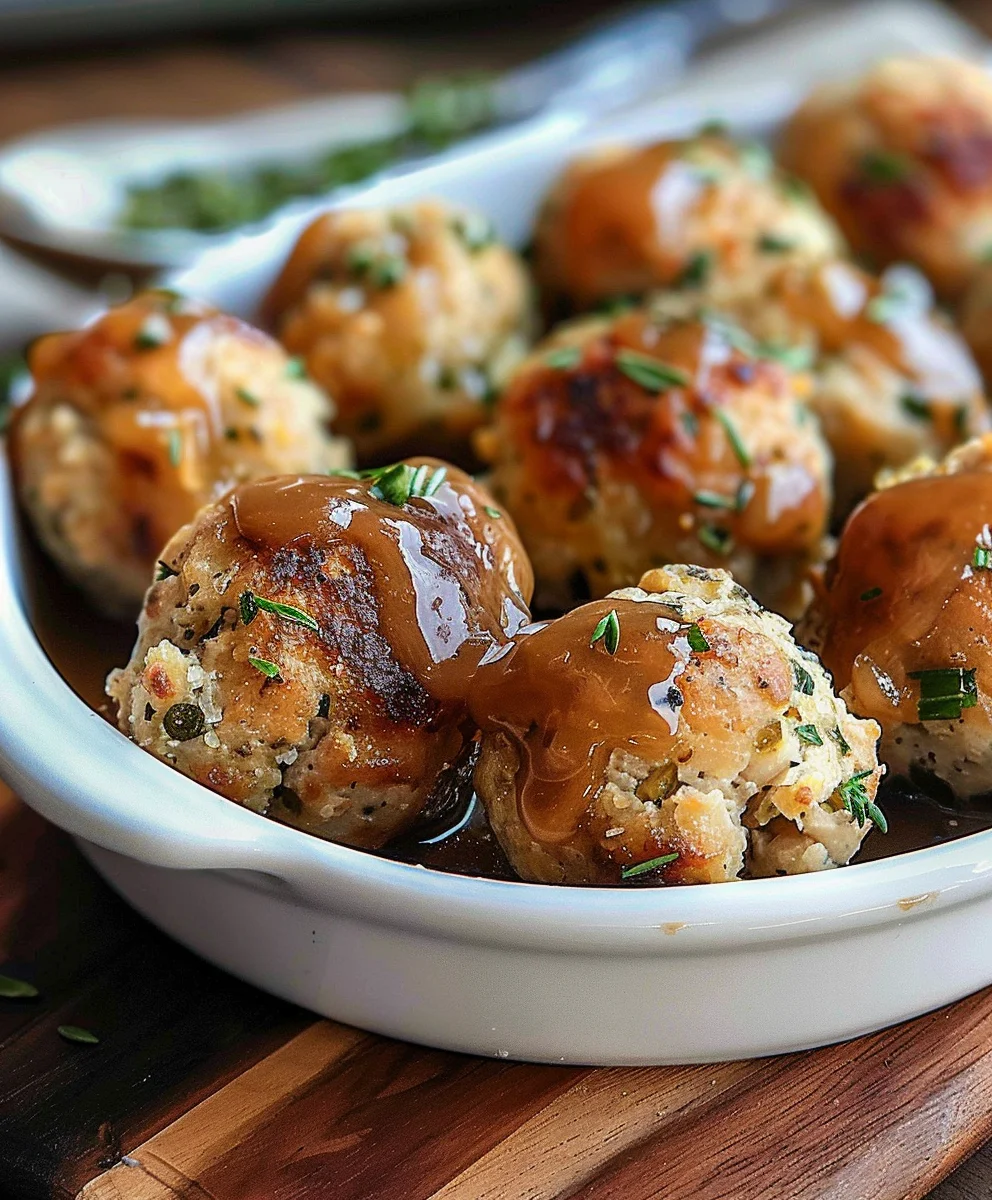
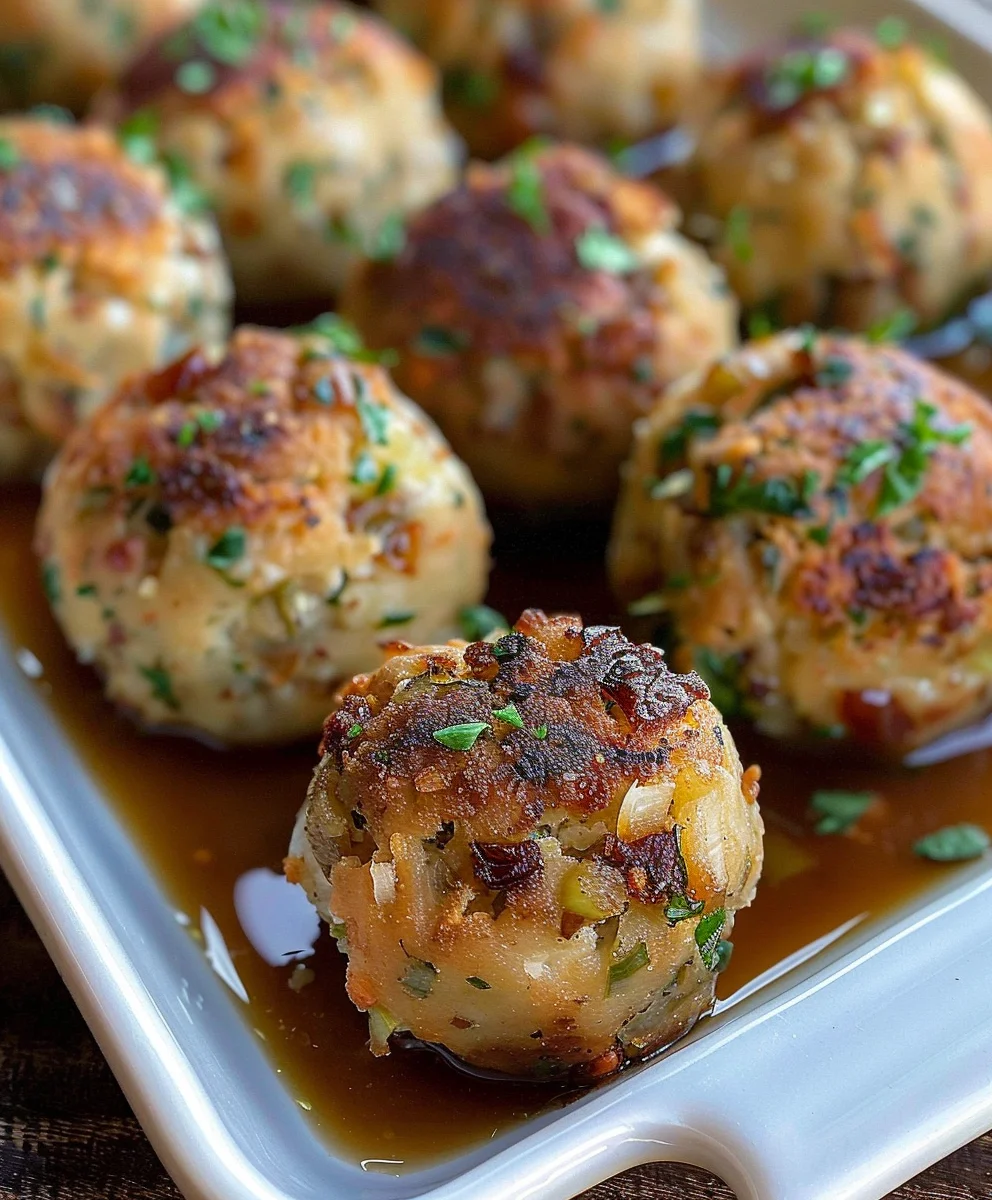
Turkey Stuffing Balls! If you’ve ever dreamt of a holiday side dish that combines all the beloved, comforting flavors of traditional stuffing with an innovative, mess-free serving experience, then you’ve truly come to the right place. I know the familiar struggle of trying to get that perfect, crumbly scoop of stuffing onto everyone’s plate. This ingenious presentation not only elegantly solves that common dilemma but also elevates the humble stuffing to a delightful star in its own right. Rooted deeply in the rich culinary history of festive holiday feasts, where aromatic herbs, savory broths, and tender bread are transformed into a comforting masterpiece, these delightful morsels offer a fantastic, modern twist.
Why Everyone Loves Turkey Stuffing Balls
People absolutely adore Turkey Stuffing Balls for several incredibly compelling reasons. Imagine a perfectly golden-brown exterior, offering a subtle crispness, which then gives way to a wonderfully moist, tender, and intensely flavorful interior. Each bite is packed with all those cherished classic sage, thyme, and onion notes you know and love. They are incredibly convenient as individual portions, making them absolutely ideal for a buffet line, a charming appetizer, or simply as a hassle-free side dish. Forget the stress of scooping and messy plates; these glorious, ready-to-enjoy bites bring joy and simplicity to every meal. Whether you’re aiming to simplify your grand holiday spread or simply crave that quintessential stuffing flavor in an exciting new format, I promise you, these are an absolute game-changer for your culinary repertoire. Your holiday table – or any weeknight gathering – will never be quite the same!

Ingredients:
- For the Turkey Stuffing Balls:
- 1.5 lbs (approximately 680g) lean ground turkey
- 8 cups (approximately 200g) stale bread, cubed (use a mix of white and whole wheat for depth, or a good quality pre-made stuffing mix)
- 1 large yellow onion, finely diced (about 1.5 cups)
- 3 stalks celery, finely diced (about 1 cup)
- 4 cloves garlic, minced
- 1/2 cup (113g) unsalted butter, plus extra for greasing
- 2 cups (470ml) low-sodium chicken or turkey broth, plus more if needed
- 2 large eggs, lightly beaten
- 1/2 cup (60g) Panko breadcrumbs (or regular breadcrumbs if Panko is unavailable)
- 1/4 cup fresh parsley, chopped
- 2 tablespoons fresh sage, chopped
- 1 tablespoon fresh thyme, chopped
- 1 teaspoon fresh rosemary, finely chopped
- 1.5 teaspoons salt, or to taste
- 1 teaspoon black pepper, freshly ground, or to taste
- Optional additions: 1/2 cup dried cranberries, 1/2 cup chopped pecans or walnuts
- For the Savory Gravy (Optional):
- 4 tablespoons (56g) unsalted butter
- 4 tablespoons all-purpose flour
- 2 cups (470ml) low-sodium chicken or turkey broth
- 1/4 teaspoon salt, or to taste
- 1/8 teaspoon black pepper, or to taste
- Optional: 1 tablespoon fresh parsley, chopped, for garnish
Prepping Your Stuffing Foundation: Building Flavor From Scratch
- Prepare the Bread: If you’re using fresh bread, you’ll want to dry it out first. Cube your bread into roughly 1/2-inch to 3/4-inch pieces. Spread the cubes in a single layer on a baking sheet and bake at a low temperature, around 250°F (120°C), for 15-20 minutes, or until they are dry and slightly crisp but not toasted brown. Alternatively, you can leave them out overnight to air dry. Once dried, transfer the bread cubes to a very large mixing bowl. This foundational step is crucial for the texture of your Turkey Stuffing Balls, ensuring they absorb liquid without becoming mushy.
- Sauté the Aromatics: In a large skillet or Dutch oven, melt 1/2 cup of unsalted butter over medium heat. Add the finely diced onion and celery. Sauté for about 8-10 minutes, stirring occasionally, until the vegetables are softened and translucent. We’re aiming for tenderness here, not browning.
- Infuse with Garlic and Herbs: Add the minced garlic to the skillet and cook for another 1-2 minutes until fragrant. Be careful not to burn the garlic, as it can turn bitter very quickly. Immediately stir in your fresh chopped herbs: parsley, sage, thyme, and rosemary. Cook for just about 30 seconds to release their wonderful aromas. The combination of these herbs is what gives classic stuffing its comforting, holiday-ready flavor profile, which will perfectly permeate our Turkey Stuffing Balls.
- Combine Wet and Dry Ingredients: Pour the sautéed aromatic mixture, including all the melted butter, over the dried bread cubes in the large mixing bowl. Add 2 cups of low-sodium chicken or turkey broth. Toss gently with a large spoon or your hands, ensuring the bread begins to absorb the liquid and flavorful butter. Let it sit for about 5 minutes to fully absorb. If the mixture seems too dry after this time, you can add a little more broth, a tablespoon at a time, until it’s moist but not soggy. The goal is a perfectly hydrated stuffing base for your Turkey Stuffing Balls.
- Season the Stuffing Base: Add 1.5 teaspoons of salt and 1 teaspoon of freshly ground black pepper to the moist bread mixture. If you’re using the optional dried cranberries and chopped nuts, now is the time to fold them in. Mix everything thoroughly to distribute the seasonings and any optional additions evenly. Taste a small bit of the stuffing base at this point and adjust seasonings if necessary. Remember, this is the base flavor that will define your finished Turkey Stuffing Balls.
Crafting the Delicious Turkey Stuffing Balls: Mixing, Forming, and Perfecting
- Introduce the Ground Turkey: Add the 1.5 lbs of lean ground turkey directly into the large bowl with your prepared stuffing base. Using lean ground turkey is excellent for making these balls less greasy, allowing the stuffing flavors to truly shine.
- Add Binders for Structure: Crack the 2 large eggs into the bowl and lightly beat them directly over the turkey and stuffing mixture. Sprinkle in the 1/2 cup of Panko breadcrumbs. The eggs will act as a binding agent, helping the Turkey Stuffing Balls hold their shape during cooking, while the Panko adds a little extra texture and ensures everything stays together beautifully.
- Thoroughly Mix Everything: Now comes the fun part! Get your hands in there and mix everything together thoroughly. Gently but firmly combine the ground turkey, stuffing base, eggs, and Panko. The goal is to ensure the turkey is evenly distributed throughout the stuffing mixture, but be careful not to overmix, as this can make the turkey tough. Mix just until everything is well combined and uniform in consistency. You want a mixture that feels cohesive and easily moldable. This is the heart of creating your perfect Turkey Stuffing Balls.
- Form the Balls: Prepare a baking sheet by lightly greasing it or lining it with parchment paper for easy cleanup. Take about 2-3 tablespoons of the mixture (or use a small ice cream scoop for consistency) and gently roll it between your palms to form balls that are approximately 1.5 to 2 inches in diameter. Arrange the formed Turkey Stuffing Balls on the prepared baking sheet, leaving a little space between each one to allow for even cooking. The size of the balls can be adjusted, but maintaining a consistent size will ensure they all cook at the same rate. This recipe typically yields about 24-30 stuffing balls, depending on their size.
Baking Your Perfect Turkey Stuffing Balls: Achieving Golden Perfection
- Preheat Your Oven: Preheat your oven to 375°F (190°C). Ensuring your oven is at the correct temperature before placing the baking sheet inside is crucial for even cooking and a beautiful golden-brown exterior on your Turkey Stuffing Balls.
- Arrange for Baking: Make sure your formed Turkey Stuffing Balls are spaced out on your baking sheet. If you have too many to fit on one sheet without crowding, use a second baking sheet. Crowding can lead to steaming instead of baking, preventing that lovely slightly crisp exterior.
- Bake to Golden Brown: Place the baking sheet(s) in the preheated oven and bake for 25-30 minutes. Halfway through the cooking time (around the 15-minute mark), you might want to gently flip the Turkey Stuffing Balls to ensure even browning on all sides. They should turn golden brown and be cooked through.
- Check for Doneness: The most important step for any ground meat product is ensuring it’s cooked to a safe internal temperature. Using a meat thermometer, check the internal temperature of a few of the largest Turkey Stuffing Balls. They are done when they reach an internal temperature of 165°F (74°C). If they haven’t reached this temperature, return them to the oven for a few more minutes and check again. The turkey should no longer be pink in the center, and the stuffing itself should be hot throughout and slightly crispy on the outside.
- Rest and Serve: Once cooked, remove the Turkey Stuffing Balls from the oven and let them rest on the baking sheet for 5 minutes before serving. This brief resting period allows the juices to redistribute, ensuring they remain moist and flavorful.
Whipping Up a Savory Gravy (Optional, but Highly Recommended!): The Perfect Companion
While your Turkey Stuffing Balls are resting, you can quickly whip up a simple yet incredibly flavorful gravy. This gravy perfectly complements the rich flavors of the stuffing balls.
- Melt Butter: In a small saucepan, melt 4 tablespoons of unsalted butter over medium heat. Allow the butter to fully melt and just begin to bubble.
- Make a Roux: Once the butter is melted, whisk in 4 tablespoons of all-purpose flour. Continue whisking constantly for 1-2 minutes, cooking out the raw flour taste. This mixture, known as a roux, will be light golden and thick. This is the base that will thicken our gravy.
- Gradually Add Broth: Slowly pour in 2 cups of low-sodium chicken or turkey broth, whisking continuously to prevent lumps. It’s essential to add the broth gradually, allowing the roux to fully incorporate each addition, creating a smooth and creamy consistency.
- Simmer and Thicken: Bring the gravy mixture to a gentle simmer, still whisking occasionally. Continue to simmer for 5-7 minutes, or until the gravy has thickened to your desired consistency. It should be thick enough to coat the back of a spoon.
- Season to Perfection: Season the gravy with 1/4 teaspoon of salt and 1/8 teaspoon of black pepper, or to taste. Taste and adjust seasonings as needed. If you have any pan drippings from roasting a turkey or chicken, you can add a tablespoon or two here for an even richer flavor. Remove from heat.
- Garnish and Serve: If desired, stir in 1 tablespoon of fresh chopped parsley for a burst of color and fresh flavor just before serving. Serve the warm gravy alongside your perfectly baked Turkey Stuffing Balls.
Serving Your Incredible Turkey Stuffing Balls: Presentation and Storage Tips
- Plating Perfection: Arrange your golden-brown Turkey Stuffing Balls beautifully on a serving platter. If you made the gravy, serve it in a small pitcher or gravy boat right alongside, allowing guests to drizzle it generously over their portions. These are not just side dishes; they are flavorful mini meals in themselves!
- Pairing Suggestions: These delightful Turkey Stuffing Balls are incredibly versatile. They make a fantastic addition to any holiday spread, serving as an alternative or complement to traditional stuffing. Beyond holidays, they are excellent with roasted chicken, pork loin, or as a hearty component of a weeknight meal. You could even serve them as an appetizer with a cranberry dipping sauce for a festive touch. Don’t forget a side of mashed potatoes or green bean casserole to complete the meal.
- Creative Uses for Leftovers: If you’re lucky enough to have any leftover Turkey Stuffing Balls, they can be repurposed in wonderful ways. Crumble them over a salad for added flavor and texture, or chop them up and add them to a turkey sandwich for an elevated experience. They also make a great addition to a breakfast hash.
- Storage Instructions: To store any leftover Turkey Stuffing Balls, allow them to cool completely to room temperature. Transfer them to an airtight container and refrigerate for up to 3-4 days. For longer storage, you can freeze them for up to 2-3 months. To reheat, simply warm them in the oven at 350°F (175°C) until heated through, or gently microwave them. Make sure they are thoroughly hot before serving again. The gravy can also be stored in an airtight container in the refrigerator for up to 3-4 days and reheated gently on the stovetop.
- Embrace the Comfort: These Turkey Stuffing Balls are more than just a recipe; they are a comforting, savory experience that brings warmth and joy to any table. Enjoy the process of making them, and savor every delicious bite! They’re a fantastic way to enjoy all the flavors of a holiday feast in a convenient, bite-sized form.
Conclusion:
As we wrap up our culinary journey with this incredible recipe, I truly hope you’re feeling inspired to bring these delightful creations to your own table. I know I’ve said it before, but allow me to reiterate why this particular dish isn’t just another side; it’s a revelation. This recipe transforms humble ingredients into something truly extraordinary – a dish that boasts a perfect balance of a wonderfully crispy exterior and a wonderfully moist, aromatic interior. The carefully selected blend of herbs and spices creates a symphony of flavors that is both comforting and sophisticated, promising to elevate any meal it graces. Forget dry, crumbly, or overly dense traditional stuffings; these are designed for perfection, offering a delightful texture that melts in your mouth and leaves you craving more. They’re also incredibly practical, allowing you to prepare a significant portion of your meal ahead of time, thereby reducing stress on the big day and allowing you more time to enjoy your guests and the festivities. The convenience combined with the exceptional flavor profile truly sets this recipe apart from the rest, making it an indispensable addition to your recipe collection for both special occasions and simple family dinners.
Serving Suggestions to Spark Your Imagination:
For the ultimate holiday spread, naturally, these are the ideal accompaniment to a perfectly roasted turkey or even a succulent glazed ham. Drizzle generously with your favorite homemade or store-bought gravy, allowing it to soak into the tender bites for an unparalleled burst of savory goodness. Pair them with creamy mashed potatoes, tangy cranberry sauce, and crisp green beans for a classic, soul-satisfying plate that embodies warmth and tradition. The way these spherical treasures soak up the rich flavors of a hearty meal is simply unmatched.
But don’t limit yourself! Think about incorporating them into your everyday meals. Imagine them alongside a simple roasted chicken or pork tenderloin on a cozy Sunday evening, adding a touch of gourmet flair without extra fuss. Or, for a truly innovative lunch, crumble a few into a vibrant green salad, perhaps with some leftover shredded turkey and a light vinaigrette, for a hearty and flavorful twist that will make your colleagues envious. They even make a fantastic, substantial element in a leftover sandwich the day after the main event – squashed between two slices of soft bread with a dollop of cranberry sauce and a slice of turkey, it’s pure heaven. Consider serving them as a unique appetizer at your next gathering; they hold up beautifully and can be served with a variety of dipping sauces like a spiced apple chutney, a savory aioli, or even a robust red wine reduction. The possibilities are genuinely endless once you realize how truly versatile and appealing these little bites are.
Unleash Your Inner Chef: Creative Variations:
Part of the joy of cooking is making a recipe truly your own, and this one lends itself beautifully to personal touches. Don’t be afraid to experiment! For a richer, more savory profile, try incorporating finely crumbled, cooked sausage (sage sausage works exceptionally well) or sautéed mushrooms and onions into the mixture before forming the balls. If you prefer a hint of sweetness, a handful of dried cranberries, chopped apricots, or even some finely diced apple can add a wonderful counterpoint to the savory herbs. For those who enjoy a bit of crunch, toasted pecans or walnuts can be a delightful addition, providing both texture and a subtle nutty flavor. Feeling adventurous with herbs? While sage is classic, consider swapping in a mix of rosemary and thyme, or even a touch of marjoram for a slightly different aromatic depth. A pinch of red pepper flakes can introduce a subtle warmth, while lemon zest brightens the entire flavor profile. If you’re catering to dietary restrictions, simply opt for gluten-free bread and a vegetable broth to make them accessible for everyone without sacrificing an ounce of flavor. The core technique remains the same, but the flavor journey can be uniquely yours with just a few thoughtful tweaks, allowing you to tailor them perfectly to your family’s preferences or the occasion.
So, there you have it – my earnest plea for you to try this recipe. I promise you, making these delightful Turkey Stuffing Balls will not only be a rewarding culinary experience but will also win you rave reviews from everyone who tastes them. They are a true game-changer, combining convenience with unparalleled taste and texture, ensuring your holiday or family meal is remembered for all the right reasons. Don’t just take my word for it; experience the magic yourself! I am genuinely excited for you to discover the deliciousness and ease that this recipe brings to your kitchen, transforming a traditional side into a star. Once you’ve made them, please, please share your triumphs with us! I’d absolutely love to hear about your experience, see your beautiful creations, and maybe even learn about your own unique variations and serving suggestions. Happy cooking, and get ready to impress!
Best Turkey Stuffing Balls
Transform beloved holiday flavors into mess-free, delightful bites! These turkey stuffing balls offer a golden-brown exterior and a moist, flavorful interior, perfect as a convenient side dish, appetizer, or an innovative way to enjoy festive leftovers.
Ingredients
-
3 cups mashed potatoes
-
3 cups stuffing
-
1½ cups shredded turkey
-
Black pepper, to taste
-
Panko breadcrumbs (optional)
-
Butter or oil (optional, for frying)
-
Gravy, for serving
Instructions
-
Step 1
In a large bowl, combine the mashed potatoes, stuffing, shredded turkey, and black pepper. Mix well until all ingredients are evenly distributed and the mixture is cohesive. -
Step 2
Using about 2-3 tablespoons of mixture per ball, gently roll between your palms to form 1.5 to 2-inch diameter balls. For extra crispness, optionally roll balls in Panko breadcrumbs. -
Step 3
Preheat oven to 375°F (190°C) and lightly grease a baking sheet, or heat butter/oil in a skillet over medium heat for frying. Bake for 15-20 minutes, flipping halfway, or pan-fry until golden brown and heated through (internal temperature 165°F/74°C). -
Step 4
Serve the turkey stuffing balls warm, accompanied by gravy.
Important Information
Nutrition Facts (Per Serving)
It is important to consider this information as approximate and not to use it as definitive health advice.
Allergy Information
Please check ingredients for potential allergens and consult a health professional if in doubt.