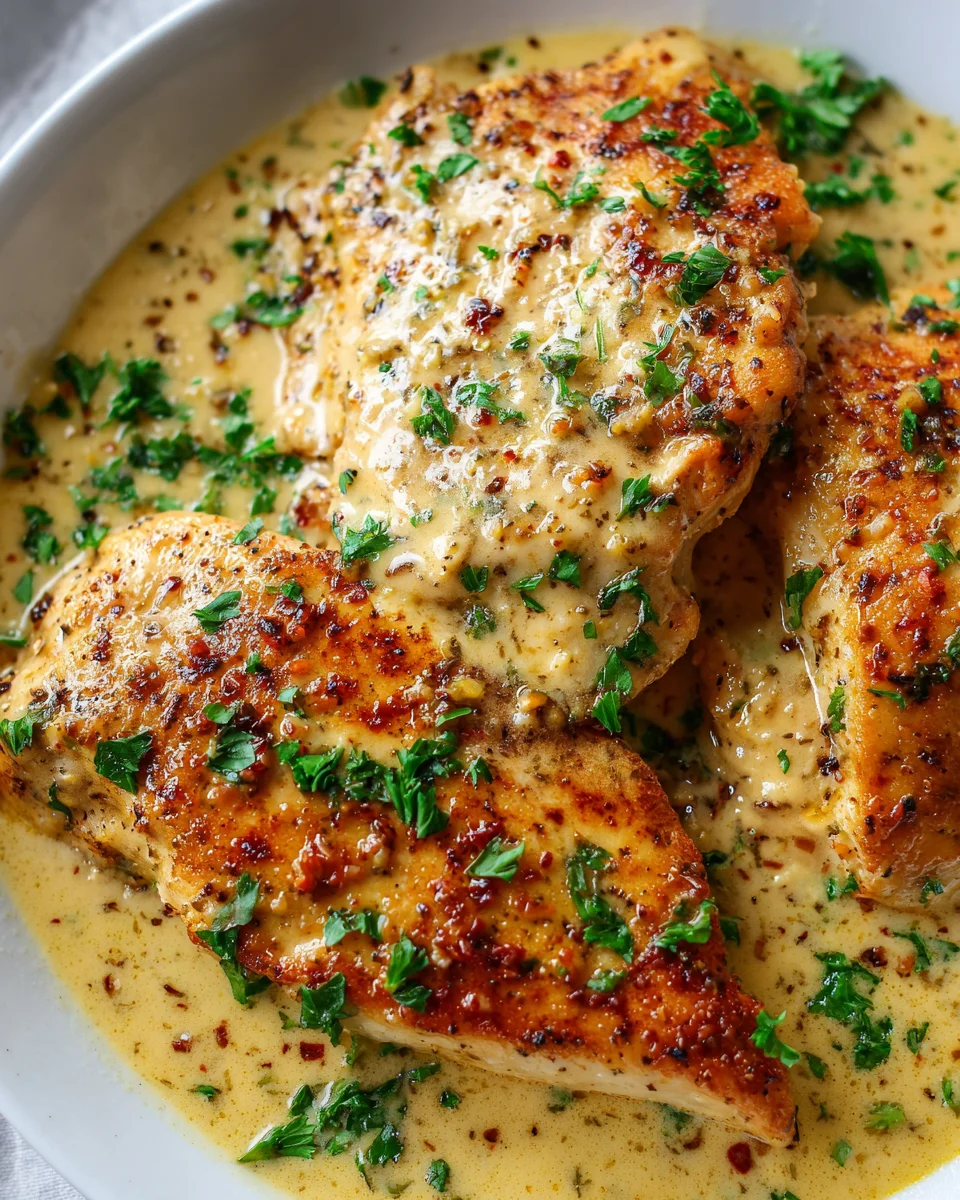
Melt In Your Mouth Caesar Chicken
Oh, prepare yourselves, because you’re about to discover your new favorite weeknight dinner: Melt In Your Mouth Caesar Chicken! I’m genuinely thrilled to share this one with you because it’s a complete game-changer. What makes this recipe so incredibly special, you ask? Well, it lives up to its name in every single bite. We’re talking about chicken so unbelievably tender and succulent, it practically dissolves in your mouth, leaving behind a burst of that iconic, garlicky, Parmesan-rich Caesar flavor we all adore.
You are going to absolutely love this dish because it takes the classic, universally loved taste of Caesar dressing and transforms it into an unforgettable main course that’s both comforting and elegant. It’s perfect for busy evenings when you want something spectacular without all the fuss, or even for entertaining guests who will be utterly impressed by its flavor and texture. Imagine perfectly cooked chicken, infused with the tangy, savory goodness of Caesar, emerging from your oven or pan so juicy and flavorful that it needs nothing more than a simple side to complete the meal.
In a nutshell, this recipe involves tenderizing and infusing chicken with a delightful Caesar marinade before gently cooking it to perfection. The result is a wonderfully moist and flavorful piece of chicken that truly melts, leaving you craving more. Trust me, once you try this Caesar chicken, you’ll understand exactly why I call it ‘Melt In Your Mouth’!

Ingredient Notes
Welcome to my kitchen! Today, we’re diving into the absolute delight that is ‘Melt In Your Mouth Caesar Chicken’. This isn’t just a catchy name; it’s a promise, and I’m going to guide you through the key ingredients that make it happen. The beauty of this dish lies in its simplicity and the quality of its components, ensuring every bite is tender, juicy, and packed with that irresistible Caesar flavor.
The Star: Chicken
- Boneless, Skinless Chicken Breasts: These are my top choice for achieving that “melt in your mouth” tenderness. When pounded thinly, they cook quickly and evenly, preventing them from drying out. You can also opt for boneless, skinless chicken thighs if you prefer a richer, slightly more forgiving dark meat; they will also be incredibly tender with this method.
- Substitution: If you’re not a fan of chicken or are looking for an alternative, thinly sliced beef cutlets (like minute steaks) could be adapted, though the cooking time and method might need slight adjustments. However, for the classic Caesar experience, chicken truly shines.
The Flavor Foundation: Caesar Dressing
- High-Quality Creamy Caesar Dressing: This is the backbone of our dish, so choose wisely! Whether you prefer store-bought or homemade, ensure it’s robust in flavor with good notes of garlic, Parmesan, lemon, and a hint of anchovy (or anchovy paste, which is often in bottled dressings and provides umami without being overtly “fishy”). A good quality dressing will elevate the entire dish.
- Homemade Option: If you’re feeling ambitious, a homemade Caesar dressing with fresh garlic, Dijon mustard, egg yolk, olive oil, lemon juice, Worcestershire sauce (or a vegetarian alternative), and Parmesan will truly make this dish sing.
The Moisture & Richness: Mayonnaise
- Full-Fat Mayonnaise: Don’t skip this! Mayonnaise might seem an odd addition, but it’s a secret weapon for keeping the chicken incredibly moist and tender as it bakes. It helps create a luscious, creamy coating that locks in all the flavor and prevents dryness.
- Substitution: For a lighter option, you could try a blend of light mayonnaise and Greek yogurt, but be aware that full-fat mayo truly contributes to the “melt in your mouth” texture.
The Zing & Savory Depth
- Fresh Garlic: Minced garlic adds essential aromatic depth that’s synonymous with Caesar flavor. Fresh is non-negotiable here for the best taste.
- Freshly Grated Parmesan Cheese: Not the pre-shredded stuff! Freshly grated Parmesan melts beautifully and provides a much superior nutty, salty flavor that complements the Caesar dressing perfectly.
- Fresh Lemon Juice: A squeeze of fresh lemon juice brightens all the flavors and adds a crucial tangy counterpoint to the richness.
The Crunch (Optional but Recommended)
- Panko Breadcrumbs: If you love a little crispy exterior, panko breadcrumbs are fantastic. They create an incredibly light and airy crust that adds wonderful texture without being heavy. Regular breadcrumbs work too, but panko provides that extra crunch.
With these ingredients at the ready, you’re well on your way to creating a truly unforgettable meal that lives up to its name!
Step-by-Step Instructions
Alright, let’s get cooking! Follow these simple steps to bring your ‘Melt In Your Mouth Caesar Chicken’ to life. I promise, the process is straightforward, and the results are absolutely worth it.
Step 1: Prepare Your Chicken
-
Pound the Chicken: This is a crucial step for achieving that signature tenderness. Place each boneless, skinless chicken breast between two pieces of plastic wrap or in a large zip-top bag. Using a meat mallet or the flat side of a heavy pan, pound the chicken until it’s about ½ inch thick, or even ¼ inch thick for extra speedy cooking and tenderness. Pounding ensures even cooking and helps the chicken absorb flavors better.
-
Pat Dry: Gently pat the pounded chicken dry with paper towels. This helps the coating adhere better.
Step 2: Whisk Together the Creamy Caesar Coating
-
In a medium bowl, combine your high-quality Caesar dressing, full-fat mayonnaise, minced fresh garlic, a generous amount of freshly grated Parmesan cheese, and a squeeze of fresh lemon juice. Whisk everything together until it’s smooth and well combined. This is your magic coating that will infuse the chicken with incredible flavor and moisture.
-
Taste and Adjust: Give it a quick taste. Does it need a little more garlic? A touch more lemon? Adjust to your preference!
Step 3: Coat the Chicken
-
Dredge in Sauce: Dip each pounded chicken breast into the creamy Caesar mixture, ensuring it’s thoroughly coated on all sides. Let any excess drip off.
-
(Optional) Add a Crispy Layer: If you’re using panko breadcrumbs, gently press each coated chicken breast into the breadcrumbs, ensuring an even layer adheres. This step adds a wonderful textural contrast.
Step 4: Bake to Perfection
-
Preheat Oven: Preheat your oven to 375°F (190°C).
-
Prepare Baking Dish: Lightly grease a baking dish or line it with parchment paper for easier cleanup.
-
Arrange Chicken: Place the coated chicken breasts in a single layer in the prepared baking dish.
-
Bake Covered (Initial Cook): For ultimate tenderness and to lock in moisture, I like to cover the baking dish loosely with foil for the first part of the cooking. Bake for 15-20 minutes, or until the chicken is mostly cooked through.
-
Bake Uncovered (To Brown): Remove the foil and continue baking for another 5-10 minutes, or until the chicken is golden brown and cooked through, and the internal temperature reaches 165°F (74°C) using an instant-read thermometer. If you want extra browning or crispiness, you can briefly broil for the last 1-2 minutes, keeping a very close eye on it to prevent burning.
Step 5: Rest and Serve
-
Rest the Chicken: Once cooked, remove the baking dish from the oven and let the chicken rest for 5-10 minutes before slicing or serving. This allows the juices to redistribute, resulting in even more tender and moist chicken.
-
Garnish: Sprinkle with a little fresh chopped parsley or extra Parmesan cheese for a beautiful finish.
And there you have it! Perfectly cooked, incredibly tender ‘Melt In Your Mouth Caesar Chicken’ ready to be enjoyed.
Tips & Suggestions
To truly master this ‘Melt In Your Mouth Caesar Chicken’ and ensure it lives up to its name every single time, I’ve got a few extra tips and suggestions for you. These little tricks can make a big difference in both the flavor and the texture of your dish.
Achieving Ultimate Tenderness
- Don’t Skip the Pounding: I can’t stress this enough! Pounding the chicken breasts to an even thickness (around ¼ to ½ inch) is paramount. It not only ensures uniform cooking but also breaks down the fibers, making the chicken incredibly tender. This is key to the “melt in your mouth” experience.
- Avoid Overcooking: Chicken breasts can go from perfectly juicy to dry in a matter of minutes. Use an instant-read meat thermometer and pull the chicken from the oven as soon as it hits 165°F (74°C). Remember, it will continue to cook slightly as it rests.
- The Mayo Magic: Trust the mayonnaise! Its fat content helps to insulate the chicken and keep it moist during baking. Don’t be shy with it; it contributes significantly to the tender texture.
Boosting the Caesar Flavor
- Quality Dressing Matters: As mentioned in the ingredient notes, a good quality Caesar dressing will make or break this dish. Invest in one you love, or better yet, make your own from scratch for unparalleled freshness.
- Fresh is Best: Always use fresh garlic and freshly grated Parmesan cheese. The intensity of flavor from these fresh ingredients far surpasses their pre-packaged counterparts.
- Lemon Zest: For an extra burst of bright, tangy flavor, consider adding a pinch of lemon zest to your creamy Caesar coating alongside the lemon juice. It really wakes up the palate.
For the Perfect Crispy Finish
- Panko Power: If you enjoy a crispy topping, panko breadcrumbs are your best friend. For maximum crunch, make sure your oven is adequately preheated, and don’t be afraid to finish with a quick broil (watch it carefully!). You can also lightly toast the panko in a dry pan before coating the chicken for an even crispier result.
- Lightly Oil the Panko: Before applying the panko, you can lightly toss it with a tablespoon of olive oil. This helps the breadcrumbs brown more evenly and become crispier in the oven.
Serving Suggestions
- Classic Caesar Salad: What goes better with Caesar chicken than a Caesar salad? Serve alongside a fresh, crisp romaine salad with extra dressing, croutons, and Parmesan.
- Pasta: Toss with some al dente pasta and a light cream sauce or a simple garlic and olive oil sauce.
- Roasted Vegetables: Roasted asparagus, broccoli, or green beans make excellent companions.
- Rice or Quinoa: For a more complete meal, serve over a bed of fluffy rice or healthy quinoa.
Storage
Once you’ve savored your delicious ‘Melt In Your Mouth Caesar Chicken’, you might find yourself with some leftovers (a rare but delightful occurrence!). Here’s how to properly store and reheat them to maintain their fantastic flavor and texture.
Refrigeration
- Airtight Container: Once the chicken has cooled to room temperature (within two hours of cooking), transfer any leftover pieces to an airtight container.
- Shelf Life: Stored properly in the refrigerator, your cooked Caesar chicken will stay fresh for 3-4 days.
Reheating
- Oven for Best Results: For the best quality and to help retain moisture, I highly recommend reheating the chicken in the oven. Preheat your oven to 300-325°F (150-160°C). Place the chicken in an oven-safe dish, possibly with a tiny splash of chicken broth or water at the bottom to create some steam, and cover loosely with foil. Heat for 10-15 minutes, or until warmed through, checking the internal temperature to ensure it reaches 165°F (74°C). This gentle reheating prevents the chicken from drying out.
- Microwave (Use with Caution): If you’re in a hurry, the microwave is an option, but it can sometimes make chicken tougher or drier. Reheat in short bursts (30-60 seconds at a time) on a medium power setting, flipping the chicken once, until it’s heated through. Covering it with a damp paper towel can help retain some moisture.
- Air Fryer: An air fryer can also work wonders for reheating, especially if you want to crisp up the breadcrumb coating again. Place the chicken in a single layer and air fry at 300°F (150°C) for 5-8 minutes, checking periodically.
Freezing
- Cooked Chicken: Yes, you can freeze cooked ‘Melt In Your Mouth Caesar Chicken’! Ensure it’s completely cooled. You can wrap individual portions tightly in plastic wrap, then place them in a freezer-safe bag or airtight container. This helps prevent freezer burn.
- Freezer Life: It will keep well in the freezer for up to 2-3 months.
- Thawing and Reheating: Thaw the frozen chicken overnight in the refrigerator. Once thawed, reheat it using one of the methods above, preferably the oven, until it’s piping hot.
Enjoy every tender bite, whether fresh from the oven or as a delicious leftover!
Final Thoughts
And there you have it! I truly hope you’re as excited as I am about this incredible dish. There’s just something magical about how the flavors come together to create the Melt In Your Mouth Caesar Chicken. It’s more than just a meal; it’s an experience!
From the first forkful, you’ll understand exactly why I gave it that name. The chicken is unbelievably tender, literally melting away, and the classic Caesar dressing infusion delivers that irresistible tangy, savory punch we all love. It’s surprisingly simple to prepare, yet tastes like something you’d order at a fancy restaurant. Whether you’re looking for a weeknight dinner savior or a show-stopping dish to impress guests, this Melt In Your Mouth Caesar Chicken fits the bill perfectly.
So, what are you waiting for? Give this recipe a try and prepare to fall in love. I promise, your taste buds will thank you for indulging in the sheer deliciousness of Melt In Your Mouth Caesar Chicken!

Best Melt-In-Your-Mouth Caesar Chicken Recipe Ever
- Total Time: 45 minutes
- Yield: 4 servings
Description
Discover the ultimate weeknight dinner with this Melt In Your Mouth Caesar Chicken! Tender, succulent chicken infused with garlicky, Parmesan-rich Caesar flavor makes for an unforgettable meal.
Ingredients
- Boneless, Skinless Chicken Breasts
- High-Quality Creamy Caesar Dressing
- Full-Fat Mayonnaise
- Fresh Garlic, minced
- Freshly Grated Parmesan Cheese
- Fresh Lemon Juice
- Panko Breadcrumbs (optional)
Instructions
- Pound the Chicken: Place each boneless, skinless chicken breast between two pieces of plastic wrap or in a large zip-top bag. Using a meat mallet or the flat side of a heavy pan, pound the chicken until it's about ½ inch thick.
- Pat Dry: Gently pat the pounded chicken dry with paper towels.
- Whisk Together the Creamy Caesar Coating: In a medium bowl, combine your high-quality Caesar dressing, full-fat mayonnaise, minced fresh garlic, freshly grated Parmesan cheese, and fresh lemon juice. Whisk until smooth.
- Taste and Adjust: Taste the mixture and adjust garlic or lemon juice to your preference.
- Coat the Chicken: Dip each pounded chicken breast into the creamy Caesar mixture, ensuring it's thoroughly coated.
- Add a Crispy Layer: If using panko breadcrumbs, gently press each coated chicken breast into the breadcrumbs.
- Preheat Oven: Preheat your oven to 375°F (190°C).
- Prepare Baking Dish: Lightly grease a baking dish or line it with parchment paper.
- Arrange Chicken: Place the coated chicken breasts in a single layer in the prepared baking dish.
- Bake Covered (Initial Cook): Cover the baking dish loosely with foil and bake for 15-20 minutes.
- Bake Uncovered (To Brown): Remove the foil and continue baking for another 5-10 minutes until golden brown and cooked through, reaching an internal temperature of 165°F (74°C).
- Rest the Chicken: Remove from the oven and let the chicken rest for 5-10 minutes before slicing or serving.
- Garnish: Sprinkle with fresh chopped parsley or extra Parmesan cheese.
- Prep Time: 15 mins
- Cook Time: 30 mins
- Category: Dinner
- Method: Baking
- Cuisine: Italian
Nutrition
- Serving Size: 1 piece
- Calories: 350
- Sugar: 1 g
- Sodium: 800 mg
- Fat: 20 g
- Saturated Fat: 3 g
- Unsaturated Fat: 15 g
- Trans Fat: 0 g
- Carbohydrates: 10 g
- Fiber: 1 g
- Protein: 30 g
- Cholesterol: 90 mg
Keywords: Pounding the chicken ensures even cooking and tenderness. Use fresh ingredients for the best flavor, and consider adding lemon zest for extra brightness.