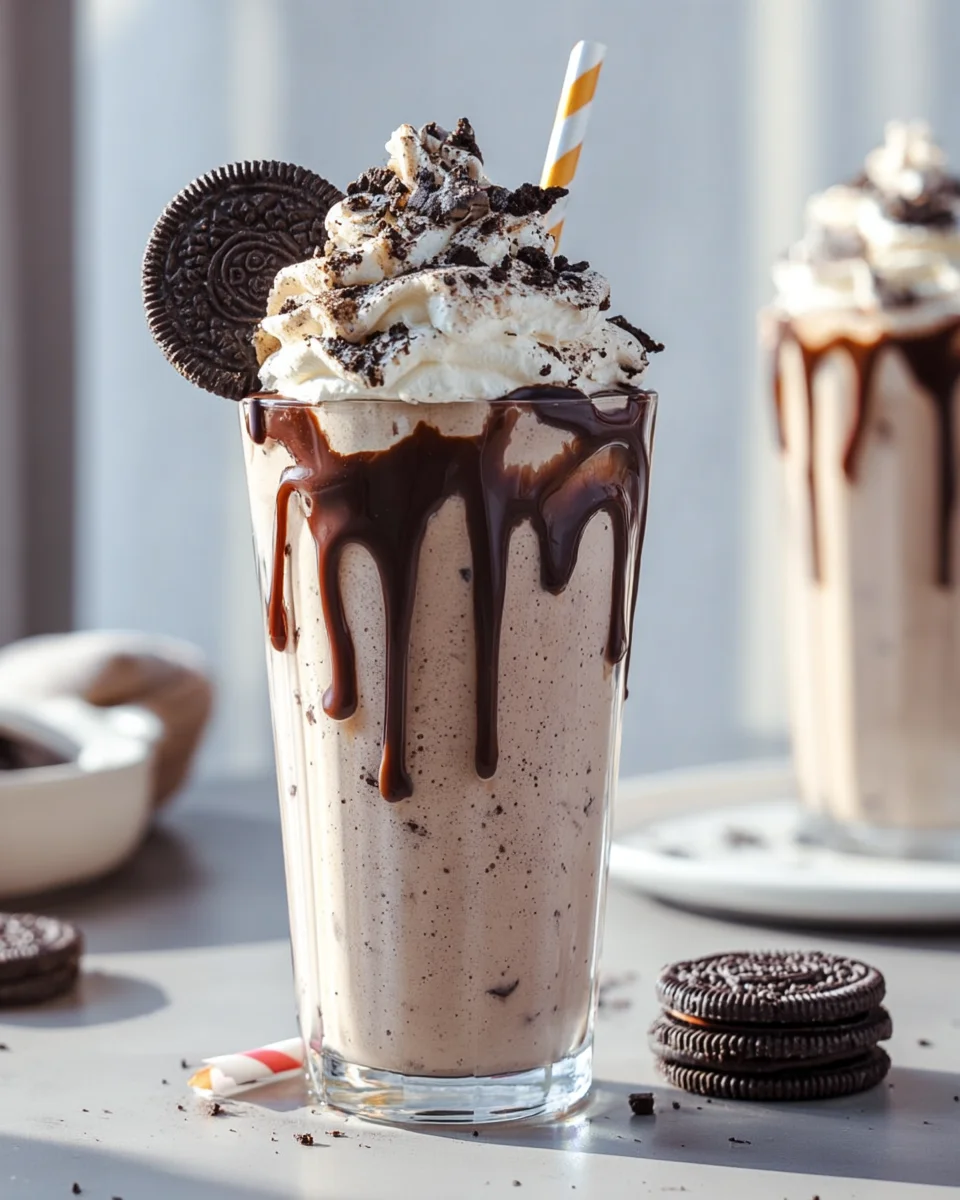
Oreo Milkshake
Oh my goodness, where do I even begin with this absolute dream in a glass? If you’ve ever craved the ultimate sweet treat, something that screams pure joy and indulgence, then you’ve come to the right place. I promise you, this isn’t just any milkshake; it’s the Oreo Milkshake, and it’s truly special.
What makes it so incredibly special? Well, it takes everything you love about those classic chocolate sandwich cookies – that rich cocoa flavor, the sweet cream filling – and blends it into a thick, frosty, and utterly irresistible beverage. Imagine a velvety smooth vanilla ice cream base, swirled with generous chunks of your favorite cookie, all brought together with a splash of milk. It’s creamy, it’s crunchy, it’s intensely chocolatey, and it’s pure bliss.
You, my friend, are going to absolutely adore this recipe because it delivers maximum flavor with minimal effort. It’s the perfect refreshing pick-me-up on a hot day, a delightful dessert after dinner, or simply an excuse to treat yourself to something extraordinary. Get ready to experience pure happiness with every single sip of this iconic, homemade delight!

Ingredient Notes
Crafting the perfect Oreo Milkshake truly starts with understanding the stars of the show – our ingredients. While the recipe itself is wonderfully simple, a little attention to detail here will elevate your shake from good to utterly irresistible. I’m talking about that dreamy, creamy, crumbly perfection!
Oreo Cookies
These are, without a doubt, the heart and soul of our milkshake. For an authentic “Oreo Milkshake” experience, I always recommend sticking with the classic original Oreo cookies. They provide that iconic chocolatey wafer crunch and sweet cream filling that we all know and love. I typically use around 8-10 cookies per serving, but don’t hesitate to add a couple more if you’re a true Oreo fanatic! You’ll want some for blending into the shake for flavor and texture, and a few extra to crush as a garnish. If you’re feeling adventurous after mastering the classic, you could experiment with Double Stuffed for extra creaminess or even Mint Oreos for a refreshing twist, but for the true classic, stick to the original.
Vanilla Ice Cream
This is where the ‘milkshake’ part truly shines through. Good quality vanilla ice cream is absolutely crucial for a rich, creamy texture and a delightful base flavor that complements the Oreos without overpowering them. I always reach for a premium, full-fat vanilla ice cream. The higher fat content results in a much smoother, thicker, and more luxurious shake. Avoid low-fat or ‘light’ varieties, as they tend to produce a thinner, icier shake that lacks that comforting creaminess we’re aiming for. Make sure your ice cream isn’t rock solid straight from the freezer; letting it soften for just 5-10 minutes on the counter can make it much easier to blend, preventing strain on your blender and ensuring a smoother consistency.
Milk
Milk is key for achieving the right consistency and helping everything blend smoothly. For the richest, creamiest Oreo Milkshake, I strongly recommend using whole milk. Its higher fat content contributes beautifully to the overall mouthfeel. If you prefer, 2% milk can work, but you might notice a slight difference in richness. I typically start with about half a cup of milk per serving and adjust from there. You can always add a little more to thin it out if it’s too thick, but you can’t easily make it thicker once you’ve added too much liquid, so always start conservatively. For an extra decadent touch, a splash of heavy cream instead of some of the milk can take your shake to the next level of indulgence!
Optional Enhancers
While not strictly necessary, a few optional additions can really elevate your Oreo Milkshake. A tiny splash of pure vanilla extract can deepen the overall flavor profile, adding another layer of aromatic sweetness. If you’re craving an extra chocolate punch, a drizzle of chocolate syrup directly into the blender with the other ingredients will intensify the chocolatey goodness. And, of course, for serving, don’t forget the whipped cream and extra crushed Oreos – they’re part of the fun!
Step-by-Step Instructions
Get ready to whip up an utterly delicious Oreo Milkshake that will have everyone asking for seconds! This recipe makes two generous servings, perfect for sharing (or not!).
Step 1: Prepare Your Oreos
First things first, let’s get those glorious cookies ready. I like to take about 8-10 Oreo cookies for two servings. Take most of these (say, 6-8 cookies) and break them into smaller pieces. You can do this by hand or give them a quick pulse in a food processor if you’re feeling fancy. These are going into the blender. Reserve 2-4 cookies to crush more finely for a delightful topping later. This initial preparation ensures that your blender doesn’t struggle and you get a nice distribution of cookie bits throughout the shake, plus a lovely garnish.
Step 2: Combine in the Blender
Now, let’s get everything into the blender. To ensure the smoothest blending process, I always add ingredients in a specific order. Start by pouring in your milk (about 1/2 cup for two servings) first. This liquid base helps the blender blades get going without resistance. Next, scoop in your vanilla ice cream (about 4 large scoops, or roughly 2 cups). The slightly softened ice cream will mix more easily. Finally, add the broken Oreo pieces you prepared in Step 1. If you’re using any optional vanilla extract or chocolate syrup, now is the time to add those in too.
Step 3: Blend Until Smooth and Creamy
With all your ingredients nestled comfortably in the blender, it’s time to bring your milkshake to life! Start blending on a low speed to incorporate everything without splashing. Once the initial blending begins, gradually increase the speed to medium-high. You want to blend until the mixture is completely smooth and creamy, with no large chunks of ice cream or cookies remaining. It might take about 30-60 seconds, depending on your blender’s power. Keep an eye on it; if the blades get stuck, pause the blender, scrape down the sides with a rubber spatula (making sure the blender is off and unplugged before doing so!), and then continue blending.
Step 4: Check and Adjust Consistency
The perfect milkshake consistency is a personal preference, and this is your moment to tailor it exactly how you like it. After the initial blend, take a look. Is it too thick for your liking? Add a splash more milk, about 1-2 tablespoons at a time, and blend briefly until you reach your desired pourable consistency. Is it too thin? Add another scoop of vanilla ice cream and blend again until it thickens up. I also like to give it a quick taste test at this point. With Oreos being quite sweet, you probably won’t need extra sugar, but if you want an extra boost of sweetness or chocolate, a touch more syrup can be added here.
Step 5: Serve Immediately and Garnish
An Oreo Milkshake is best enjoyed immediately! Before serving, I always like to chill my glasses in the freezer for about 10-15 minutes. This helps keep your milkshake colder for longer, enhancing the refreshing experience. Pour your freshly blended, creamy Oreo Milkshake into your chilled glasses. Now for the fun part – garnishing! Top generously with a swirl of whipped cream. Sprinkle the finely crushed Oreo crumbs you reserved earlier over the whipped cream. For an extra flourish, you could even add a whole Oreo cookie or a drizzle of chocolate syrup on top. Hand out some straws and enjoy your homemade masterpiece!
Tips & Suggestions
Making a great Oreo Milkshake is fairly straightforward, but with a few insider tips, you can elevate your creation from good to absolutely legendary. These little tricks will ensure every sip is pure bliss.
Achieving the Perfect Consistency
The ideal milkshake is thick enough to require a spoon but thin enough to drink easily through a straw. This balance is key! My top tip is to always start with less milk than you think you’ll need. You can always add more milk to thin out a thick shake, but it’s much harder to thicken a thin one (unless you have extra ice cream on hand). Add milk gradually, a tablespoon at a time, blending in between additions, until you hit that sweet spot. Remember, slightly softened ice cream blends more easily and contributes to a smoother, thicker texture.
Chilled Glasses are Your Best Friend
This might seem like a small detail, but it makes a huge difference! Placing your serving glasses in the freezer for 10-15 minutes before pouring your milkshake will help keep your shake colder for a longer period. There’s nothing worse than a lukewarm milkshake that quickly turns watery. A chilled glass helps maintain that refreshing, frosty temperature, ensuring every sip is as delightful as the first.
Flavor Boosters and Variations
While the classic Oreo Milkshake is perfect as is, there are always ways to subtly enhance or vary the flavor. A tiny pinch of salt (just a literal pinch!) added to the blender can actually help to enhance the sweetness of the Oreos and vanilla, making the flavors pop even more. If you’re a coffee lover, a teaspoon of instant espresso powder can add a wonderful depth and slightly bitter contrast to the sweetness of the Oreos. For a more indulgent chocolate flavor, melt a square of good quality dark chocolate and drizzle it into the blender along with the other ingredients. Once you’ve mastered the classic, don’t be afraid to experiment with other Oreo flavors, like mint or peanut butter, for exciting twists on the original!
Blender Best Practices
Don’t overload your blender. If you’re making a larger batch, consider blending in two smaller batches to prevent strain on your appliance and ensure a smoother result. If your blender seems to be struggling or the ingredients aren’t circulating well, stop, remove the lid, and use a rubber spatula (always with the blender turned off and unplugged!) to push the thicker ingredients down towards the blades. Starting on a low speed and gradually increasing it is also gentler on your blender and prevents splashes.
Get Creative with Garnishes
Garnishes aren’t just for looks; they add to the overall experience! Beyond the classic whipped cream and crushed Oreos, consider a drizzle of chocolate fudge or caramel sauce down the inside of the glass before pouring in the shake. You could even stick a whole Oreo cookie on the rim or add some chocolate shavings for a truly decadent presentation. Don’t underestimate the power of a good garnish to make your milkshake feel extra special.
Storage
When it comes to the Oreo Milkshake, I have to be completely honest with you: it’s truly a creation designed for immediate enjoyment. Milkshakes, by their very nature, are at their absolute best right after they’ve been blended.
Best When Fresh
The perfect Oreo Milkshake boasts a creamy, thick texture with delightful little bits of crushed Oreos suspended throughout, and it’s wonderfully frosty cold. This ideal state is fleeting. As soon as it sits, especially at room temperature, the ice cream starts to melt, causing the shake to lose its thickness and become watery. The Oreo crumbs, which were once crisp and distinctive, will also soften and get soggy, losing their textural appeal. So, my strongest advice is to make only as much as you intend to drink right away. Enjoy it within minutes of blending for the ultimate experience.
Short-Term Storage (Not Recommended, But Possible)
If you absolutely must store a leftover portion for a very short period (say, an hour or two), your best bet is to pour it into an airtight container and place it in the coldest part of your refrigerator. However, please manage your expectations! Even in the fridge, the milkshake will begin to separate, and the texture will significantly change. It will become thinner, and the Oreos will become quite soft. It won’t have that lovely frothy, creamy consistency it once had.
Freezing (A Last Resort)
Can you freeze an Oreo Milkshake? Technically, yes, you can. If you have a significant amount leftover and truly don’t want to waste it, you can transfer it to an airtight, freezer-safe container. It will freeze solid, much like ice cream. However, upon thawing, it will not return to its original milkshake glory. To attempt to revive it, you’ll need to let it thaw in the refrigerator for a while until it’s somewhat scoopable, then transfer it back to your blender. Add a splash of fresh milk (about 1-2 tablespoons per serving) and re-blend until it reaches a drinkable consistency. While it will still taste like Oreos, the texture will likely be less smooth and creamy than a freshly made shake. Think of it more as a soft-serve ice cream or a very thick smoothie rather than a true milkshake. Honestly, making a fresh batch is always the superior option!
Final Thoughts
And there you have it – your very own delicious Oreo Milkshake! I truly believe this recipe is an absolute must-try for anyone looking for a quick, indulgent, and incredibly satisfying treat. The magic of crushed Oreos blended into creamy goodness creates a symphony of textures and flavors that is simply irresistible. It’s the kind of dessert that brings an instant smile to your face, whether you’re whipping it up for a special occasion or just a casual afternoon pick-me-up.
So go ahead, treat yourself and your loved ones to this delightful experience. You deserve the simple joy that a perfectly blended Oreo Milkshake brings. I promise, once you’ve tasted its perfection, you’ll be making it again and again!

Best Homemade Oreo Milkshake – Easy & Creamy Recipe!
- Total Time: 15 minutes
- Yield: 2 servings 1x
Description
Indulge in the ultimate Oreo Milkshake that combines rich chocolatey cookies with creamy vanilla ice cream for a refreshing treat. Perfect for any occasion, this easy recipe delivers maximum flavor with minimal effort.
Ingredients
- 8–10 Oreo cookies
- 2 cups vanilla ice cream (about 4 large scoops)
- 1/2 cup whole milk (adjust as needed)
- Optional: splash of pure vanilla extract
- Optional: drizzle of chocolate syrup
- Optional: whipped cream for serving
- Optional: extra crushed Oreos for garnish
Instructions
- Step 1: Prepare Your Oreos – Take about 8-10 Oreo cookies for two servings. Break 6-8 cookies into smaller pieces and reserve 2-4 cookies to crush for garnish.
- Step 2: Combine in the Blender – Pour in 1/2 cup of milk first, then add 2 cups of vanilla ice cream, and finally the broken Oreo pieces. Add any optional vanilla extract or chocolate syrup.
- Step 3: Blend Until Smooth and Creamy – Start blending on low speed, then gradually increase to medium-high until the mixture is smooth and creamy, about 30-60 seconds.
- Step 4: Check and Adjust Consistency – If too thick, add 1-2 tablespoons of milk at a time until desired consistency is reached. If too thin, add another scoop of vanilla ice cream.
- Step 5: Serve Immediately and Garnish – Chill glasses in the freezer for 10-15 minutes. Pour the milkshake into the glasses, top with whipped cream and crushed Oreos, and serve with straws.
- Prep Time: 15 mins
- Cook Time: 0 mins
- Category: Dessert
- Method: Blending
- Cuisine: American
Nutrition
- Serving Size: 1 milkshake
- Calories: 600
- Sugar: 70 g
- Sodium: 200 mg
- Fat: 30 g
- Saturated Fat: 15 g
- Unsaturated Fat: 10 g
- Trans Fat: 0 g
- Carbohydrates: 80 g
- Fiber: 2 g
- Protein: 8 g
- Cholesterol: 60 mg
Keywords: For a richer shake, consider using heavy cream instead of some of the milk. Always start with less milk to achieve your desired thickness, and remember to chill your glasses for a better experience.