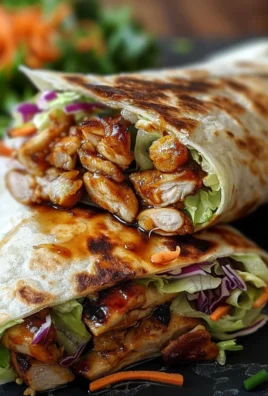
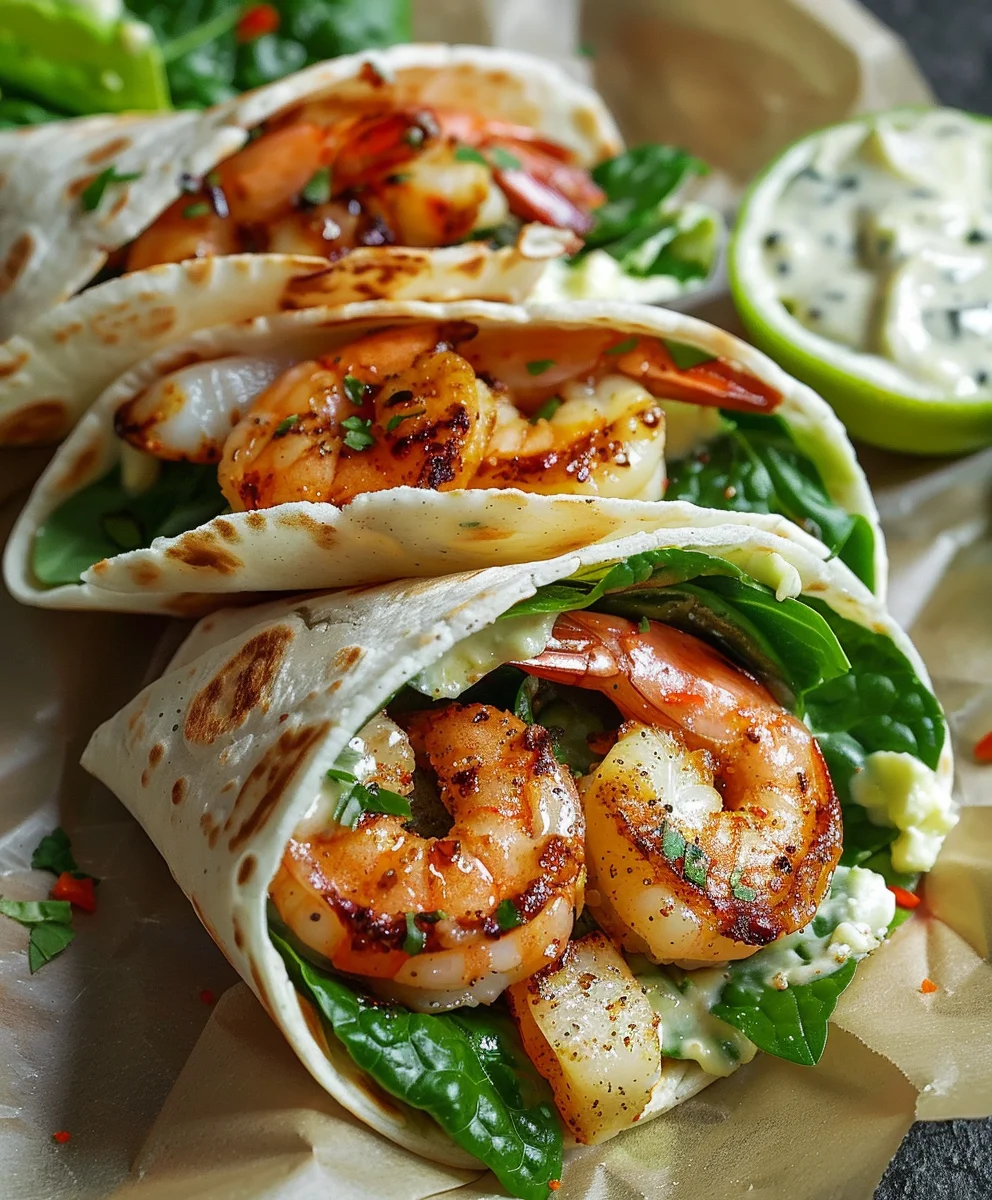
Grilled Shrimp Caesar Wraps are more than just a meal; they’re a culinary revelation, transforming a beloved classic into an incredibly convenient and utterly satisfying experience. I’ve always been captivated by dishes that offer both familiarity and an exciting twist, and this recipe absolutely delivers. Imagine the succulent, smoky char of perfectly grilled shrimp, nestled amongst crisp romaine lettuce, tangy Parmesan, and a generous drizzle of creamy Caesar dressing, all neatly tucked into a soft tortilla. It’s the quintessential flavor profile of a Caesar salad, elevated for effortless enjoyment and designed for your busy life.
While the classic Caesar salad itself boasts a fascinating origin story from Tijuana, Mexico, thanks to restaurateur Caesar Cardini in the 1920s, the concept of transforming it into a portable wrap is a testament to modern culinary innovation. We’ve taken that rich heritage and adapted it for today’s fast-paced lifestyle without sacrificing any of its iconic appeal. People absolutely adore this dish because it masterfully combines a refreshing crunch with the savory depth of grilled seafood, all wrapped up in a handheld package perfect for lunch on the go, a light dinner, or even a delightful picnic. The sheer convenience, coupled with the explosion of fresh and vibrant flavors, makes these Grilled Shrimp Caesar Wraps an instant favorite for anyone seeking a healthy, incredibly tasty, and easy-to-manage meal solution. Get ready to experience your new go-to way to enjoy Caesar!

Ingredients:
-
For the Grilled Shrimp:
- 1 ½ pounds large shrimp, peeled and deveined (fresh or frozen, thawed)
- 2 tablespoons olive oil, plus extra for the grill grates
- 1 tablespoon fresh lemon juice
- 2 cloves garlic, minced very finely
- 1 teaspoon smoked paprika (or regular paprika if you prefer)
- ½ teaspoon dried oregano
- ½ teaspoon sea salt
- ¼ teaspoon freshly ground black pepper
-
For the Creamy Homemade Caesar Dressing:
- 1 large fresh egg yolk (ensure it’s from a very fresh, pasteurized egg for safety)
- 1 tablespoon Dijon mustard
- 2 cloves garlic, minced to a paste (you can use a microplane)
- 1 teaspoon Worcestershire sauce
- 2 tablespoons fresh lemon juice
- 1-2 teaspoons anchovy paste (or 2-4 finely minced anchovy fillets, adjust to your taste preference)
- ¼ cup finely grated Parmesan cheese, plus more for garnish
- ½ cup vegetable oil, canola oil, or light olive oil (a neutral-flavored oil works best)
- ¼ teaspoon sea salt, or to taste
- ⅛ teaspoon freshly ground black pepper, or to taste
-
For the Grilled Shrimp Caesar Wraps Assembly:
- 6-8 large flour tortillas or whole wheat wraps (about 10-12 inches in diameter)
- 1 large head of romaine lettuce, washed, dried thoroughly, and chopped into bite-sized pieces
- ½ cup Caesar-style croutons, lightly crushed or left whole (optional, for added crunch)
- Extra Parmesan cheese, shaved or grated, for garnish
- Cherry tomatoes, halved (optional, for a burst of color and sweetness)
- Thinly sliced red onion (optional, for a slight bite)
For the Creamy Homemade Caesar Dressing:
Making your own Caesar dressing from scratch is an absolute game-changer for these Grilled Shrimp Caesar Wraps. It’s fresh, vibrant, and incredibly flavorful, elevating the entire dish far beyond what a store-bought version could ever achieve. Don’t be intimidated; it’s quite simple!
- First things first, let’s get that glorious Caesar dressing whipped up. In a medium-sized mixing bowl, combine the single large, fresh egg yolk (remember, using a pasteurized egg is recommended if you’re concerned about raw egg consumption), Dijon mustard, the minced garlic paste, Worcestershire sauce, and the fresh lemon juice. Now, here’s where the magic of the dressing truly comes alive: add the anchovy paste. Start with one teaspoon, and if you’re an anchovy lover like me, you can certainly go for two. Trust me, it doesn’t make the dressing taste “fishy”; instead, it adds an incredible depth of umami that is absolutely essential for an authentic Caesar flavor. Whisk all these ingredients together vigorously until they are well combined and slightly frothy.
- Now comes the emulsification process, which sounds fancy but simply means slowly incorporating the oil to create a thick, creamy dressing. While continuously whisking the egg yolk mixture, begin to drizzle in the vegetable or light olive oil in a very slow, steady stream. It’s crucial to add the oil gradually, almost drop by drop at first, especially for the initial minute or two. If you add it too quickly, your dressing might “break” and separate, which we definitely want to avoid! Continue whisking and slowly adding the oil until it is all incorporated and the dressing has thickened considerably, resembling a rich, creamy mayonnaise. This takes a bit of arm work, but it’s so worth it.
- Once your dressing is beautifully thick and creamy, stir in the ¼ cup of finely grated Parmesan cheese. Give it another good whisk to ensure the cheese is fully integrated. Finally, season the dressing with ¼ teaspoon of sea salt and ⅛ teaspoon of freshly ground black pepper. Taste it, my friends! This is your moment to adjust. Does it need more lemon for brightness? A little more salt? Perhaps another touch of anchovy for that extra punch? Adjust it to your personal preference. Once perfected, set your homemade Caesar dressing aside. It can be made a day in advance and stored in an airtight container in the refrigerator, allowing the flavors to meld even further.
Preparing and Marinating the Shrimp:
Properly preparing and marinating your shrimp is key to ensuring they are flavorful and juicy for your Grilled Shrimp Caesar Wraps. This step is quick but incredibly impactful.
- If you’re using frozen shrimp, make sure they are completely thawed. The best way to thaw shrimp is by placing them in a bowl of cold water for about 15-20 minutes, or overnight in the refrigerator. Once thawed, if they aren’t already, take a moment to peel them (leaving the tails on or off is completely up to your preference; I often leave them on for aesthetic appeal and a convenient “handle” if eating them individually, but for wraps, tails off might be easier). Then, carefully devein them if they aren’t already. To devein, simply make a shallow cut along the back curve of the shrimp and remove the dark, stringy vein. Rinse the shrimp under cold water and then, this is a very important step, pat them thoroughly dry with paper towels. Removing excess moisture helps them achieve a better sear and prevents steaming on the grill.
- In a medium bowl, prepare your marinade. Combine the 2 tablespoons of olive oil, 1 tablespoon of fresh lemon juice, the 2 cloves of finely minced garlic, 1 teaspoon of smoked paprika (the smoked variety adds a wonderful depth that complements the grilled flavor beautifully), ½ teaspoon of dried oregano, ½ teaspoon of sea salt, and ¼ teaspoon of freshly ground black pepper. Whisk these ingredients together until they are well combined.
- Add the patted-dry shrimp to the bowl with the marinade. Toss the shrimp gently but thoroughly to ensure every single piece is coated evenly with the flavorful mixture. You want all those delicious spices and aromatics to adhere to the shrimp!
- Let the shrimp marinate at room temperature for about 15-20 minutes. If you’re planning ahead, you can marinate them in the refrigerator for up to 30 minutes, but no longer than that. Shrimp are delicate and the lemon juice in the marinade can start to “cook” them (a process called denaturation) if they sit for too long, resulting in a rubbery texture. While the shrimp are marinating, if you’re using wooden skewers, now would be a good time to soak them in water. This prevents them from burning on the grill. Skewering the shrimp isn’t strictly necessary for cooking, but it makes handling them on the grill much easier, especially when you need to flip them.
Grilling the Shrimp:
Grilling shrimp is a quick process, and getting it right is crucial for tender, perfectly cooked shrimp in your Grilled Shrimp Caesar Wraps. Overcooked shrimp are tough and rubbery, so we want to avoid that at all costs!
- Preheat your grill or grill pan to a medium-high heat. If you’re using an outdoor grill, allow it to preheat for about 10-15 minutes to ensure it’s consistently hot. For a grill pan on the stovetop, give it about 5-7 minutes. Once hot, carefully clean the grill grates with a wire brush to remove any residue from previous cooks. Then, lightly oil the grates. You can do this by dipping a paper towel in a little olive oil and, using tongs, carefully wiping down the hot grates. This prevents the shrimp from sticking and helps achieve those beautiful grill marks.
- Carefully arrange the marinated shrimp directly onto the hot grill grates. If you’ve skewered them, lay the skewers across the grates. If they’re loose, place them in a single layer, ensuring they don’t overlap. You want to hear that satisfying sizzle when they hit the heat! Don’t overcrowd the grill; if you have a lot of shrimp, cook them in batches to maintain the grill’s temperature and ensure even cooking. Overcrowding can lower the temperature and lead to steaming rather than grilling.
- Grill the shrimp for approximately 2-3 minutes per side. Shrimp cook very quickly, so stay close and keep an eye on them. You’ll know they’re ready to flip when they turn opaque and pink, and start to curl slightly. Once you flip them, grill for another 2-3 minutes on the second side. The exact cooking time will depend on the size of your shrimp and the intensity of your grill’s heat. You’re looking for them to be opaque all the way through, with a beautiful pink color and a slight char from the grill. Don’t let them sit too long, as they will quickly become rubbery.
- Once cooked, immediately remove the grilled shrimp from the grill and transfer them to a clean plate. If you’ve used skewers, carefully slide the shrimp off the skewers. While they don’t strictly need to “rest” like a large cut of meat, letting them sit for a minute or two can help them cool slightly before handling and assembling. I often like to give them a quick squeeze of fresh lemon juice at this stage, which brightens their flavor even further.
Assembling Your Grilled Shrimp Caesar Wraps:
This is where all our hard work comes together! Assembling your Grilled Shrimp Caesar Wraps is a fun and customizable process, allowing you to create the perfect bite every time.
- Before you begin assembly, ensure all your components are ready and within easy reach. The romaine lettuce should be freshly washed, thoroughly dried, and chopped into manageable, bite-sized pieces. If you’re using them, have your optional cherry tomatoes halved, and your red onion thinly sliced. Grab your crushed croutons and extra Parmesan cheese. If your tortillas are cold from the package, I highly recommend warming them slightly. You can do this by heating them one at a time in a dry skillet over medium heat for about 15-20 seconds per side, until they are soft and pliable. Alternatively, you can stack them, wrap them in a damp paper towel, and microwave for 30-60 seconds. Warm tortillas are less likely to crack when rolled and are much more pleasant to eat.
- Lay one warm tortilla flat on a clean work surface or a large plate. Take a generous spoonful (about 2-3 tablespoons, or to your liking) of your glorious homemade Caesar dressing and spread it evenly over the entire surface of the tortilla, leaving a small border around the edges. This dressing is the glue and the flavor foundation for our amazing wraps, so don’t skimp!
- Next, arrange a layer of your crisp, chopped romaine lettuce down the center of the tortilla, leaving enough space at the bottom to fold up. You want a good amount of lettuce for that essential crunch and freshness, but be mindful not to overfill the wrap at this stage, as we still have more delicious components to add.
- Now, it’s time for the star of the show: your perfectly grilled shrimp! Arrange about 4-5 pieces of grilled shrimp (or more, depending on their size and your appetite) directly on top of the romaine lettuce. If your shrimp are particularly large, you might want to slice them in half or into thirds to make for easier biting in the wrap.
- This is where you can truly personalize your Grilled Shrimp Caesar Wraps. Sprinkle a few crushed Caesar croutons over the shrimp and lettuce layer for an added textural element and classic Caesar flavor. If you’re using them, scatter some halved cherry tomatoes for a pop of color and sweetness, and a few thin slices of red onion for a subtle bite. Finally, generously sprinkle some extra grated or shaved Parmesan cheese over all the fillings.
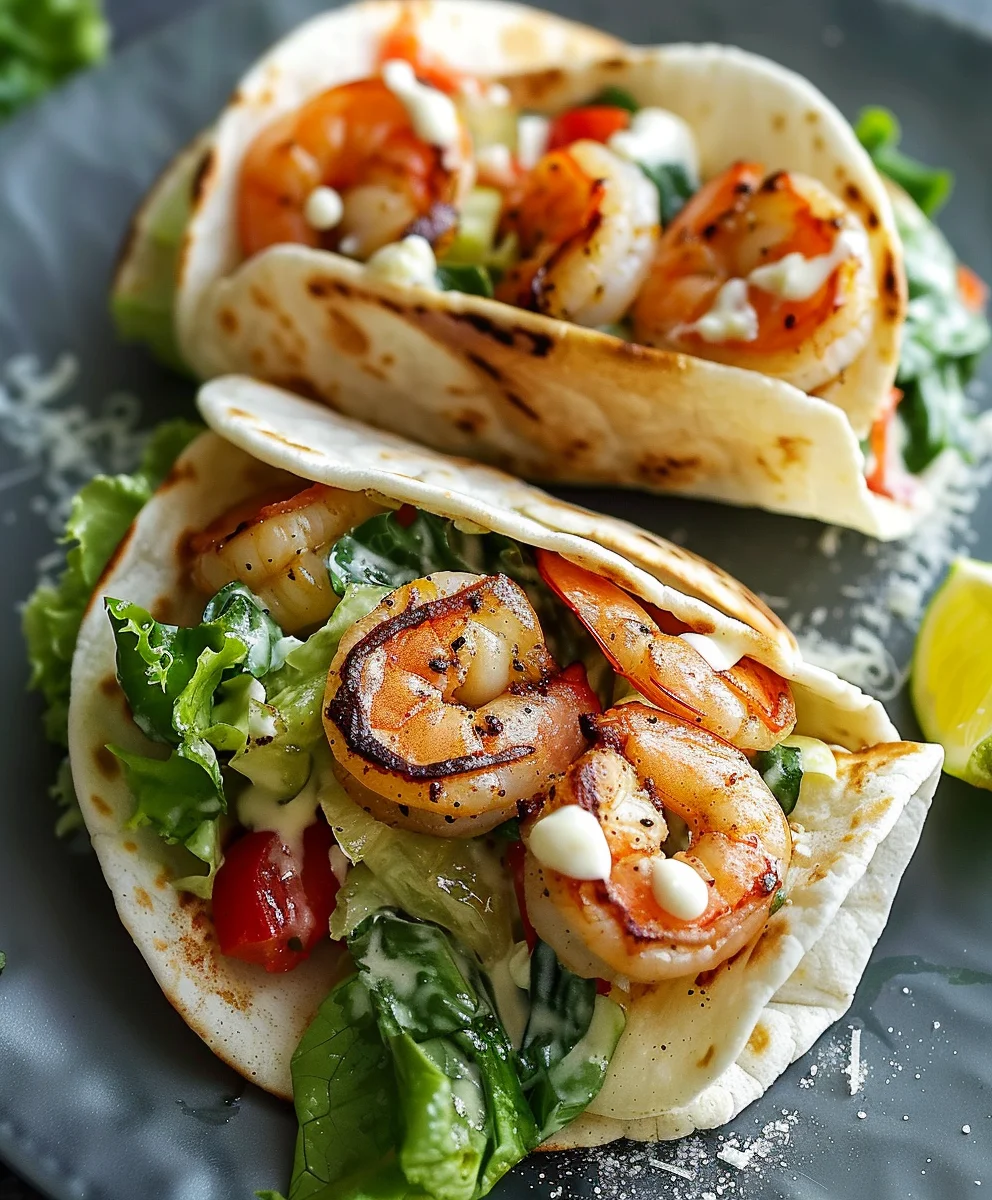
- To expertly roll your wrap, fold the bottom edge of the tortilla up over the fillings, tucking it in snugly. Then, fold in the left and right sides of the tortilla over the filling. While holding these sides in, tightly roll the entire wrap upwards from the bottom until you have a compact, cylindrical wrap. The key is to keep it as tight as possible to ensure everything stays together when you take a bite. If you’re serving these immediately, you can slice them in half diagonally for an attractive presentation. If you need to hold them for a short time, you can wrap them tightly in parchment paper or foil. Serve your sensational Grilled Shrimp Caesar Wraps immediately and enjoy every flavorful bite! They make a fantastic light lunch, an easy dinner, or even an impressive appetizer when cut into smaller pinwheels.
Conclusion:
So, there you have it – my absolute favorite way to enjoy a classic with a twist that truly elevates your mealtime. I truly believe that once you try these, you’ll understand why I’m so passionate about them. We’re talking about a dish that takes the beloved Caesar salad and transforms it into a portable, exciting, and unbelievably delicious experience. The magic truly lies in the marriage of textures and tastes: the succulent, smoky char of perfectly grilled shrimp, the crisp, refreshing crunch of fresh romaine lettuce, the rich and tangy embrace of a creamy Caesar dressing, and those satisfyingly crunchy croutons, all bundled snugly into a soft, pliable tortilla. It’s a symphony for your taste buds, a culinary adventure that’s both familiar and delightfully new.
I crafted this recipe with the modern home cook in mind – someone who appreciates incredible flavor without spending hours slaving away in the kitchen. This isn’t just another meal; it’s a smart solution for busy weeknights, an impressive yet effortless option for entertaining, and a fantastic way to inject some excitement into your lunch routine. It’s light enough to make you feel good, yet substantial enough to satisfy even the hungriest appetites. The protein-packed shrimp and fiber-rich lettuce make it a wholesome choice, proving that fast food can indeed be fantastic and good for you. I often find myself reaching for this recipe when I need something quick, incredibly flavorful, and guaranteed to put a smile on everyone’s face at the dinner table. It’s a testament to how simple, quality ingredients, thoughtfully combined, can create something truly extraordinary.
These Grilled Shrimp Caesar Wraps are more than just a meal; they’re a revelation. They are perfect for those moments when you crave something fresh and vibrant, but also deeply satisfying. I’ve found that they hit all the right notes: a touch of savory, a hint of zest, a delightful crunch, and that unmistakable smoky essence from the grill. Every single bite is packed with so much flavor that you’ll be planning your next batch before you’ve even finished the first. It’s a recipe that inspires confidence in the kitchen and delivers results that taste like they came from a gourmet restaurant, even though they were whipped up with minimal fuss in your own home. That’s the beauty of it – gourmet taste, home-cooked ease.
Beyond the Wrap: Serving Suggestions and Creative Variations
One of the aspects I adore most about this recipe is its incredible versatility. While the wrap format is undeniably fantastic, there are so many ways you can serve and adapt these delightful flavors to suit any occasion or dietary preference. For a complete meal, I often serve my Grilled Shrimp Caesar Wraps alongside a simple green salad with a light vinaigrette – something to complement the richness of the Caesar dressing without overpowering it. A bowl of creamy tomato soup or a refreshing gazpacho also makes for a wonderful pairing, especially on a cooler evening or a hot summer day. If you’re hosting a casual get-together, a platter of these wraps, sliced into smaller, bite-sized pinwheels, makes for an incredibly popular appetizer that always disappears quickly! Don’t forget a side of crispy sweet potato fries or a colorful fruit salad for a bit of extra sweetness and freshness.
Unleash Your Inner Chef: Flavor & Ingredient Swaps
Feeling adventurous? The core components of this dish are wonderfully adaptable. If shrimp isn’t quite what you’re in the mood for, feel free to swap it out for other proteins. Perfectly grilled chicken breast, sliced into tender strips, makes for an equally delicious Grilled Chicken Caesar Wrap. For a red meat option, thinly sliced steak, marinated and seared, adds a hearty twist that’s absolutely divine. And for my vegetarian friends, don’t feel left out! Roasted chickpeas seasoned with paprika and garlic, or thick slices of grilled portobello mushrooms, offer a fantastic plant-based alternative that’s rich in umami and satisfyingly textural. You could even pan-fry some halloumi cheese for a salty, squeaky, and utterly delicious addition that holds up beautifully in the wrap.
Let’s talk about the Caesar dressing itself. While I love a classic, you can certainly customize it. A squeeze of fresh lemon juice or a dash of hot sauce can perk it up. For those who prefer a homemade touch, whipping up your own Caesar dressing from scratch is incredibly rewarding and allows you to control the exact flavor profile – perhaps a little more garlic, a touch more anchovy, or even a hint of Dijon mustard. If you’re looking for a lighter option, a Greek yogurt-based Caesar dressing can offer the creaminess with fewer calories.
And the wraps themselves? While flour tortillas are my go-to, don’t hesitate to experiment! Large lettuce cups (like butter lettuce or endive) make for an excellent gluten-free and low-carb option, turning your wrap into a vibrant salad cup. Whole wheat tortillas add a nutty flavor and extra fiber, while spinach or sun-dried tomato flavored tortillas can infuse an extra layer of taste and color. For a truly unique presentation, consider serving the Caesar mixture in hollowed-out bell pepper halves or even large avocado boats. The possibilities are truly endless!
Don’t be shy about adding extra vegetables either. Sliced cherry tomatoes, thinly cut red onion, cucumber, or even a few strips of roasted bell pepper can add wonderful color, texture, and nutritional value. A sprinkle of crumbled feta cheese or shaved Parmesan beyond the initial dusting can elevate the saltiness and creaminess. And for an extra layer of crunch, consider toasted pumpkin seeds, sunflower seeds, or even a sprinkle of crispy fried onions alongside or instead of the croutons. Each small adjustment can lead to a completely new and exciting culinary experience, making this recipe a fantastic canvas for your own creativity.
Your Culinary Journey Starts Now!
I truly hope this recipe inspires you to get into your kitchen and give these incredible wraps a try. I promise you won’t be disappointed. They are the perfect embodiment of fresh, flavorful, and fuss-free cooking – exactly what I strive for in my own culinary adventures. There’s a profound satisfaction that comes from creating something so delicious from scratch, something that brings joy to your table and to those you share it with.
So, fire up that grill, gather your ingredients, and prepare to embark on a flavor journey that you’ll want to revisit again and again. Once you’ve made these, I would absolutely love to hear about your experience! Did you stick to the original recipe, or did you put your own unique spin on it? What were your favorite variations? Did you serve them as wraps, a salad, or perhaps as mini appetizers? Please share your triumphs, your tips, and especially your photos! Tag me on social media or leave a comment below with your feedback. Your insights and creations truly make this community vibrant and inspire me to keep sharing more delicious ideas. Happy cooking, my friends – I can’t wait to see what you create!
Grilled Shrimp Caesar Wraps
A delicious and convenient twist on the classic Caesar salad, featuring succulent, smoky grilled shrimp, crisp romaine, tangy Parmesan, and creamy Caesar dressing, all neatly tucked into a soft tortilla. Perfect for a quick, flavorful meal.
Ingredients
-
1 pound large shrimp, peeled and deveined
-
2 tablespoons olive oil
-
Salt and freshly ground black pepper to taste
-
1 teaspoon garlic powder
-
Juice of 1 lemon
-
4 cups romaine lettuce, chopped
-
1⁄4 cup grated Parmesan cheese
-
1⁄2 cup Caesar dressing
-
4 large flour tortillas
-
1⁄4 cup croutons, crushed
-
Optional: cherry tomatoes, sliced
Instructions
-
Step 1
Pat shrimp thoroughly dry. In a bowl, toss shrimp with olive oil, garlic powder, lemon juice, salt, and pepper until coated. Marinate at room temperature for 15-20 minutes. -
Step 2
Preheat grill or grill pan to medium-high heat and lightly oil the grates. Grill shrimp for 2-3 minutes per side, until pink and opaque. Remove immediately to a clean plate. -
Step 3
Warm tortillas slightly for pliability. Spread Caesar dressing evenly over each tortilla. Layer with chopped romaine lettuce, grilled shrimp (slice large shrimp if desired), grated Parmesan, and crushed croutons. Add optional cherry tomatoes or other desired toppings. -
Step 4
Fold the bottom edge of the tortilla up over the fillings, then fold in the left and right sides. Tightly roll the wrap from the bottom upwards into a compact cylinder. Slice in half diagonally if desired and serve immediately.
Important Information
Nutrition Facts (Per Serving)
It is important to consider this information as approximate and not to use it as definitive health advice.
Allergy Information
Please check ingredients for potential allergens and consult a health professional if in doubt.