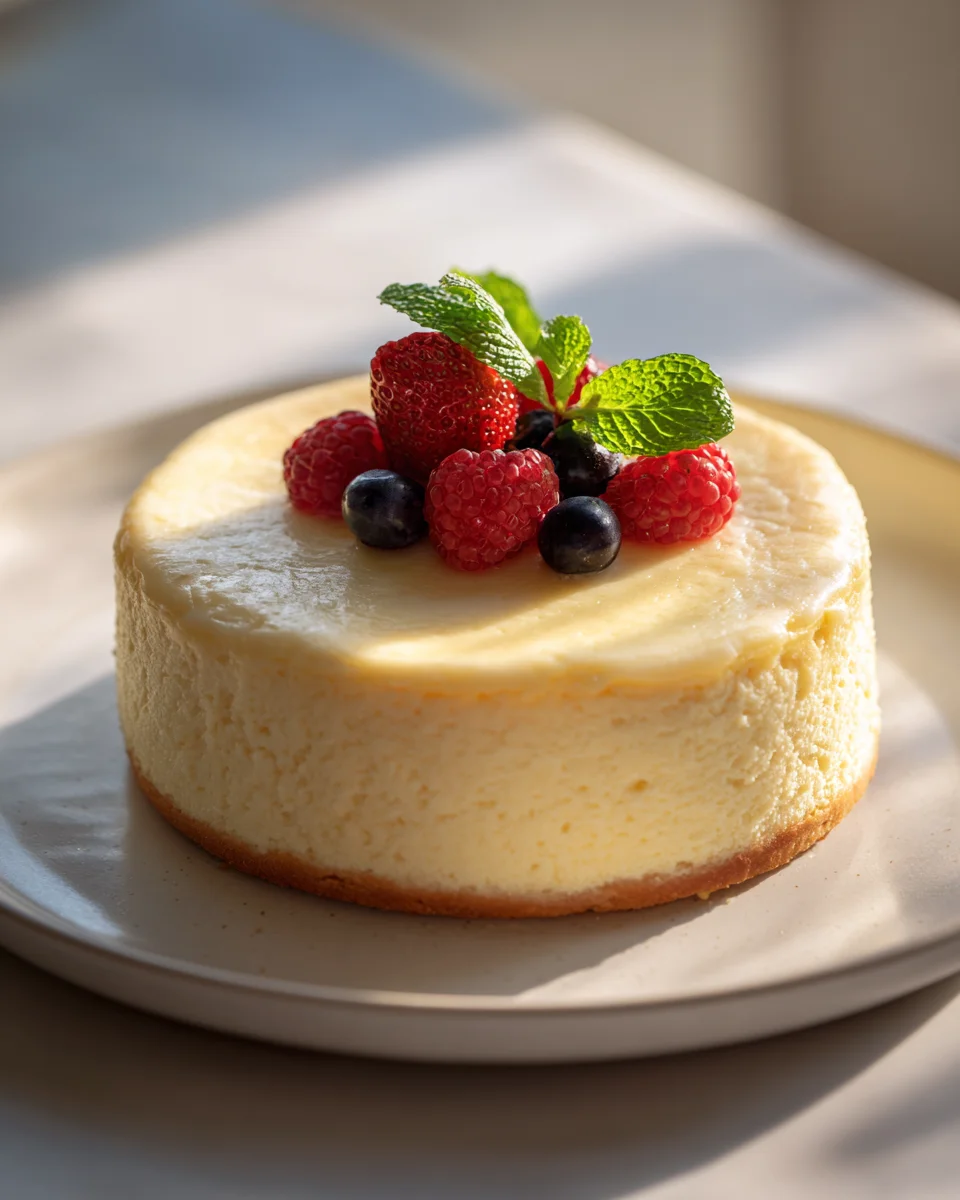
Best Cheesecake
Get ready to make the cheesecake of your dreams!
I know, I know, everyone says their cheesecake is the ‘best.’ But trust me on this one – this recipe isn’t just good, it’s transcendent. What makes it so special? It’s all about that unbelievably smooth, velvety texture that melts in your mouth, perfectly balanced with just the right amount of tang and sweetness. There’s no grittiness here, no cracks, just pure, creamy bliss from the first bite to the last. My friends literally beg me for this recipe, and I guarantee you’ll be the star of your next potluck or family gathering once you master it.
We’re talking about a classic, baked cheesecake with a rich, buttery graham cracker crust and a dense, luxurious cream cheese filling. It’s the kind of dessert that feels incredibly indulgent, yet with my step-by-step guide, it’s surprisingly achievable even if you’re new to baking. Prepare yourself for compliments, because this isn’t just a dessert; it’s an experience. Let’s get baking!

Ingredient Notes
Achieving the “Best Cheesecake” truly starts with understanding your ingredients. While the list might seem straightforward, each component plays a critical role in developing that classic, creamy, and utterly irresistible texture and flavor we all crave. Trust me, paying attention to these details will elevate your cheesecake from good to absolutely phenomenal.
- Full-Fat Cream Cheese: This is non-negotiable for the best results. You absolutely need full-fat block cream cheese, like Philadelphia brand. Do NOT use reduced-fat or whipped cream cheese from a tub; these have a higher water content and will give you a runny, grainy, or simply inferior cheesecake. Make sure it’s completely softened to room temperature – this is crucial for a smooth, lump-free batter. I usually take it out of the fridge at least 2 hours before I plan to start baking.
- Granulated Sugar: Fine granulated sugar is perfect here. It dissolves easily into the cream cheese, ensuring a silky-smooth filling. The amount I specify strikes the perfect balance, providing sweetness without overpowering the rich tang of the cream cheese.
- Sour Cream or Full-Fat Greek Yogurt (Plain): My secret weapon for preventing cracks and adding an extra layer of velvety smoothness and a subtle tang. Full-fat sour cream is my go-to, but a good quality, full-fat plain Greek yogurt can be used as a substitute if you’re in a pinch. Just ensure it’s at room temperature as well.
- Large Eggs: Room temperature eggs are vital. Cold eggs can cause the batter to seize and curdle, making it harder to get a smooth consistency. They also incorporate more evenly, leading to a more consistent bake. Don’t worry, the cheesecake won’t taste eggy – they’re here for structure and richness.
- Pure Vanilla Extract: Use the best quality pure vanilla extract you can find. It enhances all the other flavors beautifully. Resist the urge to use artificial vanilla here; the difference is noticeable in such a delicate dessert.
- Graham Cracker Crumbs: For the crust, finely ground graham cracker crumbs are classic. You can buy them pre-crushed or easily make your own by pulsing graham crackers in a food processor. Other delicious alternatives include digestive biscuits or even vanilla wafers, but graham crackers provide that quintessential cheesecake base.
- Unsalted Butter: Melted unsalted butter binds the crust together perfectly. Using unsalted allows you to control the overall saltiness in the recipe.
Step-by-Step Instructions
Baking the “Best Cheesecake” is a process that rewards patience and precision. Follow these steps carefully, and you’ll be rewarded with a masterpiece.
- Prepare Your Pan and Oven (The Foundation): First, preheat your oven to 325°F (160°C). Grab a 9-inch springform pan. I always line the bottom with a circle of parchment paper for easy release, then lightly grease the sides. Crucially, wrap the outside of your springform pan tightly with several layers of heavy-duty aluminum foil. This creates a waterproof barrier for the water bath, protecting your cheesecake from moisture and ensuring even cooking.
- Craft the Perfect Crust: In a medium bowl, combine your graham cracker crumbs with granulated sugar. Pour in the melted unsalted butter and mix until the crumbs are evenly moistened and resemble wet sand. Press this mixture firmly and evenly into the bottom of your prepared springform pan. You can use the bottom of a flat glass or measuring cup to get a really compact crust. Bake for 8-10 minutes, just until lightly golden. Remove from the oven and let it cool completely on a wire rack while you prepare the filling.
- Whip Up the Silky Filling: In the bowl of a stand mixer fitted with the paddle attachment (or using a large bowl with a hand mixer), beat the softened full-fat cream cheese on medium speed until it’s incredibly smooth and creamy – about 2-3 minutes. Make sure there are absolutely no lumps! Scrape down the sides of the bowl. Gradually add the granulated sugar, beating on medium-low speed until just combined and smooth. Don’t overmix here; we don’t want to incorporate too much air.
- Incorporate Wet Ingredients (Carefully!): Reduce the mixer speed to low. Add the room temperature sour cream and pure vanilla extract. Beat until just combined. Now, add the room temperature eggs, one at a time, mixing on the lowest speed possible just until each egg is incorporated before adding the next. Stop mixing as soon as the last egg is combined. Overmixing after the eggs are added introduces too much air, which can lead to cracks in your baked cheesecake.
- The All-Important Water Bath: Pour your luscious cheesecake batter over the cooled crust in the foil-wrapped springform pan. Place the springform pan inside a larger roasting pan. Carefully pour hot water into the roasting pan, reaching about halfway up the sides of the springform pan. This water bath is crucial for even, gentle baking and preventing cracks.
- Bake Low and Slow: Carefully transfer the roasting pan with your cheesecake to the preheated oven. Bake for 60-75 minutes. The cheesecake is done when the edges are set, but the very center (about a 2-inch circle) still has a slight jiggle to it when you gently shake the pan. Don’t overbake!
- Cooling is Key (Patience, my friend): This is where many go wrong! Once baked, turn off the oven, prop the oven door open slightly (about 3-4 inches), and let the cheesecake cool in the oven for 1 hour. This slow, gradual cooling prevents temperature shock and cracking. After an hour, carefully remove the roasting pan from the oven, then lift the springform pan out of the water bath. Remove the foil. Place the cheesecake on a wire rack to cool completely to room temperature (this can take another 2-3 hours).
- Chill for Perfection: Once at room temperature, cover the cheesecake loosely with plastic wrap and transfer it to the refrigerator to chill for at least 6-8 hours, or preferably overnight. This final chill allows the cheesecake to fully set and firm up, resulting in that perfectly dense, creamy texture.
Tips & Suggestions
Crafting the “Best Cheesecake” is an art, and these little nuggets of wisdom will help you master it every time.
- All Ingredients at Room Temperature: I cannot stress this enough! Cream cheese, eggs, sour cream – everything needs to be at room temperature. This ensures a perfectly smooth, lump-free batter that emulsifies beautifully and bakes evenly.
- Do Not Overmix: Once you add the eggs, mix only until just combined on the lowest speed. Overmixing incorporates too much air into the batter, which expands during baking and then collapses during cooling, causing unsightly cracks.
- The Magic of the Water Bath: The water bath (bain-marie) is your best friend. It provides a moist, even cooking environment, preventing the edges from baking faster than the center and thus, preventing cracks. It also contributes to that signature silky-smooth texture.
- Resist the Urge to Peek: During baking, avoid opening the oven door unnecessarily. Sudden temperature changes can cause the cheesecake to crack or sink.
- Slow Cooling is Crucial: The cooling process is just as important as the baking itself. Allowing the cheesecake to cool gradually in the turned-off oven with the door ajar, then slowly to room temperature, prevents thermal shock and those dreaded cracks. Don’t rush it!
- Chill, Chill, Chill: A truly great cheesecake needs ample time to chill in the refrigerator. This allows the flavors to meld and the texture to firm up properly. Plan ahead and aim for overnight chilling for the absolute best result.
- Clean Slices: For beautifully neat slices, run a thin, sharp knife under hot water, wipe it clean, and slice. Repeat this process for each slice. Serving the cheesecake slightly chilled (not ice cold) often enhances the flavor and texture.
- Flavor Variations: Feel free to experiment! You can add lemon or orange zest to the filling for a brighter flavor, swirl in some melted chocolate, a non-alcohol liqueur alternative like rum or orange extract, or top with fresh berries, fruit compote, or a chocolate ganache once completely chilled.
Storage
Once you’ve made the “Best Cheesecake,” you’ll want to store it properly to maintain its exquisite taste and texture.
- Refrigeration: Cheesecake must be stored in the refrigerator. Cover it tightly with plastic wrap or place it in an airtight container to prevent it from absorbing other odors from your fridge and to keep it from drying out. When stored correctly, your cheesecake will remain fresh and delicious for 3-5 days.
- Freezing (for longer storage): Cheesecake freezes beautifully! To freeze a whole cheesecake, ensure it’s completely chilled. You can freeze it on its springform base, or remove it and place it on a cardboard cake circle. Wrap it tightly first in plastic wrap, then in a layer of aluminum foil. Label with the date. It can be stored in the freezer for up to 1-2 months. For individual slices, place them on a baking sheet to freeze solid, then wrap each slice individually in plastic wrap and foil before placing them in an airtight container or freezer bag.
- Thawing: To thaw a frozen cheesecake (whole or slices), transfer it to the refrigerator and let it thaw slowly overnight. Avoid thawing at room temperature, as this can affect the texture. Once thawed, it’s ready to enjoy!
Final Thoughts
And there you have it! My personal journey to creating what I truly believe is the Best Cheesecake. I’m so excited for you to try this recipe and experience the magic for yourself. What makes this cheesecake so special, you ask? It’s that perfect balance of incredibly creamy texture, rich flavor, and a subtly tangy finish that just makes every single bite a dream come true. Forget everything you thought you knew about cheesecake, because this particular recipe elevates it to a whole new level of dessert perfection. Trust me, once you’ve tasted the Best Cheesecake, there’s no going back to anything less. It’s not just a dessert; it’s an unforgettable experience. Go on, bake it, share it, and prepare to be adored!

Best Cheesecake Recipe: Indulge in Creamy, Perfect Dessert!
- Total Time: 1 hour 45 minutes
- Yield: 12 servings 1x
Description
This cheesecake is not just good, it’s transcendent with an unbelievably smooth, velvety texture that melts in your mouth. Experience pure, creamy bliss with every bite of this classic, baked cheesecake.
Ingredients
- 24 oz Full-Fat Cream Cheese, softened
- 1 cup Granulated Sugar
- 1 cup Sour Cream or Full-Fat Greek Yogurt (Plain), at room temperature
- 4 Large Eggs, at room temperature
- 1 tsp Pure Vanilla Extract
- 1 ½ cups Graham Cracker Crumbs
- ½ cup Unsalted Butter, melted
Instructions
- Preheat your oven to 325°F (160°C) and prepare a 9-inch springform pan by lining the bottom with parchment paper and greasing the sides.
- Wrap the outside of the springform pan tightly with several layers of heavy-duty aluminum foil to create a waterproof barrier.
- In a medium bowl, combine graham cracker crumbs with granulated sugar, then pour in melted unsalted butter and mix until evenly moistened.
- Press the crumb mixture firmly into the bottom of the prepared springform pan and bake for 8-10 minutes until lightly golden. Let it cool completely on a wire rack.
- In a stand mixer, beat the softened cream cheese on medium speed until smooth and creamy, about 2-3 minutes. Scrape down the sides of the bowl.
- Gradually add the granulated sugar and beat on medium-low speed until just combined and smooth.
- Reduce the mixer speed to low and add the sour cream and vanilla extract, beating until just combined.
- Add the eggs one at a time, mixing on the lowest speed possible just until each egg is incorporated before adding the next.
- Pour the cheesecake batter over the cooled crust in the foil-wrapped springform pan.
- Place the springform pan inside a larger roasting pan and carefully pour hot water into the roasting pan, reaching halfway up the sides of the springform pan.
- Bake for 60-75 minutes until the edges are set but the center still has a slight jiggle.
- Turn off the oven, prop the oven door open slightly, and let the cheesecake cool in the oven for 1 hour.
- Remove the roasting pan from the oven and lift the springform pan out of the water bath. Remove the foil and let the cheesecake cool completely to room temperature.
- Cover the cheesecake loosely with plastic wrap and refrigerate for at least 6-8 hours, preferably overnight.
- Prep Time: 30 mins
- Cook Time: 75 mins
- Category: Dessert
- Method: Baking
- Cuisine: American
Nutrition
- Serving Size: 1 slice
- Calories: 350
- Sugar: 25 g
- Sodium: 300 mg
- Fat: 25 g
- Saturated Fat: 15 g
- Unsaturated Fat: 5 g
- Trans Fat: 0 g
- Carbohydrates: 30 g
- Fiber: 1 g
- Protein: 6 g
- Cholesterol: 100 mg
Keywords: Ensure all ingredients are at room temperature for a smooth batter. Avoid overmixing after adding eggs to prevent cracks.