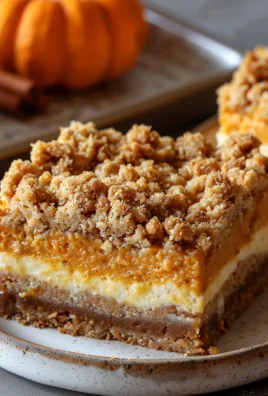
Apple Cider Whoopie Pie Cookies With Caramel are not just a dessert; they are an invitation to experience the very essence of autumn in every delightful bite. As the leaves begin to turn and the crisp scent of fall fills the air, my kitchen inevitably begins to hum with the promise of comforting, spiced treats. There’s something undeniably magical about whoopie pies, a beloved American classic often celebrated for their nostalgic charm and irresistible cake-like texture. Originating as a lunchbox staple in regions like New England and Pennsylvania Dutch country, whoopie pies have always offered a delightful surprise with their soft, cakey layers and creamy filling.
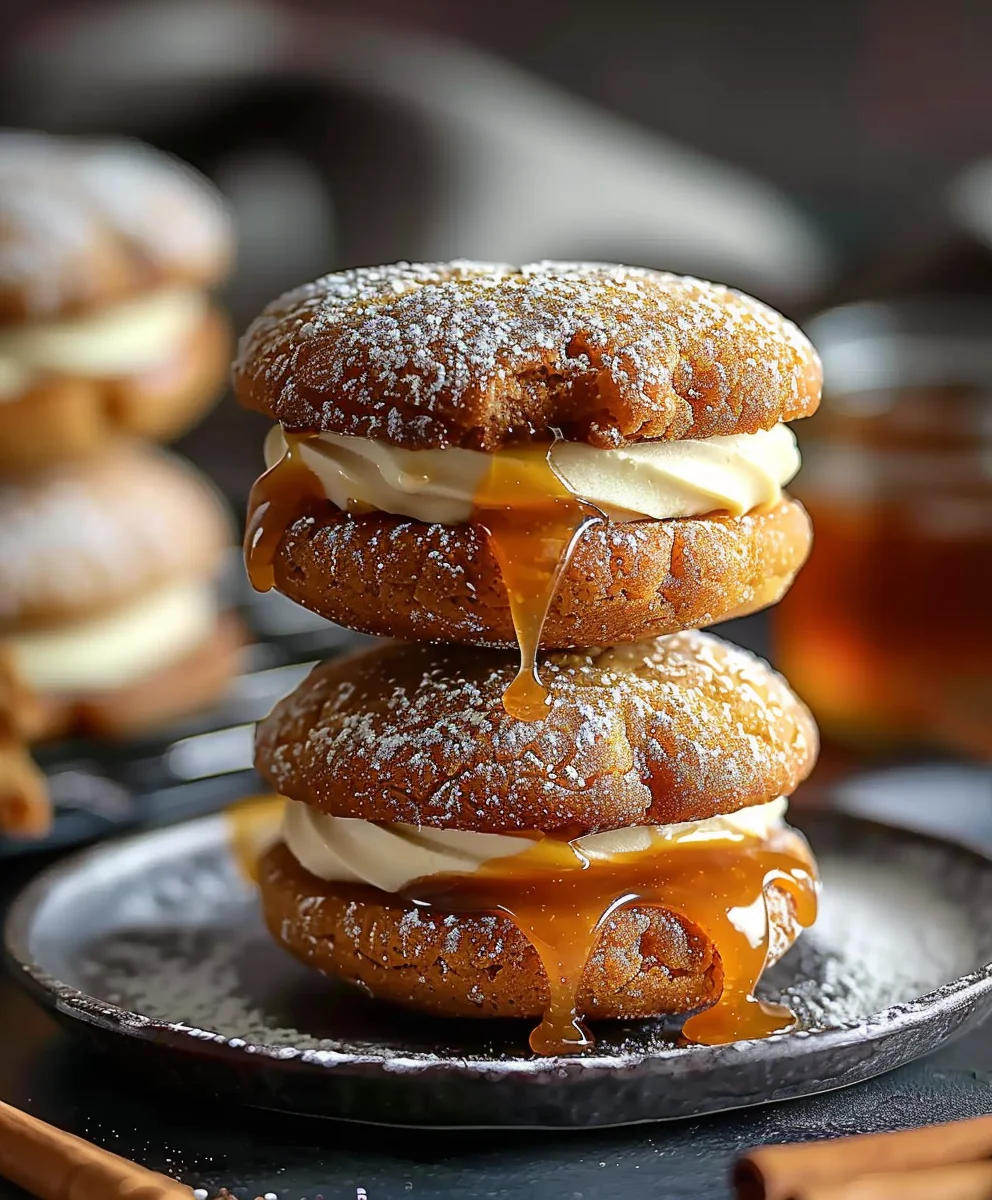
This particular rendition takes that cherished concept and infuses it with the vibrant, heartwarming flavors of the season. I truly believe you will fall head over heels for the harmonious blend of tender, apple cider-spiced cookies, generously filled with a creamy, sweet center, and finished with a luxurious drizzle of rich, buttery caramel. It’s the perfect marriage of tangy apple notes with deep, sweet caramel, creating a textural and taste sensation that is simply unparalleled. These Apple Cider Whoopie Pie Cookies With Caramel offer a sophisticated twist on a classic, making them an ideal treat for gatherings, a cozy evening indulgence, or a thoughtful gift. Their unique combination of moistness, spice, and decadent sweetness ensures they vanish quickly from any platter, leaving everyone craving just one more.

<h2>Ingredients:</h2>
<ul>
<li><strong>For the Apple Cider Reduction:</strong>
<ul>
<li>4 cups (960ml) good quality apple cider, preferably unfiltered for a richer, more concentrated apple flavor.</li>
</ul>
</li>
<li><strong>For the Apple Cider Whoopie Pie Cookies:</strong>
<ul>
<li>2 ½ cups (300g) all-purpose flour, carefully spooned and leveled for accurate measurement.</li>
<li>1 teaspoon baking soda, to help achieve that classic whoopie pie rise.</li>
<li>½ teaspoon baking powder, for additional lift and a tender crumb.</li>
<li>½ teaspoon ground cinnamon, providing a warm, inviting spice.</li>
<li>¼ teaspoon ground nutmeg, complementing the cinnamon and apple notes beautifully.</li>
<li>¼ teaspoon salt, to balance the sweetness and enhance all the flavors.</li>
<li>1 cup (226g) unsalted butter, softened to room temperature – crucial for proper creaming.</li>
<li>1 ½ cups (300g) granulated sugar, for sweetness and tenderization.</li>
<li>2 large eggs, at room temperature, which emulsify better into the batter.</li>
<li>½ cup (120ml) buttermilk, at room temperature (if you don’t have buttermilk, you can make your own by adding ½ tablespoon lemon juice or white vinegar to ½ cup regular milk and letting it sit for 5 minutes).</li>
<li>2 tablespoons (30ml) apple cider reduction (prepared from the step above), providing an intense apple essence.</li>
<li>1 teaspoon pure vanilla extract, for a classic aromatic touch.</li>
</ul>
</li>
<li><strong>For the Salted Caramel Filling:</strong>
<ul>
<li>1 cup (200g) granulated sugar, the base for our luscious caramel.</li>
<li>¼ cup (60ml) water, to help dissolve the sugar initially.</li>
<li>½ cup (120ml) heavy cream, warmed slightly to prevent seizing when added to hot sugar.</li>
<li>4 tablespoons (56g) unsalted butter, cut into 4 pieces and at room temperature, for richness and smoothness.</li>
<li>1 teaspoon sea salt flakes, or ½ teaspoon fine sea salt (adjust to your preferred level of saltiness), to perfectly balance the sweet caramel.</li>
<li>½ teaspoon pure vanilla extract, for an extra layer of flavor.</li>
</ul>
</li>
</ul>
<h3>Making the Apple Cider Reduction</h3>
<ol>
<li>Pour the 4 cups of apple cider into a medium-sized, heavy-bottomed saucepan. I always recommend using a wider pan for this step, as it provides a larger surface area for evaporation, which significantly speeds up the reduction process. This concentration of flavor is what will make our <strong>Apple Cider Whoopie Pie Cookies With Caramel</strong> truly stand out.</li>
<li>Bring the cider to a rapid boil over medium-high heat. Once it reaches a vigorous, rolling boil, reduce the heat to medium-low and allow it to simmer gently. You’re aiming for consistent, steady bubbling, not a fierce boil that might cause it to boil over. <strong>This gentle simmer is key to gradually evaporating the water and concentrating the apple essence.</strong></li>
<li>Continue to simmer, stirring only occasionally to prevent any sticking, for about 30-45 minutes. You’ll know it’s ready when the cider has reduced significantly to approximately 2 tablespoons. The liquid will become noticeably syrupy, much darker in color, and will coat the back of a spoon. <h4>Watch it closely in the final minutes!</h4> It can quickly go from a perfect reduction to a burnt, sticky mess, ruining that beautiful apple flavor we’re aiming for.</li>
<li>Once reduced, immediately remove the pan from the heat and carefully transfer the hot apple cider reduction to a small, heatproof bowl or container. Allow it to cool completely to room temperature before you even think about adding it to your whoopie pie dough. <strong>A warm reduction could affect the texture of your batter.</strong> You can even prepare this step a day in advance and store it covered in the refrigerator until ready to use.</li>
</ol>
<h3>Preparing the Whoopie Pie Dough</h3>
<ol>
<li>In a medium bowl, take a moment to thoroughly whisk together all of your dry ingredients: the measured all-purpose flour, baking soda, baking powder, ground cinnamon, ground nutmeg, and salt. <strong>Whisking them well ensures that the leavening agents and spices are evenly distributed throughout the dough,</strong> guaranteeing that every bite of our <strong>Apple Cider Whoopie Pie Cookies With Caramel</strong> is perfectly spiced and textured. I usually whisk for at least 30 seconds to fully aerate and combine.</li>
<li>In a large mixing bowl, using an electric mixer fitted with a paddle attachment (or a sturdy hand mixer), beat the softened unsalted butter on medium speed for about 1-2 minutes until it becomes wonderfully light and fluffy. <strong>The consistency of your butter is paramount here!</strong> Butter that is at true room temperature (soft enough to indent with a finger but not melted) creams significantly better, incorporating air which is essential for a soft, cake-like whoopie pie texture.</li>
<li>With the mixer still running on medium-high speed, gradually add the granulated sugar to the creamed butter. Continue beating for another 3-4 minutes until the mixture transforms into a pale, even lighter, and incredibly fluffy consistency. <h4>Don’t forget to scrape down the sides of the bowl frequently!</h4> This ensures all ingredients are uniformly incorporated, building the strong foundation for a tender and moist cookie.</li>
<li>Now, beat in the large eggs one at a time. Make sure each egg is fully incorporated into the mixture before you add the next one. The mixture might appear slightly curdled after the first egg, but keep mixing, and it will smooth out beautifully. <strong>Just like the butter, having your eggs at room temperature helps them emulsify more effectively with the butter and sugar,</strong> contributing to a smoother, more homogenous batter.</li>
<li>In a separate, small bowl, gently whisk together the buttermilk, the completely cooled apple cider reduction we made earlier, and the pure vanilla extract. <h5>Quick Buttermilk Hack:</h5> If you’re out of buttermilk, don’t fret! Simply add ½ tablespoon of fresh lemon juice or white vinegar to ½ cup of regular milk and let it sit for about 5 minutes until it thickens and curdles slightly. It works perfectly every time!</li>
<li>With your mixer set to the lowest speed, begin to incorporate the dry ingredients. Add about one-third of the whisked dry mixture to the wet ingredients, mixing just until it’s combined and no streaks of flour are visible. Then, add half of the buttermilk mixture, mixing until just incorporated. Continue alternating, always ending with the dry ingredients. <strong>This is a critical point: avoid overmixing the dough at all costs!</strong> Overmixing will develop the gluten in the flour too much, leading to tough, chewy whoopie pies instead of the soft, delicate, cake-like texture we desire. Mix only until the ingredients are just combined.</li>
<li>Once everything appears combined, give the dough a final gentle scrape down with a rubber spatula to ensure there are no hidden pockets of unmixed ingredients. The resulting dough will be thick, fluffy, and somewhat sticky – precisely what we’re looking for!</li>
</ol>
<h3>Baking the Whoopie Pie Cookies</h3>
<ol>
<li>Preheat your oven to 350°F (175°C). While the oven preheats, line two large baking sheets with either parchment paper or high-quality silicone baking mats. <strong>This step is non-negotiable for preventing sticking and ensuring your whoopie pie cookies bake evenly and release easily.</strong> I personally find silicone mats give them a lovely, even bottom crust.</li>
<li>Using a small cookie scoop (one that holds about 1 ½ tablespoons of dough) or two regular spoons, drop rounded scoops of the whoopie pie dough onto your prepared baking sheets. Make sure to leave ample space, at least 2 inches, between each mound of dough. <strong>These delightful cookies will spread as they bake!</strong> Typically, I can fit about 9-12 whoopie pie halves on a standard-sized baking sheet. Try your best to make each scoop as uniform in size as possible; this will make pairing them up later for our <strong>Apple Cider Whoopie Pie Cookies With Caramel</strong> a breeze.</li>
<li>Bake one sheet at a time in the preheated oven for 10-12 minutes. You’ll know they’re perfectly baked when the edges are lightly golden, and the centers spring back gently when lightly touched. <strong>Be extremely cautious not to overbake them!</strong> Overbaked whoopie pies will lose their signature soft, tender, and cake-like texture and become dry. Baking times can vary slightly depending on your specific oven, so it’s always a good idea to keep a close eye on your first batch.</li>
<li>Once baked, remove the baking sheets from the oven and allow the whoopie pie cookies to cool on the sheets for approximately 5 minutes. This brief cooling period helps them to firm up slightly, making them much easier to handle without breaking or crumbling.</li>
<li>Carefully transfer the partially cooled whoopie pie halves from the baking sheets to a wire rack. <strong>It is absolutely essential that they cool completely to room temperature before you even think about filling them with the luscious caramel.</strong> Attempting to fill warm cookies will result in a melted, runny, and very messy caramel situation. <h4>Patience truly is a virtue in whoopie pie creation!</h4></li>
</ol>
<h3>Making the Salted Caramel Filling</h3>
<ol>
<li>In a medium-sized, heavy-bottomed saucepan, combine the granulated sugar and water. Stir gently with a heatproof spatula or wooden spoon until the sugar is just moistened. <strong>It’s incredibly important to avoid splashing any sugar crystals up the sides of the pan.</strong> If you do see any, meticulously wipe them down with a wet pastry brush. These rogue sugar crystals are notorious for causing the entire batch of caramel to crystallize later on, resulting in a gritty, undesirable texture, and nobody wants grainy caramel in their <strong>Apple Cider Whoopie Pie Cookies With Caramel</strong>!</li>
<li>Place the saucepan over medium-high heat. Bring the sugar mixture to a full boil and then, <strong>here’s the golden rule for smooth caramel: do not stir once it starts boiling!</strong> Stirring at this stage can introduce air bubbles and trigger crystallization. You can, however, gently swirl the pan occasionally to ensure the sugar heats evenly and prevents hot spots from forming.</li>
<li>Continue to boil the syrup until it transforms into a beautiful, rich amber color. This usually takes about 8-12 minutes, but it’s crucial to watch it very closely and continuously! <strong>Caramel can quickly go from perfectly colored to scorched in mere seconds.</strong> I personally look for a deep, golden honey hue. If you happen to have a candy thermometer, aim for a temperature between 340-350°F (170-175°C).</li>
<li>As soon as your desired caramel color is achieved, immediately and with utmost care, remove the pan from the heat. <strong>Be prepared to stand back, as the next step will produce a significant amount of steam!</strong> Slowly and very carefully pour the slightly warmed heavy cream into the hot sugar syrup while continuously whisking. The mixture will bubble up vigorously and audibly, which is completely normal due to the temperature difference. Keep whisking until the mixture becomes smooth, all the initial steam has subsided, and the caramel looks cohesive.</li>
<li>Add the room temperature unsalted butter, one piece at a time, continuing to whisk until each piece is fully melted and incorporated. Keep whisking until the caramel becomes wonderfully smooth and takes on a glossy, inviting sheen. The butter not only adds incredible richness but also contributes to that beautiful, luscious texture.</li>
<li>Finally, stir in the sea salt flakes and the pure vanilla extract. <strong>Now is the time to taste and adjust the salt if necessary</strong> – I am a firm believer that a good salted caramel should have a noticeable salty kick to perfectly contrast the sweetness. The salt truly elevates the flavor profile, making this filling utterly divine and the perfect counterpoint for our <strong>Apple Cider Whoopie Pie Cookies With Caramel</strong>.</li>
<li>Pour the prepared caramel into a heatproof bowl or jar and let it cool completely to room temperature. <strong>This cooling step is absolutely critical!</strong> As it cools, the caramel will thicken considerably to a rich, spreadable consistency that is ideal for filling our whoopie pies. You can accelerate the cooling process by placing it in the refrigerator for about an hour, stirring every 15-20 minutes to ensure even cooling and prevent it from becoming too firm. However, avoid chilling it for too long, or it will become too stiff to spread easily.</li>
</ol>
<h3>Assembling the Apple Cider Whoopie Pie Cookies With Caramel</h3>
<ol>
<li>Once both your delicate apple cider whoopie pie cookies and your luxurious salted caramel filling are completely cooled to room temperature, it’s time for the most enjoyable part: assembly! <strong>Ensuring everything is at room temperature is paramount</strong> to prevent any unwanted melting, slipping, or a messy finish.</li>
<li>Take a moment to carefully pair up your cooled whoopie pie halves by size. Try to match them as closely as possible – this attention to detail will ensure you have uniform, aesthetically pleasing sandwiches that hold together beautifully.</li>
<li>Grab one cooled whoopie pie half and, using an offset spatula or a small knife, spread a generous dollop of the thickened salted caramel filling onto its flat side. I like to spread it almost to the edges, leaving just a tiny border. <h4>This small border is a smart trick!</h4> It prevents the caramel from squishing out excessively when you press the top half on, keeping your whoopie pies neat and tidy.</li>
<li>Gently place another whoopie pie half on top of the caramel, ensuring its flat side is facing down. Lightly press the two halves together to create a delightful sandwich. The caramel should spread nicely to the edges, forming a complete layer. <strong>Remember not to press too hard!</strong> You want to maintain the soft, airy, and cake-like texture of the whoopie pies, not flatten them.</li>
<li>Repeat this satisfying process with all the remaining whoopie pie halves and your exquisite salted caramel filling. Each completed <strong>Apple Cider Whoopie Pie Cookie With Caramel</strong> will be a truly delightful treat, bursting with the warm, comforting flavors of autumn and the irresistible gooey sweetness of the caramel.</li>
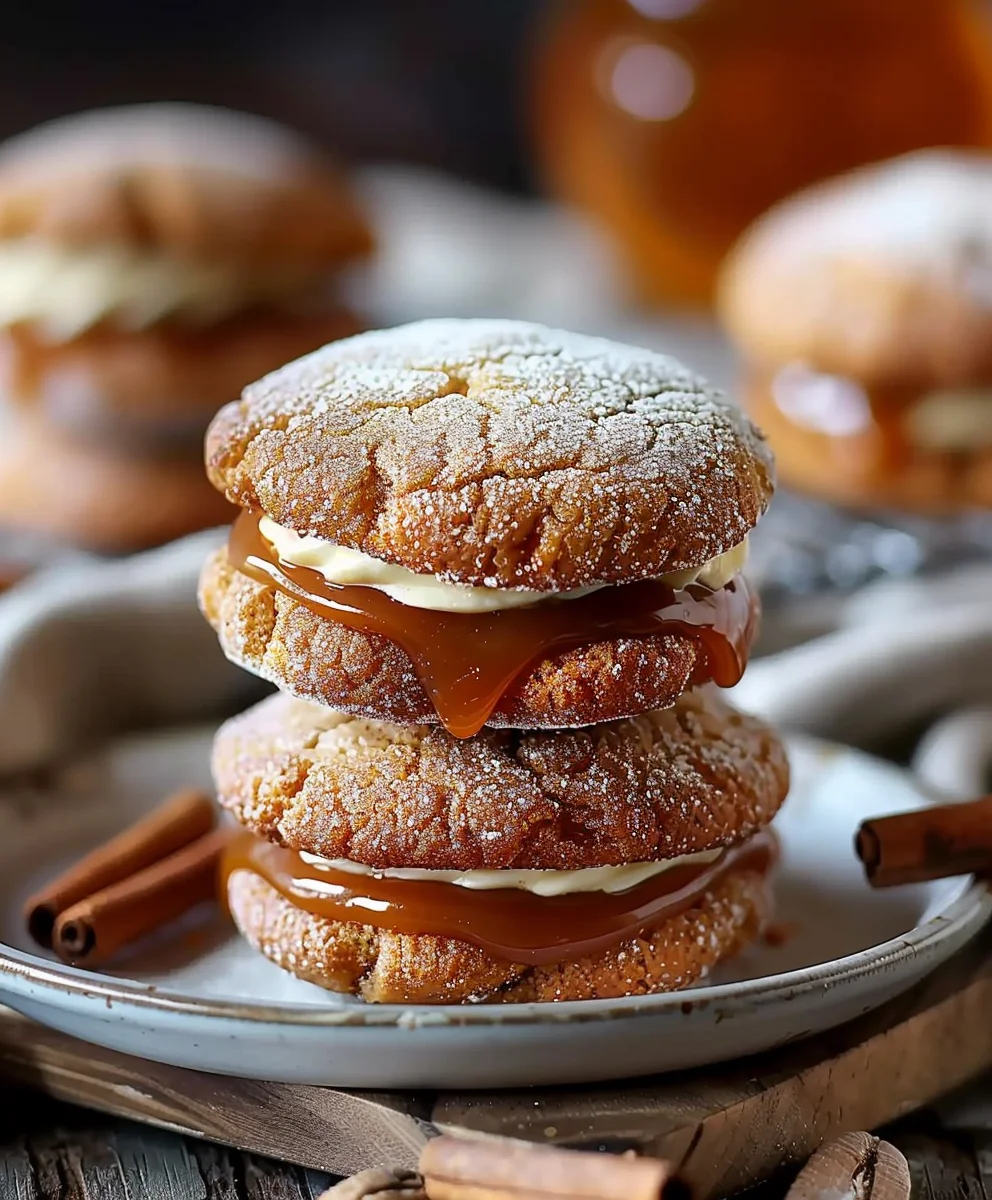
<li>These delectable <strong>Apple Cider Whoopie Pie Cookies With Caramel</strong> can be served immediately to enjoy their fresh goodness. For storage, place them in an airtight container at room temperature for up to 2-3 days, where they will maintain their wonderful texture. Alternatively, they can be stored in the refrigerator for up to a week. If you choose to refrigerate them, I highly recommend allowing them to come to room temperature for about 15-20 minutes before serving. This brings the cookies to their optimal texture and allows the caramel to soften beautifully, ensuring the best possible flavor experience. <h5>For an extra touch of gourmet elegance:</h5> Consider sprinkling a few extra sea salt flakes on the exposed caramel edge, or even a tiny drizzle of extra caramel on top, just before serving. This not only enhances the presentation but also provides an extra delightful pop of flavor. <strong>Enjoy every single bite of these wonderfully spiced, caramel-filled masterpieces!</strong> They are absolutely perfect for fall gatherings, festive holiday tables, or simply as a cozy, indulgent treat on a chilly afternoon. The harmonious combination of the soft, warmly spiced apple cider cookies and the rich, gooey, perfectly salted caramel is utterly irresistible, elevating the classic whoopie pie to a truly seasonal and spectacular dessert.</li>
</ol>
Conclusion:
As we wrap up our delightful journey through this recipe, I truly hope you’re feeling as inspired and excited as I am about the prospect of bringing these incredible treats to life in your own kitchen. I’ve poured my heart into perfecting this recipe, and I genuinely believe it’s a must-try for anyone who appreciates the comforting embrace of autumn flavors, the joy of a perfectly balanced sweet treat, and the sheer magic that happens when simple ingredients come together to create something truly extraordinary. What sets these apart, you ask? It’s that wonderfully soft, cake-like cookie infused with the crisp, tangy notes of real apple cider, perfectly complemented by a luscious, gooey caramel filling that practically melts in your mouth. It’s a symphony of textures and tastes, creating a nostalgic yet novel dessert experience that stands out from your everyday cookie or pie.
There’s a unique warmth that permeates your home when these are baking, a scent that promises coziness and joy. The balance of the slightly tart apple with the rich, buttery caramel is, in my humble opinion, nothing short of perfection. It’s not overly sweet, allowing the nuanced apple flavor to truly shine, while the caramel adds just the right depth and luxuriousness. This isn’t just a cookie; it’s a small, handheld celebration of the season, a culinary hug that reminds you of crisp air, changing leaves, and cherished gatherings. I’ve seen faces light up with the first bite, and that, for me, is the ultimate reward of sharing this recipe with you.
Serving Suggestions & Creative Variations to Elevate Your Experience:
While these cookies are absolutely phenomenal on their own, fresh from the cooling rack, there are so many ways to enjoy them or even put your own unique spin on the recipe. Imagine pairing one of these soft, flavorful cookies with a steaming mug of spiced chai latte or a robust, dark roast coffee on a cool afternoon. For a truly indulgent dessert experience, try warming one slightly and serving it alongside a scoop of vanilla bean ice cream, allowing the caramel to soften and meld with the melting ice cream – pure bliss! A glass of cold milk, of course, is always a classic companion that never disappoints.
But let’s talk variations! If you’re feeling adventurous, consider a tiny sprinkle of flaky sea salt over the caramel filling before the top cookie goes on; it beautifully enhances the sweetness and adds a sophisticated touch. For those who adore a bit of crunch, finely chopped pecans or walnuts folded into the cookie batter, or even pressed gently onto the caramel, would add a delightful textural contrast. You could also experiment with the spices in the cookie dough – a pinch of ground ginger or even a touch of allspice could deepen the autumnal character. For a twist on the filling, a brown butter cream cheese frosting would offer a tangy counterpoint to the apple cider, creating a whole new flavor profile. Don’t be afraid to make this recipe your own! Perhaps a drizzle of white chocolate, or a dusting of cinnamon sugar, could be the perfect finishing touch that makes these uniquely yours. The possibilities are truly endless, and each variation simply broadens the appeal of this already fantastic base recipe. This versatility is one of the many reasons why I consider this a truly indispensable bake for your repertoire.
Don’t Just Read, Bake! And Please, Share Your Journey!
I genuinely, from the bottom of my heart, encourage you to make these. Don’t hesitate. Block out an afternoon, gather your ingredients, and immerse yourself in the wonderful process of creating these delicious treats. The satisfaction of pulling a tray of perfectly baked cookies from the oven, filling them with that rich caramel, and then taking that first, glorious bite, is an experience I want for each and every one of you. This is more than just a recipe for Apple Cider Whoopie Pie Cookies With Caramel; it’s an invitation to create memories, to fill your home with warmth, and to share something truly special with the people you love.
Once you’ve had a chance to bake them, please, please come back and tell me all about your experience! Did you love them as much as I do? Did you try any of the variations, or did you come up with a brilliant one of your own? Your feedback, your photos, and your stories are what make this community so vibrant and inspiring. Sharing your successes, and even your learning moments, helps all of us grow as bakers. So, grab your apron, preheat your oven, and prepare to fall in love with these irresistible whoopie pies. I can’t wait to hear how they turn out for you!
Apple Cider Whoopie Pie Cookies With Caramel: Fall Favorite!
Experience the essence of autumn with these delightful Apple Cider Whoopie Pie Cookies. Tender, apple cider-spiced cookies are generously filled with a creamy, sweet caramel, offering a perfect marriage of tangy apple notes and deep, sweet caramel for an unparalleled taste sensation. A sophisticated twist on a classic, perfect for any fall occasion.
Ingredients
-
2 cups all-purpose flour
-
1 teaspoon baking soda
-
1 teaspoon ground cinnamon
-
½ teaspoon ground nutmeg
-
¼ teaspoon salt
-
½ cup unsalted butter, softened (for cookies)
-
1 cup brown sugar (for cookies)
-
2 large eggs
-
1 cup apple cider
-
1 teaspoon vanilla extract
-
½ cup unsalted butter (for caramel)
-
1 cup brown sugar (for caramel)
-
¼ cup heavy cream
Instructions
-
Step 1
Preheat oven to 350°F (175°C). Line two large baking sheets with parchment paper or silicone mats. In a medium bowl, whisk together 2 cups all-purpose flour, 1 teaspoon baking soda, 1 teaspoon ground cinnamon, ½ teaspoon ground nutmeg, and ¼ teaspoon salt. -
Step 2
In a large mixing bowl, using an electric mixer, beat ½ cup softened unsalted butter and 1 cup brown sugar until light and fluffy (3-4 minutes). Scrape down bowl sides frequently to ensure uniform mixing. -
Step 3
Beat in 2 large eggs, one at a time, ensuring each is fully incorporated. In a separate small bowl, whisk together 1 cup apple cider and 1 teaspoon vanilla extract. -
Step 4
With the mixer on low speed, alternately add the whisked dry ingredients and the apple cider mixture to the wet ingredients, beginning and ending with dry. Mix only until just combined; do not overmix to keep cookies tender. -
Step 5
Using a small cookie scoop (approx. 1 ½ tablespoons), drop rounded scoops of dough onto prepared baking sheets, leaving about 2 inches between each mound. Bake one sheet at a time for 10-12 minutes, or until edges are lightly golden and centers spring back gently. Avoid overbaking. -
Step 6
Remove baking sheets from oven and let cookies cool on the sheets for 5 minutes. Carefully transfer partially cooled cookies to a wire rack to cool completely to room temperature. This crucial step prevents the caramel from melting during assembly. -
Step 7
In a medium, heavy-bottomed saucepan, melt ½ cup unsalted butter over medium heat. Add 1 cup brown sugar and ¼ cup heavy cream. Bring the mixture to a gentle boil, stirring continuously, for 3-5 minutes until the sugar dissolves and the mixture is smooth and slightly thickened. Remove from heat. -
Step 8
Pour the prepared caramel into a heatproof bowl or jar and let it cool completely to room temperature. It will thicken significantly as it cools to a rich, spreadable consistency ideal for filling the whoopie pies. You can refrigerate for about an hour, stirring every 15-20 minutes, to accelerate cooling. -
Step 9
Once both cookies and caramel are completely cooled, carefully pair up cookie halves by size. Spread a generous dollop of the thickened caramel filling onto the flat side of one cookie half, leaving a tiny border. Gently place a matching cookie half on top, flat side down, and lightly press to create a delightful sandwich. Repeat with all remaining cookies. -
Step 10
Serve immediately. Store assembled Apple Cider Whoopie Pie Cookies With Caramel in an airtight container at room temperature for 2-3 days, or in the refrigerator for up to a week. If refrigerated, allow them to come to room temperature for 15-20 minutes before serving for optimal texture and flavor.
Important Information
Nutrition Facts (Per Serving)
It is important to consider this information as approximate and not to use it as definitive health advice.
Allergy Information
Please check ingredients for potential allergens and consult a health professional if in doubt.