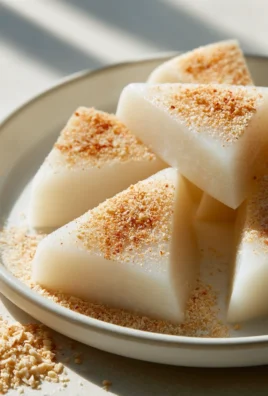
White Chocolate Rice Krispie Balls
Oh, hello there, fellow sweet tooth! Today, I’m absolutely thrilled to share one of my all-time favorite no-fuss, maximum-delight recipes: White Chocolate Rice Krispie Balls. If you’re looking for a treat that’s ridiculously easy to make, requires zero oven time, and delivers an irresistible combination of textures and flavors, then you’ve just hit the jackpot.
What makes these little gems so special, you ask? It’s that magical marriage of incredibly smooth, melt-in-your-mouth white chocolate with the satisfying, crisp crunch of puffed rice cereal. Every bite is a delightful play between creamy sweetness and airy crispness, making them utterly addictive. I promise you, once you try these, they’ll become a regular in your repertoire, especially when you need a quick dessert or a charming bite-sized snack that pleases everyone.
You’ll love how simple these are to whip up – just a few basic ingredients, a bit of melting, stirring, and rolling, and you’re well on your way to a tray of perfect little spheres of joy. Essentially, we’re taking crispy rice cereal, coating it generously in a luscious, melted white chocolate mixture, and shaping it into adorable, ready-to-eat balls. Chilled until firm, they’re the ultimate grab-and-go indulgence. Get ready to fall in love!

Ingredient Notes
Crafting delicious White Chocolate Rice Krispie Balls starts with choosing the right ingredients. The quality of your components genuinely makes a difference in the final taste and texture. Here’s what you’ll need and some thoughts on substitutions:
- White Chocolate: This is the star of our show! I highly recommend using good quality white chocolate bars or wafers designed for melting, rather than standard white chocolate chips. Chips often contain stabilizers that prevent them from melting smoothly, which can result in a grainy or clumpy coating. If you use bars, chop them finely for even melting. For an extra rich flavor, look for white chocolate with a higher cocoa butter content. While you can substitute with white compound chocolate (often labeled as “white baking chocolate” or “white confectionery coating”), be aware that it won’t have the same creamy, luxurious taste as true white chocolate, as it contains vegetable fats instead of cocoa butter.
- Crispy Rice Cereal: Of course, you’ll need your classic crispy rice cereal! Brands like Rice Krispies are excellent for their consistent crispiness. Ensure your cereal is fresh; stale cereal will yield a less satisfying crunch. There isn’t much room for substitution here if you want the classic texture, but any similar puffed rice cereal should work, just check the freshness.
- Unsalted Butter: Butter is essential for that rich, pliable base and helps prevent sticking. I always opt for unsalted butter so I can control the overall sweetness and balance of the recipe. If you only have salted butter, that’s perfectly fine; just be mindful of any additional salt you might add elsewhere, though typically none is called for in this type of treat. Margarine can be used in a pinch, but it often contains more water and can affect the texture, making the balls a bit less creamy and more prone to hardening.
- Mini Marshmallows: These are critical for creating that wonderfully chewy, gooey binder. Mini marshmallows melt more quickly and evenly than larger ones, making the process smoother. Always use fresh marshmallows; stale ones can be difficult to melt smoothly and can make your mixture stiff. If you only have large marshmallows, simply cut them into smaller pieces before melting. You can also use marshmallow fluff, but you’ll need to adjust the quantity significantly and monitor the consistency as it’s already a very sticky, spreadable product.
- Vanilla Extract (Optional but Recommended): A good quality vanilla extract really enhances the overall flavor profile, adding a subtle warmth that complements the sweetness of the white chocolate. I find it elevates the taste from simply sweet to truly delicious. A little goes a long way! For a different twist, you could try almond extract or even a hint of peppermint extract, especially around the holidays.
- Decorations (Optional): Sprinkles, edible glitter, or even a drizzle of contrasting melted chocolate can make your White Chocolate Rice Krispie Balls even more appealing.
Step-by-Step Instructions
Making these White Chocolate Rice Krispie Balls is incredibly simple and fun! Just follow these steps for a perfectly crispy, chewy, and wonderfully sweet treat:
- Prepare Your Workspace: First things first, get ready! Line a large baking sheet with parchment paper or wax paper. This will give you a non-stick surface to place your finished balls on. I also like to have all my ingredients measured out and ready to go – this makes the melting and mixing process much smoother and faster.
- Melt the Base: In a very large, heavy-bottomed saucepan, melt 4 tablespoons of unsalted butter over low heat. Once the butter is mostly melted, add 1 (10-ounce) bag of mini marshmallows. Continue to cook, stirring constantly, until the marshmallows are completely melted and smooth. The key here is low heat; you don’t want to burn the marshmallows or butter.
- Incorporate White Chocolate: Once the marshmallows are fully melted, remove the saucepan from the heat. Immediately stir in about 1 cup (6 ounces) of finely chopped good quality white chocolate or white chocolate wafers. Stir until the white chocolate is completely melted and the mixture is smooth and glossy. The residual heat from the marshmallows and butter should be enough to melt the chocolate perfectly. If you want, add 1 teaspoon of vanilla extract at this stage for an extra layer of flavor.
- Add the Crispy Rice Cereal: Now for the crunch! Gently pour 6 cups of crispy rice cereal into the marshmallow and white chocolate mixture. Using a large spatula or wooden spoon, fold the cereal into the mixture until it is evenly coated. Be gentle but thorough; you want every piece of cereal to be sticky and delicious, but you also don’t want to crush the cereal and lose its crispness.
- Form the Balls: This is where it gets a little sticky, but it’s worth it! Lightly butter your hands or spray them with a non-stick cooking spray. Take approximately 2 tablespoons of the mixture and roll it between your palms to form a compact ball, about 1 ½ to 2 inches in diameter. Place each finished White Chocolate Rice Krispie Ball onto your prepared baking sheet. Repeat until all the mixture is used up. I find it helps to re-butter my hands occasionally as they start to get sticky.
- Decorate (Optional): If you’re adding sprinkles or other decorations, now is the time to do it! While the balls are still warm and slightly tacky, roll them in your chosen sprinkles or gently press them onto the surface. For a white chocolate drizzle, melt an additional ½ cup of white chocolate and drizzle it over the cooled balls once they’ve set slightly.
- Allow to Set: Let your White Chocolate Rice Krispie Balls cool completely at room temperature for at least 30-60 minutes, or until they are firm to the touch. This allows them to set properly and prevents them from being too sticky.
Tips & Suggestions
Having made countless batches of these delightful White Chocolate Rice Krispie Balls, I’ve picked up a few tricks that I’d love to share to help you achieve perfection every time:
- Don’t Overcook the Marshmallows: When melting the butter and marshmallows, keep the heat on low and stir constantly. Overcooking the marshmallow mixture can make your finished balls hard and brittle instead of delightfully chewy. You want them just melted and smooth.
- Gentle Mixing is Key: Once you add the crispy rice cereal, fold it in gently. Aggressive stirring can crush the cereal, leading to a less satisfying texture. The goal is to coat every piece while maintaining its integrity and crispness.
- Butter Your Hands Generously: This is my number one tip for forming the balls without frustration! Lightly buttering your hands (or using a non-stick spray) before you start rolling will prevent the sticky mixture from clinging to you. Reapply as needed throughout the process.
- Consistent Ball Size: For a professional look and even serving, try to make your balls roughly the same size. Using a small cookie scoop (about 2 tablespoons) can help with this, followed by a quick roll with buttered hands.
- Chill for Easier Handling (Briefly): If your mixture feels too warm or sticky to handle, you can pop the saucepan into the refrigerator for 5-10 minutes. Don’t leave it too long, though, or it will become too stiff to form into balls.
- Flavor Variations: Don’t be afraid to experiment!
- Citrus Zest: A little lemon or orange zest folded into the mixture adds a lovely bright note.
- Extracts: Beyond vanilla, try a dash of almond, peppermint (especially for holidays!), or coconut extract.
- Mix-ins: For added texture and flavor, consider folding in mini chocolate chips (dark or milk would contrast nicely!), a few tablespoons of freeze-dried fruit powder (like raspberry or strawberry), or even finely crushed pretzels for a salty-sweet kick after the white chocolate has melted.
- Decorating Fun: Get creative with your decorations! You can melt additional white chocolate and divide it, coloring each portion with food-safe gel colors for vibrant drizzles. Edible glitter or different types of sprinkles can also add a festive touch.
Storage
Once you’ve made your delicious White Chocolate Rice Krispie Balls, proper storage is important to keep them fresh and perfectly chewy. Here’s what I recommend:
Your White Chocolate Rice Krispie Balls are best enjoyed within a few days of making them. To maintain their freshness and crisp-chewy texture, store them in an airtight container at room temperature. Placing a piece of parchment paper or wax paper between layers can prevent them from sticking to each other, especially if you’ve added any drizzles or glazes. I find that storing them in the refrigerator tends to make them quite firm, almost hard, which can diminish their pleasant chewiness. If you do refrigerate them, just be sure to let them come back to room temperature for about 15-20 minutes before serving to soften up again.
They typically stay fresh and delicious for about 3-5 days when stored correctly at room temperature. While you could technically freeze them, I generally don’t recommend it for these types of treats. Freezing can alter the texture of the marshmallows and make the cereal less crispy once thawed. They’re so quick and easy to make that whipping up a fresh batch is usually the best option!

Final Thoughts
Well, there you have it! I truly believe that these White Chocolate Rice Krispie Balls are more than just a simple sweet treat; they’re a little bite of pure joy. The delightful crunch of the rice cereal perfectly complements the smooth, rich white chocolate, creating an irresistible texture and flavor combination that simply melts in your mouth. They’re incredibly quick and easy to make, making them an ideal choice for a last-minute dessert, a charming homemade gift, or just a well-deserved indulgence for yourself. I promise, once you experience the sheer delight of these White Chocolate Rice Krispie Balls, you’ll understand why they’re destined to become a beloved staple in your kitchen. Go ahead and whip up a batch – your taste buds are in for a truly wonderful treat!