Growing up, Easter was always an exciting time in our household. I remember the scent of melting chocolate wafting through the kitchen as my mom prepared her special treats. One year, she introduced us to Chocolate Bunny Cakesicles, and I was instantly hooked. I can still picture the joy on my siblings’ faces as we dipped our pops into rich, velvety chocolate, watching with wide eyes as colorful sprinkles transformed our creations into festive bunnies. Those sweet memories of laughter, sticky fingers, and melted chocolate were unforgettable.
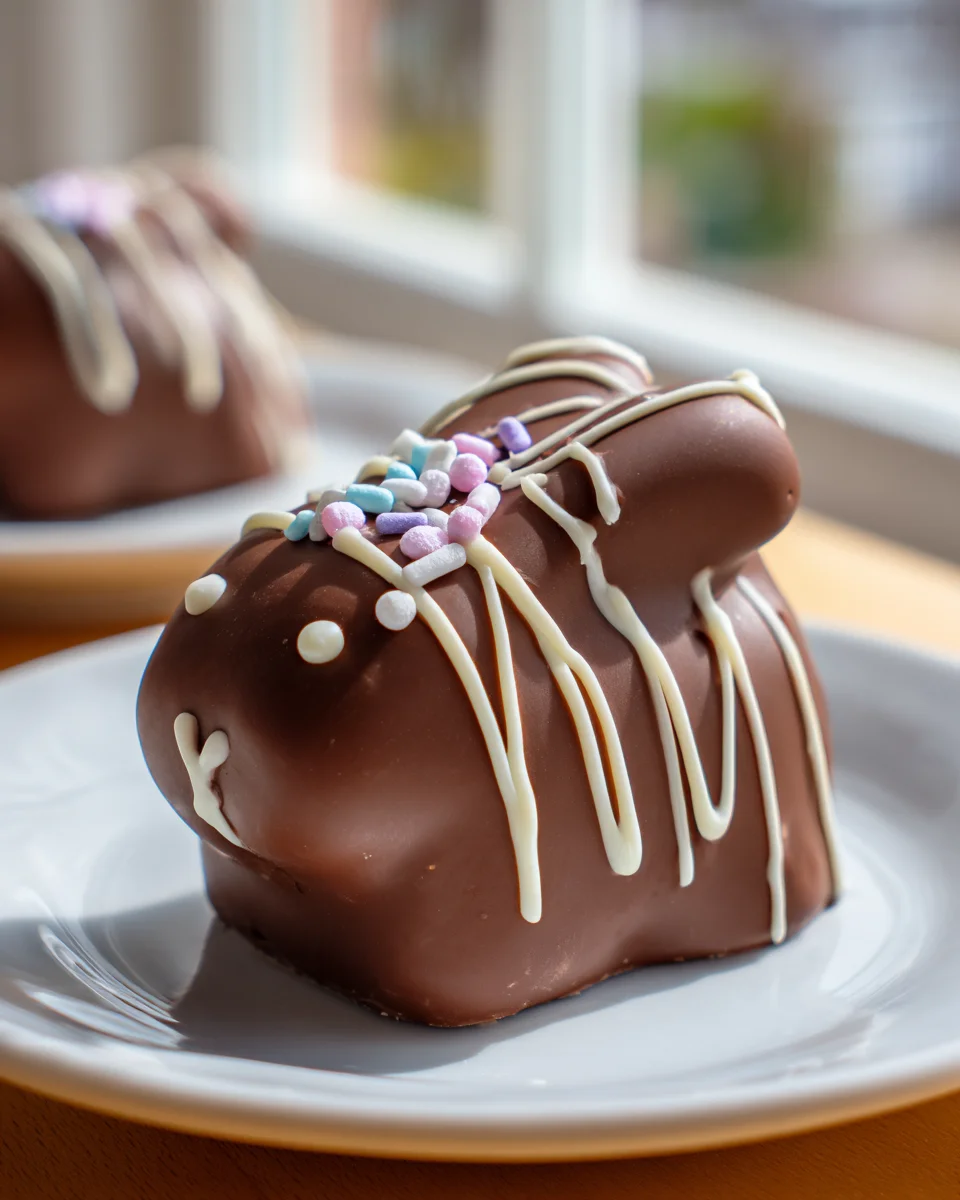
These Chocolate Bunny Cakesicles are a visual delight—small, adorable bunny shapes coated in glossy chocolate and adorned with vibrant sprinkles. The moment you take a bite, you’re greeted with a deliciously moist cake center that perfectly complements the rich chocolate coating. It’s a delightful blend of textures: the soft cake melting in your mouth, followed by the satisfying crunch of the chocolate shell. Each bite is not just a treat; it’s a burst of nostalgia wrapped in sweetness.
What makes my version of Chocolate Bunny Cakesicles stand out is the secret ingredient: a hint of vanilla extract paired with a touch of cream cheese frosting, which elevates the flavor to a whole new level. These little bunnies are not just a dessert; they’re a celebration of family, creativity, and the joy of sharing something special with loved ones.
So, are you ready to bring a little magic into your kitchen? Let me show you exactly how to make these delectable Chocolate Bunny Cakesicles!

Why You’ll Love This Recipe
- These Chocolate Bunny Cakesicles can be whipped up in under 30 minutes, making them perfect for last-minute celebrations.
- The texture is a delightful combination of moist cake and a crisp chocolate coating, ensuring a satisfying bite every time.
- Using simple, budget-friendly ingredients means you won’t have to break the bank to create these festive treats.
- They’re incredibly versatile; you can customize the decorations to match any holiday or occasion, from Easter to birthday parties.
- The fun bunny shape adds an element of whimsy, making them a hit with both kids and adults alike!
Ingredients
- For the Cake:
- 1 ½ cups all-purpose flour
- 1 cup granulated sugar
- ½ cup unsweetened cocoa powder
- 1 tsp baking powder
- ½ tsp baking soda
- ½ tsp salt
- 2 large eggs
- ½ cup whole milk
- ½ cup vegetable oil
- 1 tsp vanilla extract
- ½ cup boiling water
- For the Chocolate Coating:
- 2 cups semi-sweet chocolate chips
- 1 tbsp coconut oil (optional, for thinning the chocolate)
- For Decoration:
- ½ cup white candy melts (for bunny ears, optional)
- Edible eyes (for decoration)
- Sprinkles (optional, for added decoration)
- Tools Needed:
- Bunny-shaped silicone molds or cakesicle molds
- Mixing bowls
- Electric mixer (or whisk)
- Measuring cups and spoons
- Microwave-safe bowl for melting chocolate
- Piping bag or squeeze bottle (optional for decorating)
- Lollipop sticks or popsicle sticks
To create the moist, rich cake base for your Chocolate Bunny Cakesicles, the combination of all-purpose flour, granulated sugar, and unsweetened cocoa powder is essential. The flour provides structure, while the sugar keeps the cake sweet and moist. Cocoa powder is key for that deep chocolate flavor we all crave. If you want to make a gluten-free version, you can substitute the all-purpose flour with a 1:1 gluten-free baking mix.
The chocolate coating is equally critical, providing a satisfying crunch and a beautiful glossy finish. Semi-sweet chocolate chips are perfect for this recipe, as they strike a balance between sweetness and rich chocolate flavor. If you find the chocolate too thick for coating, you can add coconut oil to thin it out and make it easier to work with. Dark chocolate chips can also be used for a more intense chocolate experience.
Step-by-Step Instructions
- Preheat your oven to 350°F (175°C). Grease and flour your bunny-shaped silicone molds or cakesicle molds to ensure easy release later.
- In a large mixing bowl, combine 1 ½ cups all-purpose flour, 1 cup granulated sugar, ½ cup unsweetened cocoa powder, 1 tsp baking powder, ½ tsp baking soda, and ½ tsp salt. Mix until well combined and set aside.
- In another bowl, whisk together 2 large eggs, ½ cup whole milk, ½ cup vegetable oil, and 1 tsp vanilla extract until smooth. This mixture should be creamy and light yellow in color.
- Slowly add the wet ingredients to the dry ingredients, mixing gently until just combined. Be careful not to overmix; you want a smooth batter without any lumps.
- Carefully stir in ½ cup of boiling water. The batter will be thin, but that’s okay! This is what keeps your cakes moist.
- Pour the batter into the prepared molds, filling them about ¾ full. Bake in the preheated oven for 20-25 minutes. You’ll know they’re done when a toothpick inserted in the center comes out clean.
- Once baked, remove the molds from the oven and let them cool for about 10 minutes. Then, gently remove the cakes from the molds and let them cool completely on a wire rack.
- While the cakes are cooling, melt 2 cups of semi-sweet chocolate chips in a microwave-safe bowl. Heat in 30-second intervals, stirring in between, until the chocolate is completely melted and smooth. If desired, stir in 1 tbsp of coconut oil to thin the chocolate.
- Once the cakes are fully cooled, dip the lollipop sticks into the melted chocolate and insert them into the base of each cakesicle. This helps to secure the stick in place.
- Next, dip each cakesicle into the melted chocolate, ensuring it’s fully coated. Tap off any excess chocolate and place them on a parchment-lined tray.
- If you’re using white candy melts for ears, melt them separately and pipe small ear shapes onto parchment paper. Once set, attach them to the cakesicles using a bit of melted chocolate.
- Decorate each cakesicle with edible eyes and sprinkles as desired. Allow the chocolate coating to set completely, which should take about 30 minutes at room temperature.
- Once set, your Chocolate Bunny Cakesicles are ready to be enjoyed! Store them in an airtight container to keep them fresh.
Pro Tips for the Best Chocolate Bunny Cakesicles
- One common mistake is overmixing the batter, which can lead to dense cakes. Mix until just combined for a light and fluffy texture.
- For the best results, use high-quality chocolate chips for the coating. This will enhance the flavor and create a smoother finish.
- When melting chocolate, always use a microwave-safe bowl and heat it in short intervals to prevent burning. Stir between each interval!
- Consider chilling your molds in the freezer for a few minutes before pouring in the batter. This helps to create a firmer cake that holds its shape better.
- Experiment with flavors—adding a teaspoon of espresso powder to the batter can deepen the chocolate flavor without changing the overall taste.
Variations & Serving Ideas
- Try a vanilla or strawberry cake base instead of chocolate for a lighter option. These flavors pair wonderfully with the chocolate coating.
- For a festive twist, incorporate seasonal spices such as cinnamon or nutmeg into the cake batter for a holiday-themed treat.
- Make a gluten-free version by swapping the all-purpose flour with a gluten-free baking mix. Ensure all other ingredients are gluten-free as well.
- For a fun surprise, fill the cakesicles with a layer of peanut butter or raspberry jam before coating them in chocolate.
When it comes to pairing, consider serving these cakesicles alongside a scoop of vanilla ice cream; the creamy texture complements the rich chocolate perfectly. A fresh fruit platter can also provide a refreshing contrast to the sweetness. Lastly, a cup of hot cocoa or a rich coffee can enhance the chocolate experience and make for a delightful dessert spread.
Storage, Make-Ahead & Reheating
To store your Chocolate Bunny Cakesicles, place them in an airtight container in the fridge, where they will stay fresh for up to 5 days. They also freeze well; just wrap each cakesicle individually in plastic wrap and store them in a freezer-safe bag for up to 2 months. To reheat, simply let them thaw in the fridge overnight or enjoy them at room temperature. Surprisingly, these cakesicles taste even better the next day as the flavors meld beautifully!
Frequently Asked Questions
Can I make Chocolate Bunny Cakesicles ahead of time?
Yes — in fact, they taste even better the next day! You can prepare them a day in advance, store them in the refrigerator, and let the flavors develop overnight.
What can I use instead of eggs in this recipe?
For an egg substitute, consider using unsweetened applesauce or mashed banana. Use ¼ cup of either for each egg you need to replace; this will help maintain moisture and binding in the cakes.
How can I make these cakesicles more festive?
You can easily customize your cakesicles with different colored candy melts for decoration or add seasonal sprinkles based on the holiday. Edible glitter can also add a fun sparkle!
What if I don’t have molds for cakesicles?
If you don’t have specific molds, you can use a standard muffin tin or even a loaf pan. Just cut the cooled cake into pieces and insert sticks to create a similar effect.
Can I use dark chocolate for the coating?
Absolutely! Dark chocolate adds a rich depth of flavor that many people love. Just be mindful that it may be slightly less sweet than semi-sweet chocolate, so adjust to your taste preference.
Final Thoughts
These Chocolate Bunny Cakesicles are a delightful fusion of rich chocolate and moist cake, making them a truly satisfying treat for any occasion. Their adorable bunny shape adds a playful touch that brings joy to both kids and adults alike.
This is the kind of recipe I come back to again and again, especially when I’m looking to bring a little sweetness into a gathering or simply want to indulge in a creative baking project. The process of dipping each cakesicle in chocolate and decorating them is as enjoyable as the delicious outcome.
I encourage you to give these cakesicles a try—experiment with different flavors or decorations to make them your own! Don’t forget to share your results; I can’t wait to see how you put your unique spin on these charming treats!

Chocolate Bunny Cakesicles Recipe: Fun Easter Treats!
- Total Time: 40 minutes
- Yield: 12 cakesicles 1x
Description
These Chocolate Bunny Cakesicles are a delightful fusion of rich chocolate and moist cake, making them a truly satisfying treat for any occasion. Their adorable bunny shape adds a playful touch that brings joy to both kids and adults alike.
Ingredients
- 1 ½ cups all-purpose flour
- 1 cup granulated sugar
- ½ cup unsweetened cocoa powder
- 1 tsp baking powder
- ½ tsp baking soda
- ½ tsp salt
- 2 large eggs
- ½ cup whole milk
- ½ cup vegetable oil
- 1 tsp vanilla extract
- ½ cup boiling water
- 2 cups semi-sweet chocolate chips
- 1 tbsp coconut oil (optional, for thinning the chocolate)
- ½ cup white candy melts (for bunny ears, optional)
- Edible eyes (for decoration)
- Sprinkles (optional, for added decoration)
- Bunny-shaped silicone molds or cakesicle molds
- Mixing bowls
- Electric mixer (or whisk)
- Measuring cups and spoons
- Microwave-safe bowl for melting chocolate
- Piping bag or squeeze bottle (optional for decorating)
- Lollipop sticks or popsicle sticks
Instructions
- Preheat your oven to 350°F (175°C). Grease and flour your bunny-shaped silicone molds or cakesicle molds to ensure easy release later.
- In a large mixing bowl, combine 1 ½ cups all-purpose flour, 1 cup granulated sugar, ½ cup unsweetened cocoa powder, 1 tsp baking powder, ½ tsp baking soda, and ½ tsp salt. Mix until well combined and set aside.
- In another bowl, whisk together 2 large eggs, ½ cup whole milk, ½ cup vegetable oil, and 1 tsp vanilla extract until smooth. This mixture should be creamy and light yellow in color.
- Slowly add the wet ingredients to the dry ingredients, mixing gently until just combined. Be careful not to overmix; you want a smooth batter without any lumps.
- Carefully stir in ½ cup of boiling water. The batter will be thin, but that’s okay! This is what keeps your cakes moist.
- Pour the batter into the prepared molds, filling them about ¾ full. Bake in the preheated oven for 20-25 minutes. You’ll know they’re done when a toothpick inserted in the center comes out clean.
- Once baked, remove the molds from the oven and let them cool for about 10 minutes. Then, gently remove the cakes from the molds and let them cool completely on a wire rack.
- While the cakes are cooling, melt 2 cups of semi-sweet chocolate chips in a microwave-safe bowl. Heat in 30-second intervals, stirring in between, until the chocolate is completely melted and smooth. If desired, stir in 1 tbsp of coconut oil to thin the chocolate.
- Once the cakes are fully cooled, dip the lollipop sticks into the melted chocolate and insert them into the base of each cakesicle. This helps to secure the stick in place.
- Next, dip each cakesicle into the melted chocolate, ensuring it’s fully coated. Tap off any excess chocolate and place them on a parchment-lined tray.
- If you’re using white candy melts for ears, melt them separately and pipe small ear shapes onto parchment paper. Once set, attach them to the cakesicles using a bit of melted chocolate.
- Decorate each cakesicle with edible eyes and sprinkles as desired. Allow the chocolate coating to set completely, which should take about 30 minutes at room temperature.
- Once set, your Chocolate Bunny Cakesicles are ready to be enjoyed! Store them in an airtight container to keep them fresh.
- Prep Time: 15 mins
- Cook Time: 25 mins
- Category: Dessert
- Method: Baking
- Cuisine: American
Nutrition
- Serving Size: 1 cakesicle
- Calories: 200
- Sugar: 15 g
- Sodium: 150 mg
- Fat: 10 g
- Saturated Fat: 5 g
- Unsaturated Fat: 3 g
- Trans Fat: 0 g
- Carbohydrates: 25 g
- Fiber: 2 g
- Protein: 3 g
- Cholesterol: 30 mg
Keywords: One common mistake is overmixing the batter, which can lead to dense cakes. Mix until just combined for a light and fluffy texture. For the best results, use high-quality chocolate chips for the coating. This will enhance the flavor and create a smoother finish.