Green Bean Casserole Without Cream Soup (still Creamy!)
Oh, green bean casserole! It’s a holiday staple for so many of us, evoking memories of family gatherings and festive tables. But let’s be honest, the traditional version, while nostalgic, often leaves a bit to be desired when it comes to fresh flavor and wholesome ingredients. That’s precisely why I’m so thrilled to share my recipe for Green Bean Casserole Without Cream Soup (still Creamy!)!
What makes this version truly special is how we achieve that beloved creamy texture and comforting flavor entirely from scratch, bypassing the canned cream soup altogether. You’re going to absolutely love it because it delivers all the warmth and familiarity of the classic, but with a vibrant, fresh taste that’s simply superior. No artificial flavors, just real ingredients shining through!
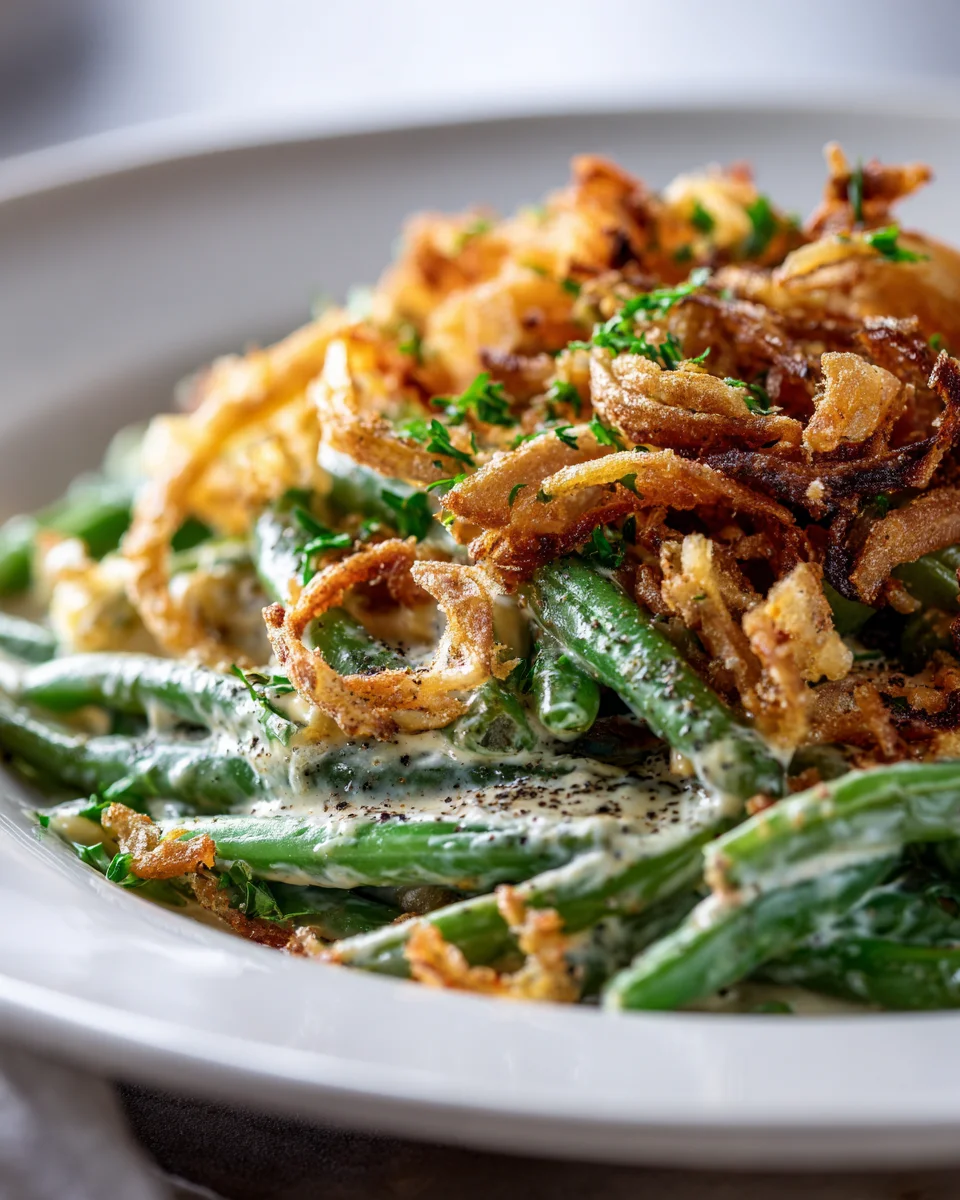
In this dish, tender-crisp green beans are enveloped in a rich, velvety homemade sauce, crafted from pantry staples that come together beautifully to create an unbelievably luscious base. We then crown it with those irresistible crispy fried onions – whether you opt for store-bought or whip up a batch of homemade ones for an extra touch – providing the perfect textural contrast. It’s a side dish that not only tastes incredible but also feels elevated and wholesome, perfect for your holiday spread or any cozy meal where you want a little extra comfort without compromise. Get ready for a new family favorite!

Ingredient Notes
Crafting a truly creamy green bean casserole without relying on canned cream soup is all about choosing the right ingredients and understanding how they contribute to the final texture and flavor. Here’s a breakdown of what we’ll use to achieve that luscious, homemade goodness:
- Green Beans: For the best texture and vibrant color, I always recommend using fresh green beans. Look for crisp, tender beans and trim the ends. If fresh isn’t an option, high-quality frozen whole green beans work wonderfully – just make sure they’re not canned! Canned green beans tend to be too soft and lack the freshness we’re aiming for here. If using fresh, a quick blanching will ensure they are perfectly tender-crisp in the final dish.
- Butter & Flour (for the Roux): This is the secret to our creamy, homemade sauce! Unsalted butter provides a rich base, and all-purpose flour thickens the sauce beautifully. Together, they form a roux, which is the foundation of many velvety sauces. It’s crucial to cook the roux long enough to eliminate any raw flour taste, but not so long that it browns too much, as we want a lighter-colored sauce.
- Milk & Broth: To create that wonderful creamy consistency, I use a combination of whole milk and either chicken or vegetable broth. Whole milk provides richness, while the broth adds depth of flavor without making the sauce overly heavy. You can certainly opt for half-and-half or even a splash of heavy cream if you desire an extra indulgent sauce, but whole milk usually does the trick perfectly. For a richer, savory flavor, homemade chicken broth or a good quality store-bought low-sodium version is ideal. Vegetable broth is an excellent alternative for a vegetarian option.
- Aromatics (Onions, Garlic, Mushrooms): These are non-negotiables for building a robust flavor profile. Sautéed sweet onions or shallots provide a delicate sweetness, fresh garlic adds a pungent kick, and sliced fresh mushrooms (cremini or white button are great) bring an earthy umami that complements the green beans perfectly. This combination creates a depth of flavor far superior to anything from a can.
- Seasonings: Beyond salt and freshly ground black pepper, a pinch of nutmeg is my secret weapon for creamy sauces. It subtly enhances the milky flavor without being detectable as nutmeg itself. A touch of dried thyme or a sprig of fresh thyme adds another layer of aromatic warmth.
- Optional Creaminess Boosters: For an even richer, tangier sauce, feel free to whisk in a tablespoon or two of cream cheese or sour cream at the very end of the sauce-making process, just before combining with the beans. This isn’t necessary for creaminess but adds a lovely complexity. Also, a handful of grated Parmesan, Gruyere, or white cheddar cheese melted into the sauce can elevate both the creaminess and flavor significantly.
- Crispy Topping: While store-bought crispy fried onions are convenient, making your own homemade crispy shallots or onions takes this casserole to another level of deliciousness. They are incredibly easy to make by thinly slicing onions or shallots, lightly dredging them in flour, and frying them until golden and crisp. Alternatively, a Panko breadcrumb topping mixed with a little melted butter and grated cheese provides a fantastic crunch.
Step-by-Step Instructions
Let’s walk through creating this incredibly satisfying and creamy green bean casserole from scratch. Trust me, the effort is well worth the reward!
- Prepare the Green Beans: If using fresh green beans, wash them thoroughly and trim the ends. Bring a large pot of salted water to a rolling boil. Add the green beans and blanch for about 4-5 minutes, or until they are tender-crisp and bright green. Immediately drain them and plunge them into an ice bath to stop the cooking and preserve their vibrant color. Once cooled, drain well and set aside. If using frozen green beans, thaw them completely and pat them dry.
- Sauté Aromatics and Mushrooms: In a large, deep skillet or Dutch oven, melt 2 tablespoons of butter over medium heat. Add the sliced onions or shallots and cook, stirring occasionally, until softened and translucent, about 5-7 minutes. Add the sliced mushrooms and cook until they release their moisture and start to brown, about 5-8 minutes more. Finally, stir in the minced garlic and cook for another minute until fragrant, being careful not to burn it. Remove the cooked aromatics and mushrooms from the skillet and set aside in a bowl.
- Make the Creamy Roux Sauce: In the same skillet, melt the remaining butter (usually 4-5 tablespoons) over medium heat. Once melted and shimmering, sprinkle in the flour. Whisk continuously for 1-2 minutes until a smooth paste forms and cooks slightly – this is your roux. It should be light blonde in color and smell a bit like pie crust.
- Whisk in Liquids: Gradually, a little at a time, slowly whisk in the milk and broth into the roux. Keep whisking constantly to prevent lumps from forming. Continue to cook, stirring frequently, until the sauce thickens to your desired consistency – it should be thick enough to coat the back of a spoon. This usually takes about 5-8 minutes.
- Season and Flavor the Sauce: Remove the skillet from the heat. Stir in the reserved sautéed onions, mushrooms, and garlic. Season generously with salt, freshly ground black pepper, and a pinch of nutmeg. If using, now is the time to stir in any grated cheese, cream cheese, or sour cream until fully melted and combined. Taste and adjust seasonings as needed. This sauce is the star, so make sure it’s delicious!
- Combine and Assemble: Gently fold the blanched green beans into the creamy sauce until they are evenly coated. Pour the entire mixture into a 9×13-inch baking dish (or a similarly sized oven-safe dish).
- Prepare and Add Topping: If making homemade crispy onions, prepare them now (thinly slice onions/shallots, dredge lightly in flour, and shallow fry until golden and crisp, then drain on paper towels and season with salt). For a breadcrumb topping, combine Panko breadcrumbs with a tablespoon of melted butter and a sprinkle of Parmesan cheese in a small bowl. Sprinkle your chosen topping evenly over the green bean mixture in the baking dish.
- Bake the Casserole: Preheat your oven to 375°F (190°C). Bake the casserole for 20-25 minutes, or until the sauce is bubbly around the edges and the topping is golden brown and crisp. If the topping is browning too quickly, you can loosely cover it with foil. If you’re using store-bought crispy onions, I recommend adding them only for the last 5-10 minutes of baking to prevent them from burning, or even sprinkling them on right before serving for maximum crispness.
- Serve: Let the casserole rest for a few minutes before serving hot. Enjoy your perfectly creamy, homemade green bean casserole!
Tips & Suggestions
Making green bean casserole from scratch opens up a world of possibilities for customization and flavor enhancement. Here are some of my favorite tips to make your “cream soup-less” version truly shine:
- Embrace Freshness: While the beans are the star, don’t skimp on fresh aromatics. Freshly minced garlic, thinly sliced shallots, and sautéed cremini mushrooms will give your casserole a depth of flavor that is miles beyond anything from a can. It makes all the difference!
- Roux Control is Key: When making your roux, be patient. Cook the butter and flour mixture for at least 1-2 minutes after combining, stirring constantly, to cook out the raw flour taste. A perfectly cooked roux is the foundation of a smooth, lump-free, and delicious sauce.
- Customize Your Creaminess: Don’t be afraid to experiment with the creaminess factor. For an extra rich sauce, use half-and-half or light cream instead of whole milk. A tablespoon or two of cream cheese or sour cream stirred into the finished sauce adds a wonderful tang and even more body. For a delightful savory note, try a bit of freshly grated Parmesan or Gruyère melted into the sauce.
- Topping Variations: While homemade crispy onions are fantastic, you have other options!
- Panko Power: For a super crispy, yet lighter, topping, mix Panko breadcrumbs with a little melted butter and maybe some grated Parmesan cheese. Spread on top before baking.
- Nutty Crunch: Toasted chopped pecans or walnuts can add a delightful texture and earthy flavor, especially when mixed with breadcrumbs.
- Savory Meat Crumble (Beef Option): If you enjoy a meaty addition, consider browning some finely ground beef with a touch of onion powder and garlic powder until crispy. Drain any excess fat, and sprinkle over the casserole for the last 10 minutes of baking, or serve on the side. This is a great alternative if you typically enjoy meat in your casseroles.
- Make Ahead Magic: You can prepare the creamy green bean mixture (without the topping) up to 1-2 days in advance. Store it covered in the refrigerator. When ready to bake, transfer it to your baking dish, add the topping, and bake as directed, adding about 10-15 minutes to the baking time to ensure it heats through evenly. The sauce might thicken slightly in the fridge; if so, you can thin it with a splash of milk or broth before baking.
- Flavor Boosters: A dash of Worcestershire sauce (ensure it’s vegetarian if needed) can add a lovely umami depth to the sauce. Or, try a tablespoon of white wine vinegar or apple cider vinegar at the end of the sauce cooking for a subtle bright lift that cuts through the richness.
Storage
Knowing how to properly store your homemade green bean casserole ensures you can enjoy the leftovers just as much as the first serving. Here’s what I recommend:
- Refrigeration: Leftover green bean casserole should be cooled completely and then transferred to an airtight container. It will keep well in the refrigerator for up to 3-4 days. I find that the sauce can thicken slightly upon chilling, but it’s still delicious.
- Freezing (Use with Caution): While it’s technically possible to freeze green bean casserole, it’s not always ideal. The dairy-based sauce can sometimes separate or become a bit grainy upon thawing and reheating, and the green beans may become softer or waterier. However, if you must freeze it, transfer the cooled casserole (preferably without the crispy topping, as it will get soggy) to a freezer-safe container, leaving about an inch of headspace. Cover tightly or wrap well with plastic wrap and then foil. It can be frozen for up to 1 month.
- Reheating:
- Oven (Recommended): For best results, especially if you want to revive some crispness in the topping, reheat the casserole in the oven. Preheat to 325°F (160°C). Place the casserole in an oven-safe dish, cover loosely with foil (to prevent over-browning if the topping is already crisp), and bake for 20-30 minutes, or until heated through. If the topping has become soft, you can remove the foil for the last 5-10 minutes to help it crisp up again.
- Microwave: You can reheat individual portions in the microwave. Place a serving on a microwave-safe plate, cover loosely, and heat on medium power in 1-2 minute intervals, stirring occasionally, until hot. Be aware that the texture of the green beans might become softer, and the topping will lose its crispness.
- From Frozen: If reheating from frozen, it’s best to thaw the casserole in the refrigerator overnight first. Then, follow the oven reheating instructions. If reheating directly from frozen, it will take significantly longer in the oven (likely 45-60 minutes or more), and you’ll definitely want to keep it covered with foil for most of the cooking time to prevent drying out.
Final Thoughts
And there you have it! I truly hope you’re as thrilled with this recipe as I am. We’ve just proven that achieving that classic comfort food taste and texture doesn’t require a can of condensed soup. This Green Bean Casserole Without Cream Soup (still Creamy!) is, in my opinion, a total game-changer. It delivers on all the promises: a rich, velvety creaminess, an incredible depth of flavor, and that undeniable homemade goodness, all without relying on artificial ingredients. It’s the perfect way to enjoy a fresher, more wholesome version of a beloved dish, ensuring it stands out beautifully on any holiday table or family meal. I promise, once you taste how wonderfully creamy and flavorful this version is, you’ll never look back. Give it a try; your taste buds will thank you!

Creamy Green Bean Casserole from Scratch – No Cream Soup
- Total Time: 45 minutes
- Yield: 8 servings
Description
This Green Bean Casserole is a fresh take on a holiday classic, made entirely from scratch without any cream soup. Enjoy a rich, creamy texture and vibrant flavors that will elevate your festive table.
Ingredients
- Fresh green beans
- Unsalted butter
- All-purpose flour
- Whole milk
- Chicken broth or vegetable broth
- Sweet onions or shallots
- Garlic
- Sliced fresh mushrooms (cremini or white button)
- Salt
- Freshly ground black pepper
- Nutmeg
- Dried thyme or fresh thyme
- Cream cheese or sour cream (optional)
- Grated Parmesan, Gruyere, or white cheddar cheese (optional)
- Crispy fried onions or homemade crispy shallots or onions
- Panko breadcrumbs (optional)
- Melted butter (for topping)
- Grated cheese (for topping, optional)
Instructions
- Prepare the Green Beans: If using fresh green beans, wash them thoroughly and trim the ends. Bring a large pot of salted water to a rolling boil. Add the green beans and blanch for about 4-5 minutes, or until they are tender-crisp and bright green. Immediately drain them and plunge them into an ice bath to stop the cooking and preserve their vibrant color. Once cooled, drain well and set aside. If using frozen green beans, thaw them completely and pat them dry.
- Sauté Aromatics and Mushrooms: In a large, deep skillet or Dutch oven, melt 2 tablespoons of butter over medium heat. Add the sliced onions or shallots and cook, stirring occasionally, until softened and translucent, about 5-7 minutes. Add the sliced mushrooms and cook until they release their moisture and start to brown, about 5-8 minutes more. Finally, stir in the minced garlic and cook for another minute until fragrant, being careful not to burn it. Remove the cooked aromatics and mushrooms from the skillet and set aside in a bowl.
- Make the Creamy Roux Sauce: In the same skillet, melt the remaining butter (usually 4-5 tablespoons) over medium heat. Once melted and shimmering, sprinkle in the flour. Whisk continuously for 1-2 minutes until a smooth paste forms and cooks slightly – this is your roux. It should be light blonde in color and smell a bit like pie crust.
- Whisk in Liquids: Gradually, a little at a time, slowly whisk in the milk and broth into the roux. Keep whisking constantly to prevent lumps from forming. Continue to cook, stirring frequently, until the sauce thickens to your desired consistency – it should be thick enough to coat the back of a spoon. This usually takes about 5-8 minutes.
- Season and Flavor the Sauce: Remove the skillet from the heat. Stir in the reserved sautéed onions, mushrooms, and garlic. Season generously with salt, freshly ground black pepper, and a pinch of nutmeg. If using, now is the time to stir in any grated cheese, cream cheese, or sour cream until fully melted and combined. Taste and adjust seasonings as needed.
- Combine and Assemble: Gently fold the blanched green beans into the creamy sauce until they are evenly coated. Pour the entire mixture into a 9×13-inch baking dish (or a similarly sized oven-safe dish).
- Prepare and Add Topping: If making homemade crispy onions, prepare them now (thinly slice onions/shallots, dredge lightly in flour, and shallow fry until golden and crisp, then drain on paper towels and season with salt). For a breadcrumb topping, combine Panko breadcrumbs with a tablespoon of melted butter and a sprinkle of Parmesan cheese in a small bowl. Sprinkle your chosen topping evenly over the green bean mixture in the baking dish.
- Bake the Casserole: Preheat your oven to 375°F (190°C). Bake the casserole for 20-25 minutes, or until the sauce is bubbly around the edges and the topping is golden brown and crisp. If the topping is browning too quickly, you can loosely cover it with foil. If you're using store-bought crispy onions, I recommend adding them only for the last 5-10 minutes of baking to prevent them from burning.
- Serve: Let the casserole rest for a few minutes before serving hot.
- Prep Time: 15 mins
- Cook Time: 30 mins
- Category: Side Dish
- Method: Baking
- Cuisine: American
Nutrition
- Serving Size: 1 cup
- Calories: 250
- Sugar: 3 g
- Sodium: 400 mg
- Fat: 15 g
- Saturated Fat: 8 g
- Unsaturated Fat: 5 g
- Trans Fat: 0 g
- Carbohydrates: 25 g
- Fiber: 4 g
- Protein: 6 g
- Cholesterol: 30 mg
Keywords: For an extra rich sauce, use half-and-half or light cream instead of whole milk. A tablespoon or two of cream cheese or sour cream stirred into the finished sauce adds a wonderful tang and even more body.