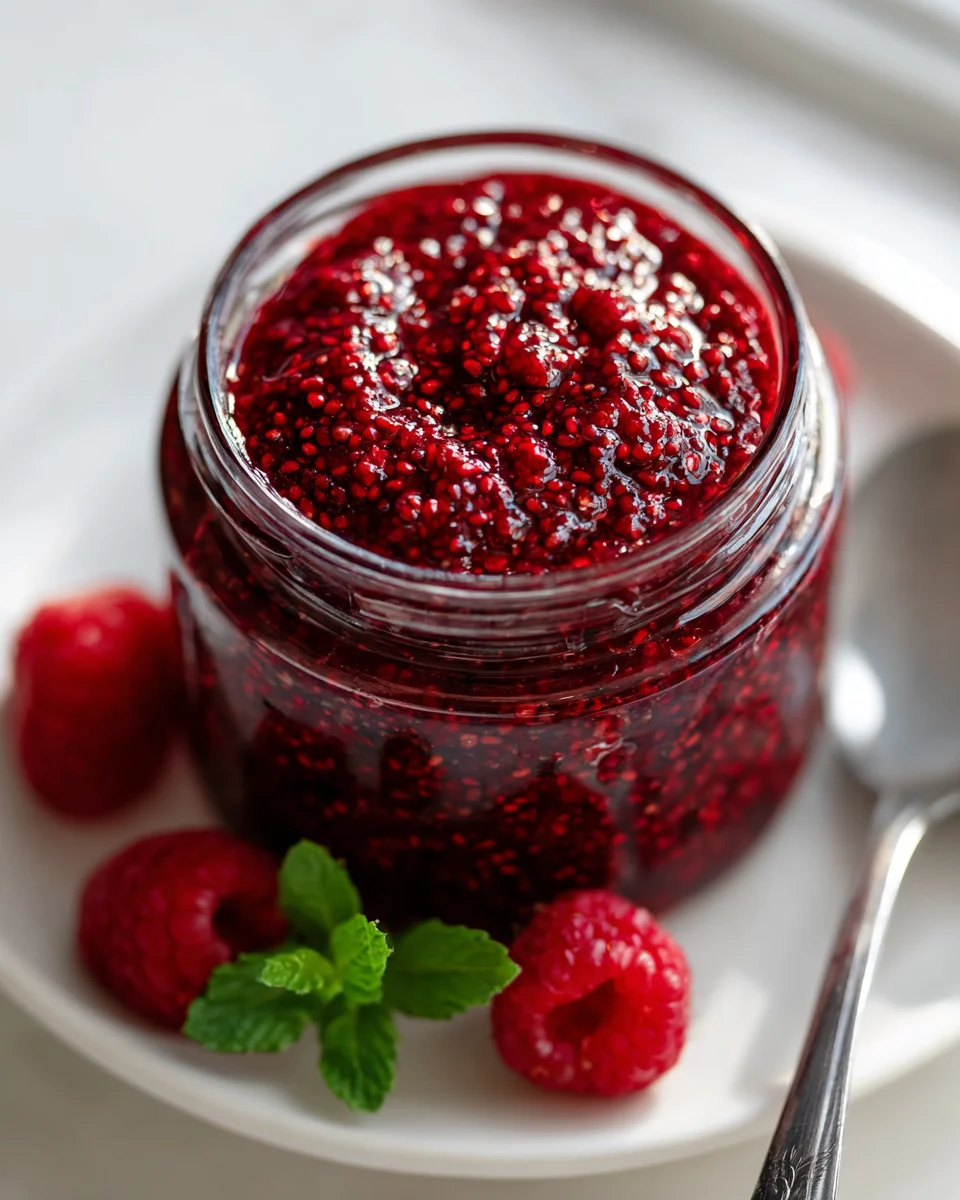
Raspberry Chia Jam (no Cook)
Oh my goodness, get ready to have your breakfast game utterly transformed! I’m so excited to share this incredible Raspberry Chia Jam (no Cook) recipe with you. What makes this jam truly special, and why I know you’ll absolutely adore it, is right there in the name: it’s “no cook”! That means no standing over a hot stove, no complicated canning process, and no waiting for hours. We’re talking fresh, vibrant, homemade jam in mere minutes. It’s the perfect solution for those of us who crave that homemade goodness but are short on time or just intimidated by traditional jam-making methods.
You’ll love how ridiculously easy it is to whip up a batch, and the taste? Pure, unadulterated summer joy! We’re simply mashing beautiful fresh raspberries, stirring in those magical little chia seeds that naturally thicken everything up, and adding just a touch of sweetness. The result is a delightfully chunky, brilliantly colored jam that bursts with natural raspberry flavor, all while being significantly healthier than most store-bought options thanks to the goodness of chia seeds and less added sugar. It’s perfect for slathering on toast, swirling into yogurt, topping pancakes, or even just enjoying by the spoonful. Trust me, once you try this effortless Raspberry Chia Jam, you’ll wonder how you ever lived without it!

Ingredient Notes
Making homemade Raspberry Chia Jam (no Cook) is incredibly simple, and it relies on just a few key ingredients that work together beautifully to create a vibrant, flavorful spread. I love how naturally wholesome this jam is, and you’ll find it surprisingly easy to customize to your taste!
Raspberries (Fresh or Frozen)
- My top pick: For this no-cook method, I actually prefer using frozen raspberries! They break down wonderfully as they thaw, releasing their juices readily, which is exactly what we need to activate the chia seeds. Plus, they’re often more economical and available year-round.
- If using fresh: Make sure your fresh raspberries are ripe and sweet. Give them a gentle rinse and then get ready to mash them up. You might need to mash a little more vigorously to achieve the desired consistency compared to thawed frozen berries.
- Substitutions: While this recipe focuses on raspberries, you could absolutely experiment with other berries like blueberries, strawberries, or mixed berries. Just be aware that the sweetness and water content might vary, so you might need to adjust your sweetener and chia seeds slightly.
Chia Seeds
- The magic thickener: These tiny powerhouses are the star of our no-cook jam! When chia seeds come into contact with liquid, they absorb it and swell up, creating a gel-like consistency that perfectly mimics traditional jam’s texture without any cooking or added pectin.
- Black vs. White Chia Seeds: You can use either black or white chia seeds; the nutritional benefits are essentially the same. White chia seeds might give your jam a slightly ‘cleaner’ look, but black ones are more common and work just as well. I usually just grab whatever’s available!
- My advice: Don’t skimp on quality chia seeds. They’re essential for the jam to set properly.
Sweetener (Maple Syrup, Agave, or Honey)
- To taste is key: Raspberries can vary greatly in their natural sweetness, so I always recommend adding sweetener to your personal preference. I find maple syrup is a fantastic choice here as it offers a lovely, subtle flavor that complements the raspberries without overpowering them.
- Other options: Agave nectar or even a good quality honey would also work beautifully. If you’re avoiding refined sugars, these are all excellent natural choices. You could also use a granulated sugar substitute if that’s your preference, just ensure it dissolves well.
- Adjust as you go: You can always add a little more sweetener after the jam has sat for a bit if you find it’s not sweet enough for your liking.
Lemon Juice (Freshly Squeezed)
- A flavor brightener: A squeeze of fresh lemon juice is crucial. It doesn’t just add a lovely zing that brightens the overall flavor of the jam, cutting through the sweetness of the fruit.
- Natural preservative: Lemon juice also acts as a natural preservative, helping your jam last a little longer in the fridge. Don’t skip it!
(Optional) Vanilla Extract
- A touch of warmth: Sometimes, I like to add a splash of pure vanilla extract. It adds a wonderful depth and warmth to the jam, making it feel a little more gourmet. It’s completely optional, but I think it takes the flavor profile up a notch!
Step-by-Step Instructions
You’ll be amazed at how quickly this Raspberry Chia Jam comes together without ever touching a stove! Here’s how I make my favorite no-cook jam:
-
Prepare Your Raspberries
If you’re using frozen raspberries, I recommend letting them thaw in a medium-sized bowl for about 15-20 minutes at room temperature, or even overnight in the fridge. This allows them to release their juices, which is vital for the chia seeds to do their job. If you’re using fresh raspberries, simply give them a gentle rinse under cool water and place them in your bowl.
-
Mash the Berries
Once your raspberries are ready, it’s time to mash them! I use a fork or a potato masher for this. Mash them to your desired consistency – if you like a chunkier jam, leave some pieces intact. If you prefer a smoother jam, mash them more thoroughly. Don’t worry about getting every single piece perfectly smooth; the natural texture is part of the charm.
-
Combine the Ingredients
To your mashed raspberries, add the chia seeds, your chosen sweetener (I usually start with a couple of tablespoons of maple syrup and adjust later), and the fresh lemon juice. If you’re adding vanilla extract, now’s the time to include that too.
-
Stir Well and Let Sit (Initial Thickening)
Give all the ingredients a really good stir to ensure the chia seeds are evenly distributed throughout the berry mixture. It’s important that they come into contact with the liquid. Once everything is mixed, let the bowl sit at room temperature for about 5 to 10 minutes. During this short time, you’ll notice the chia seeds will start to absorb the liquid and swell, beginning the thickening process.
-
Stir Again and Check Consistency
After the initial rest, give the mixture another thorough stir. At this point, you should already see it beginning to thicken. If you prefer your jam even smoother, you could give it another mash or even use an immersion blender for a few pulses now. I usually just give it a good stir.
-
Transfer and Chill to Set Completely
Spoon the raspberry chia jam into a clean, airtight jar or container. I love using Mason jars for this. Once transferred, place the jam in the refrigerator. It needs at least 30 minutes to an hour (or even longer, up to a few hours) to fully set and reach that perfect jam-like consistency. The longer it chills, the thicker it will become.
-
Taste and Adjust (Optional)
Once the jam has chilled and set, give it a taste! If you find it’s not sweet enough for you, you can stir in a little more sweetener. If it’s too thick, you could stir in a tiny bit of water or another splash of lemon juice to thin it out slightly, though this is rarely needed with my recipe.
Tips & Suggestions
Making Raspberry Chia Jam is super forgiving, but a few tricks can help you perfect it every time. Here are some of my go-to tips and ways I like to enjoy this delicious spread:
- Adjusting Consistency:
- Too Thick? If your jam ends up too thick after chilling (which can happen if your raspberries weren’t super juicy), don’t fret! You can simply stir in a teaspoon or two of water or extra lemon juice until you reach your desired consistency.
- Too Thin? If it’s too runny, you can add another teaspoon of chia seeds, stir well, and let it sit in the fridge for another 30 minutes to an hour to allow them to absorb more liquid and thicken the jam further.
- Sweetness is Personal: Always taste and adjust! Raspberries vary widely in tartness. I always start with a conservative amount of sweetener and add more after the initial mix and even after it’s chilled, if necessary. You want the sweetness to balance the tartness, not overpower the lovely raspberry flavor.
- Texture Preferences:
- Chunky: Mash your raspberries gently, leaving plenty of whole or half pieces.
- Smooth: For a super smooth jam without any seeds or large pieces, you can press the mashed raspberry mixture through a fine-mesh sieve before adding the chia seeds. Alternatively, after the jam has initially thickened for 10 minutes, you can use an immersion blender or transfer it to a regular blender for a quick pulse until smooth, then proceed to chill.
- Flavor Variations:
- Vanilla Bean: Instead of extract, scrape half a vanilla bean into the mixture for intense vanilla flavor.
- Almond Extract: A tiny drop (1/8 teaspoon) of almond extract can complement raspberries beautifully.
- Spice It Up: A pinch of cinnamon or cardamom can add a warm, interesting note.
- Mixed Berries: Don’t limit yourself to just raspberries! Try a mix of raspberries and strawberries, or add some blueberries for a deeper flavor profile.
- Serving Suggestions (My Favorites!):
- Classic Toast or Scones: A timeless choice, perfect for breakfast or brunch.
- Yogurt Parfaits: Layer with Greek yogurt and granola for a healthy and delicious treat.
- Oatmeal Topping: Stir a spoonful into your morning oatmeal for added fruit and sweetness.
- Pancakes & Waffles: Drizzle over a stack of fluffy pancakes or crispy waffles.
- Peanut Butter & Jam Sandwiches: Elevate a childhood classic with homemade goodness.
- Dessert Enhancer: Serve as a topping for cheesecake, ice cream, or even simple vanilla pudding. It’s also fantastic spread inside crepes or as a filling for thumbprint cookies!
Storage
One of the great advantages of making this no-cook Raspberry Chia Jam is how easy it is to store, both for immediate use and for longer periods.
Refrigeration
- Airtight Container: Always transfer your freshly made chia jam into a clean, airtight jar or container. I find that glass Mason jars work perfectly for this.
- Shelf Life: Stored properly in the refrigerator, your Raspberry Chia Jam will typically last for about 1 to 2 weeks. Since it’s a raw, no-cook jam and doesn’t contain the high sugar content or specific canning processes of traditional jams, its shelf life is shorter.
- Visual Check: Always give your jam a quick visual inspection before using it. Look for any signs of mold or unusual smells. If you see or smell anything off, it’s best to discard it.
Freezing
- Excellent for Longer Storage: If you’ve made a larger batch or want to enjoy your jam for longer, freezing is a fantastic option! This jam freezes beautifully without compromising its texture or flavor too much.
- Freezer-Safe Containers: Use freezer-safe containers or jars. If using glass jars, make sure they are specifically designed for freezing and always leave about 1/2 to 1 inch of headspace at the top. This is crucial because liquids expand when frozen, and not leaving enough room can cause the jar to crack. Plastic freezer containers or heavy-duty freezer bags (squeezing out excess air) also work well.
- Freezer Life: When properly frozen, your Raspberry Chia Jam can last in the freezer for up to 2 to 3 months. Beyond that, while still safe to eat, the quality and freshness might start to diminish slightly.
- Thawing Instructions: To use frozen jam, simply transfer the container from the freezer to the refrigerator and let it thaw overnight. Once thawed, give it a good stir, and it’s ready to enjoy! You might notice a slight change in consistency after thawing, but a good stir usually brings it right back. Consume thawed jam within about a week.
Final Thoughts
And there you have it! My absolute favorite way to whip up a batch of incredible, healthy jam. This Raspberry Chia Jam (no Cook) truly is a game-changer in the kitchen. I love how effortlessly it comes together, skipping all the fuss and lengthy processing of traditional methods, yet delivering a vibrant, fresh-tasting spread that’s bursting with natural sweetness.
What makes this Raspberry Chia Jam (no Cook) a must-try, you ask? Beyond its incredible simplicity, it’s packed with the goodness of chia seeds and the pure, unadulterated flavor of fresh raspberries, without any added refined sugars. It’s perfect for slathering on toast, swirling into yogurt, topping pancakes, or even adding a fruity twist to your morning oatmeal. The texture is wonderfully satisfying, and the taste? Pure summer bliss!
So, I wholeheartedly encourage you to give this Raspberry Chia Jam (no Cook) a try. You’ll be amazed at how quickly you can create such a delicious and wholesome treat that will elevate countless meals. Trust me, once you experience the ease and flavor, you’ll wonder why you ever made jam any other way!

Quick & Easy No-Cook Raspberry Chia Jam – Healthy Spread!
- Total Time: 15 minutes
- Yield: 1 cup 1x
Description
Transform your breakfast with this incredibly simple and vibrant Raspberry Chia Jam that requires no cooking! Enjoy a fresh, healthy spread bursting with natural raspberry flavor in just minutes.
Ingredients
- 2 cups raspberries (fresh or frozen)
- 1/4 cup chia seeds
- 2 tablespoons maple syrup (or to taste)
- 1 tablespoon freshly squeezed lemon juice
- 1/2 teaspoon vanilla extract (optional)
Instructions
- If you're using frozen raspberries, let them thaw in a medium-sized bowl for about 15-20 minutes at room temperature, or overnight in the fridge. If using fresh raspberries, rinse them gently under cool water and place them in your bowl.
- Mash the raspberries using a fork or potato masher to your desired consistency.
- Add the chia seeds, your chosen sweetener, and the fresh lemon juice to the mashed raspberries. If using vanilla extract, add it now.
- Stir well to ensure the chia seeds are evenly distributed and let the mixture sit at room temperature for about 5 to 10 minutes.
- After the initial rest, stir the mixture again. If you prefer a smoother jam, you can mash it again or use an immersion blender for a few pulses.
- Transfer the jam into a clean, airtight jar or container and refrigerate for at least 30 minutes to an hour to set.
- Taste the jam after it has chilled. If it's not sweet enough, stir in more sweetener. If it's too thick, add a little water or more lemon juice to thin it out.
- Prep Time: 15 mins
- Cook Time: 0 mins
- Category: Spread
- Method: No-Cook
- Cuisine: American
Nutrition
- Serving Size: 1 tablespoon
- Calories: 30
- Sugar: 3 g
- Sodium: 1 mg
- Fat: 1 g
- Saturated Fat: 0 g
- Unsaturated Fat: 0 g
- Trans Fat: 0 g
- Carbohydrates: 7 g
- Fiber: 1 g
- Protein: 1 g
- Cholesterol: 0 mg
Keywords: Adjust the sweetness to your taste, as raspberries can vary in natural sweetness. You can also experiment with other berries or flavor variations like almond extract or spices.