Honey Mustard Chicken Sliders The Ultimate Recipe Guide is more than just a recipe title; it’s your gateway to unlocking the secret of an irresistibly delicious, crowd-pleasing dish that will have everyone asking for seconds. Have you ever wished for that perfect appetizer or light meal that combines incredible flavor with effortless preparation? Look no further! These delightful mini sandwiches are a testament to how simple ingredients can create a symphony of taste.
While sliders themselves have a charming history, evolving from their humble origins as bite-sized burgers into versatile canvases for culinary creativity, the honey mustard chicken version stands out as a modern classic. I find that people absolutely adore this dish because of its perfect balance: the tender, succulent chicken coated in a luscious, tangy-sweet honey mustard sauce, all nestled within soft, pillowy slider buns. It’s the ultimate comfort food, ideal for game nights, potlucks, family dinners, or simply a treat for yourself. Preparing these sliders is incredibly satisfying, and the end result is a guaranteed hit, making “Honey Mustard Chicken Sliders The Ultimate Recipe Guide” an essential addition to your culinary repertoire.

Ingredients:
Creating the perfect batch of Honey Mustard Chicken Sliders requires a careful selection of fresh ingredients. Here’s everything you’ll need to bring this incredibly satisfying dish to life. Remember, quality ingredients make all the difference!
- For the Chicken:
- 2 lbs boneless, skinless chicken breasts or thighs (I often use breasts for a leaner slider, but thighs offer more flavor and moisture!)
- 1 tablespoon olive oil (or avocado oil)
- 1 teaspoon garlic powder
- 1 teaspoon onion powder
- 1 teaspoon paprika (smoked paprika adds a lovely depth!)
- ½ teaspoon dried oregano
- ¼ teaspoon black pepper
- ½ teaspoon salt (or to taste)
- For the Homemade Honey Mustard Sauce:
- ½ cup mayonnaise (full-fat is best for richness)
- ¼ cup Dijon mustard (stone-ground can add texture, but smooth Dijon is my go-to)
- ¼ cup honey (local honey is wonderful if you can find it!)
- 1 tablespoon apple cider vinegar (this really brightens up the sauce)
- ½ teaspoon garlic powder
- A pinch of salt and black pepper (to taste)
- Optional: A dash of hot sauce (for a little kick!)
- For the Sliders:
- 1 (12-count) package Hawaiian sweet rolls (King’s Hawaiian are a classic for a reason!)
- 6-8 slices provolone cheese, Swiss cheese, or cheddar cheese (sliced, not shredded; shredded can clump)
- 2 tablespoons unsalted butter, melted
- 1 teaspoon poppy seeds (optional, but they add a nice visual touch and subtle crunch)
- ½ teaspoon garlic powder (for the butter topping)
- A pinch of dried parsley flakes (optional, for garnish)
Preparing the Chicken: The Heart of Your Sliders
The chicken is truly the star of these Honey Mustard Chicken Sliders, so we want to make sure it’s cooked perfectly. I prefer pan-searing for speed and flavor, but you could also bake or air fry it if you prefer.
-
Season and Prepare the Chicken
First things first, let’s get our chicken ready. If you’re using chicken breasts, I recommend patting them very dry with paper towels. This helps achieve a better sear. If your breasts are particularly thick, you might want to slice them horizontally to create two thinner cutlets, or pound them slightly to an even ½-inch thickness. Even thickness ensures they cook through at the same rate. In a small bowl, combine your garlic powder, onion powder, paprika, dried oregano, salt, and black pepper. Sprinkle this seasoning mixture generously all over both sides of the chicken. Don’t be shy with the seasoning; this is where a lot of our initial flavor comes from!
-
Pan-Sear the Chicken to Perfection
Heat the olive oil in a large skillet (cast iron works wonderfully here if you have one!) over medium-high heat. You want the oil to be shimmering, but not smoking. Carefully place the seasoned chicken breasts into the hot skillet, making sure not to overcrowd the pan. If necessary, cook the chicken in batches. This allows for proper searing rather than steaming. Sear the chicken for about 5-7 minutes per side, or until it’s beautifully golden brown and cooked through. The internal temperature should reach 165°F (74°C). An instant-read thermometer is your best friend here to ensure safety and prevent overcooking, which can lead to dry chicken.
Once cooked, remove the chicken from the skillet and place it on a cutting board. Let it rest for at least 5-10 minutes. This resting period is crucial! It allows the juices to redistribute throughout the meat, keeping it moist and tender. Skipping this step often results in dry chicken, and we definitely don’t want that for our sliders.
-
Shred or Dice Your Cooked Chicken
After the chicken has rested, it’s time to prepare it for the sliders. You have a couple of options here: shredding or dicing. For shredded chicken, I like to use two forks to pull the chicken apart while it’s still warm. Alternatively, for really quick shredding, a stand mixer with the paddle attachment can shred chicken in seconds! If you prefer diced chicken, simply cut it into small, bite-sized pieces. Both methods work perfectly, so choose what you prefer for the texture of your sliders. I personally lean towards shredded for a more cohesive filling.
Crafting the Homemade Honey Mustard Sauce: The Tangy Sweet Secret
This homemade honey mustard sauce is what truly elevates these sliders from good to absolutely phenomenal. It’s creamy, tangy, sweet, and incredibly easy to make. Forget store-bought; once you try this, you won’t go back!
-
Combine All Sauce Ingredients
In a medium bowl, combine the mayonnaise, Dijon mustard, honey, apple cider vinegar, garlic powder, salt, and black pepper. I always start with the amounts listed, but remember, sauces are all about personal preference!
-
Whisk Until Smooth and Taste Test
Using a whisk, mix all the ingredients thoroughly until the sauce is completely smooth and well combined. Give it a good taste. Is it sweet enough for you? Too tangy? Not enough mustard kick? This is your moment to adjust! You can add a little more honey for sweetness, another splash of apple cider vinegar for tang, or more Dijon for that signature mustard flavor. If you like a little heat, now is the time to stir in a dash of your favorite hot sauce. I often add just a tiny bit of cayenne pepper for a subtle warmth.
Once you’re happy with the flavor, you can cover the sauce and refrigerate it until you’re ready to assemble the sliders. Letting it sit for even 15-20 minutes allows the flavors to meld beautifully.
-
Integrate Chicken into the Sauce
Now, take your prepared shredded or diced chicken and add it directly into the bowl with your glorious honey mustard sauce. Using a spoon or spatula, gently fold the chicken into the sauce until every piece is thoroughly coated. You want each bite of your Honey Mustard Chicken Sliders to be bursting with that incredible flavor. This step ensures maximum deliciousness!
Assembling Your Delicious Honey Mustard Chicken Sliders: Layer by Layer
This is where the magic happens and our individual components come together to form one irresistible dish. Assembly is straightforward, but a few tips can make all the difference for presentation and ease of serving.
-
Prepare the Rolls for Assembly
Preheat your oven to 350°F (175°C). Take your package of Hawaiian sweet rolls. Instead of separating them, carefully slice the entire block of rolls in half horizontally using a large serrated knife. You want to keep the tops connected and the bottoms connected. This makes assembly much faster and easier. Place the bottom half of the rolls into a 9×13 inch baking dish or a similar sized oven-safe pan.
-
Layer with Cheese and Chicken
First, arrange your slices of cheese evenly over the bottom half of the rolls. I like to overlap them slightly to ensure full coverage. Provolone or Swiss are fantastic choices for their meltability and mild flavor that complements the honey mustard beautifully. Cheddar also works if you prefer a sharper taste. Next, spoon the saucy honey mustard chicken mixture evenly over the cheese layer. Use a spatula to spread it right to the edges. You want a generous layer of chicken filling because, let’s face it, that’s what we’re here for!
-
Top with More Cheese (Optional, but Recommended!) and the Roll Tops
If you’re a cheese lover like me, you might want to add another layer of cheese slices over the chicken mixture. This creates an extra gooey, cheesy pull when you bite into the sliders. It’s completely optional but highly recommended! Finally, carefully place the top half of the rolls back over the chicken and cheese. Gently press down to ensure everything is snuggled in tight. This careful layering is key to perfect Honey Mustard Chicken Sliders.
The Final Bake: Bringing It All Together for the Ultimate Honey Mustard Chicken Sliders
The last step is to bake these beauties, allowing the cheese to melt into a gooey dream and the rolls to become perfectly golden and slightly crisp on top. This is the moment when all those wonderful flavors truly meld together.
-
Prepare the Flavorful Butter Topping
In a small microwave-safe bowl, melt the unsalted butter. Once melted, stir in the garlic powder and poppy seeds (if using). The poppy seeds add a fantastic texture and visual appeal, reminding me of classic deli sandwiches. Stir until well combined. This butter mixture is what gives the tops of our sliders that irresistible golden sheen and a burst of savory flavor.
-
Brush the Topping and Prepare for Baking
Using a pastry brush, generously brush the melted butter mixture over the tops of the rolls. Make sure to get into all the crevices. Don’t be shy; this butter topping is not just for flavor, it also helps the rolls crisp up beautifully in the oven. If you have any dried parsley flakes, you can sprinkle a few over the top for a little color contrast. Cover the baking dish tightly with aluminum foil. This step is important as it helps to steam the sliders slightly, ensuring the rolls stay soft while the cheese melts and prevents the tops from browning too quickly.
-
Bake to Golden Perfection and Serve
Place the covered baking dish into your preheated 350°F (175°C) oven. Bake for 15 minutes. After 15 minutes, carefully remove the foil. This will allow the tops to get nice and golden. Continue baking for another 5-10 minutes, or until the tops of the rolls are golden brown and the cheese is completely melted and bubbly. You’ll know they’re ready when your kitchen smells absolutely amazing!
Once baked, remove the dish from the oven. Let the sliders rest for about 5 minutes before slicing. This allows the hot cheese to set slightly, making them easier to separate. Using a sharp knife, cut along the lines of the rolls to create individual sliders. Serve them warm and watch them disappear! These Honey Mustard Chicken Sliders are perfect for game day, parties, or a fun family dinner. Enjoy creating and devouring these ultimate Honey Mustard Chicken Sliders with your friends and family!
Conclusion:
This recipe, my friends, isn’t just another dish; it’s an experience waiting to happen in your kitchen. Throughout our culinary journey, we’ve explored the delightful simplicity and incredible flavor profile that makes these sliders an absolute standout. From the perfectly seasoned chicken to the irresistible sweet and tangy honey mustard glaze, every element comes together in a symphony of taste that truly elevates a simple meal into something extraordinary. I honestly can’t stress enough how much joy these sliders bring, whether you’re whipping them up for a casual weeknight dinner or preparing for a big get-together. They are incredibly easy to assemble, requiring minimal fuss but delivering maximum impact. The buttery, toasted buns, the tender chicken, and that glorious sauce – it’s a combination that’s guaranteed to put a smile on everyone’s face, making them an undisputed crowd-pleaser for any occasion. These aren’t just appetizers; they are mini masterpieces designed for maximum enjoyment with minimal effort.
What I love most about these sliders is their incredible versatility, not just in terms of occasion but also in how you can serve them. While they shine brightly on their own, imagine them paired with a crisp, refreshing coleslaw for a classic picnic feel, or alongside a generous serving of sweet potato fries for a heartier, more substantial meal. A simple garden salad with a light vinaigrette would also beautifully complement the richness of the sliders, adding a fresh contrast. Don’t stop there, though! Consider serving them with some homemade potato chips, or even a cup of warm tomato soup for a cozy, comforting spread during cooler evenings. For those looking to expand their culinary horizons, consider a few delightful variations. You could easily swap out the cheddar cheese for a sharp provolone or a creamy Swiss to alter the flavor profile slightly, offering a different depth of taste. Adding a slice of crispy bacon or some sautéed onions before baking would introduce an extra layer of savory depth and texture that is simply divine. A few thin pickle slices or some crisp lettuce tucked inside after baking can also add a wonderful crunch and tang, cutting through the richness beautifully. If you’re feeling adventurous, try experimenting with different types of slider buns – while Hawaiian rolls are a personal favorite for their sweetness, potato rolls or even mini brioche buns can offer a delightful alternative, each imparting its own subtle character. The possibilities for customization are truly endless, allowing you to tailor this recipe to your exact preferences and pantry staples, ensuring every batch feels uniquely yours.
So, now it’s your turn! I genuinely hope you feel inspired to dive into your kitchen and give this incredible recipe a try. There’s a unique satisfaction that comes from creating something so delicious with your own hands, and I promise you, the reward of sinking your teeth into one of these warm, gooey, flavor-packed sliders is absolutely worth it. This isn’t just another recipe to bookmark and forget; it’s an invitation to create unforgettable moments and truly delicious food that will have everyone asking for more. Once you’ve experienced the magic, I’d be absolutely thrilled to hear about your culinary adventures. Did you add a secret ingredient? Did you come up with a brilliant serving suggestion that I haven’t mentioned? Please don’t hesitate to share your experiences, tips, and even photos with me and the wider community. Your feedback is invaluable, and it helps all of us grow and discover new ways to enjoy our favorite dishes, fostering a wonderful exchange of ideas. Remember, mastering Honey Mustard Chicken Sliders The Ultimate Recipe Guide is not just about following steps; it’s about embracing the joy of cooking and sharing that joy with others. Get cooking, have fun, and most importantly, enjoy every single bite!
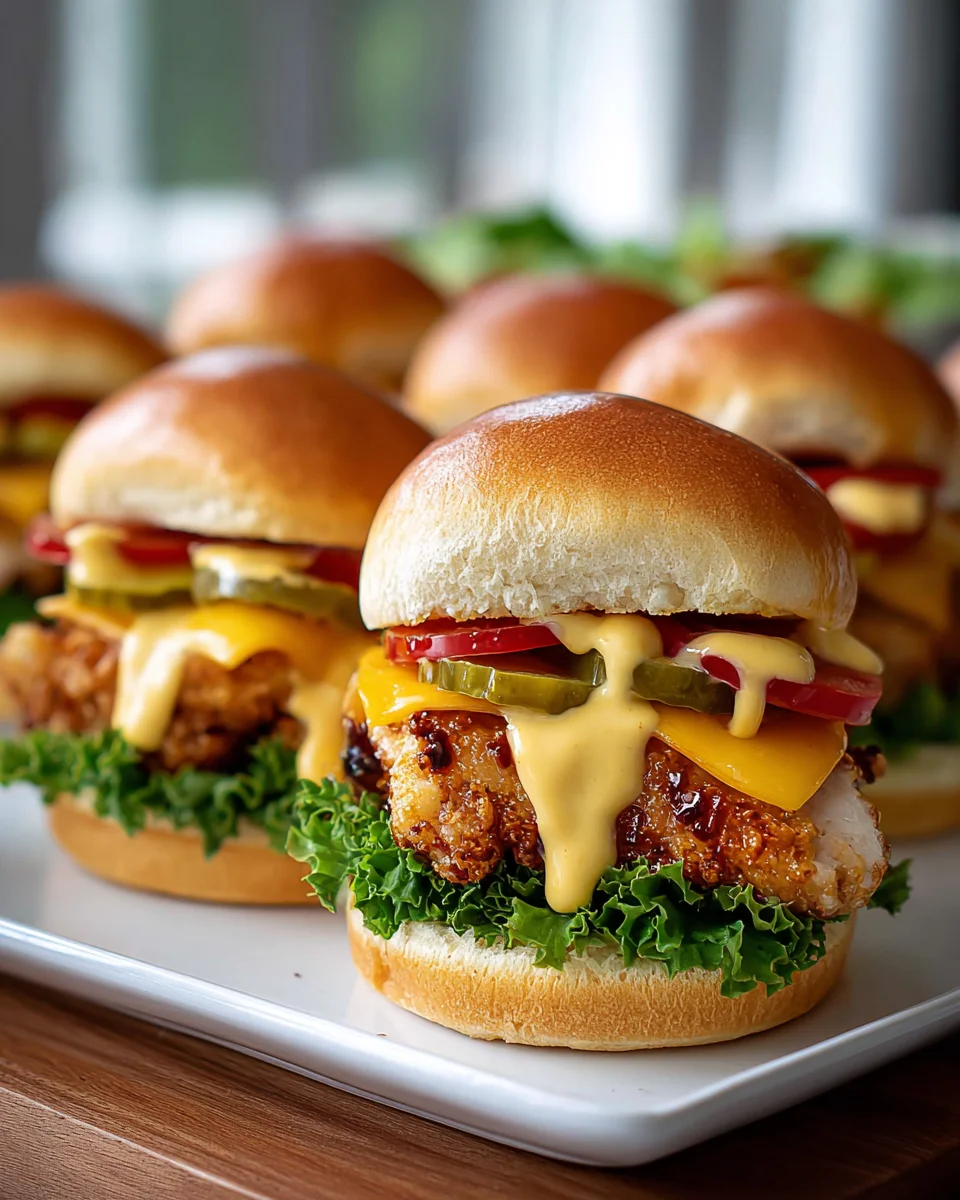
Honey Mustard Chicken Sliders: Ultimate Quick & Easy Recipe
An irresistible, crowd-pleasing dish, these ultimate Honey Mustard Chicken Sliders feature tender, crispy fried chicken coated in a luscious, tangy-sweet homemade sauce, nestled within soft Hawaiian rolls with melted cheese. Perfect for game nights, potlucks, or family dinners.
Ingredients
Instructions
Important Information
Nutrition Facts (Per Serving)
It is important to consider this information as approximate and not to use it as definitive health advice.
Allergy Information
Please check ingredients for potential allergens and consult a health professional if in doubt.