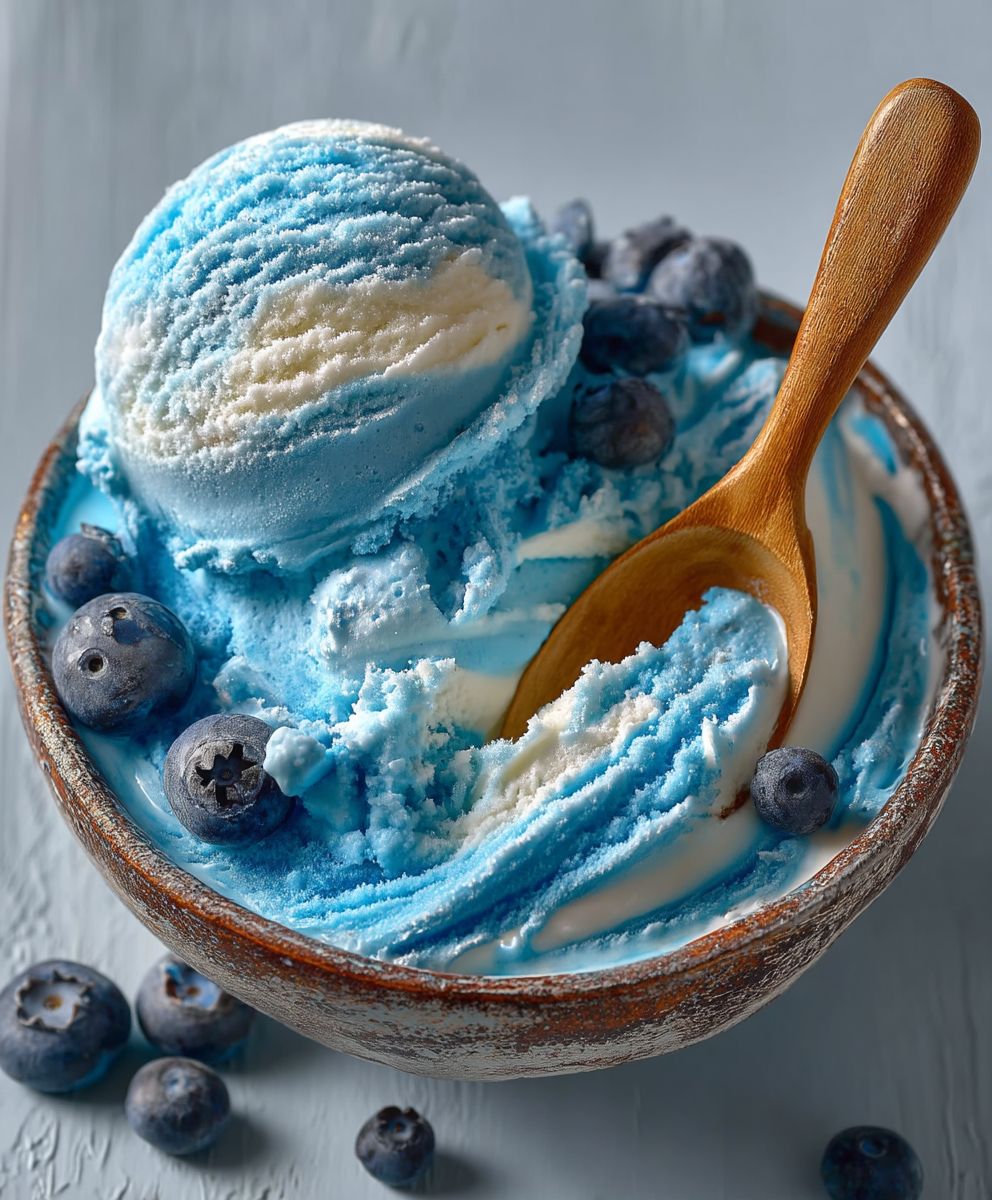
Blue Moon Ice Cream: a flavor shrouded in mystery and beloved by generations! Have you ever tasted something so uniquely vibrant and yet struggled to describe exactly what it is? That’s the magic of Blue Moon. This iconic Midwestern ice cream flavor, with its striking blue hue, has captivated taste buds for decades, sparking endless debates about its true essence.
While its exact origins remain a delicious enigma, many believe Blue Moon Ice Cream first emerged in the early 20th century, possibly concocted by flavor chemists at major extract companies. The recipe, often a closely guarded secret, is rumored to contain hints of citrus, vanilla, and even a touch of marshmallow. But the real allure lies in its nostalgic charm. It’s a flavor that evokes childhood memories of summer days at the local ice cream parlor, the thrill of choosing something a little different, a little magical.
People adore Blue Moon not just for its intriguing flavor profile, but also for its creamy texture and vibrant color. It’s a visual treat as much as a culinary one! Whether you’re a lifelong fan or a curious newcomer, get ready to embark on a flavor adventure as we unlock the secrets to making your very own batch of this legendary ice cream. Prepare to be amazed by the simplicity and the sheer joy of creating this iconic frozen dessert at home!

Ingredients:
- 1 ½ cups (360ml) heavy cream
- ¾ cup (180ml) whole milk
- ¾ cup (150g) granulated sugar
- ¼ teaspoon fine sea salt
- 1 teaspoon pure vanilla extract
- ½ teaspoon almond extract
- ¼ teaspoon lemon extract
- ¼ teaspoon raspberry extract
- Blue food coloring (gel or liquid) – start with a few drops and add more to achieve your desired shade of blue
- Optional: A few drops of yellow food coloring to create a slightly more complex blue hue
Preparing the Ice Cream Base:
Alright, let’s get started! The key to amazing ice cream is a rich and creamy base. This part is super important, so pay close attention.
- Combine Dairy and Sugar: In a medium saucepan, whisk together the heavy cream, whole milk, granulated sugar, and salt. Make sure the sugar is evenly distributed. This will help it dissolve properly when we heat it up.
- Heat the Mixture: Place the saucepan over medium heat. We’re not looking to boil anything here! Gently heat the mixture, stirring constantly with a whisk or spatula, until the sugar is completely dissolved. You’ll know it’s ready when you can’t feel any sugar granules when you rub a little of the mixture between your fingers. This usually takes about 5-7 minutes.
- Chill the Base: This is a crucial step! Pour the warm cream mixture into a clean bowl. Cover the bowl tightly with plastic wrap, pressing the plastic wrap directly onto the surface of the cream. This prevents a skin from forming on top. Refrigerate the mixture for at least 4 hours, or preferably overnight. The colder the base, the smoother and creamier your ice cream will be. Trust me, don’t skip this step!
Adding the Flavor and Color:
Now for the fun part – creating that signature Blue Moon flavor and color! This is where you can really customize things to your liking.
- Incorporate the Extracts: Once the ice cream base is thoroughly chilled, remove it from the refrigerator. Stir in the vanilla extract, almond extract, lemon extract, and raspberry extract. It’s important to use pure extracts for the best flavor. Imitation extracts can sometimes have a slightly artificial taste.
- Add the Blue Coloring: This is where you’ll achieve that iconic Blue Moon color. Start by adding a few drops of blue food coloring (gel or liquid) to the ice cream base. Stir well to combine. Continue adding food coloring, a drop or two at a time, until you reach your desired shade of blue. Remember, you can always add more, but you can’t take it away! If you want a slightly more complex blue, try adding a tiny drop of yellow food coloring as well. This can create a more vibrant and interesting hue.
- Taste Test and Adjust: Give the ice cream base a taste. If you feel like any of the extracts are overpowering, you can add a little more of the other extracts to balance the flavor. Remember, the flavor will mellow slightly as the ice cream freezes, so it’s okay if it tastes a little strong at this point.
Churning the Ice Cream:
Time to churn! This is where the magic happens and your ice cream starts to take shape.
- Prepare Your Ice Cream Maker: Make sure your ice cream maker bowl is properly frozen according to the manufacturer’s instructions. This usually means freezing it for at least 24 hours. A properly frozen bowl is essential for making good ice cream.
- Pour in the Base: Pour the chilled and flavored ice cream base into the frozen ice cream maker bowl.
- Churn According to Instructions: Turn on your ice cream maker and churn the mixture according to the manufacturer’s instructions. This usually takes about 20-25 minutes, but it can vary depending on your machine. The ice cream is ready when it has a soft-serve consistency.
Hardening the Ice Cream:
Almost there! Now we need to harden the ice cream so it’s scoopable and perfect.
- Transfer to a Container: Carefully transfer the soft-serve ice cream to an airtight container. A freezer-safe container with a tight-fitting lid is ideal.
- Freeze to Harden: Place the container in the freezer and freeze for at least 2-3 hours, or preferably overnight, to allow the ice cream to harden completely.
Serving and Enjoying:
The moment you’ve been waiting for! Time to enjoy your homemade Blue Moon ice cream.
- Scoop and Serve: Remove the ice cream from the freezer a few minutes before serving to allow it to soften slightly. This will make it easier to scoop.
- Enjoy! Scoop the ice cream into bowls or cones and enjoy! You can add toppings like sprinkles, whipped cream, or cherries, but honestly, this ice cream is delicious all on its own.
Tips for Success:
- Use High-Quality Ingredients: The better the ingredients, the better the ice cream. Use fresh, high-quality cream and milk for the best results.
- Don’t Overchurn: Overchurning can result in grainy ice cream. Churn until the ice cream reaches a soft-serve consistency, then transfer it to the freezer to harden.
- Store Properly: Store your homemade ice cream in an airtight container in the freezer to prevent freezer burn.
- Experiment with Flavors: Feel free to adjust the extracts to your liking. You can also add other flavorings, such as fruit purees or chocolate chips.
Troubleshooting:
- Ice Cream is Grainy: This can be caused by overchurning or not chilling the base properly. Make sure to chill the base for at least 4 hours, and don’t overchurn the ice cream.
- Ice Cream is Too Hard: This can be caused by not using enough fat in the base. Make sure to use heavy cream and whole milk. You can also add a tablespoon of corn syrup to the base to help prevent ice crystals from forming.
- Ice Cream is Too Soft: This can be caused by not freezing the ice cream maker bowl properly or not churning the ice cream long enough. Make sure the bowl is frozen solid before churning, and churn the ice cream until it reaches a soft-serve consistency.
Conclusion:
So, there you have it! This Blue Moon Ice Cream recipe is more than just a frozen treat; it’s a nostalgic trip down memory lane, a burst of unique flavor, and a guaranteed crowd-pleaser. I truly believe this is a must-try for anyone who loves experimenting in the kitchen and enjoys a little bit of whimsy in their desserts. The vibrant color alone makes it a showstopper, and the intriguing, almost indescribable flavor will keep everyone guessing (and coming back for more!).
But why is it a must-try, you ask? Well, beyond the sheer fun of creating something so visually stunning and uniquely flavored, this recipe offers a fantastic opportunity to explore your creativity. It’s a chance to break away from the ordinary vanilla and chocolate and dive into a world of unexpected deliciousness. Plus, let’s be honest, who can resist a scoop of bright blue ice cream on a hot summer day? It’s pure joy in a bowl!
And the best part? This recipe is incredibly versatile. While I’ve shared my go-to method, feel free to experiment with different extracts to find your perfect Blue Moon flavor profile. A touch more almond extract? A hint of lemon? The possibilities are endless!
Serving Suggestions and Variations:
* Classic Scoop: Serve it straight up in a waffle cone or a bowl. Simple, classic, and always a winner.
* Ice Cream Sundae: Top it with whipped cream, sprinkles, cherries, and your favorite sauces. A perfect way to indulge!
* Blue Moon Milkshake: Blend it with milk for a creamy and refreshing milkshake. Add a swirl of whipped cream and a sprinkle of blue sugar for extra flair.
* Ice Cream Sandwiches: Sandwich it between two chocolate chip cookies or sugar cookies for a delightful treat.
* Blue Moon Affogato: Pour a shot of hot espresso over a scoop of Blue Moon ice cream for a unique and delicious affogato. The contrast of hot and cold, bitter and sweet, is simply divine.
* Layered Dessert: Create a layered dessert with Blue Moon ice cream, crushed Oreos, and hot fudge sauce. A guaranteed crowd-pleaser!
* For the Adults: Add a splash of vodka or rum to the ice cream base for an adult-friendly version. Just be mindful of the alcohol content and adjust accordingly.
Don’t be afraid to get creative and personalize this recipe to your liking. That’s the beauty of homemade ice cream – you have complete control over the ingredients and flavors.
I’m so excited for you to try this recipe and experience the magic of Blue Moon Ice Cream for yourself. It’s a fun and rewarding project that will impress your friends and family.
So, grab your ice cream maker, gather your ingredients, and get ready to embark on a delicious adventure. I promise you won’t be disappointed!
Once you’ve made it, I would absolutely love to hear about your experience. Did you try any variations? What was your favorite part of the process? What did your friends and family think? Share your photos and stories in the comments below! I can’t wait to see your creations and hear all about your Blue Moon ice cream adventures. Happy ice cream making!
Blue Moon Ice Cream: A Guide to This Mysterious Flavor
Creamy homemade Blue Moon ice cream with a unique blend of extracts for that signature flavor.
Ingredients
Instructions
Recipe Notes
- Use high-quality ingredients for the best flavor.
- Don’t overchurn the ice cream.
- Store in an airtight container to prevent freezer burn.
- Adjust extracts to your preference.
- If ice cream is grainy: Chill the base longer or don’t overchurn.
- If ice cream is too hard: Use heavy cream and whole milk. You can also add a tablespoon of corn syrup to the base to help prevent ice crystals from forming.
- If ice cream is too soft: Make sure the bowl is frozen solid before churning, and churn the ice cream until it reaches a soft-serve consistency.